
Custom fonts in the Flow & Paywall Builder
When building flows, you might want to use a custom font to match the rest of your app. Here’s how to add custom fonts and use them in your flows.
All flows in one app share the fonts you upload. That includes flows you copy. Other apps in your Adapty account each need their own upload.
Configure fonts in the Styles panel before you start designing the flow. This way, any changes you make will apply globally.
Built-in fonts
When you create a flow in the Builder, Adapty uses a system font by default. This usually means SF Pro on iOS and Roboto on Android, though it can vary depending on the device. You can also choose from commonly used fonts like Arial, Times New Roman, Courier New, Georgia, and Helvetica. Each of these fonts comes with a few style options.
These fonts are not supplied as part of the Adapty SDK and are only used for preview purposes. We cannot guarantee they will work perfectly on all devices. However, in our testing, these fonts are typically recognized by most devices without any additional effort on your part. You can also check out which fonts are available by default on iOS.
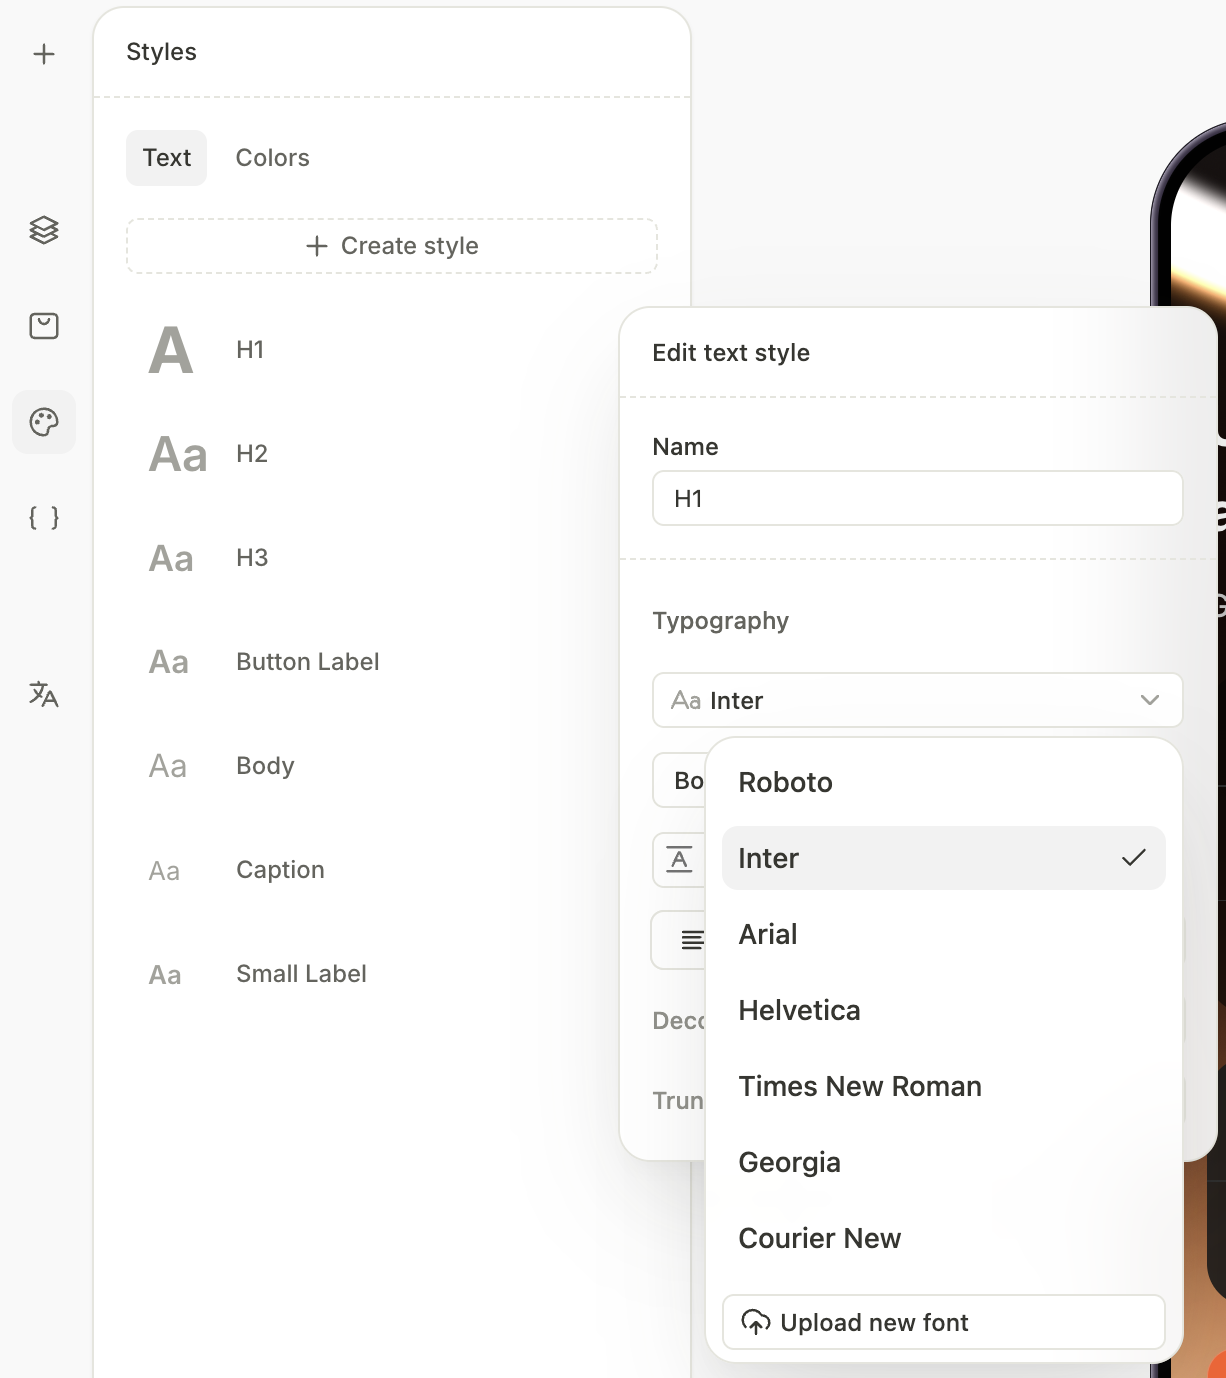
Add a custom font
The file you upload is for editor preview only — Adapty doesn’t push it to users’ devices. To render the font on device, include the file in your app bundle. Without it, the SDK falls back to SF Pro (iOS) or Roboto (Android) at runtime.
If you need to use fonts other than the system default, you can add a custom font.
To add a custom font:
- Choose Upload new font in any of the font dropdowns.
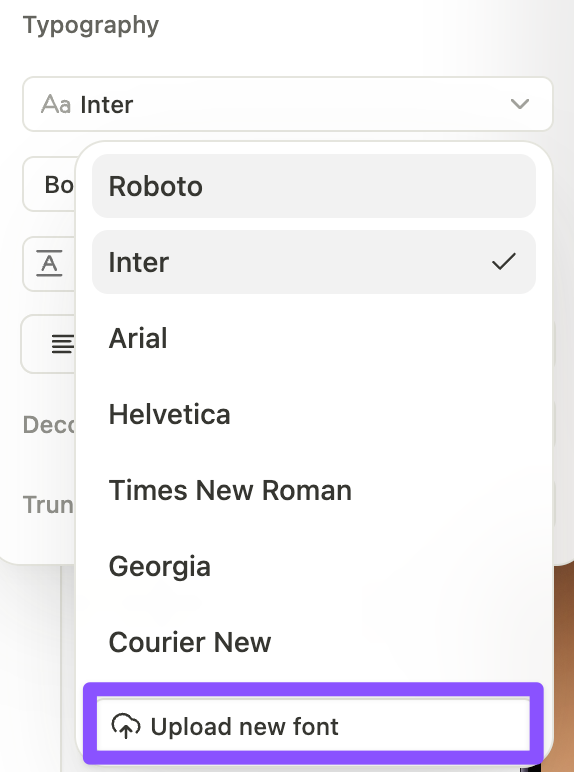
-
In the Add custom font window, drag and drop the font files or click Select files:
- Supported formats:
.ttfand.otf. - Variable fonts: Adapty creates a separate face for each named style in the file, such as Regular or Bold.
- Several typefaces at once: Add all your fonts in one upload. Adapty reads the family name stored in each file and groups the files into families. For example, 10 files of 2 typefaces become 2 font families with 5 faces each.
- Existing families: A file with the same family name as a font you already uploaded joins that font as a new face.
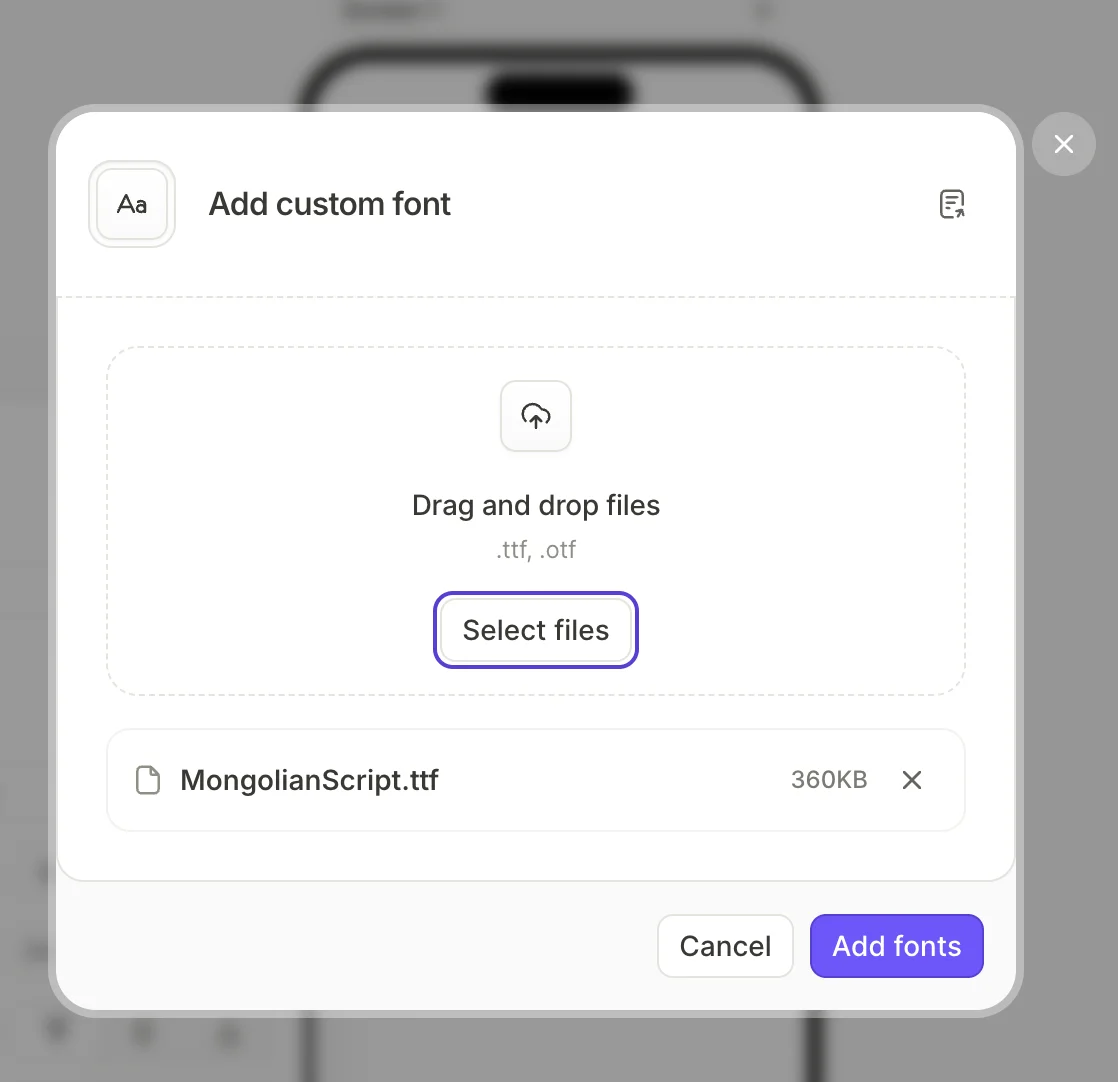
- Supported formats:
-
Click Add fonts. Adapty uploads the files and shows one card per font family. To change the name of a font family, click the pencil next to the name.
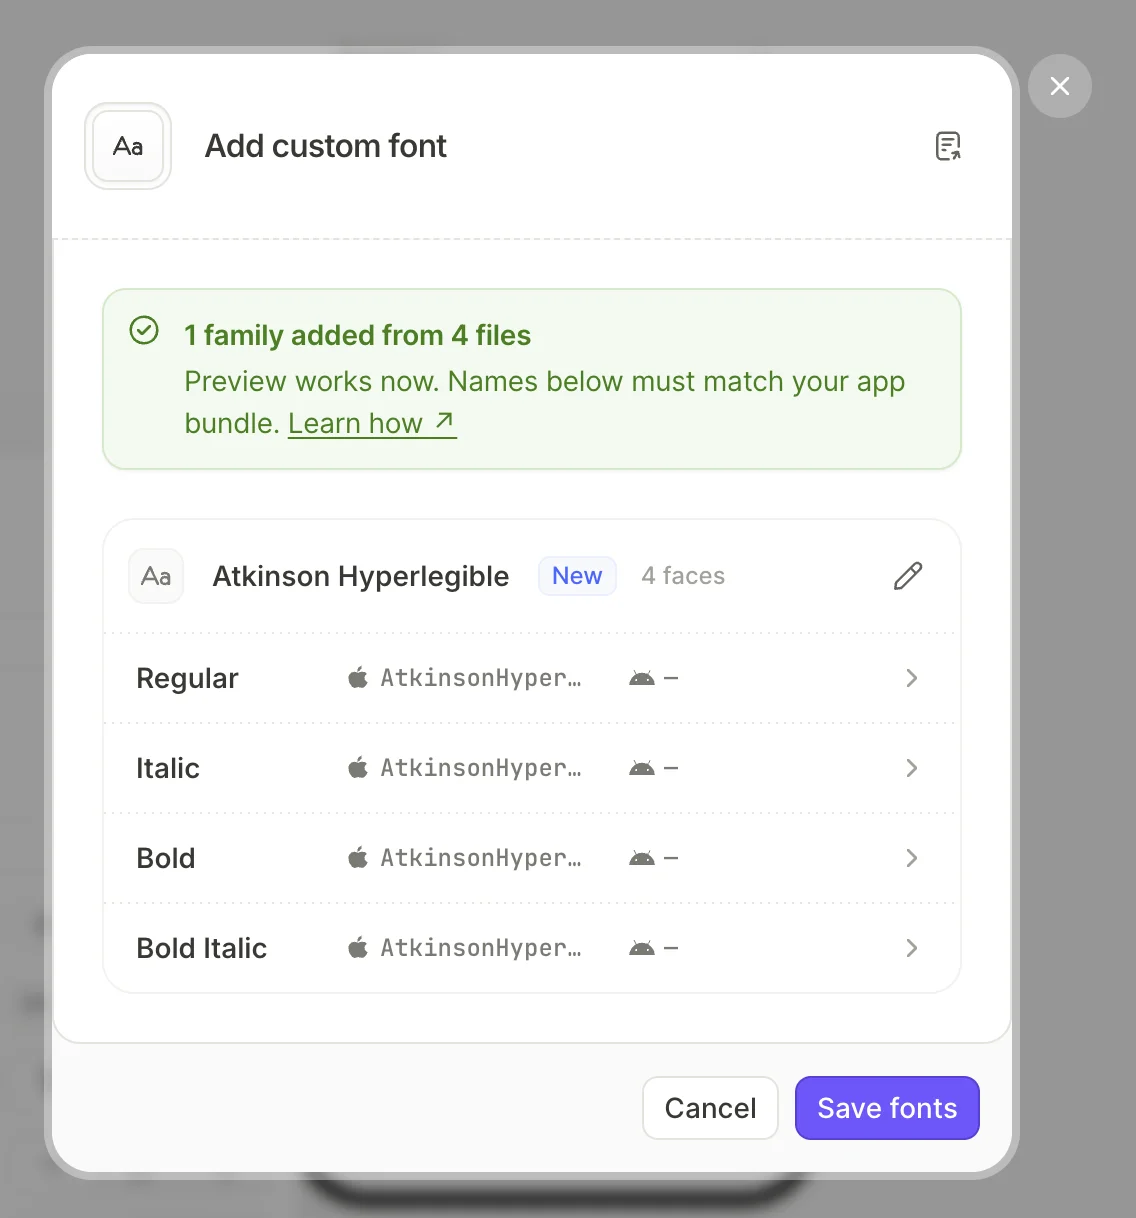
-
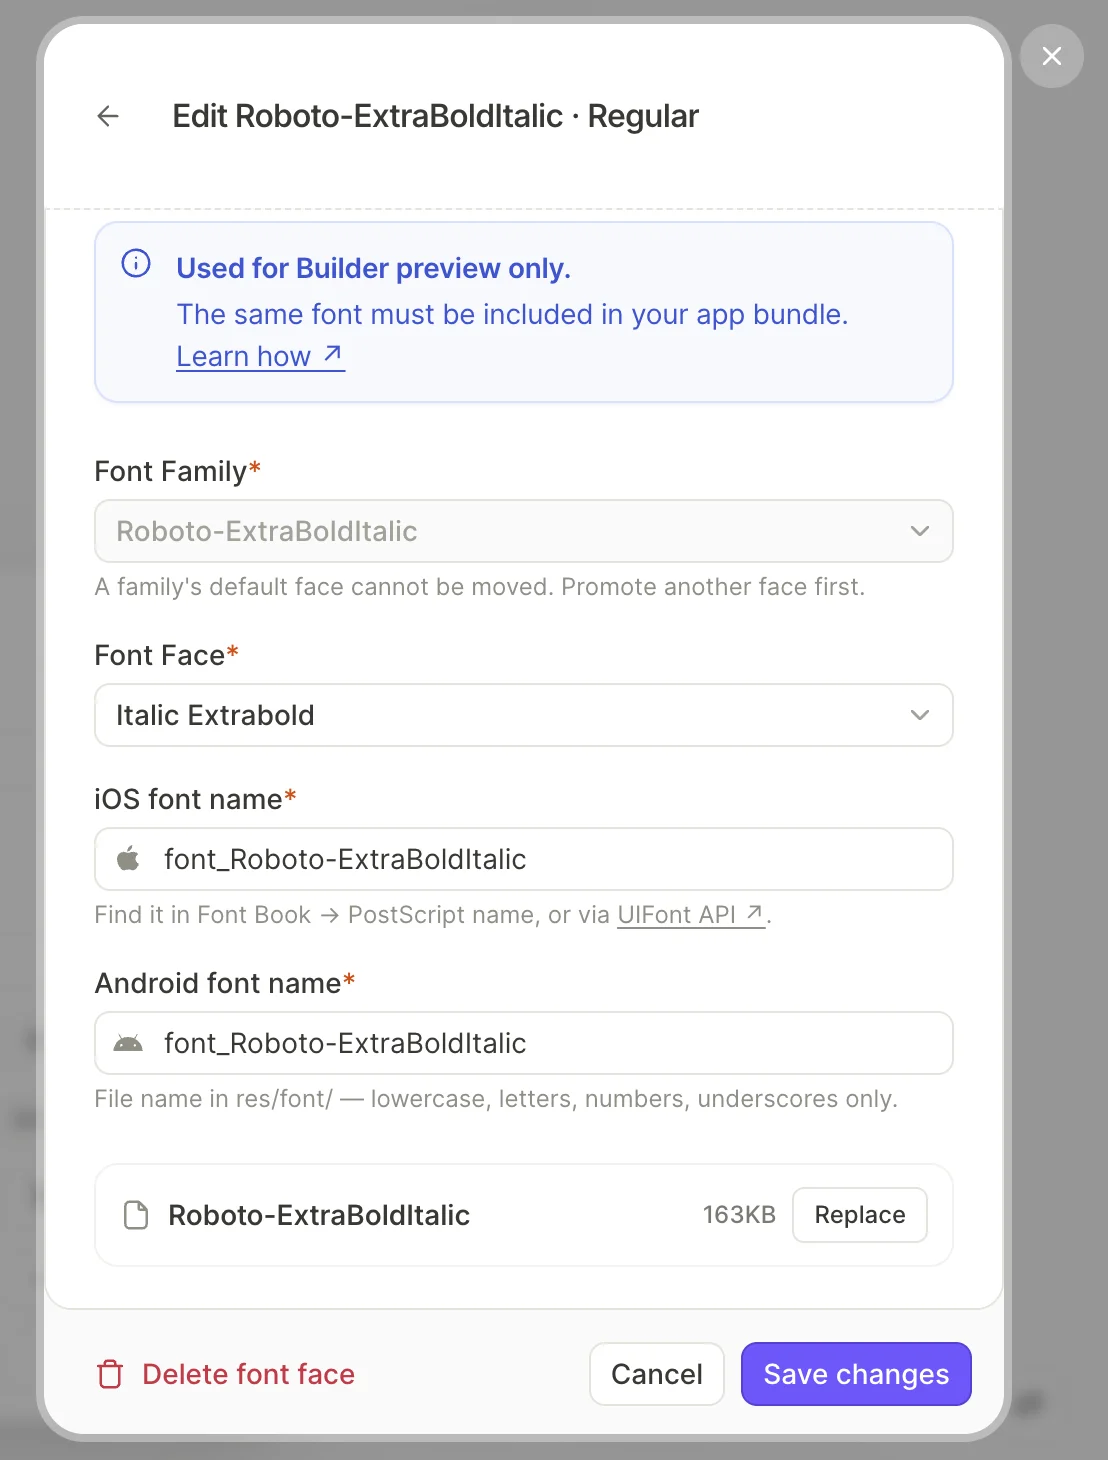
Configure the properties of each individual font face, if necessary:
- Font Family: The family the face belongs to — you can move the style to a different family.
- Font Face: The face’s weight and style — autodetected on upload.
- iOS font name and Android font name: The names of the font in your app. They must match your app bundle.
By uploading the font file to Adapty, you’re confirming that you have the right to use it in your app.
Manage a custom font
Click Edit custom font to open the property editing screen.
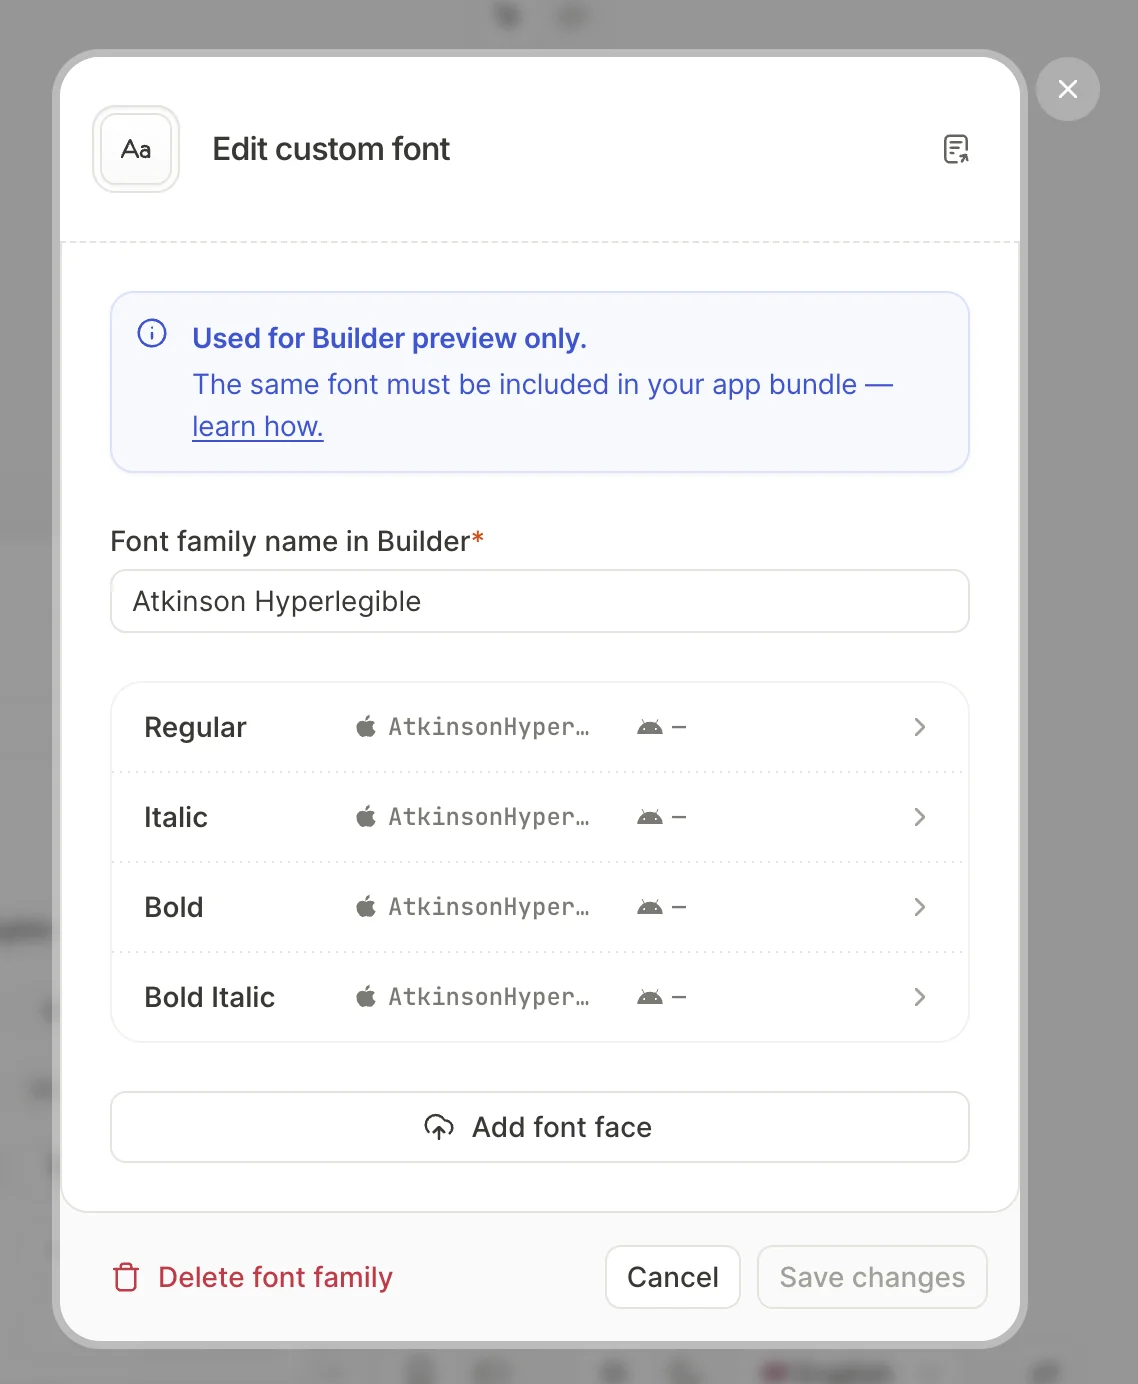
- To rename the family, edit Font family name in Builder.
- To add a new weight or style, click Add font face.
- To fix the iOS or Android font name of a style, click its row.
- To upload a new file for a style, click its row, then click Replace.
Delete a custom font
To delete a font family or a single face, click Delete font family or Delete font face in the property editing screen.
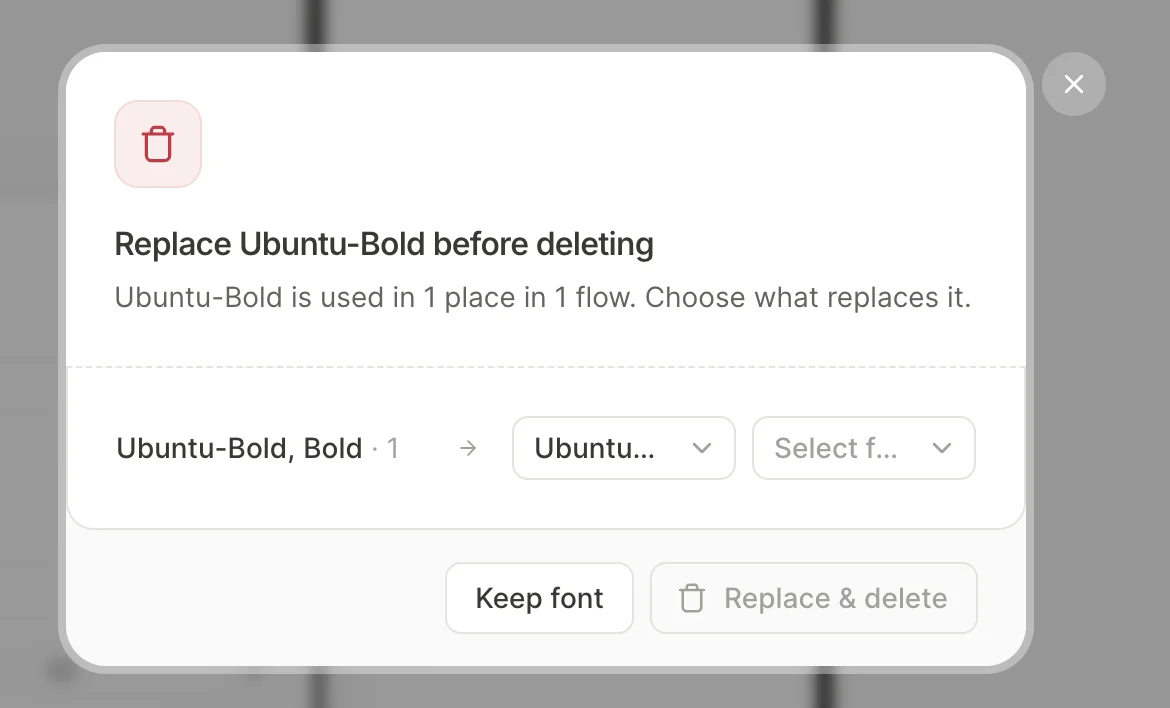
If any of your flows make use of the face, Adapty cannot delete it straight away. Instead, you are asked to select a replacement font from your library. The elements that use the old font face will carry the new font instead. Click Replace & delete to confirm your decision.
Custom fonts in flow templates
The Flow template library includes templates with custom fonts. Hover the Custom font chip on a template card to see which fonts it uses.
Adapty doesn’t bundle these fonts. You need to source them yourself, matching the font names shown in the chip. Some fonts may require a commercial license.
Once you have the font files, follow the bundling steps below.
Add the font files to your app’s bundle
Adapty doesn’t send custom fonts to users’ devices, so your app must include the file of every face your flows use. If your app already uses custom fonts, add these the same way. If not, follow the platform guide:
- iOS: Adding a custom font to your app
- Android: Fonts in XML
The flow finds each face in your app by its name, so the names in Adapty must match your app. To review the names, open the style in the font settings:
- iOS font name: The PostScript name stored inside the font file. iOS finds the font by this name, not by the file name. It must be unique across all custom fonts in the app. Adapty fills it in when the file declares one. Variable font files often don’t, so enter it yourself. To find it, open Font Book > PostScript name, or use the
UIFontAPI. - Android font name: The file name in
res/font/, without the extension. Use only lowercase letters, numbers, and underscores. Adapty never fills it in. All faces that Adapty created from one variable font file share this name.