
Add locale in Flow & Paywall Builder
You can localize your flow to serve international users locale-specific content in a language they understand. You can translate or customize the following:
- Every string in the flow.
- The URL of each Open URL action.
- Images and videos, with a separate file per locale.
In the Localizations panel, all of this content is in one table, with a column for each locale. From there, you can translate the cells by hand, with AI, or by exporting them for a third-party translator.
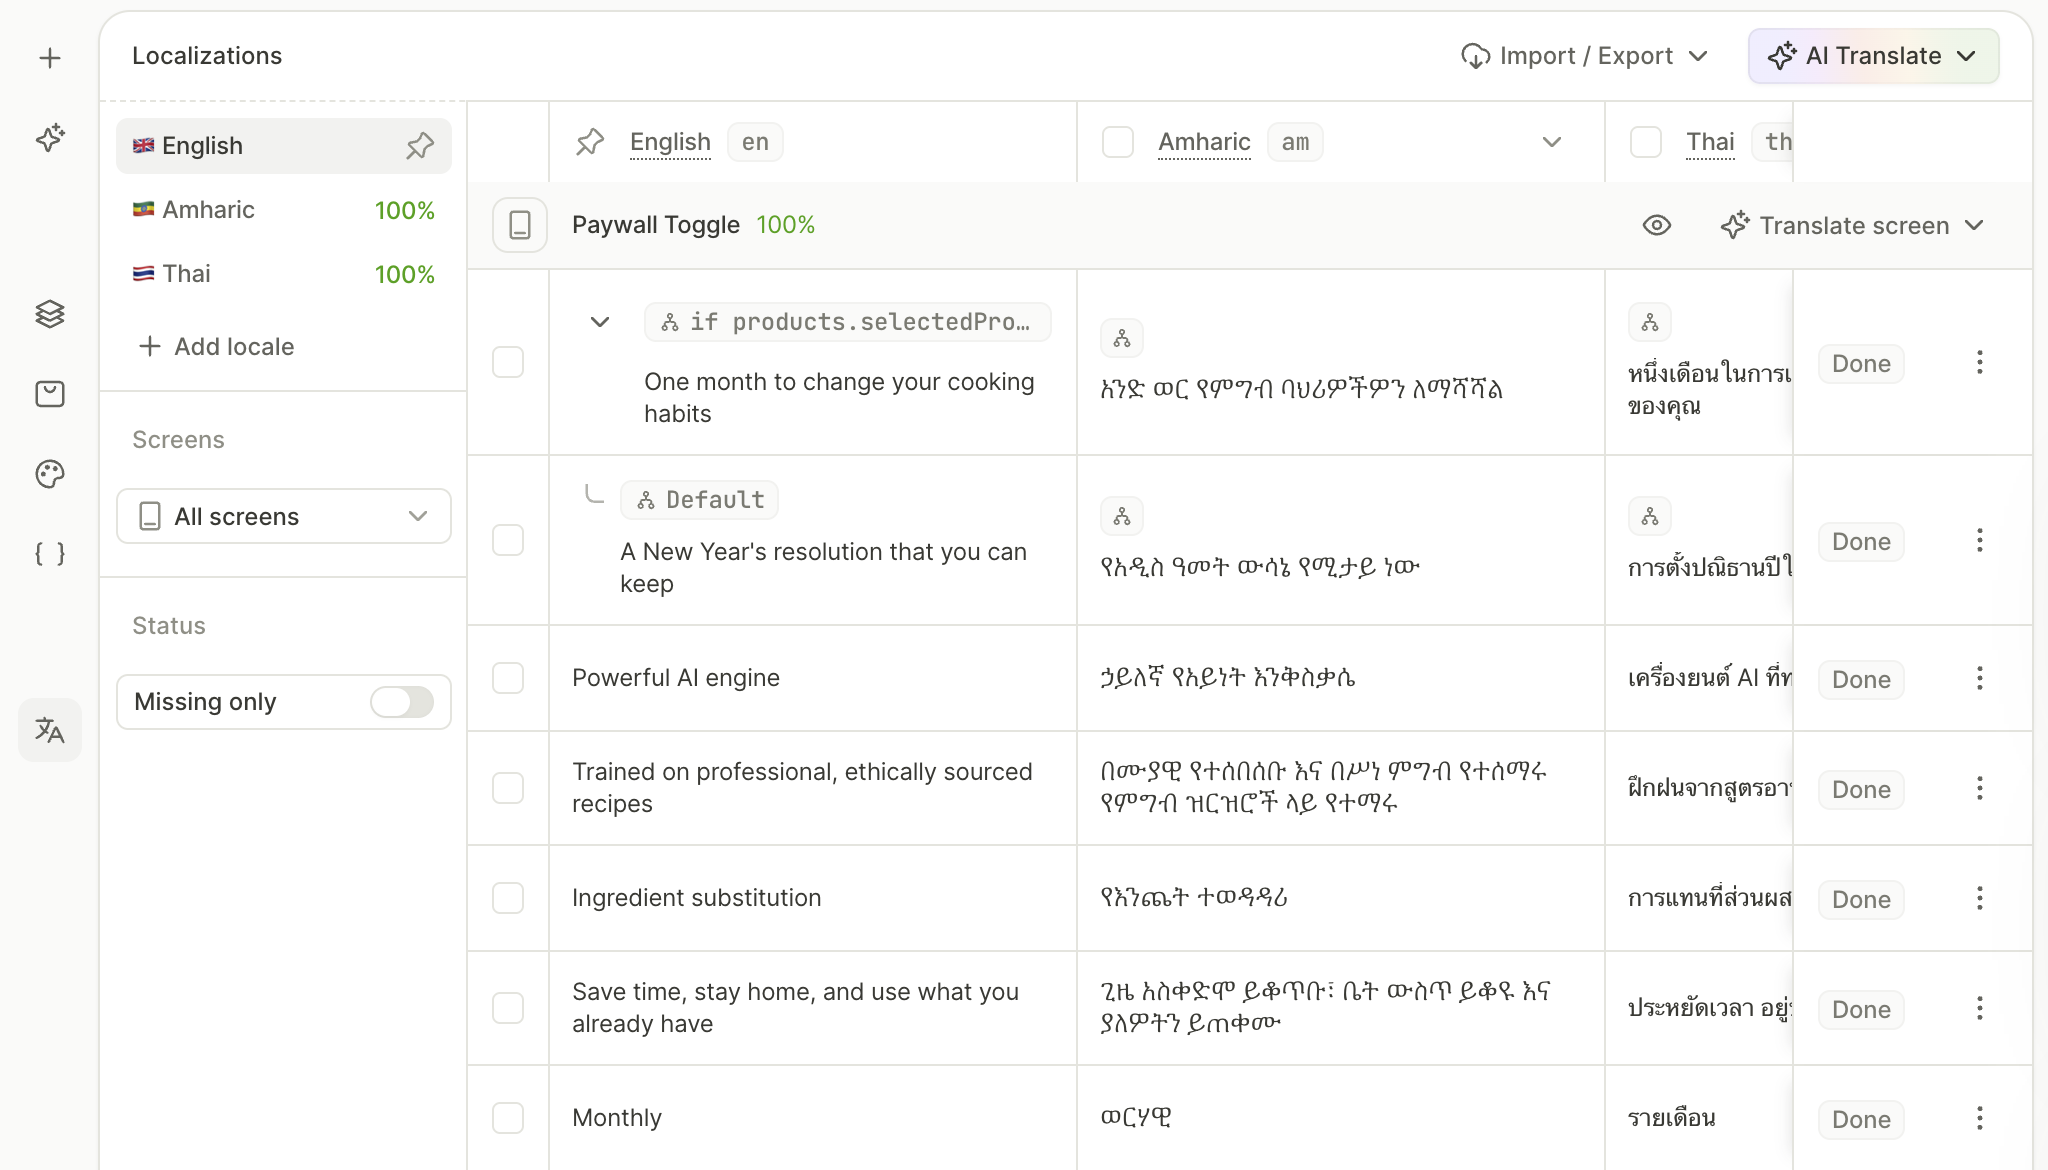
To show a locale to users, your app has to pass the locale code in the flow view configuration request. Values without a translation fall back to the content specified for the default locale (English unless you set another locale as default).
Finish setting up your flow in the default locale before adding other languages.
What you can localize
Text content
The Localizations panel has a row for every string in the flow, including:
- The content of each text element, such as a button label.
- The Placeholder of each input field.
- The title and message of each Show alert action.
What a variable shows in other locales depends on where its value comes from:
- Product variables: The store returns their values already localized. A string that only contains a product variable, such as a price, needs no translation.
- Custom and element variables: Their values cannot be localized. For example,
selectedOptionTitleshows the selected option’s Element Title exactly as you entered it. Use static or conditional text instead.
Conditional text
Text elements can display different content based on the conditions that you set. You can localize each branch of conditional text.
Conditions are the same in every locale. If a condition compares a variable to a string, the string isn’t localized.
Action URLs
An Open URL action can open a different URL in each flow locale, for example, a help page in the user’s language. If you don’t set an alternative URL for the user’s locale, they see the default URL.
Images and videos
Image and Video elements can show a different file in each locale. If you don’t upload a file for the user’s locale, they see the default file. In the Localizations panel, the row still has the Missing badge. If the default file works in every locale, mark the row as Done to remove the badge. You can’t localize icons or screen and container backgrounds.
Manage localizations and translations
Add and set up a locale
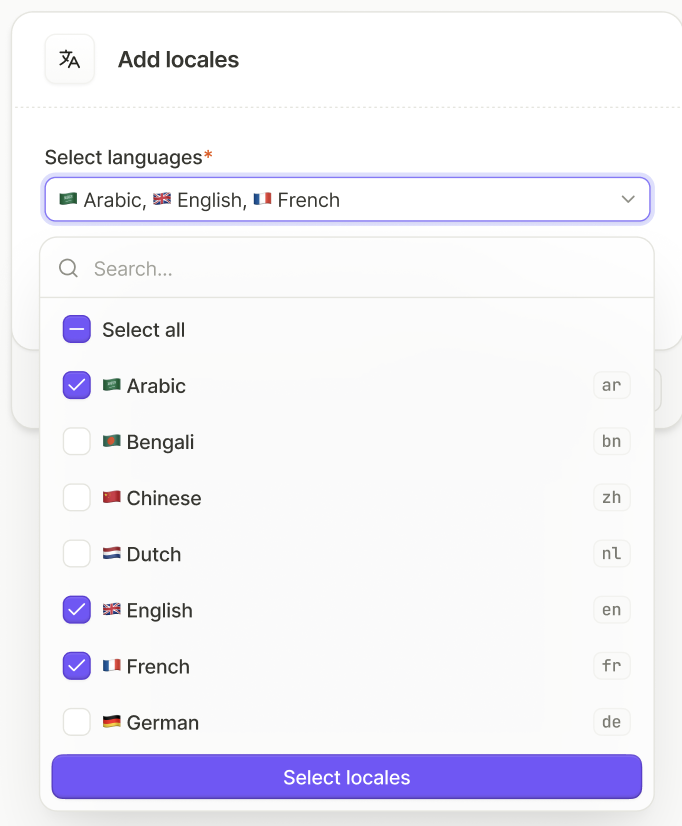
- Open the Localizations panel on the left. Click Add locale.
- In the Select languages field, select one or more languages.
- (Optional) To translate your flow into the new locales right away, select Translate content from default locale using AI.
- Click Add locales.
In the localization table, each locale is a column, and each piece of localizable content is a row. The table groups the rows into a section for each screen.
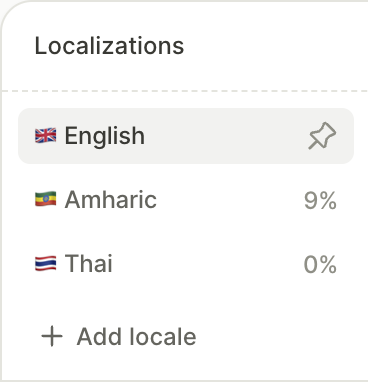
The panel’s sidebar shows your progress in each locale, as the percentage of translated cells. The section header of each screen shows that screen’s progress across all locales. The panel counts a cell as translated as soon as it has a value, even when that value is the default locale’s text, untranslated. If you mark a row as Done or Missing, the mark decides the row’s status, independent of the cells’ content.
A row with a missing translation displays the Missing badge. A cell without a locale-specific value shows the default locale’s content.
Translate strings with AI
AI translates strings from the default locale into the other locales. It doesn’t translate action URLs, images, or videos.
Open AI Translate in the panel header and select one of the following:
- Translate missing only: Translates the cells without a translation and keeps the existing translations. If you marked a row as Missing, it retranslates every cell in the row. If you marked a row as Done, it skips the row.
- Translate all: Translates every cell and replaces the existing translations, including the ones you edited by hand.
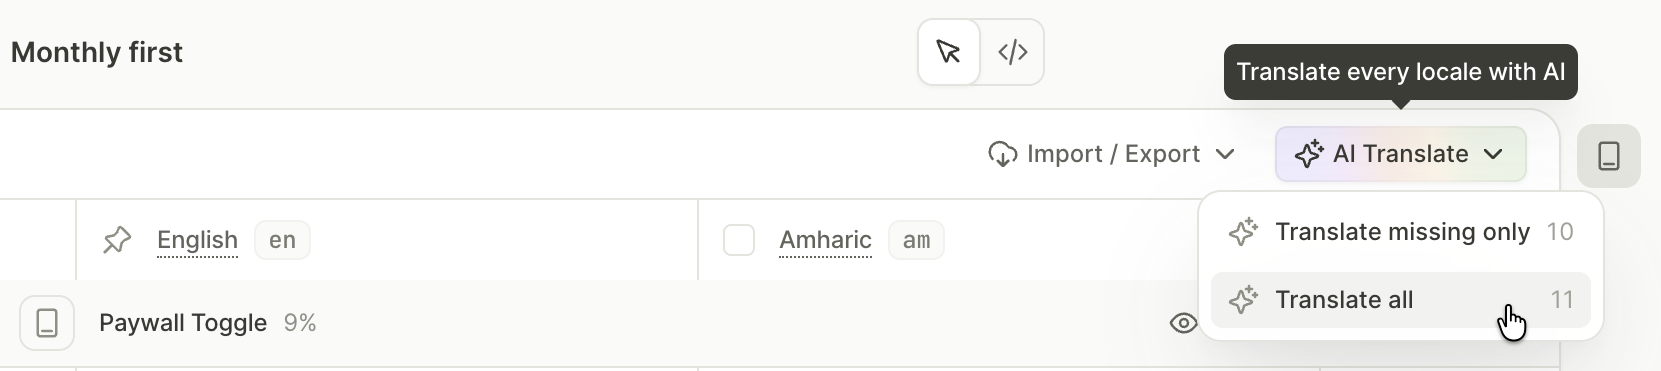
You can only translate the rows that the filters show. To translate only some rows or locales, select their checkboxes first.
If an AI translation changes a variable or the text formatting, Adapty discards that translation and keeps the cell’s previous value.
Set the default locale
The pin icon marks the default locale. It holds your source content, and serves as fallback for any missing translations. Every flow starts with English as its default and only locale.
Before you change the default locale, fill its replacement with translations. If a locale is incomplete when it becomes the default, Adapty populates it with content from the previous default locale. The fields no longer report translations as Missing.
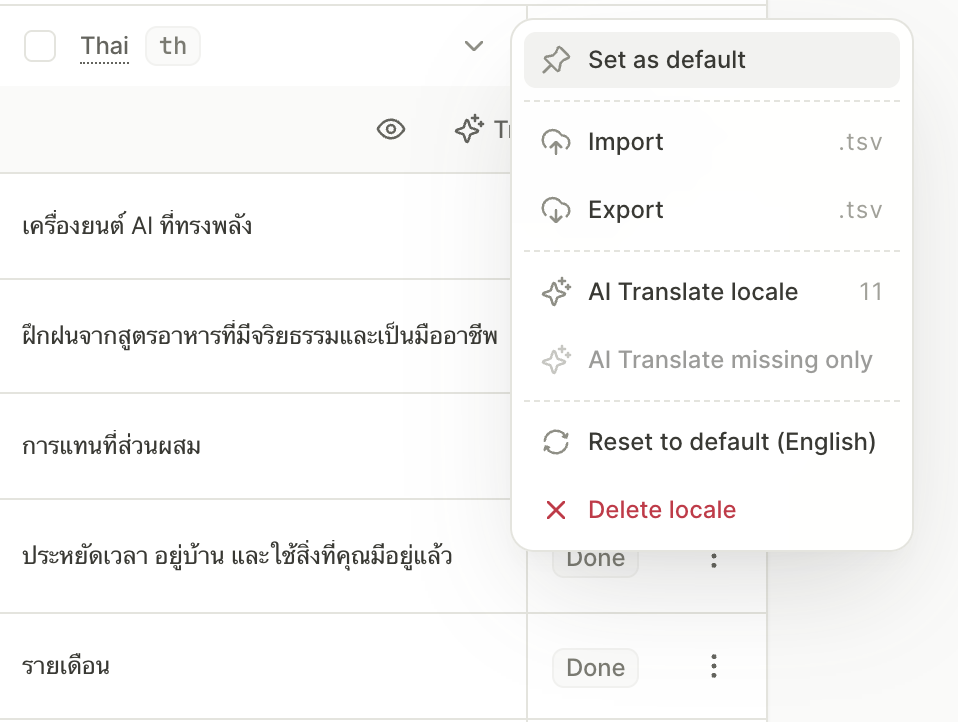
To change the default locale, in the column header of the target locale, open Locale actions and select Set as default.
If you clear an element’s content in the default locale, users of other locales still see its locale-specific content, if it has any. To remove that content too, reset the row in the Localizations panel.
Delete a locale
To delete a locale, open Locale actions in its column header and select Delete locale. Adapty removes all locale-specific content, including images and videos. To restore the locale, undo the deletion. To delete the default locale, first make another locale the default.
Table actions
You can change many cells in one operation, and a single undo reverts all of them.
Filter rows
Set the filters in the panel’s sidebar to limit the rows that the table shows:
- Screens — Limit the screen selection .
- Status > Missing only — Show only rows with the Missing badge.
To find rows by keyword, click Search in the panel header. The table then only shows rows with the keyword in any locale’s text or file name.
Bulk actions only affect visible rows. When you turn the filter on, you limit the surface area for bulk actions. To translate or reset a whole locale or the whole flow, turn off the filters and clear the search first.
Manage a locale
To bulk-manage the content of a single locale, hover over its column header, and open the column context menu :
- Set as default: Makes the locale the default locale.
- Import and Export: Import or export the locale’s translation file.
- AI Translate locale: Translate the locale’s entire column from the default locale with AI.
- AI Translate missing only: Translate the locale’s empty cells with AI.
- Reset to default (…): Removes all locale-specific content from the locale’s column.
- Delete locale: Deletes the locale and its content.
Manage a row
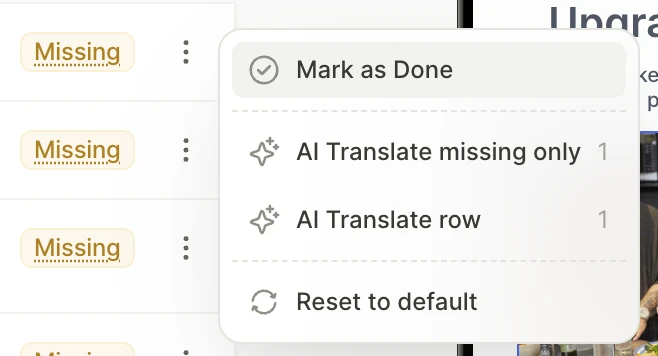
To bulk-manage the content of a single row, open the row context menu :
- Mark as Done or Mark as Missing: Sets the row’s status by hand, independent of the cells’ content. For example, mark a brand name as Done if it needs no translation.
- AI Translate missing only: Translate the row’s empty cells with AI.
- AI Translate row: Translate the entire row from the default locale with AI.
- Reset to default: Removes all locale-specific content from the row.
When you edit the default locale’s text, Adapty clears the row’s Done mark.
Cell actions
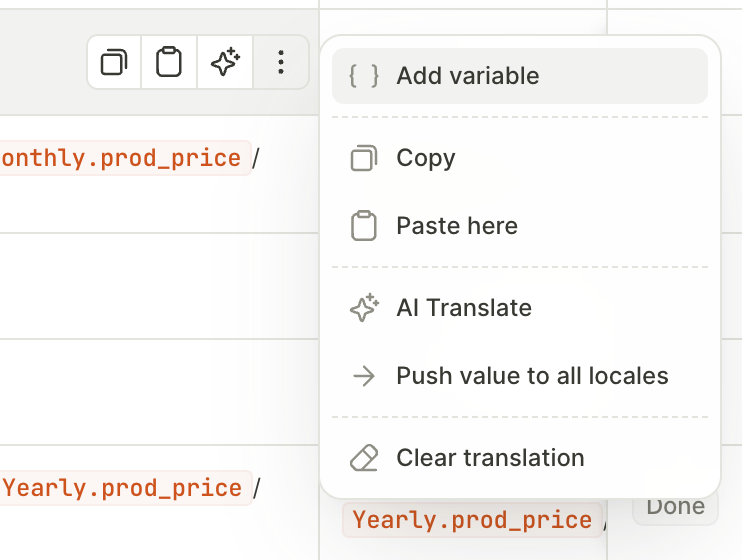
Open the cell context menu to manage a single cell value:
- Add variable: Inserts a variable into the cell.
- Copy and Paste here: Copy the cell’s value, with its formatting and variables, and paste it into another cell.
- AI Translate: Translates the cell with AI.
- Push value to all locales: Copies the cell’s value into every other locale except the default. If you edit the cell afterwards, you will need to push the value again.
- Clear translation: Empties the cell, so users in its locale see the default locale’s text.
Localize content in the builder
To translate strings and set action URLs, open the Localizations panel. You can translate them manually, with AI, or export the localization file for use with a third-party translator.
To localize images and videos, upload a file for each locale.
Translate strings manually
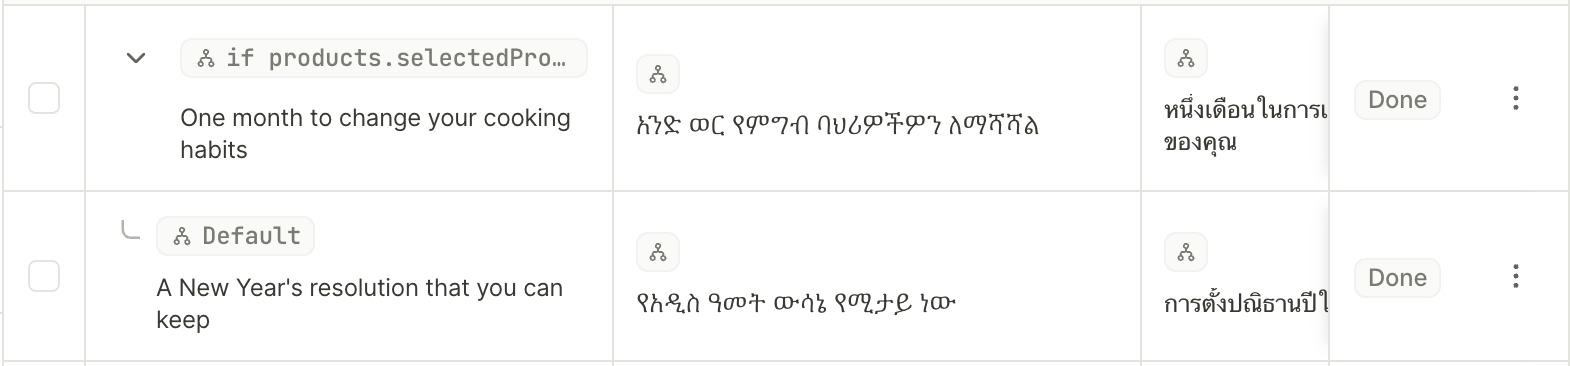
The table in the Localizations panel includes every string in the flow:
- Static text (a row per element)
- Conditional text (a row per branch)
- Open URL action targets (a row per URL)
To translate a string, click a cell and enter the translation. To insert a variable, click { } in the cell. To find a string’s row, select its element in the preview.
Each conditional text element is a separate group of rows. Click the arrow to expand the group and view all condition branches.
Set locale-specific action URLs
Each Open URL action has its own row. To set a different URL for a specific locale, click the blank area of that locale’s cell, and enter the URL. Don’t click the URL itself: you will open it in a new tab. To see which element a URL belongs to, click its row: the builder selects that element in the preview.
Localize images and videos
To show a different image or video in a locale, upload a separate file for that locale. In the Localizations panel, hover over the locale’s cell in the image or video row, and click Replace. To go back to the default locale’s file, click Reset.
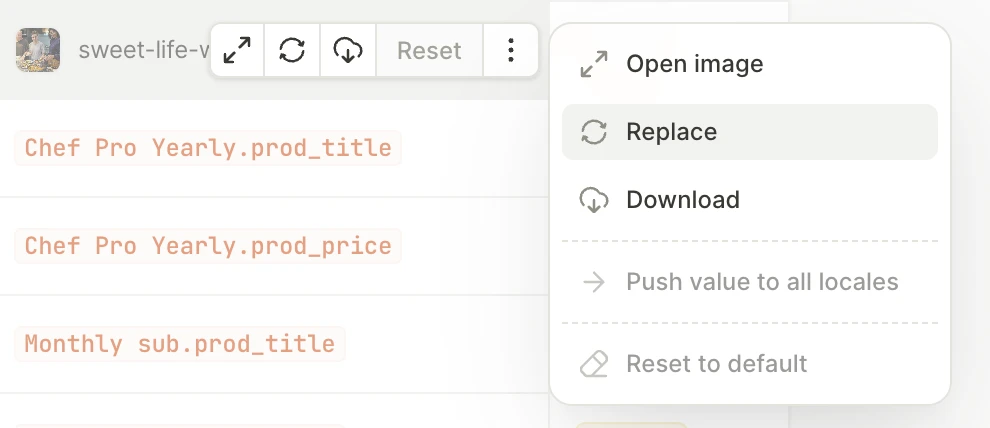
You can also upload the file in the property panel, after you select the locale in the bottom toolbar.
Localize content externally
To translate your entire flow’s text outside Adapty, such as with a translation service or your own translators, export the localization file. When the translation is ready, import the file back.
Export the localization file
To export the entire flow with all its locales, in the panel header, click Import / Export and select Export. To export an individual locale alongside the source locale, select Export in its column context menu.

Import / Export file format
The localization file is a .tsv (tab-separated) file in UTF-8, with one row per string or action URL. An exported file covers the whole flow, whatever filters you set in the panel. To import a file, keep its format unchanged. The columns are:
| Column | Description |
|---|---|
id | The row’s identifier. Adapty matches rows by it on import, so keep it unchanged. Adapty ignores rows with an id that isn’t in the flow. |
Screen | The screen the string belongs to. Adapty ignores this column on import. |
[locale] | One column per locale, named by its code (e.g., en, fr). Adapty ignores columns for locales that aren’t in the flow. |
Example:
id	Screen	en	fr	es
lc_1	Welcome	Turn words into art	Transformez les mots en art
lc_2	Welcome	Start your <b>free trial</b>	Commencez votre <b>essai gratuit</b>
lc_3	Quiz	What will you create?
In the exported file:
- Formatting appears as HTML tags, such as
<b>, and variables as{{name}}. Keep them intact: Adapty restores them on import. - Each branch of conditional text has its own row, without its condition.
- Images and videos aren’t included: you localize them in the builder.
To translate strings that you add after the export, export the file again.
Adapty can’t import a file in the old format, with Screen, Element, and Property columns. To reuse its translations, export the flow again and copy them into the new file.
Import the file with a translation
If a cell in the file is empty, Adapty removes that cell’s translation on import, except in the default locale’s column. To keep a locale’s translations, leave its cells as exported, or delete its column from the file. If an import clears translations you wanted to keep, undo the import: the whole import is one undo step.
To import the whole flow, in the panel header, click Import / Export and select Import. To import one locale, select Import in its column context menu. Then, select the translated file.
Strings without a row in the file keep their current values. A whole-flow import updates the default locale’s text wherever the file changes it. A one-locale import only changes the locale you import. To import a new language, add its locale first.
Preview different locales

The text in the preview area always shows the active locale. If you edit text content in the property panel, these edits only apply to that locale. Switch back to the default locale to edit the source content.
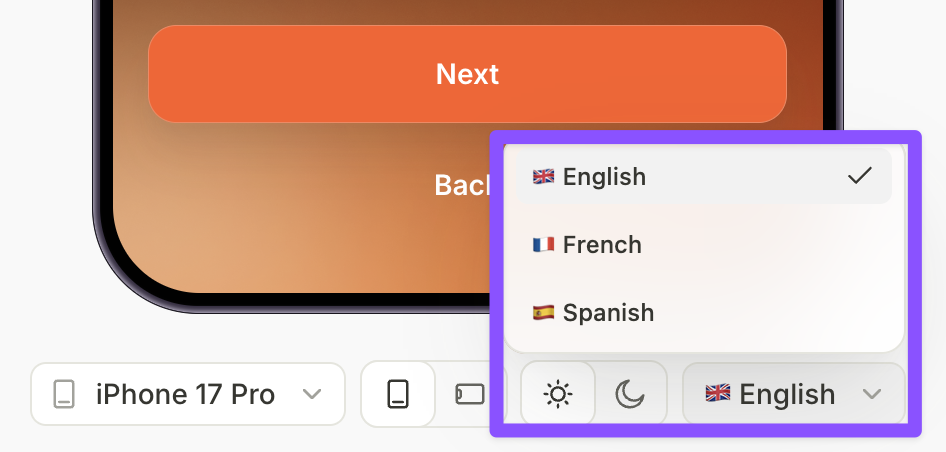
- To switch the active locale, select it from the Locale dropdown in the bottom toolbar, or click its tab in the Localizations panel.
- To switch the active screen from the Localizations panel, click View screen in its section header.
- To spread the localization table across the entire screen, click Hide preview.
To find untranslated text without previewing every screen, run the flow-audit skill.