
Create custom paywall
If you implement your purchase screen yourself, you need to create a custom paywall in Adapty. It defines which products you sell, in what order, and with which promotional offers. Flows work differently: products attach to the flow itself.
Once created, assign the custom paywall to a placement — the point in your app where you insert content from Adapty.
Tip
You can also create custom paywalls programmatically using the Developer CLI.
Before you start creating custom paywalls (Click to Expand)
- Create at least one product.
- (optional) Create offer.
Create custom paywall
To create a custom paywall in the Adapty dashboard:
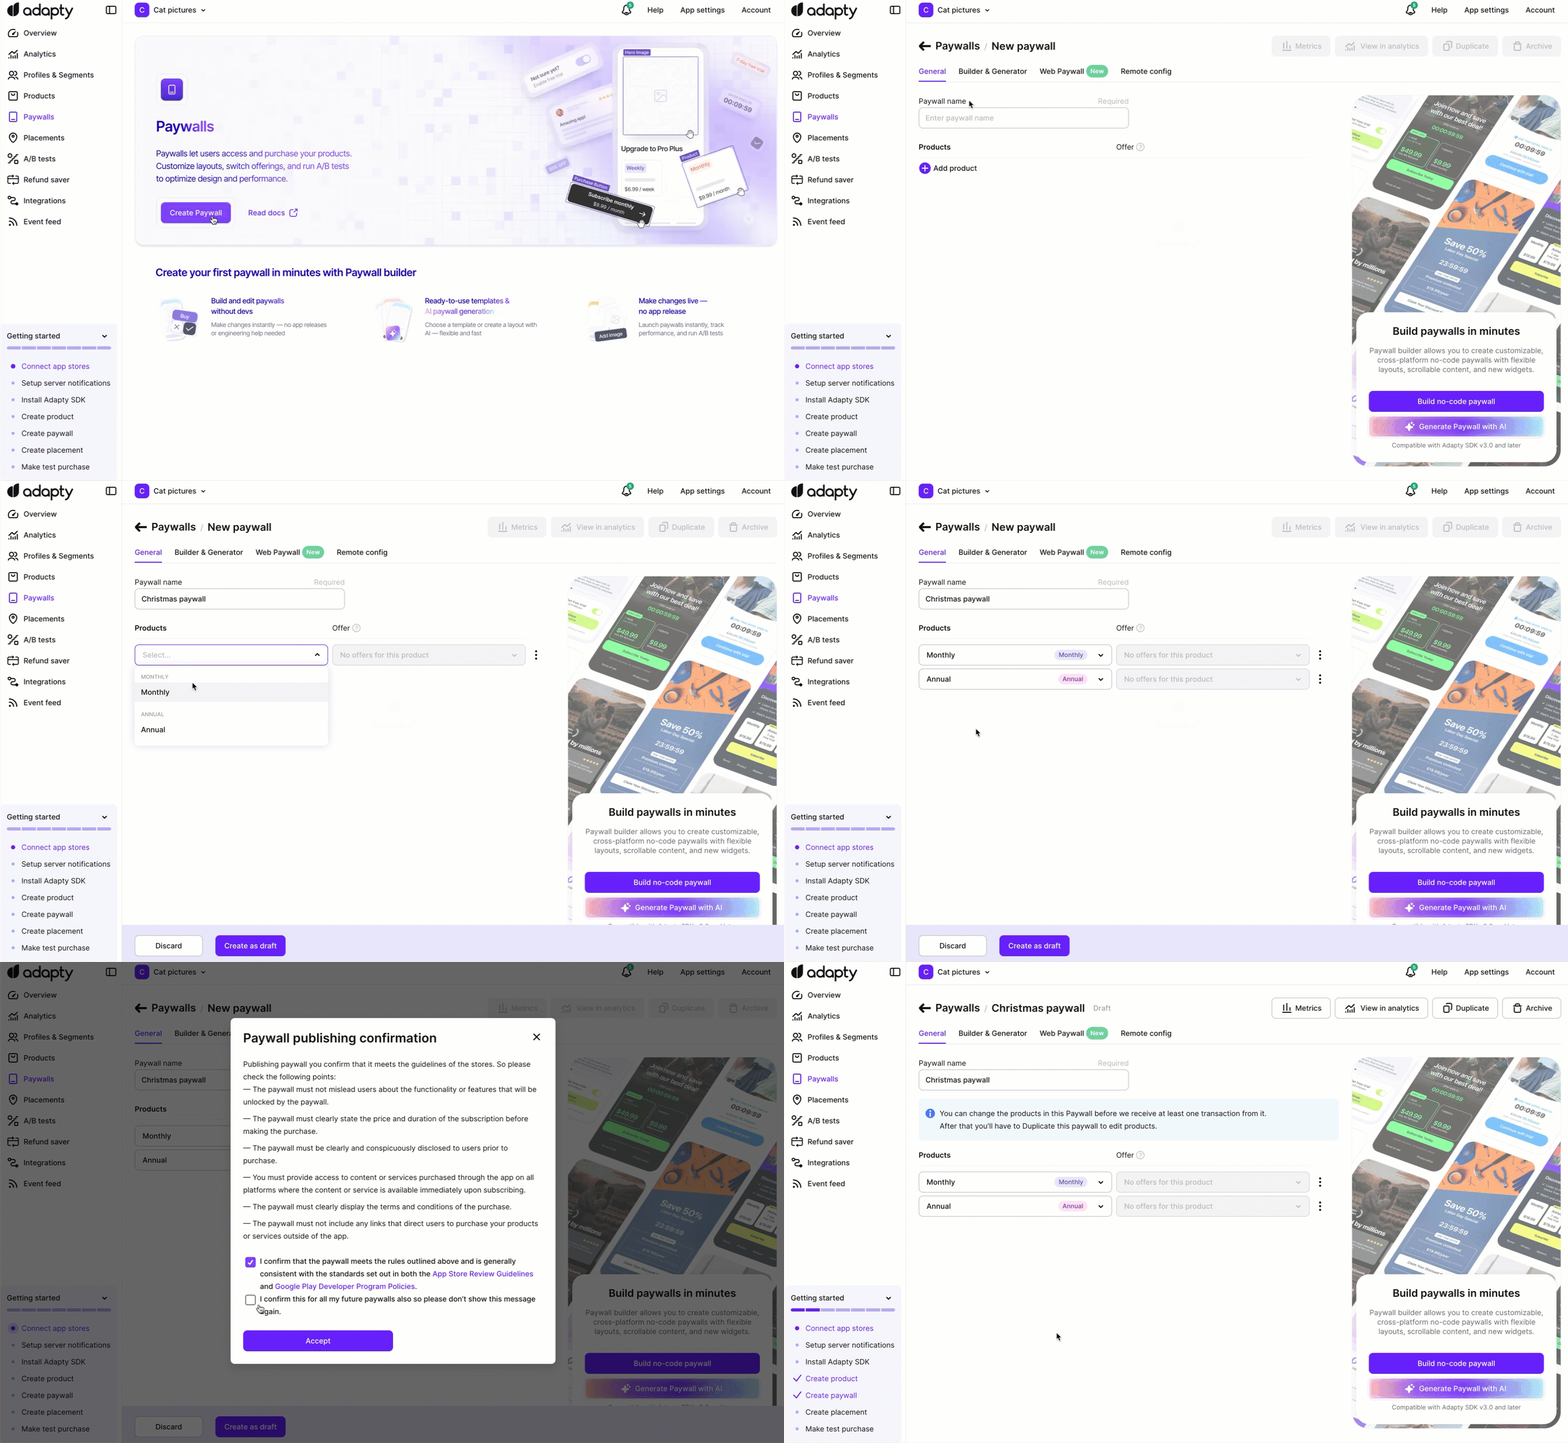
- Go to Flows & Paywalls in the Adapty main menu and open the Custom Paywalls tab.
- Click Create custom paywall.
- On the Custom Paywalls / New paywall page, enter a Paywall name to identify this paywall throughout the Adapty Dashboard.
- Click Add product.
- Select products to be shown to your customers.
Note
- The product order in this list will be maintained in the SDK, so arrange products in your desired order.
- Once a paywall is shown in production, you won’t be able to change the products on it, as this could affect paywall metrics.
- If you’re offering free trials or other offers for your products, add them here, or they won’t be available. Choose an offer you created earlier for this product from the Offer list. The list is only available for products that have offers.
- Click Create as a draft to confirm paywall creation.
Your custom paywall is now created!
Next steps
After you have created your first custom paywall:
- Add it to a placement — the placement ID is the only Adapty identifier you hardcode in your app.
- Implement the purchase screen in your app: iOS | Android | React Native | Flutter | Unity | Kotlin Multiplatform | Capacitor