Step 1. Create flow to show paywall data
When using the FlutterFlow plugin, you can’t use paywalls created in the Adapty Paywall builder. You must implement your own paywall page in FlutterFlow and connect it to Adapty.
After adding the Adapty library as a dependency to your FlutterFlow project, it’s time to build the flow that retrieves Adapty paywall and product data and displays it on the paywall you’ve designed in FlutterFlow.
We first need to receive the paywall data from Adapty. We’ll start by requesting the Adapty paywall, then its associated products, and finally checking if the data was successfully received. If successful, we’ll display the product title and price on the paywall page. Otherwise, we’ll show an error message.
Before proceeding, make sure you’ve done the following:
- Created at least one paywall and added at least one product to it in the Adapty Dashboard.
- Created at last one placement and added your paywall to it in the Adapty Dashboard.
Let’s get started!
Step 1.1. Request Adapty paywall
As mentioned, to display data in your FlutterFlow paywall, we first need to retrieve it from Adapty. The initial step is to get the Adapty paywall itself. Here’s how:
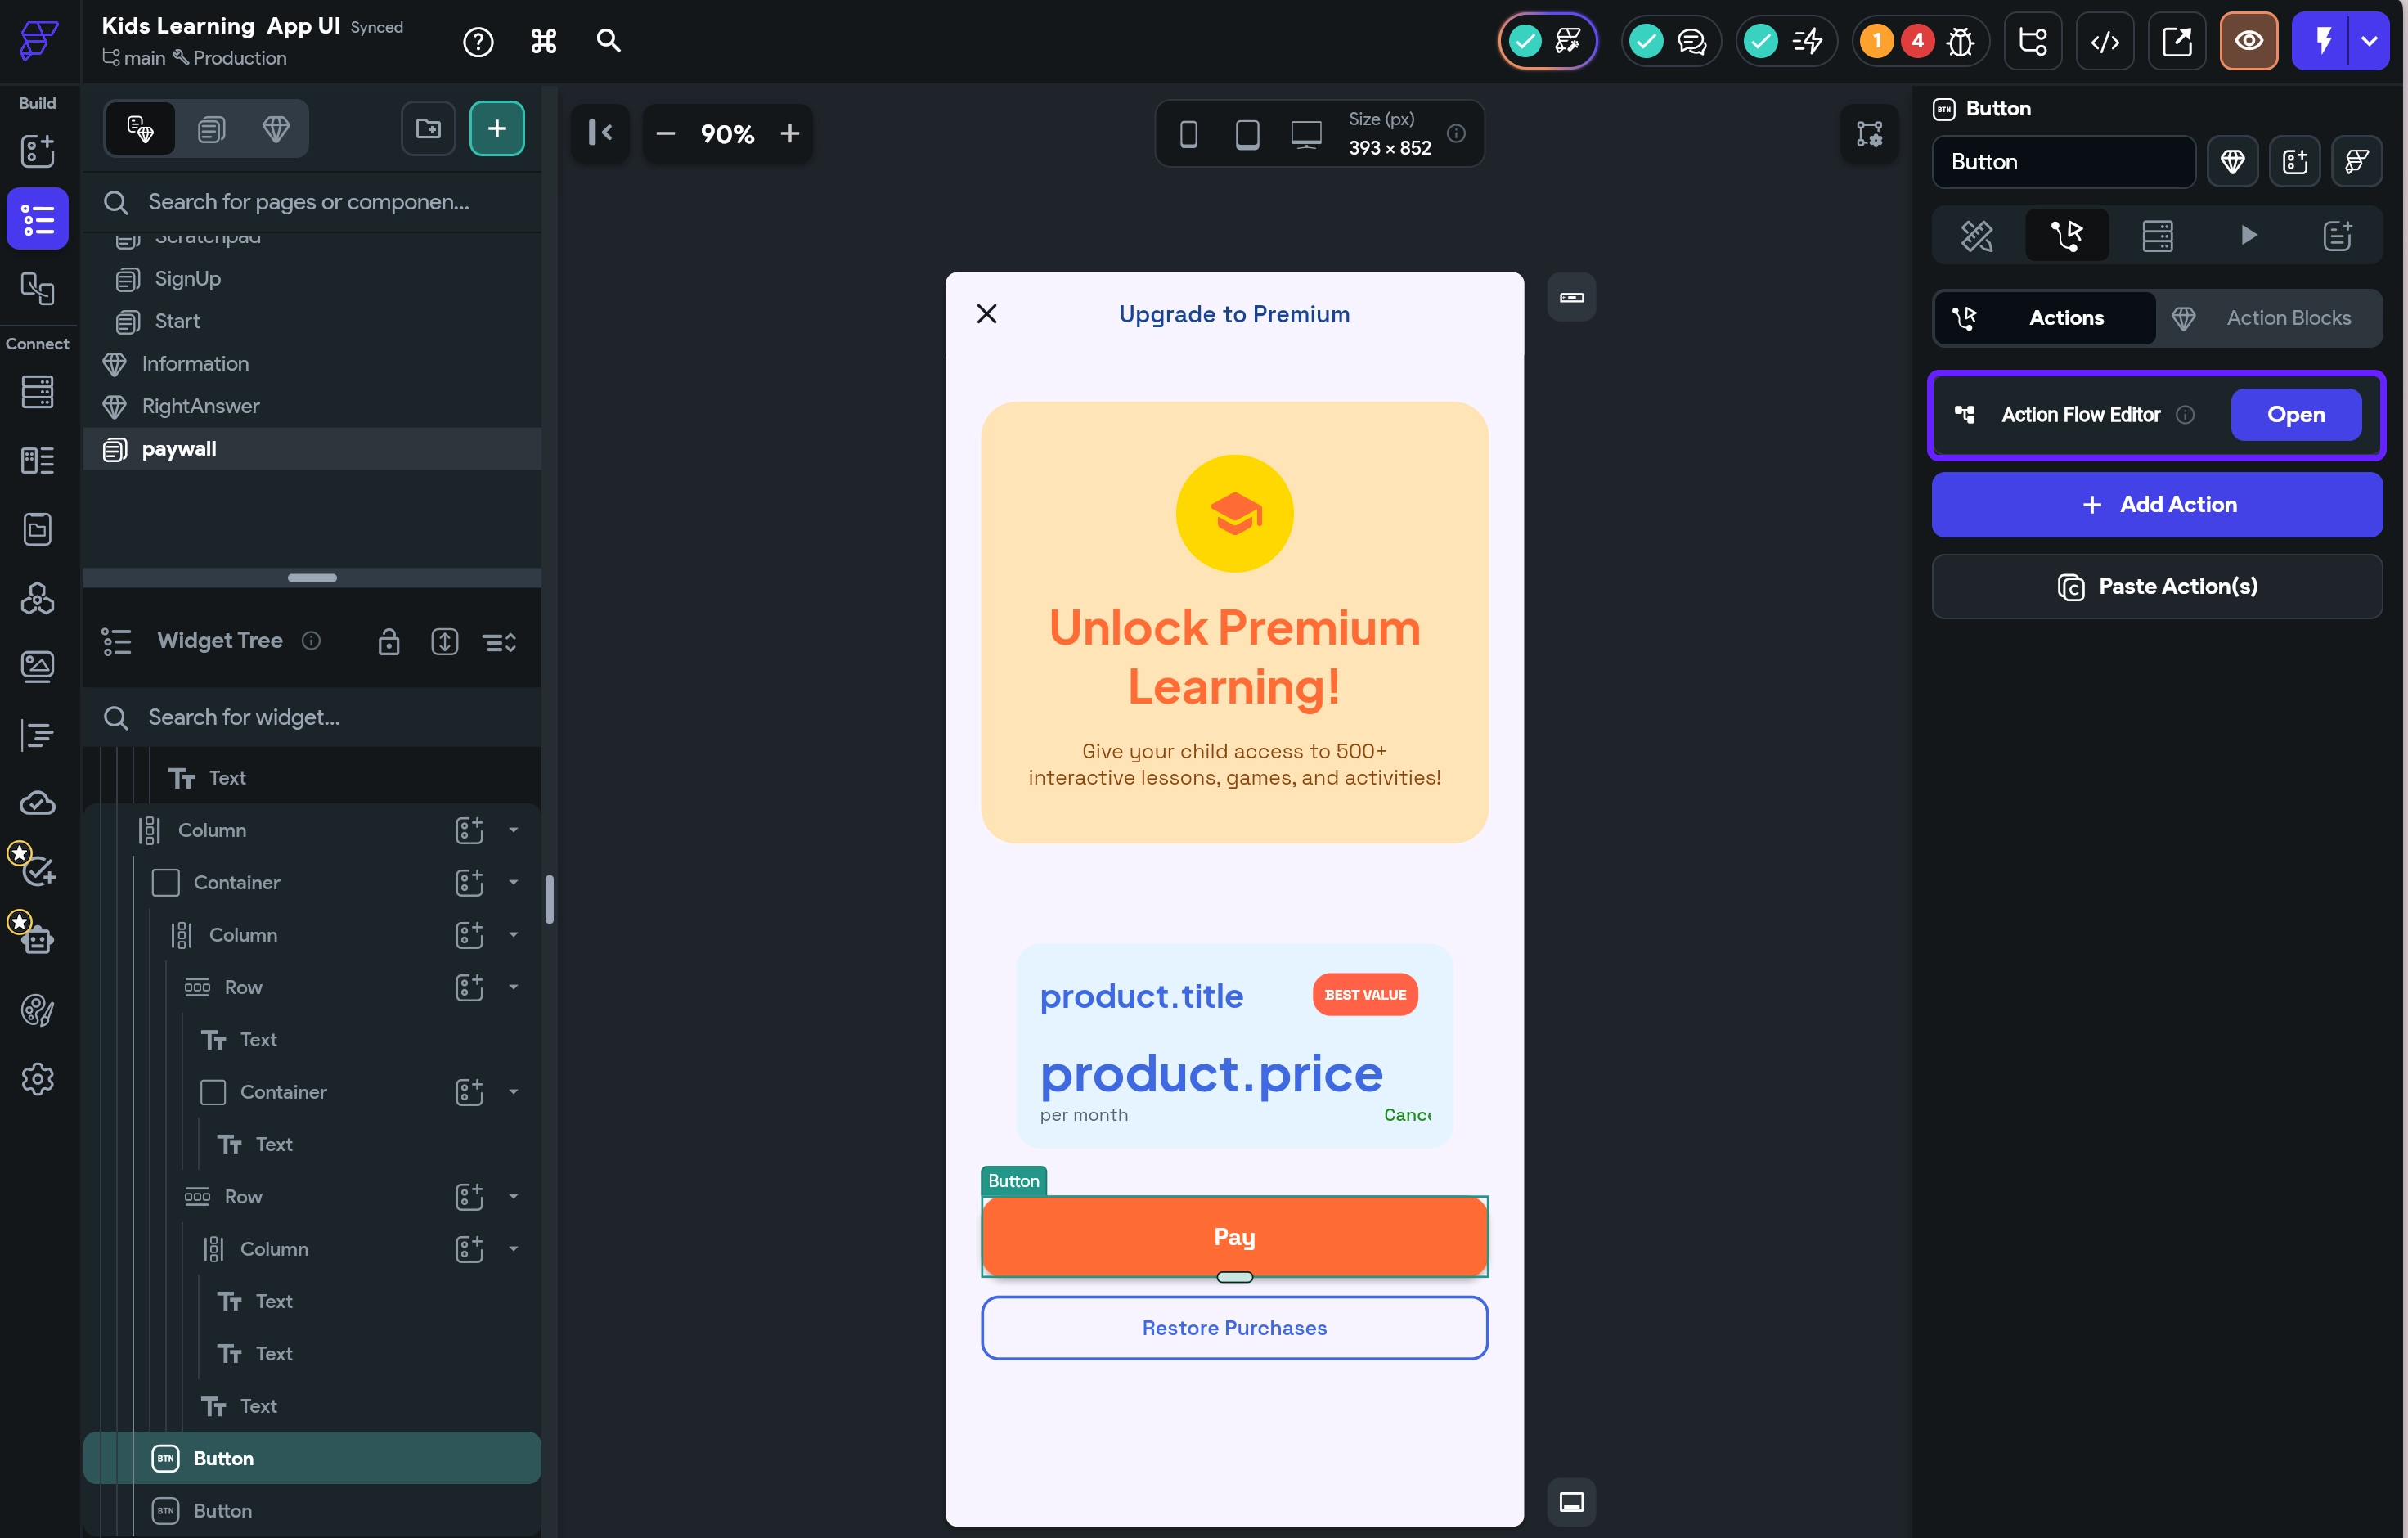
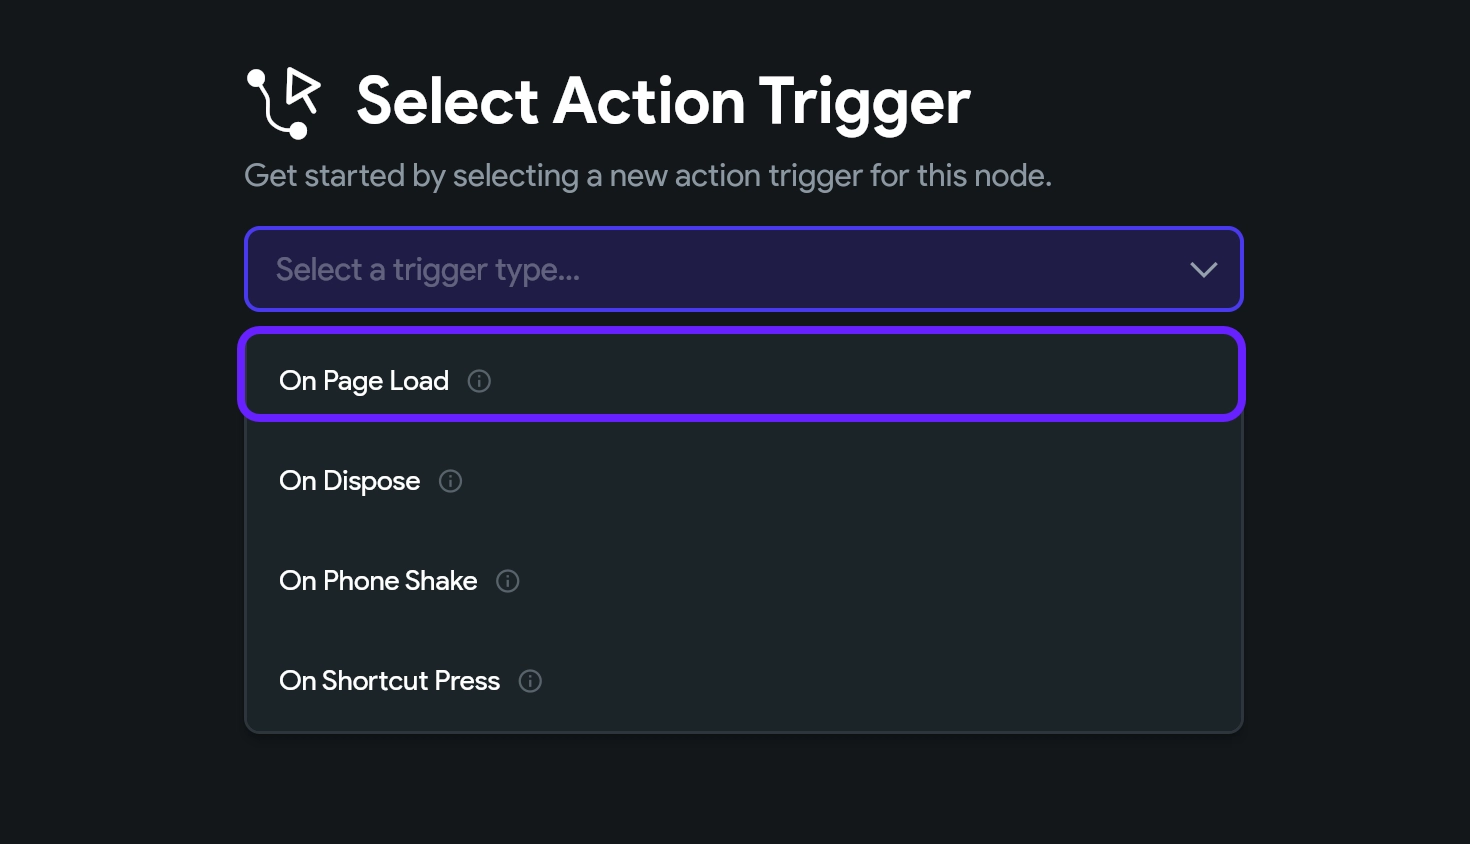
- Open your paywall screen and switch to the Actions section in the right pane. There, open the Action Flow Editor.
- In the Select Action Trigger window, select On Page Load.
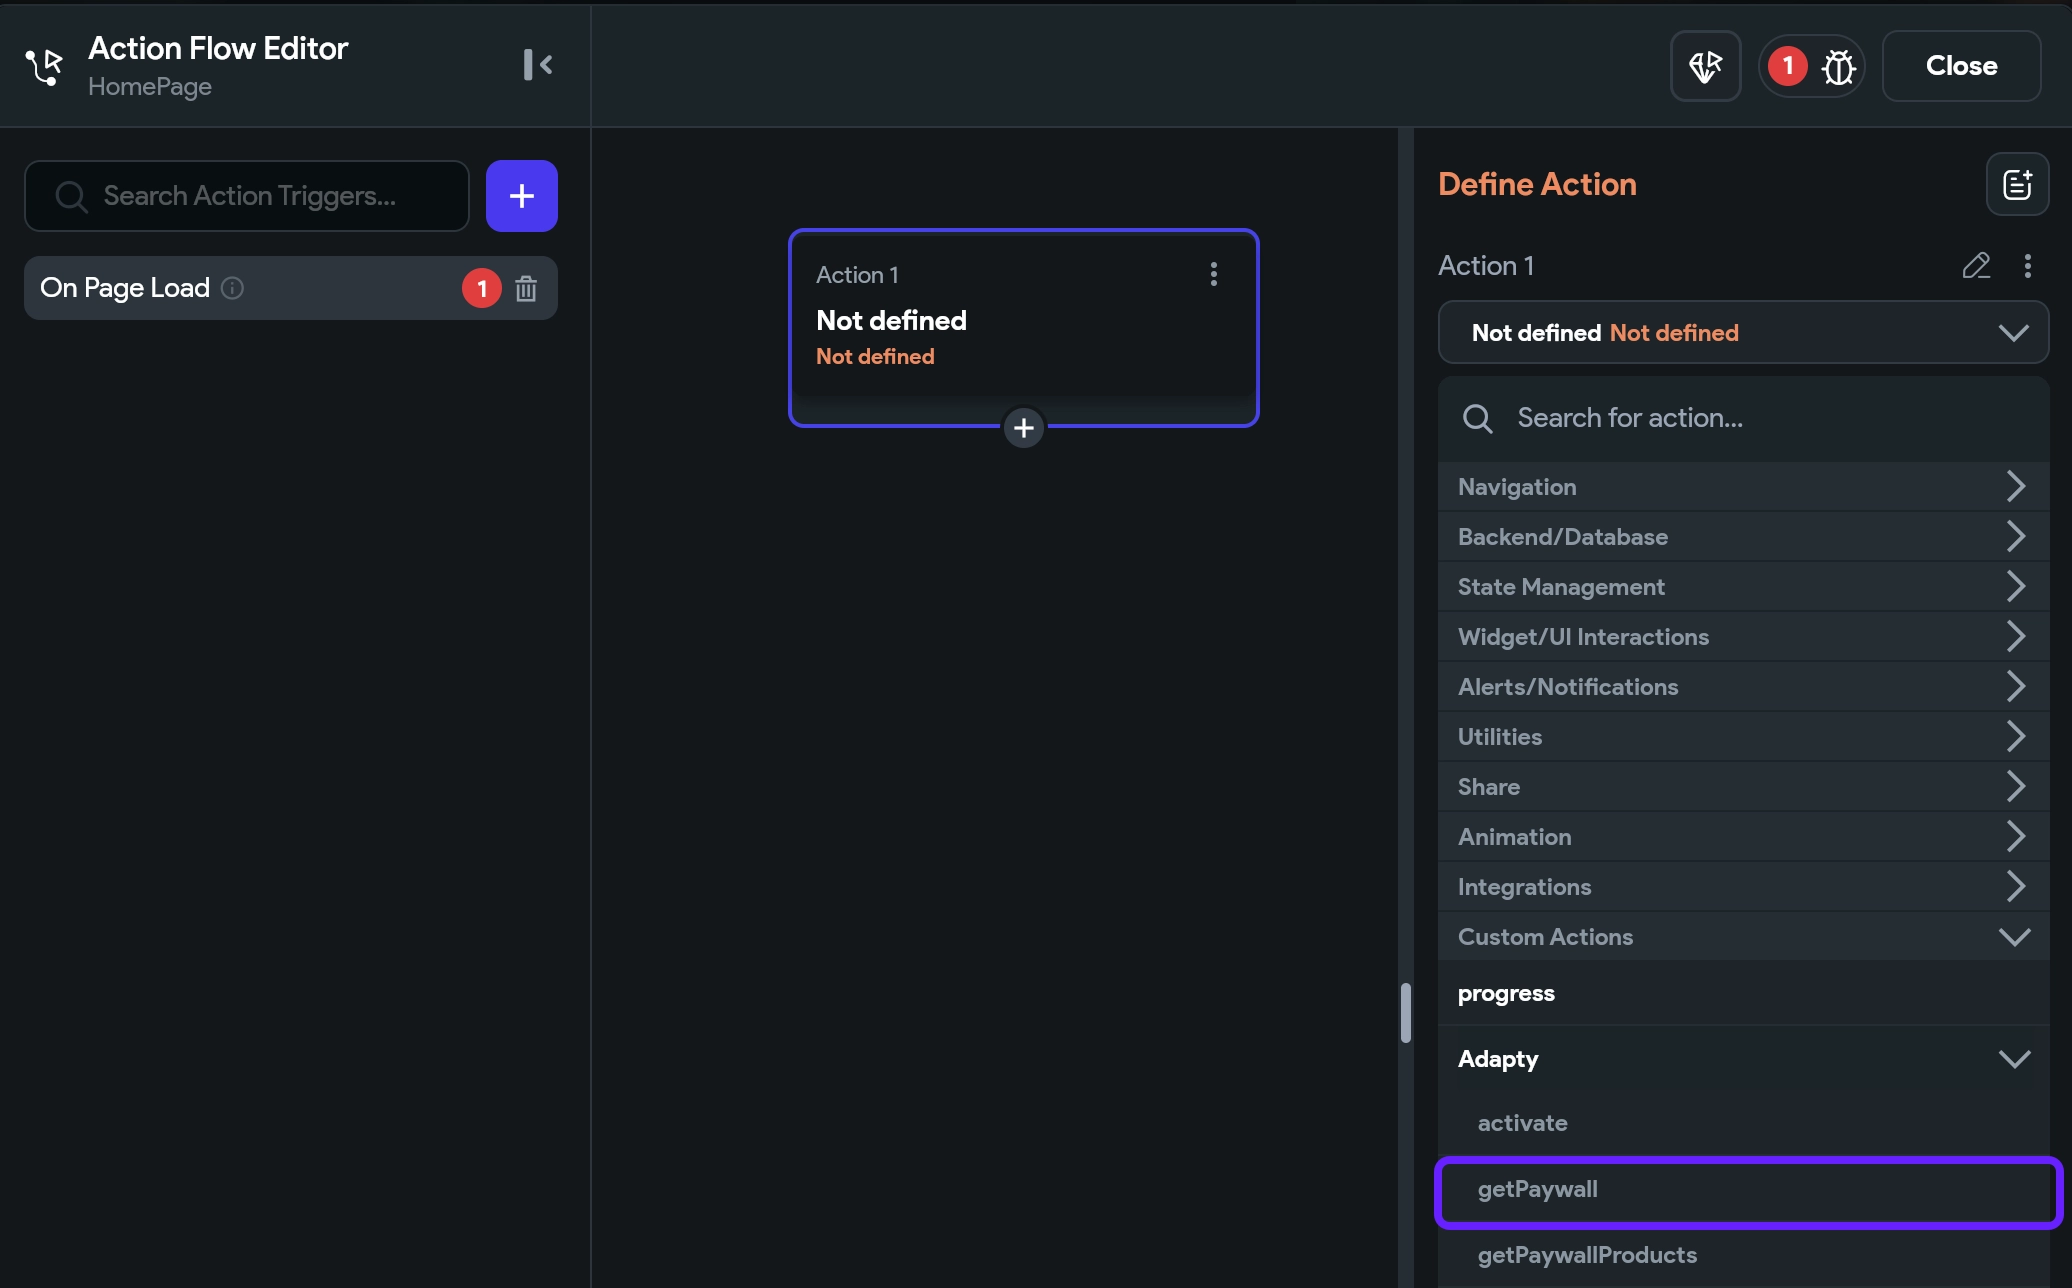
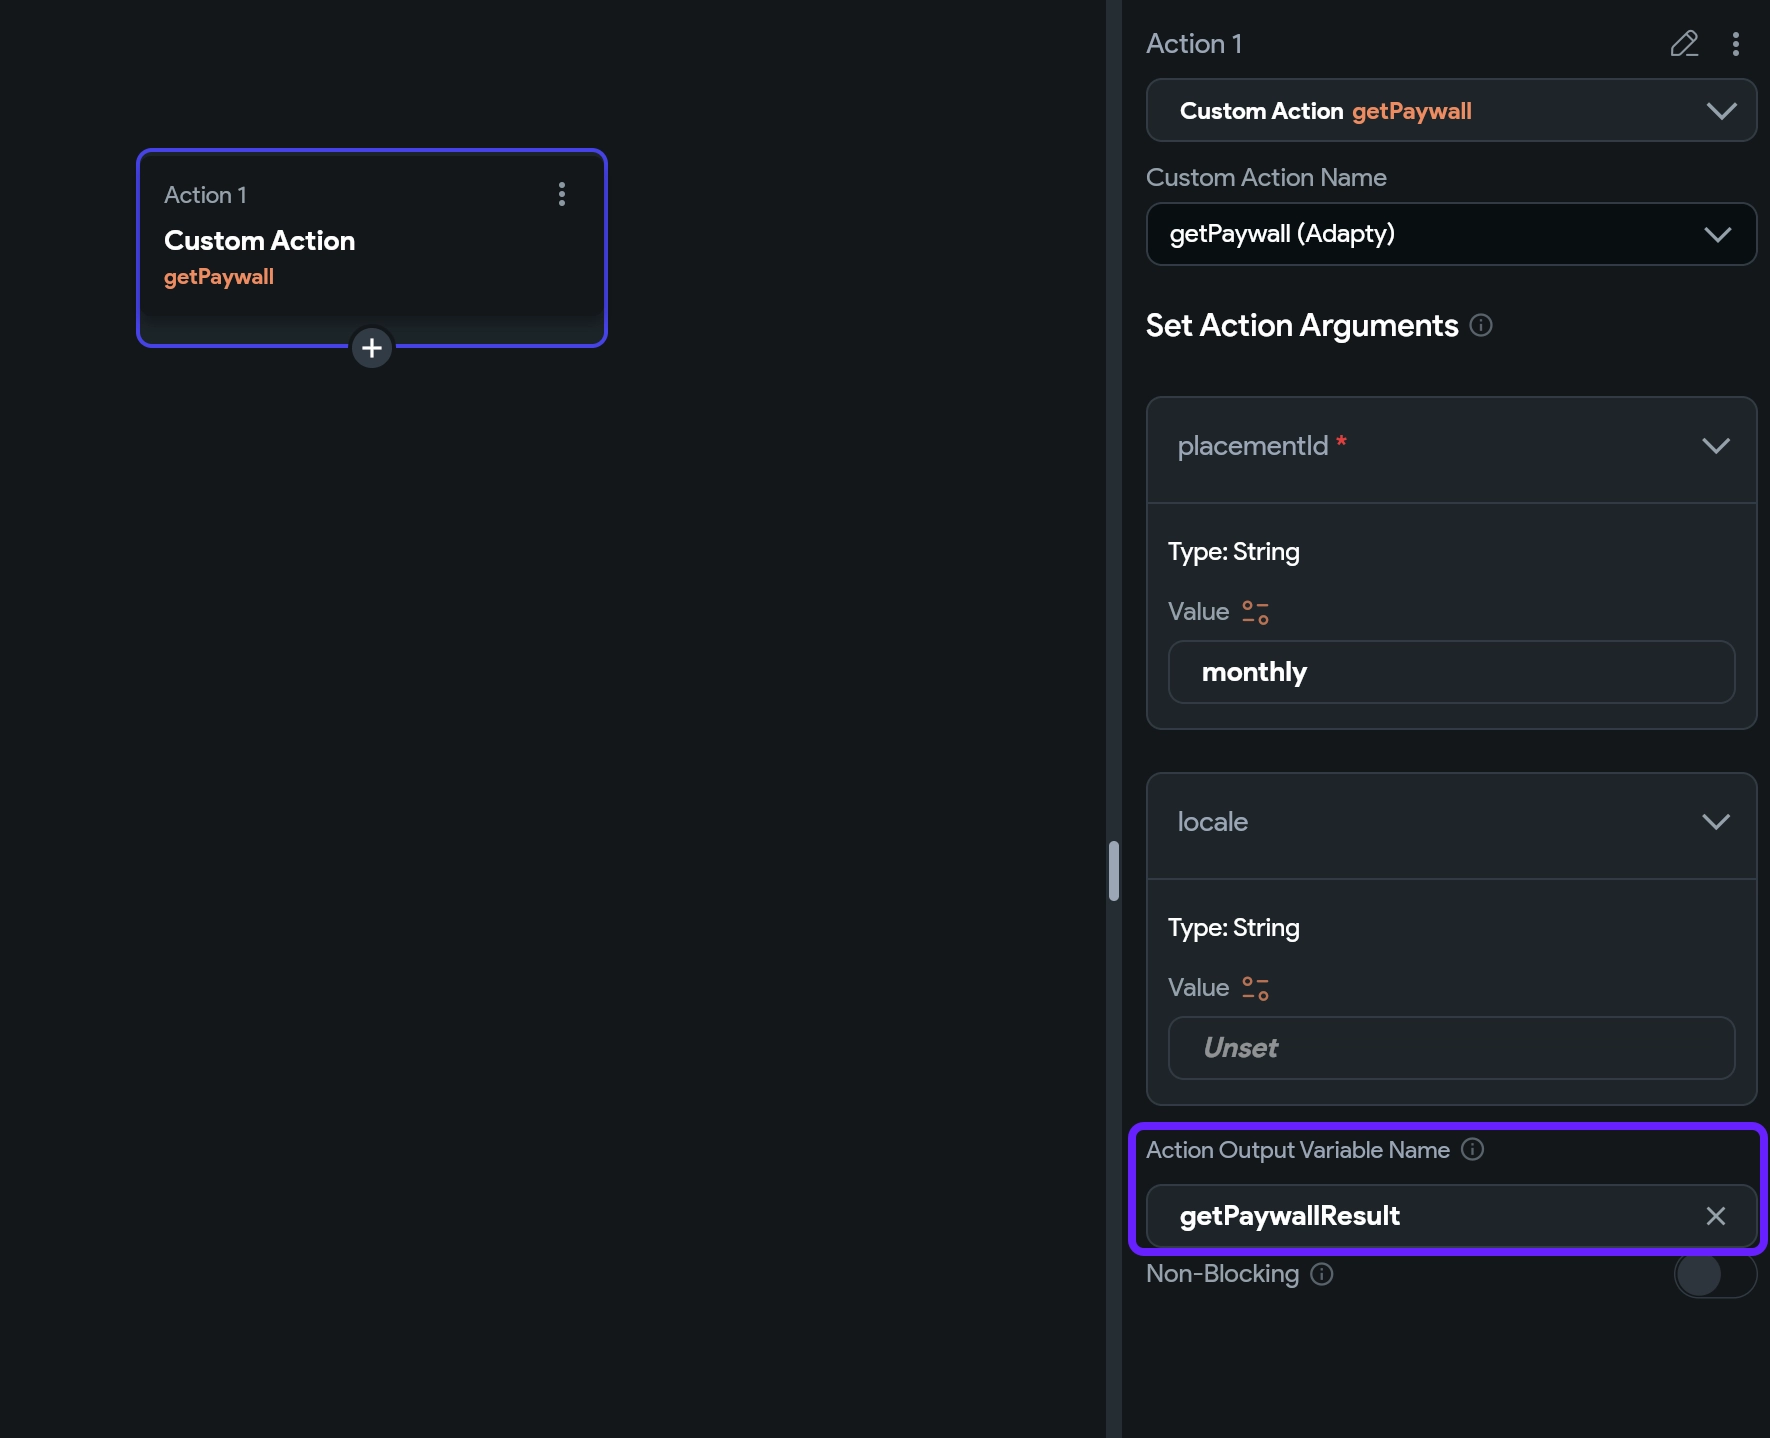
- Click Add Action. Then, search for the
getPaywallcustom action and select it.
- In the Set Actions Arguments section, enter the real ID of the placement you have created in the Adapty Dashboard that includes the paywall. In this example it’s
monthly. Be sure to use your real placement ID!
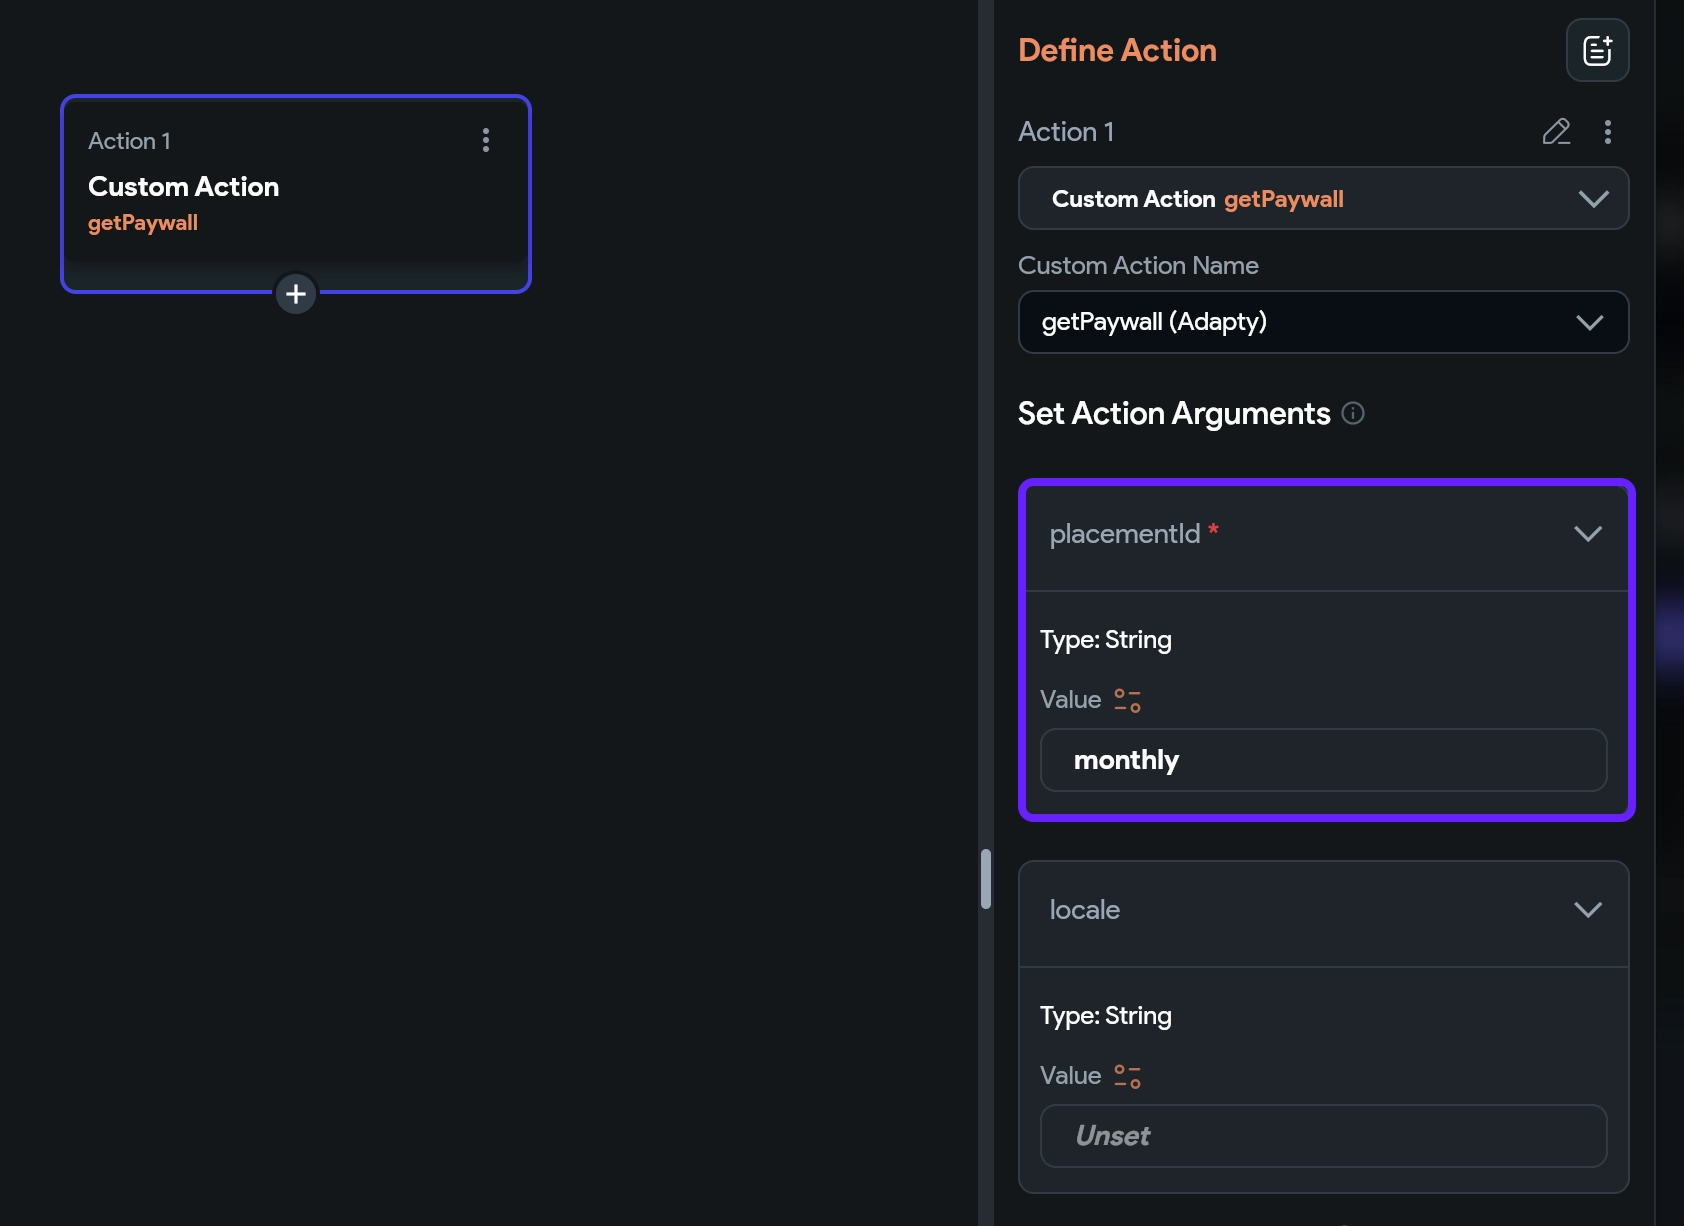
-
If you have localized your paywall in the Adapty dashboard, you can also set up the locale argument.
-
In the Action Output Variable Name, create a new variable and name it
getPaywallResult. We’ll use this in the next step to reference the Adapty paywall and request its products.
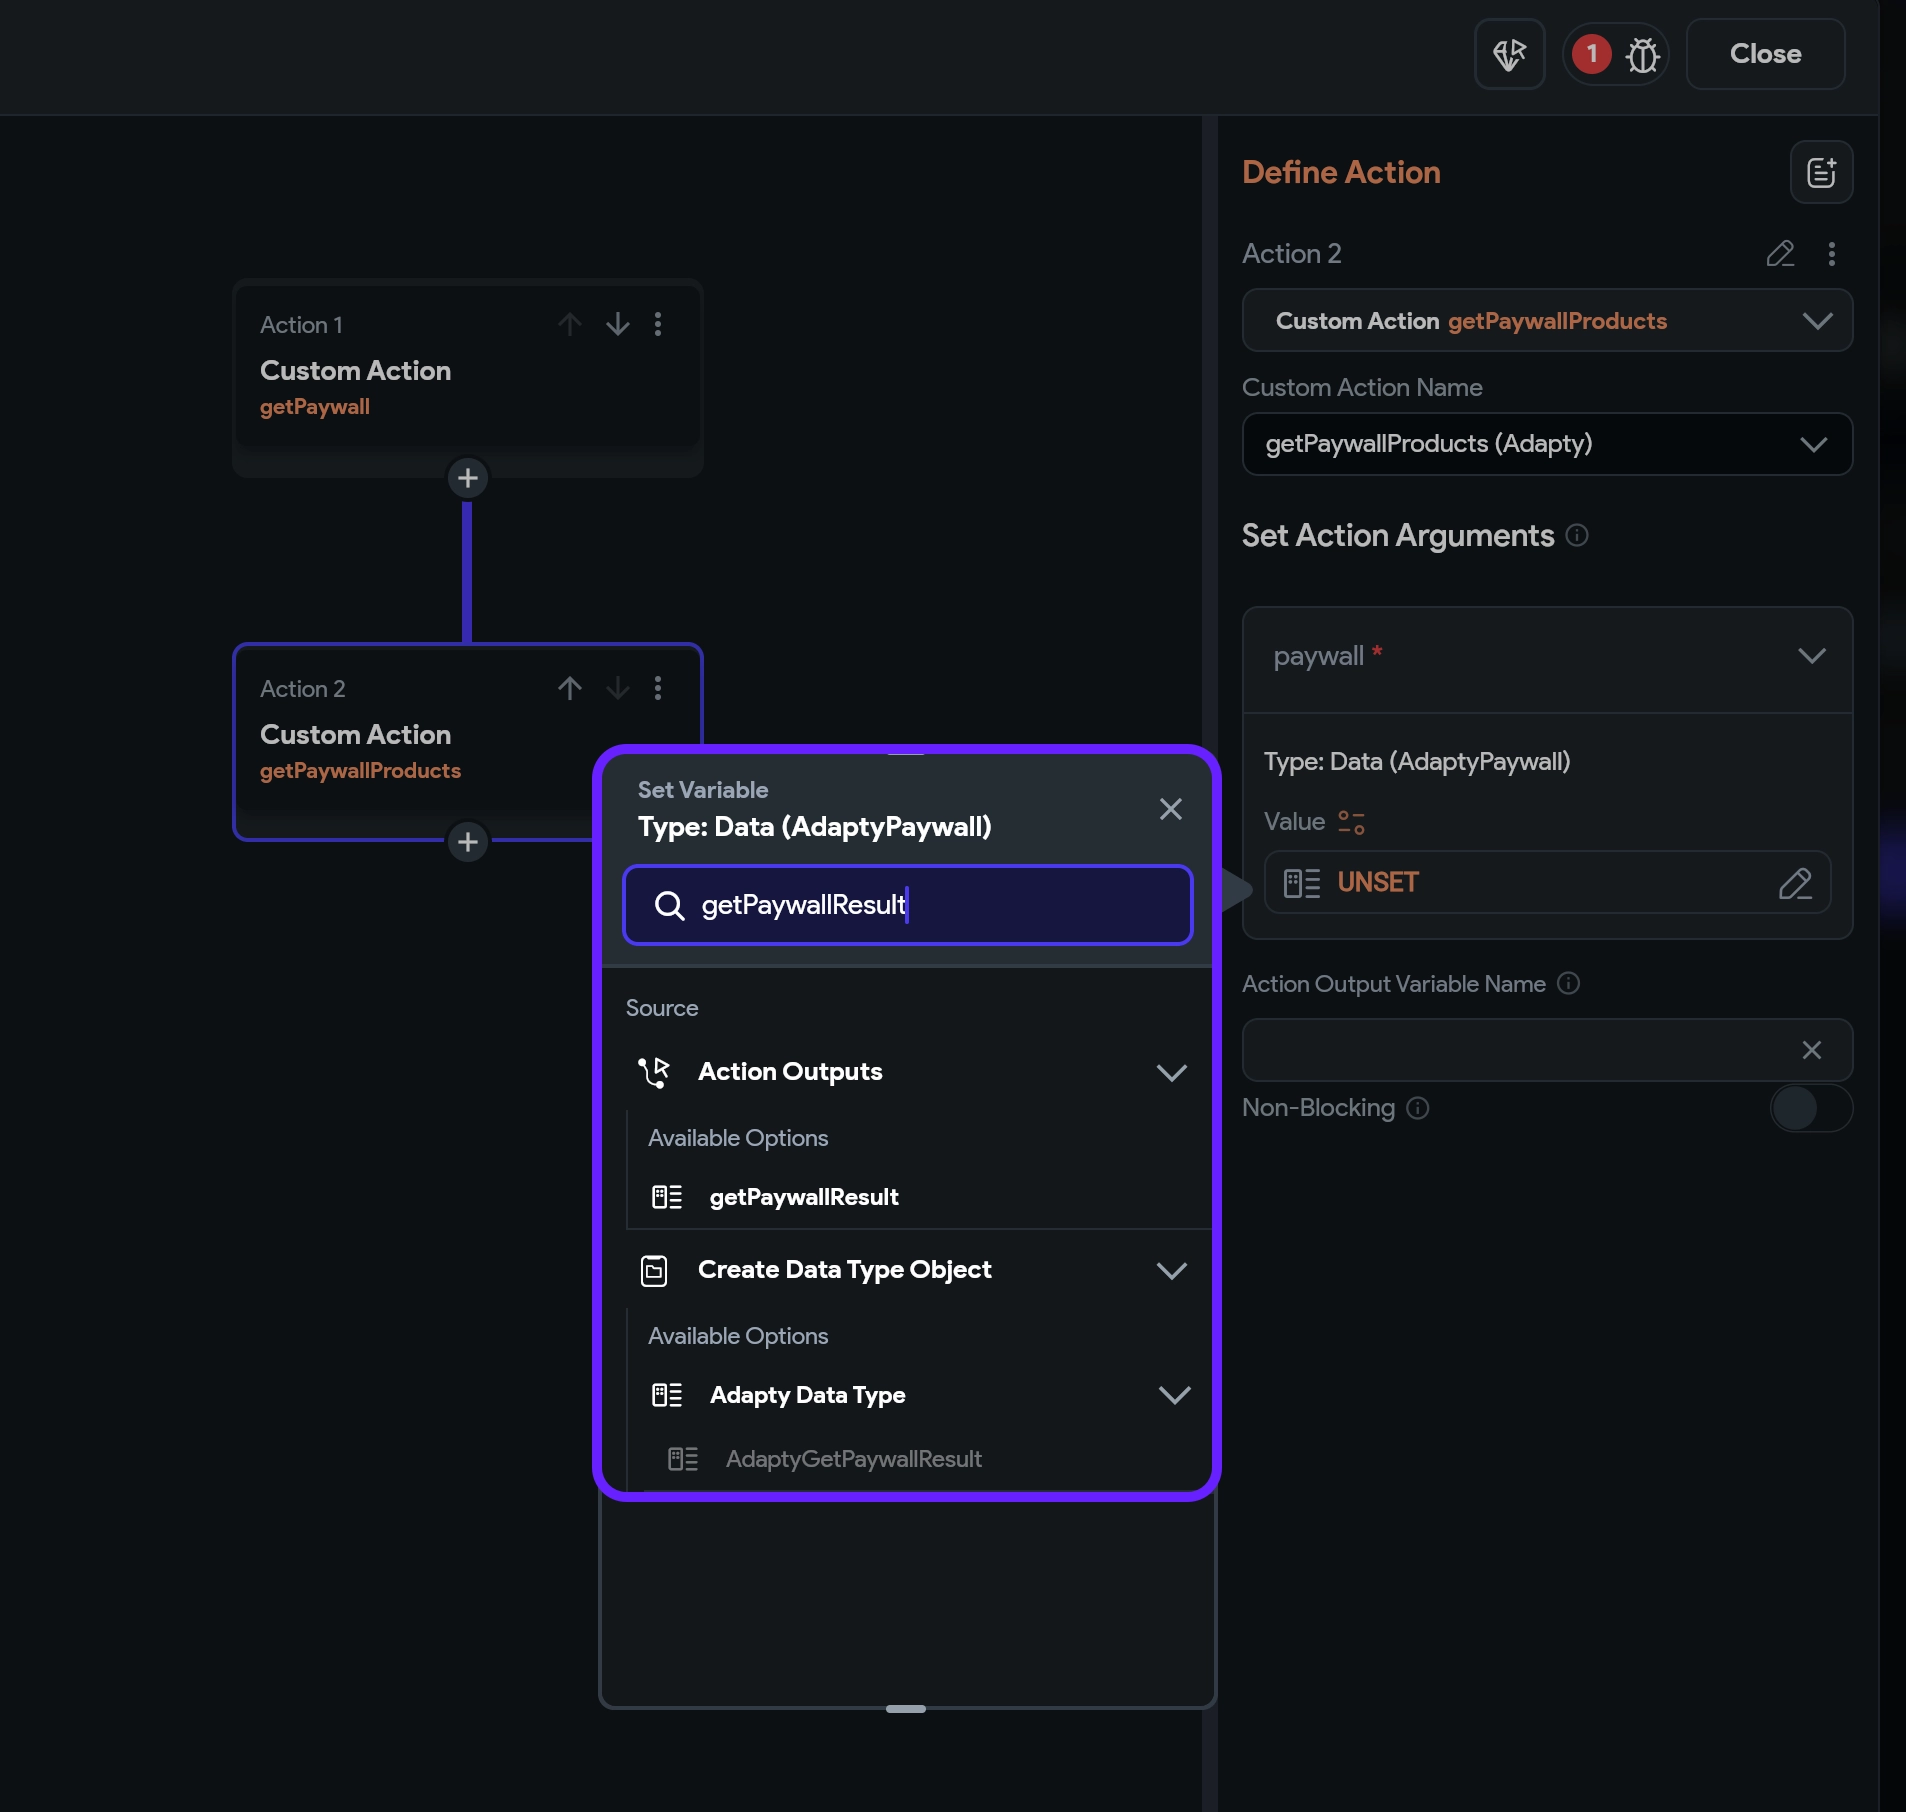
Step 1.2. Request Adapty paywall products
Great! We’ve retrieved the Adapty paywall. Now, let’s get the products associated with this paywall:
-
Click + under the created action and select Add Action. This action will receive Adapty paywall products. For this, search and select
getPaywallProducts. -
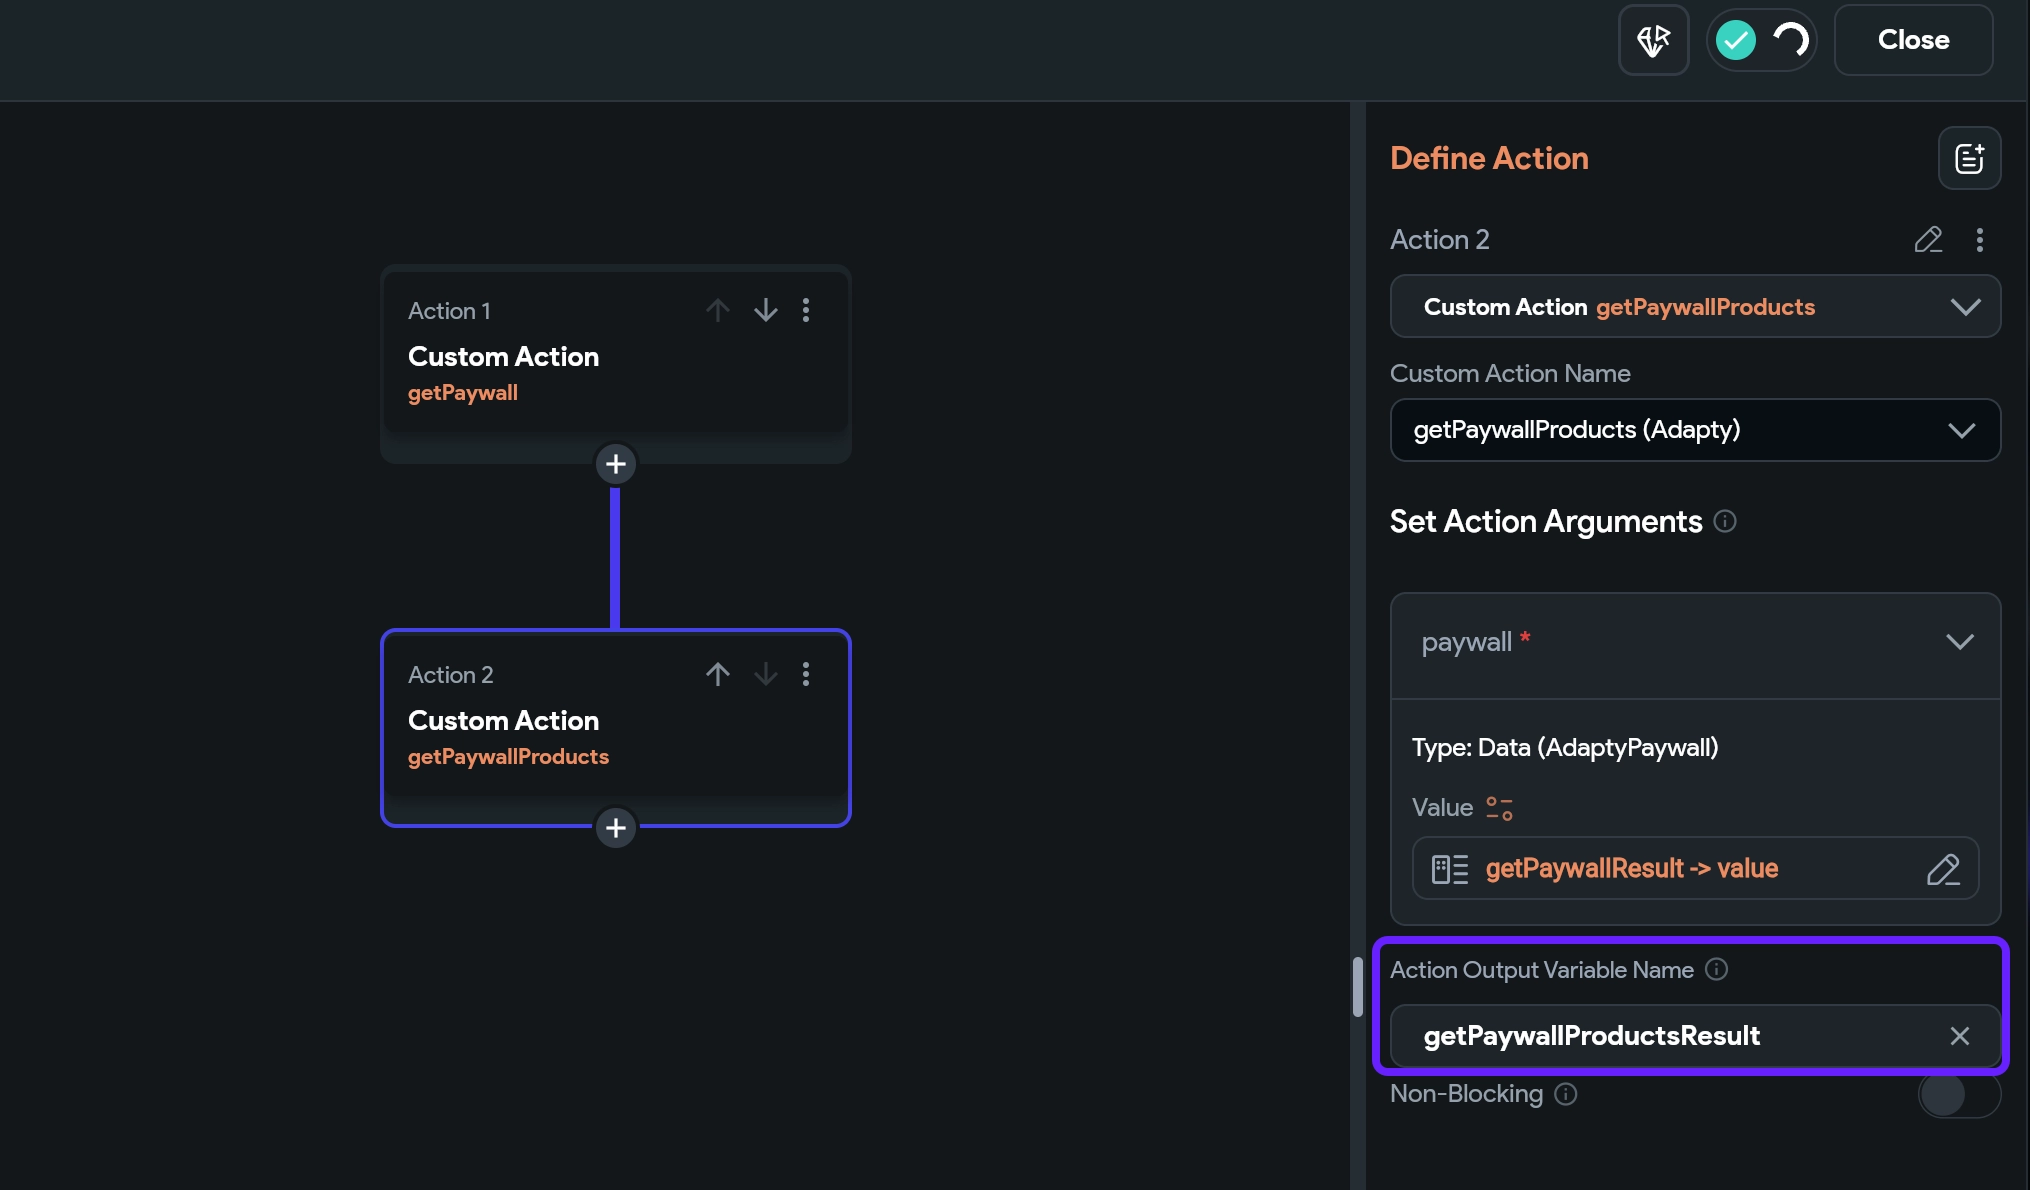
In the Set Actions Arguments section, select the
getPaywallResultvariable created earlier.
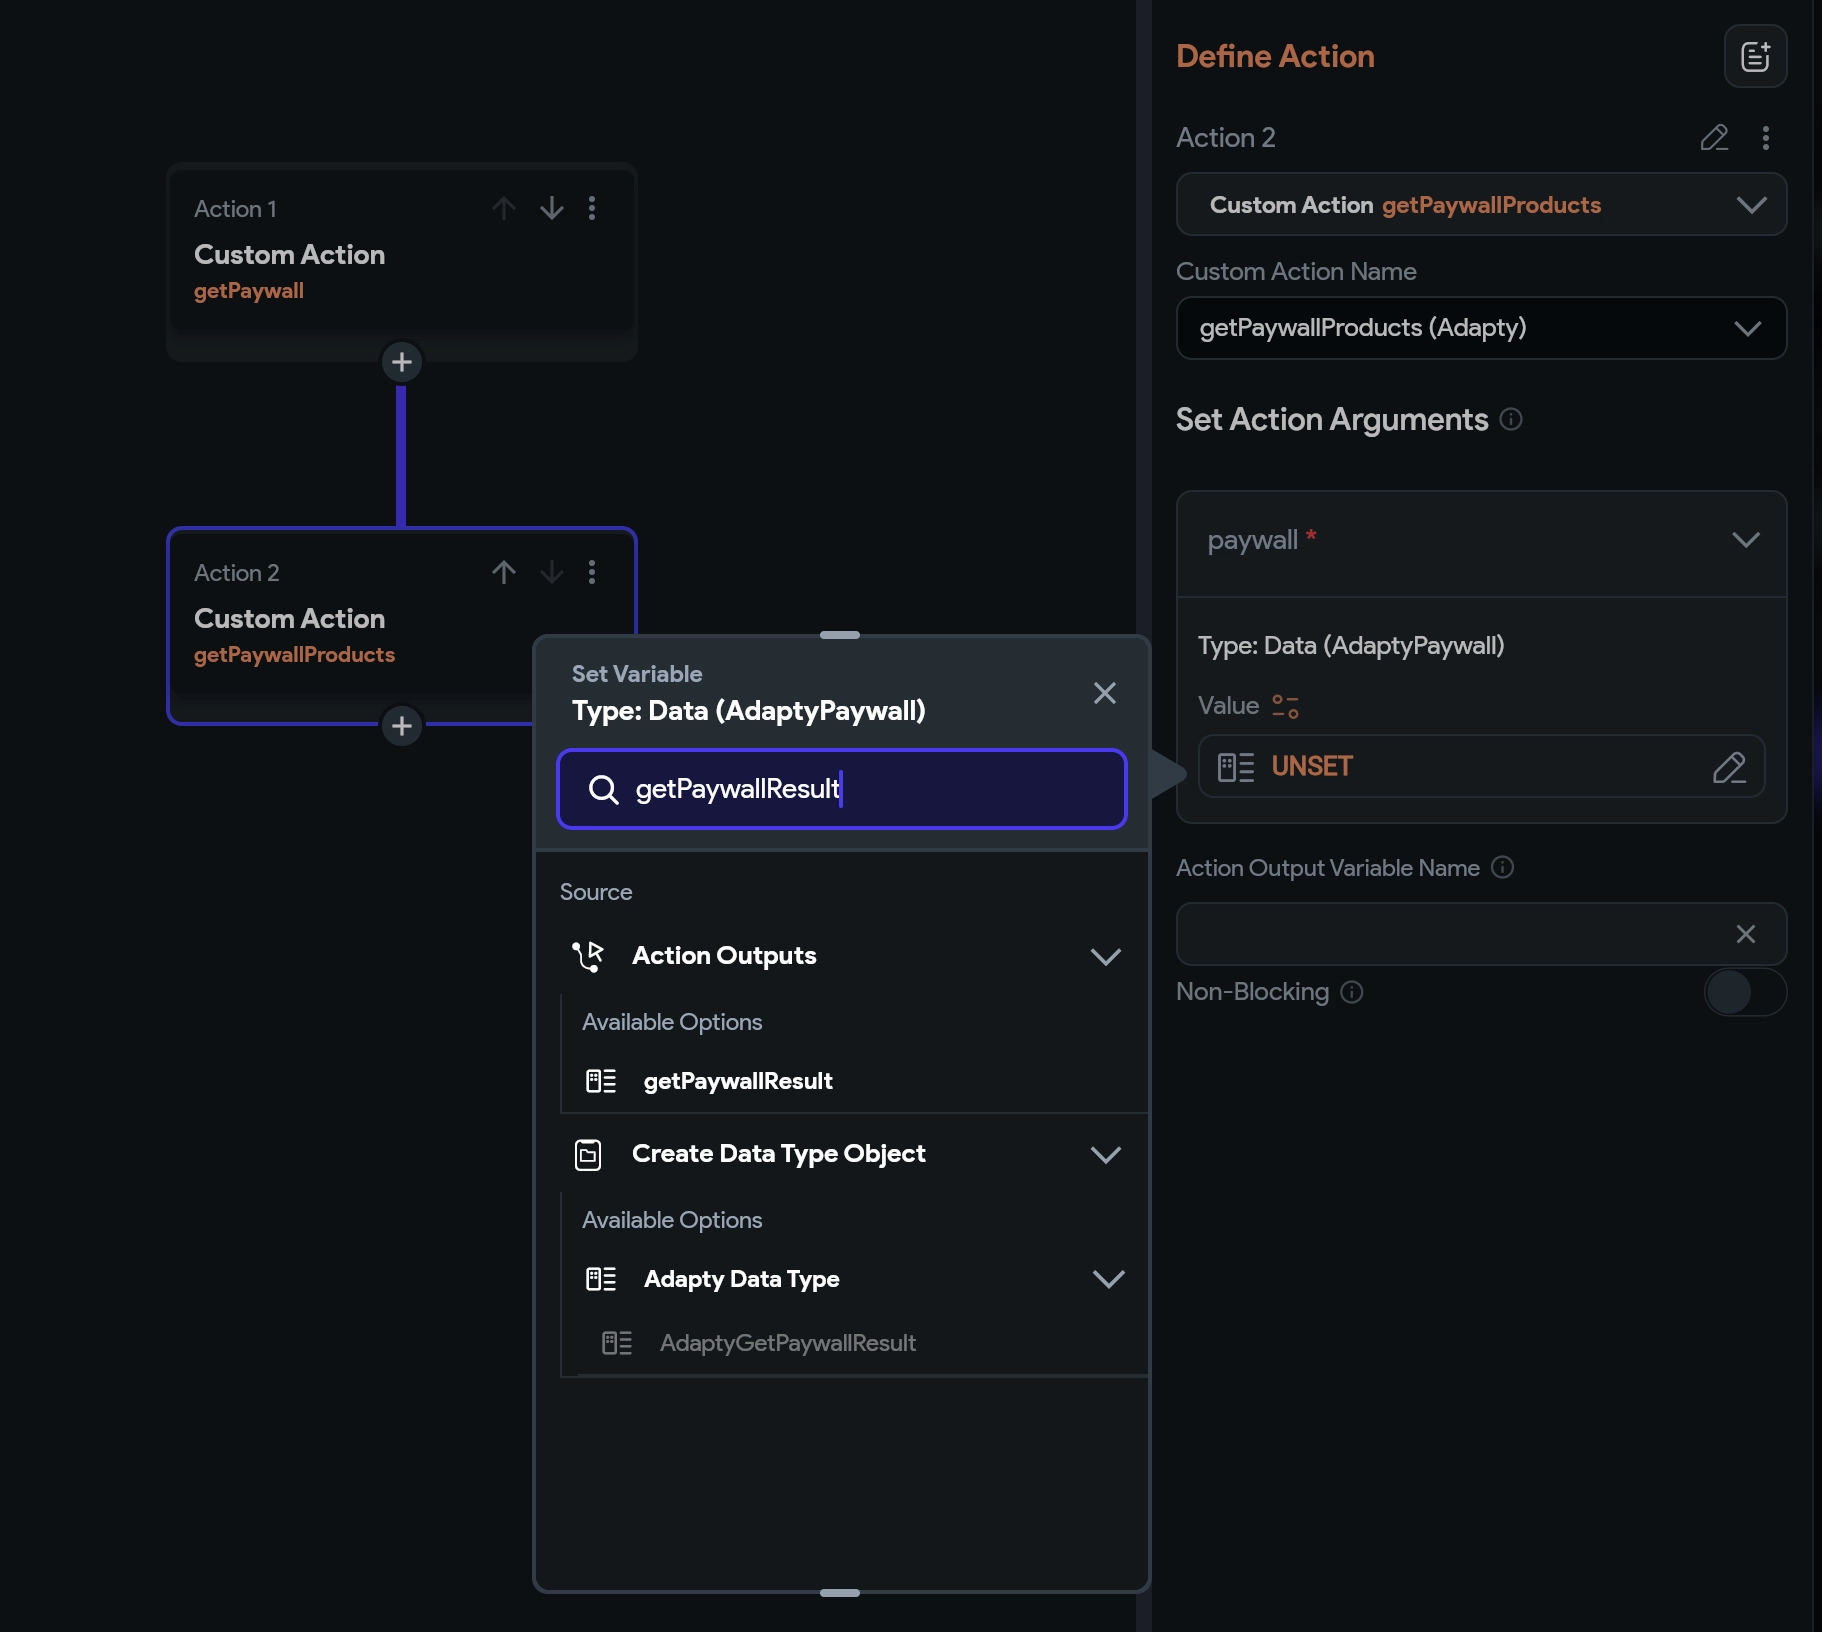
- Fill in the other fields as follows:
- Available Options: Data Structured Field
- Select Field: value
- Available Options: No further changes

- Click Confirm.
- In the Action Output Variable Name, create a new variable and name it
getPaywallProductsResult. We’ll use this to map the paywall you designed in FlutterFlow with the Adapty paywall data.
Step 1.3. Add check if the paywall uploaded successfully
Before moving on, let’s verify that the Adapty paywall was received successfully. If so, we can update the paywall with the product data. If not, we’ll handle the error. Here’s how to add the check:
- Click + and click Add Conditional.
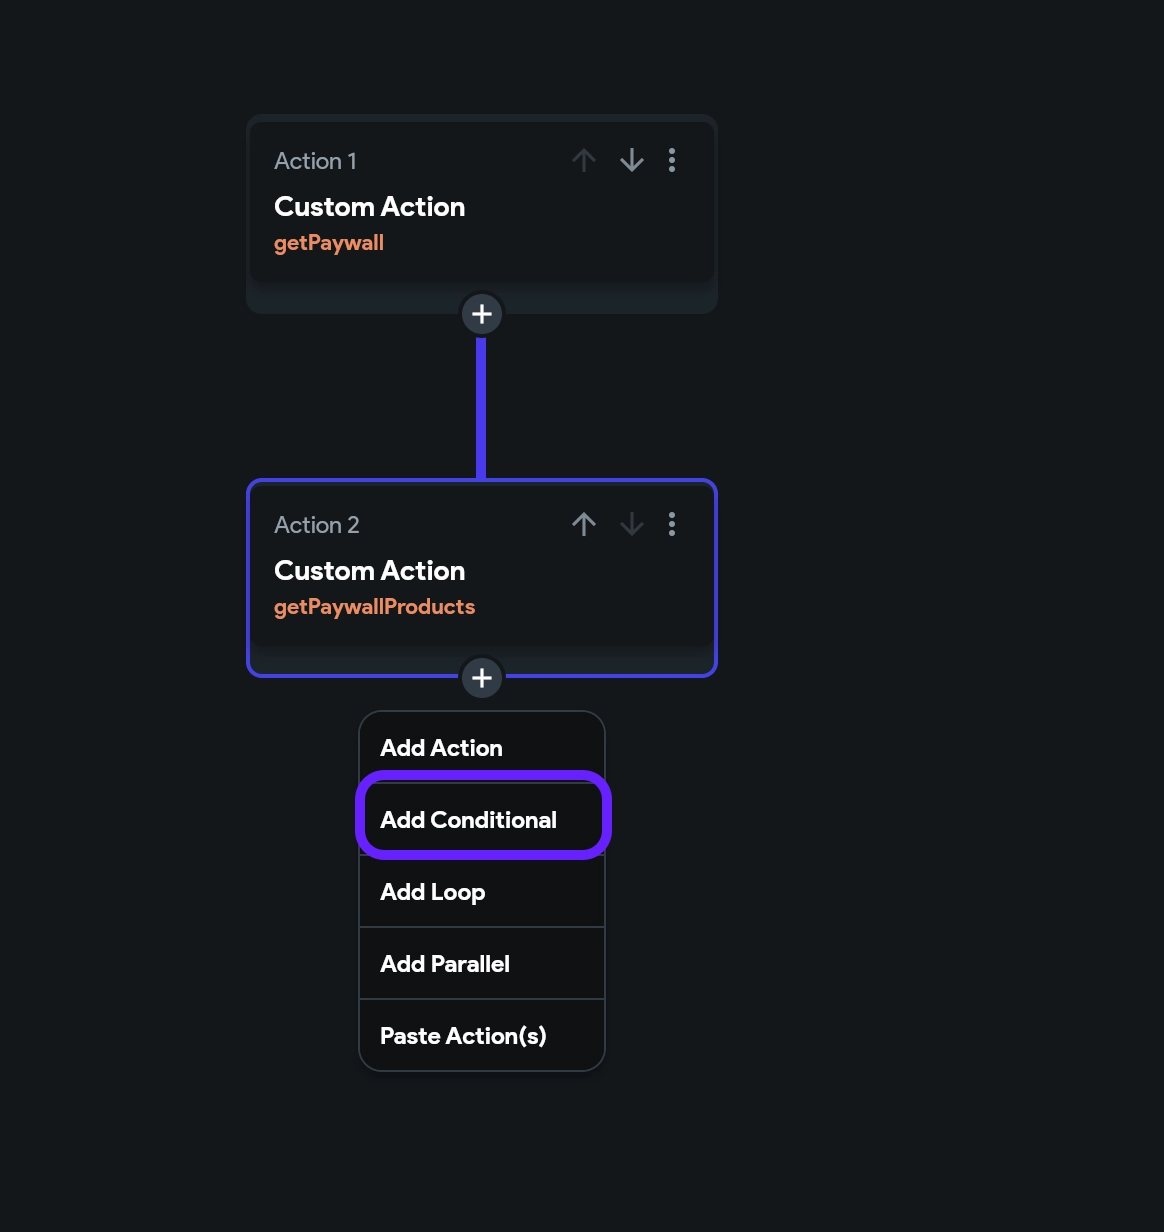
- In the Action Output section, select the action output variable created earlier (
getPaywallResultin our example).
- To verify that the Adapty paywall was received, check for the presence of a field with a value. Fill in the fields as follows:
- Available Options: Has Field
- Field (AdaptyGetPaywallResult): value
- Click Confirm to finalize the condition.
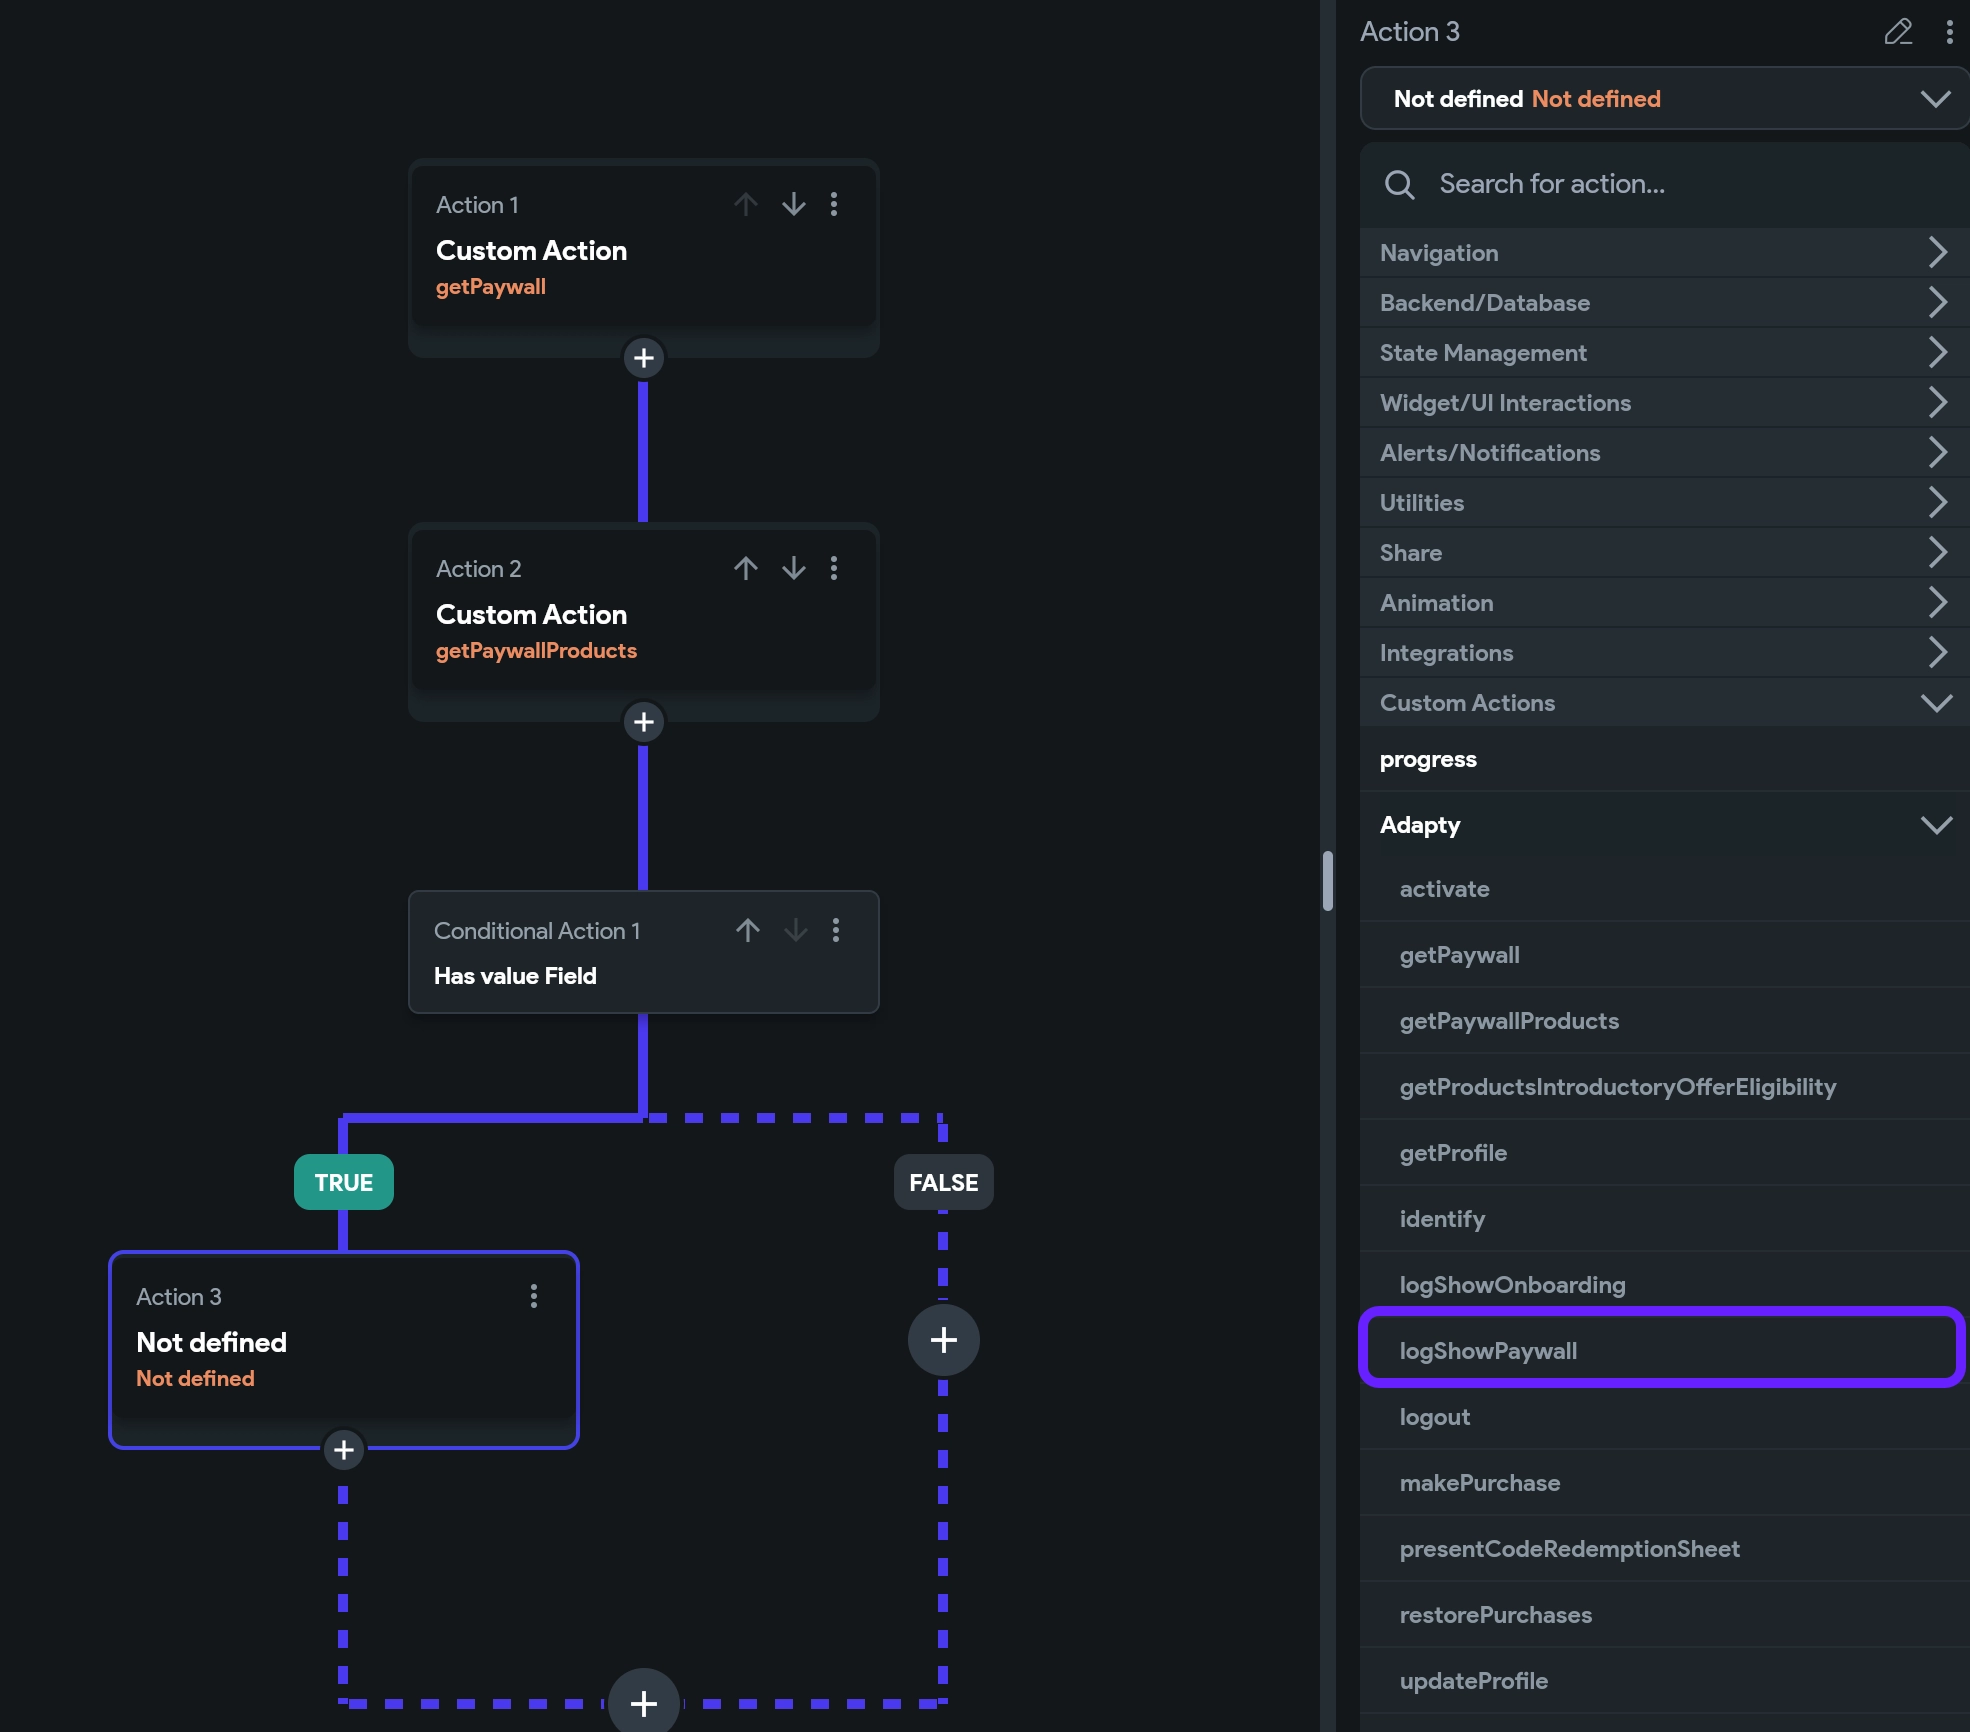
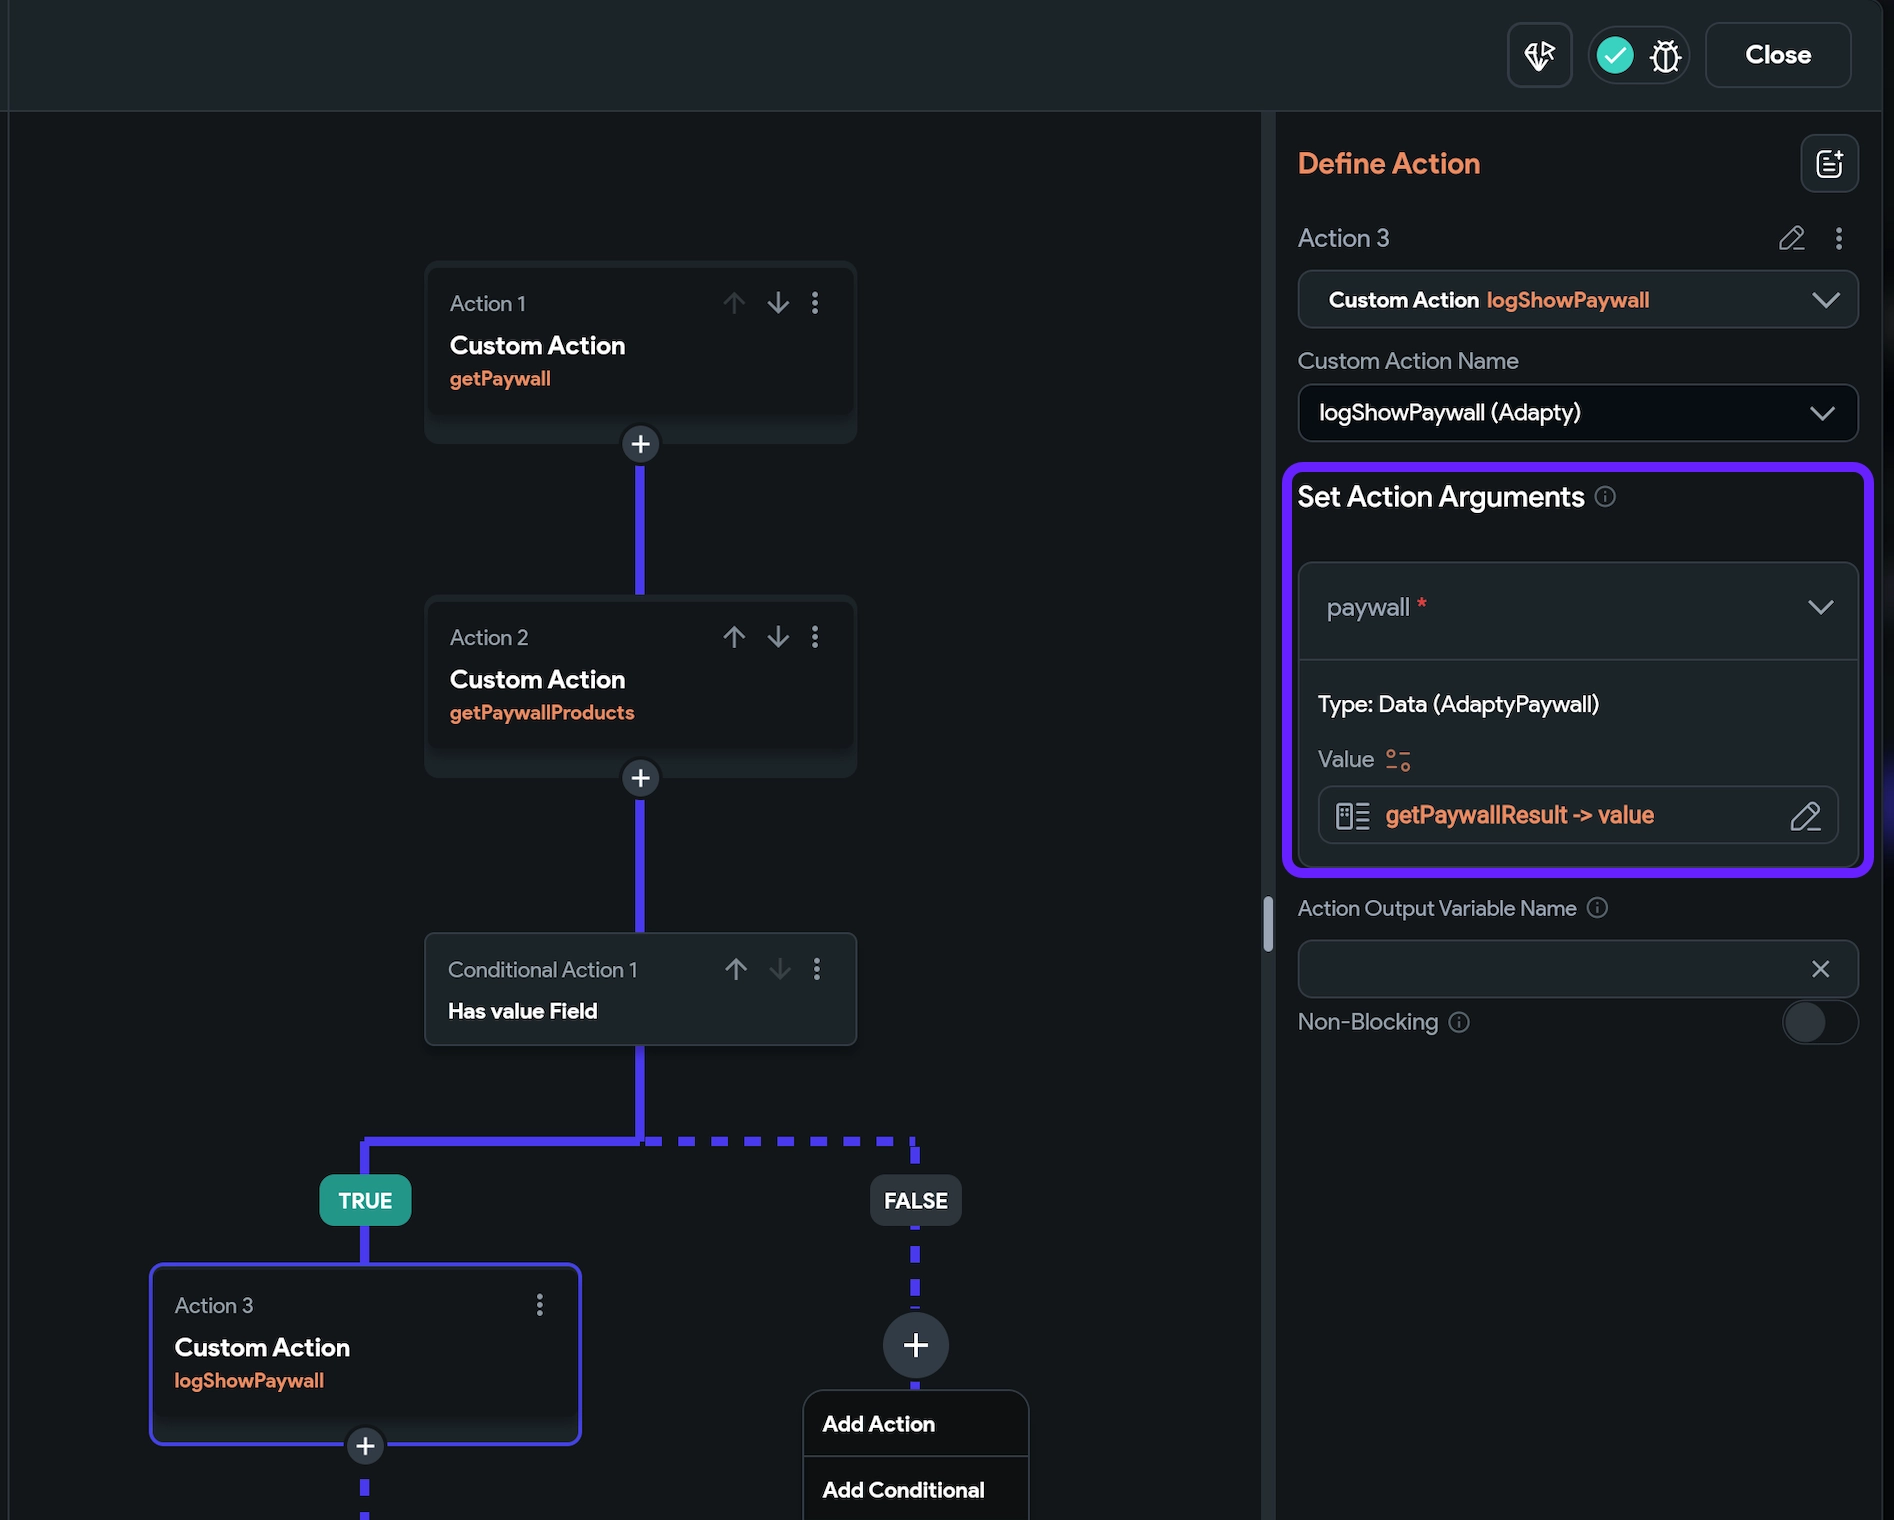
Step 1.4. Log the paywall review
To ensure Adapty analytics track the paywall view, we need to log this event. Without this step, the view won’t be counted in the analytics. Here’s how:
- Click + under the TRUE label and click Add Action.
- In the Select Action field, search for and choose logShowPaywall.
- Click Value in the Set Action Arguments area and choose the
getPaywallResultvariable we’ve created. This variable contains the paywall data. - Fill in the fields as follows:
- Available Options: Data Structured Field
- Select Field: value
- Click Confirm.
Step 1.5. Show error if paywall not received
If the Adapty paywall is not received, you need to handle the error. In this example, we’ll simply display an alert message.
-
Add an Informational Dialog action to the FALSE label.
-
In the Title field, add text you want to see as the dialog title. In this example, it’s Error.
-
Click Value in the Message box.
-
Fill in the fields as follows:
- Set Variable:
getPaywallProductResultvariable we’ve created - Available Options: Data Structure Field
- Select Field: error
- Available Options: Data Structure Field
- Select Field: errorMessage
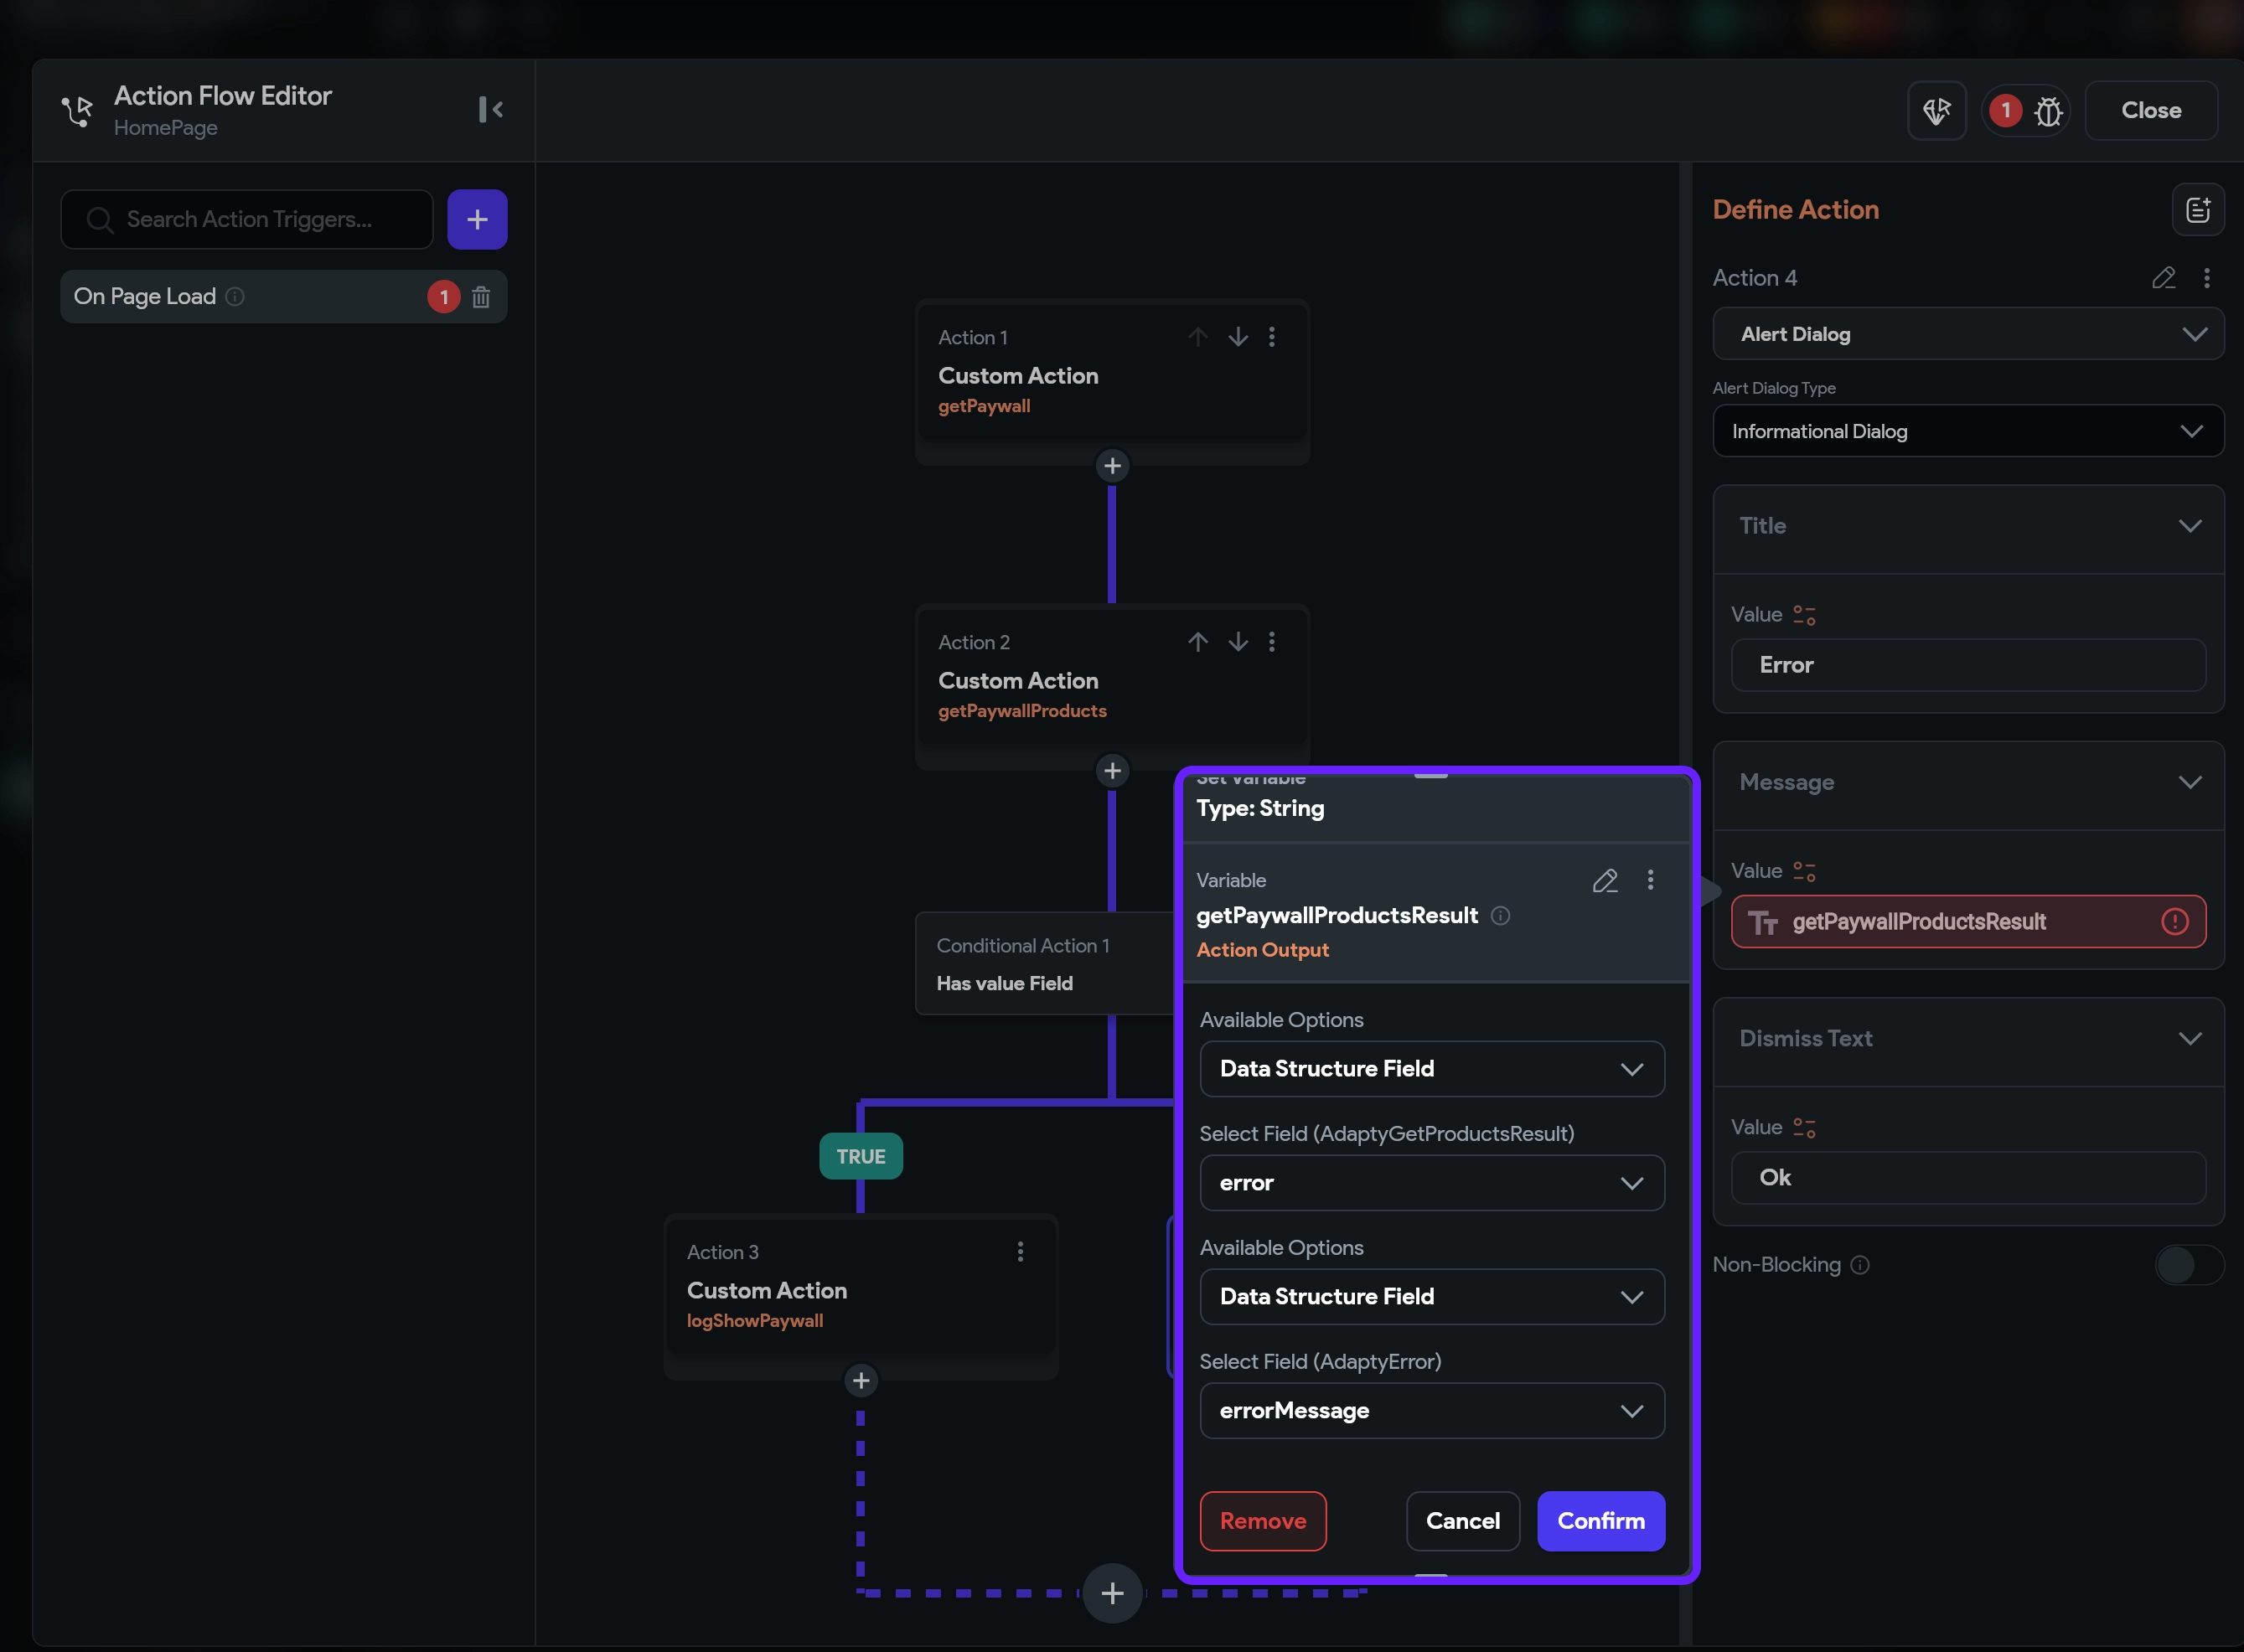
- Click Confirm.
- Add a Terminate action to the FALSE flow.
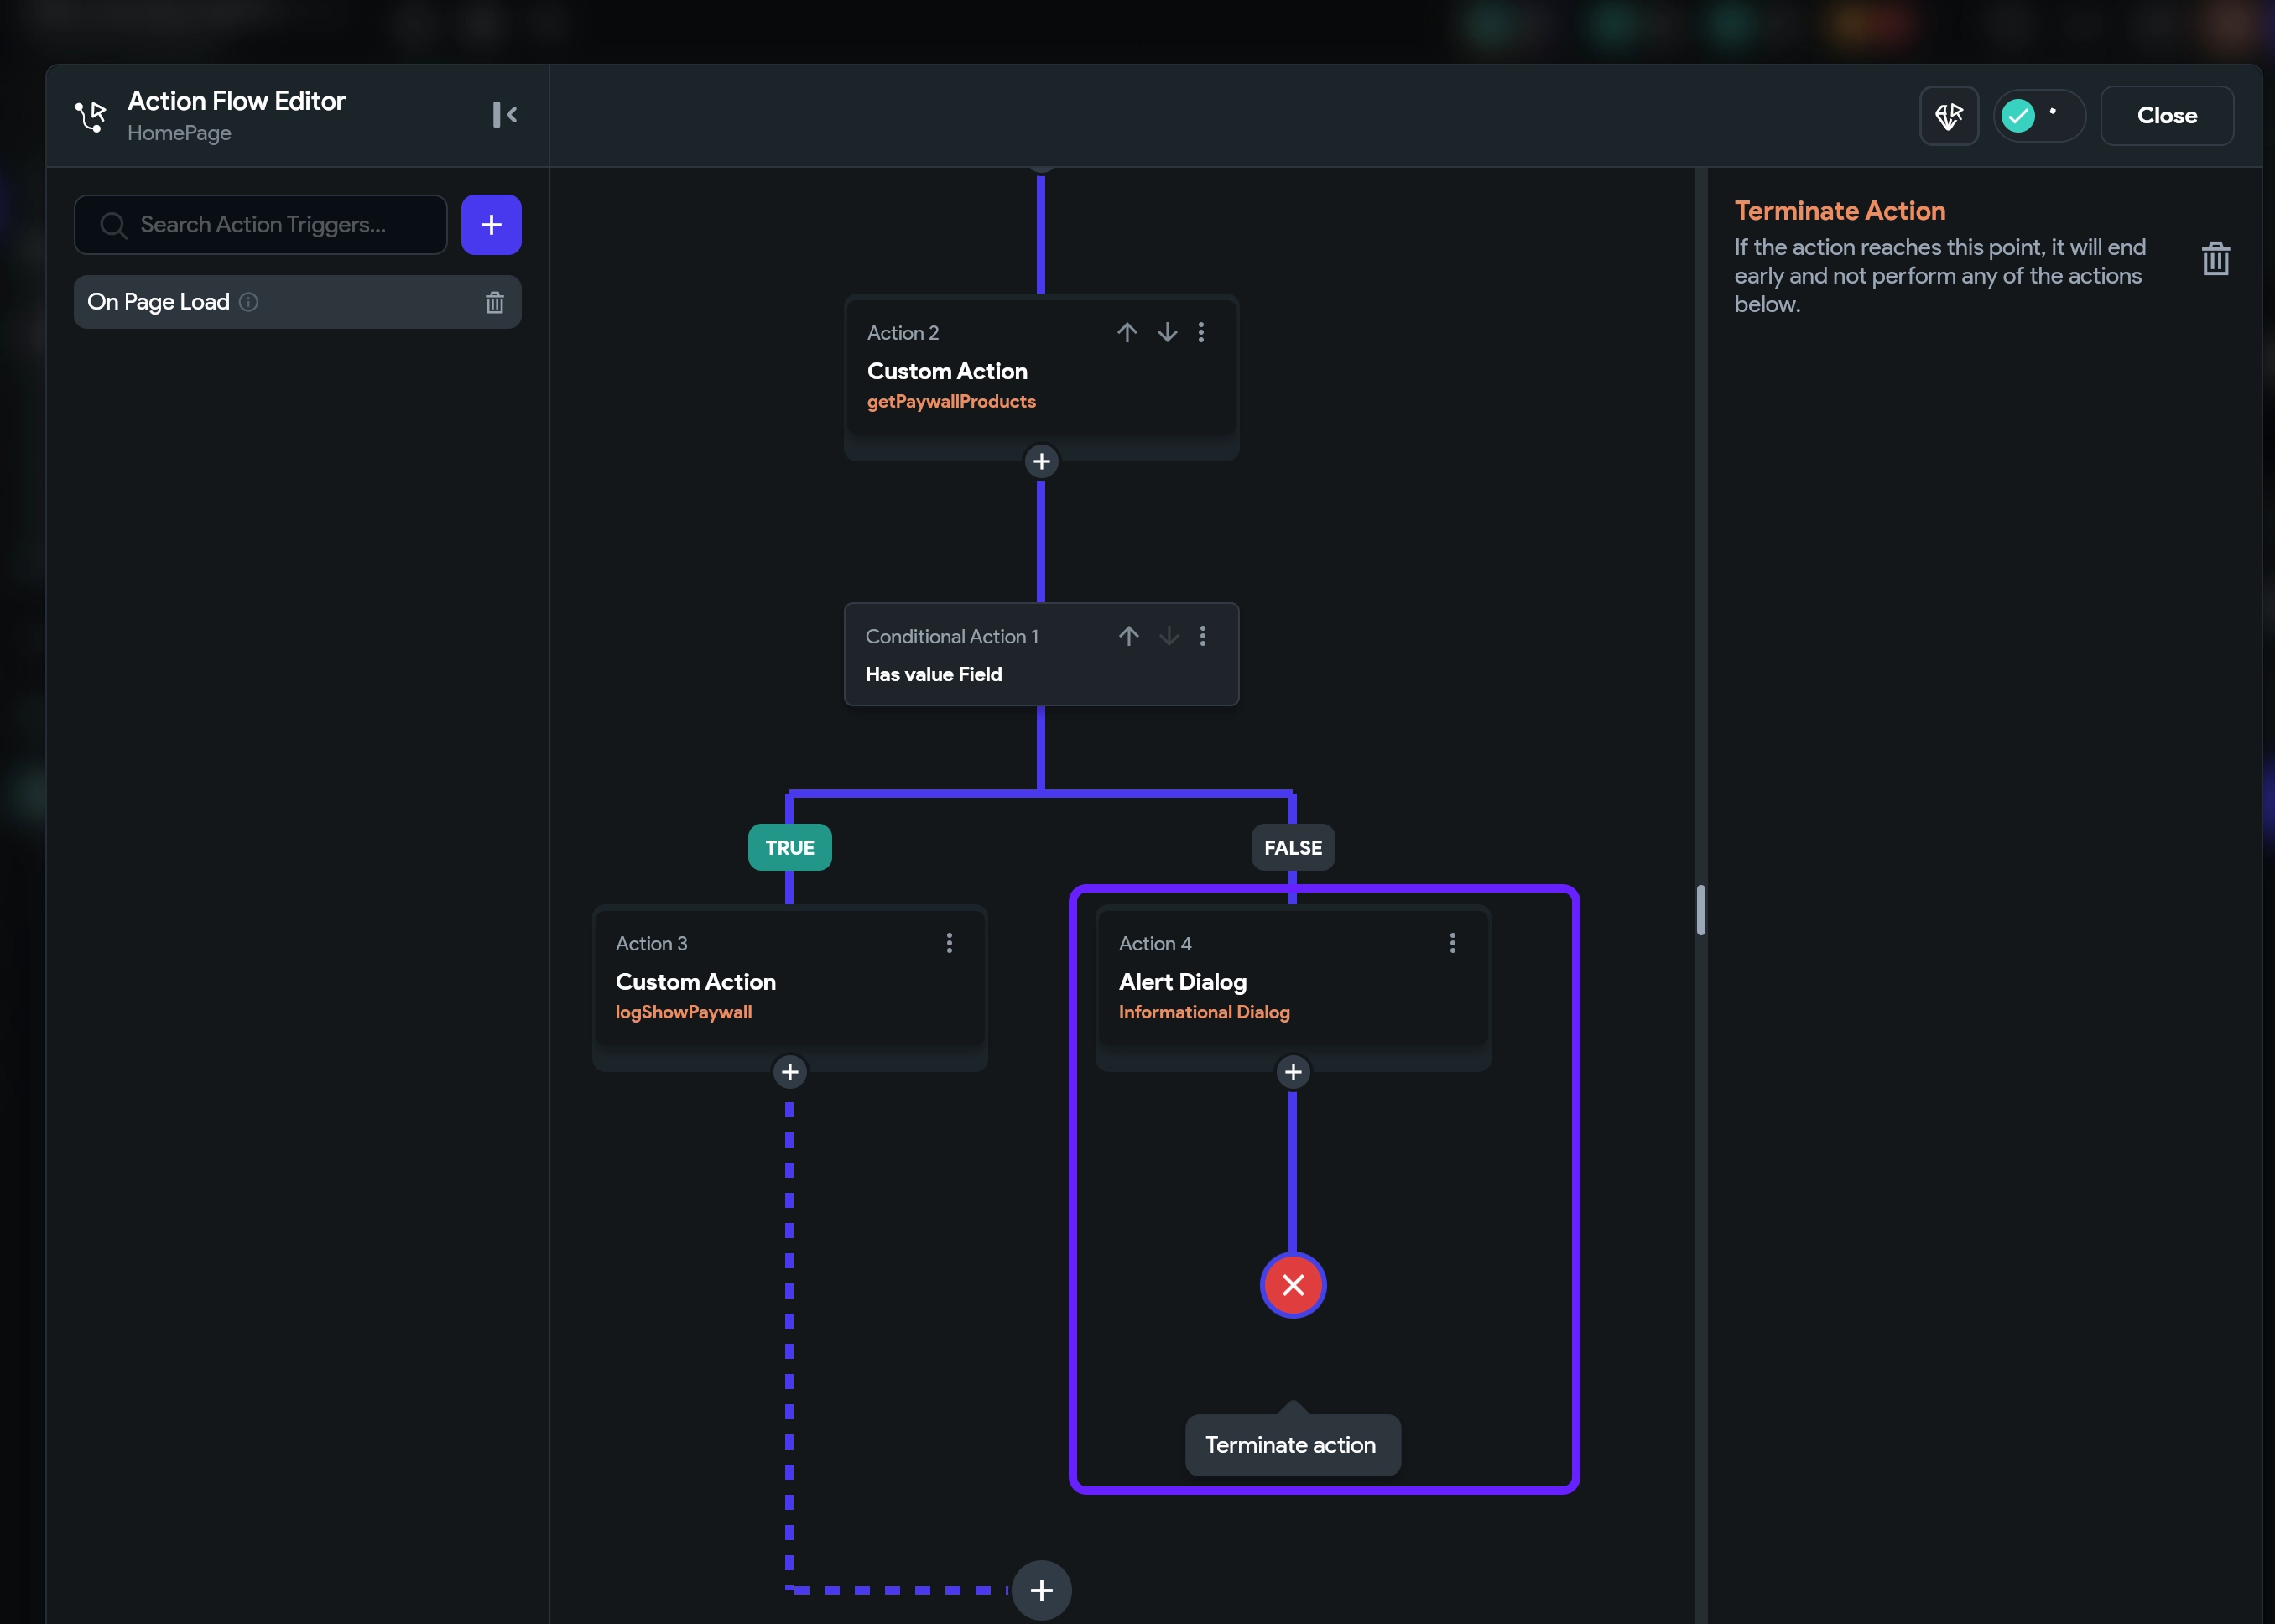
- Click Close in the top-right corner.
Congratulations! You’ve successfully received the product data. Now, let’s map it to your paywall you’ve designed in FlutterFlow.