Initial integration with Stripe
Adapty supports web2app subscription flows by tracking web payments and subscriptions made through Stripe.
This integration covers web-initiated purchases (Stripe Checkout, hosted payment pages, or custom web flows) and synchronizes them with mobile app access and analytics.
It is useful in the following scenarios:
- Automatically providing access to paid features for users who purchased on the web but later installed the app and logged in to their account
- Having all the subscription analytics in a single Adapty Dashboard (including cohorts, predictions, and the rest of our analytics toolbox)
Even though web purchases are becoming increasingly popular for apps, the Apple App Store allows a different system than in-app purchases for digital goods only in the USA. Ensure you don’t promote your web subscriptions inside your app for other countries. Otherwise, your app may get rejected or banned.
The steps below outline how to configure the Stripe integration.
This integration focuses on tracking and syncing Stripe web purchases. If you need to send users from the app to a web checkout, see Web paywalls.
1. Connect Stripe to Adapty
This integration mainly relies on Adapty pulling subscription data from Stripe via the webhook. Therefore, you need to connect your Adapty account to your Stripe account by providing API Keys and using Adapty’s webhook URL in Stripe. To automate configuring your webhook, install the Adapty app in Stripe:
The steps below are the same for Stripe’s Production and Test modes, but you will need to use different API keys for each.
-
Determine if you are connecting Stripe in test mode or live mode. If you are initially doing this in test mode, you will need to repeat the steps below for live mode again.
-
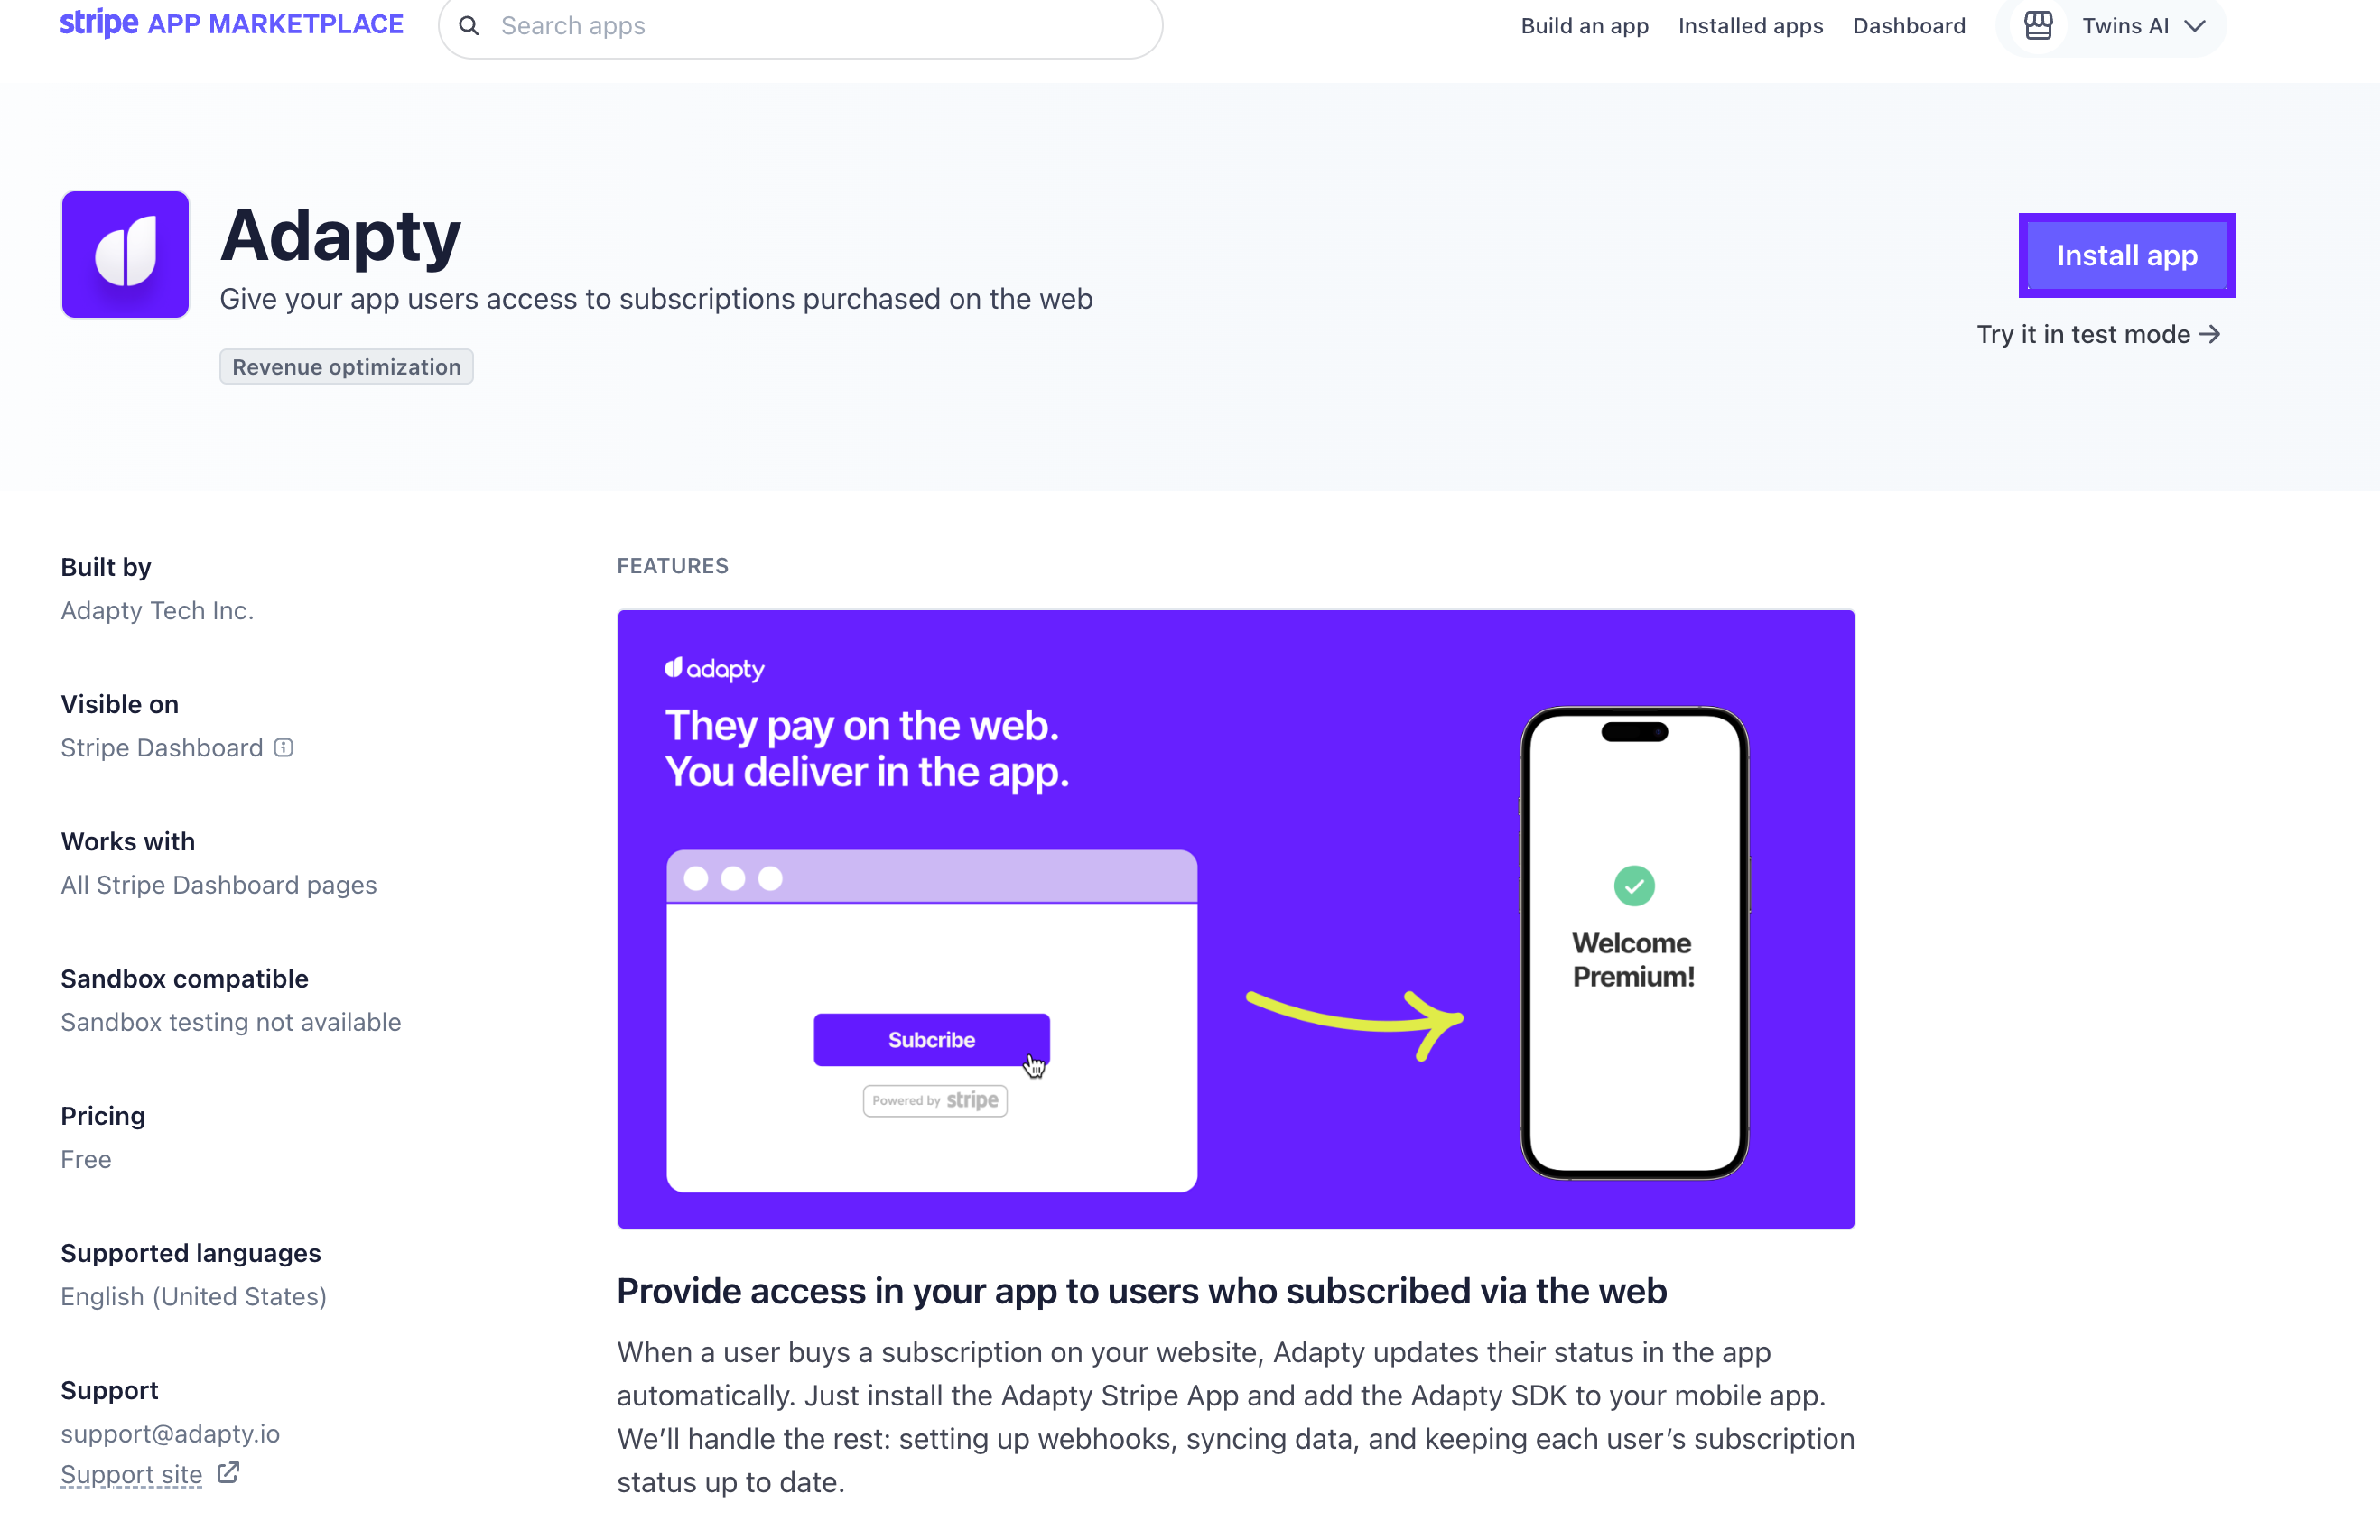
Go to the Stripe App Marketplace and install the Adapty app. Note that the sandbox mode doesn’t support installing apps. You can only do it in the production or test mode.
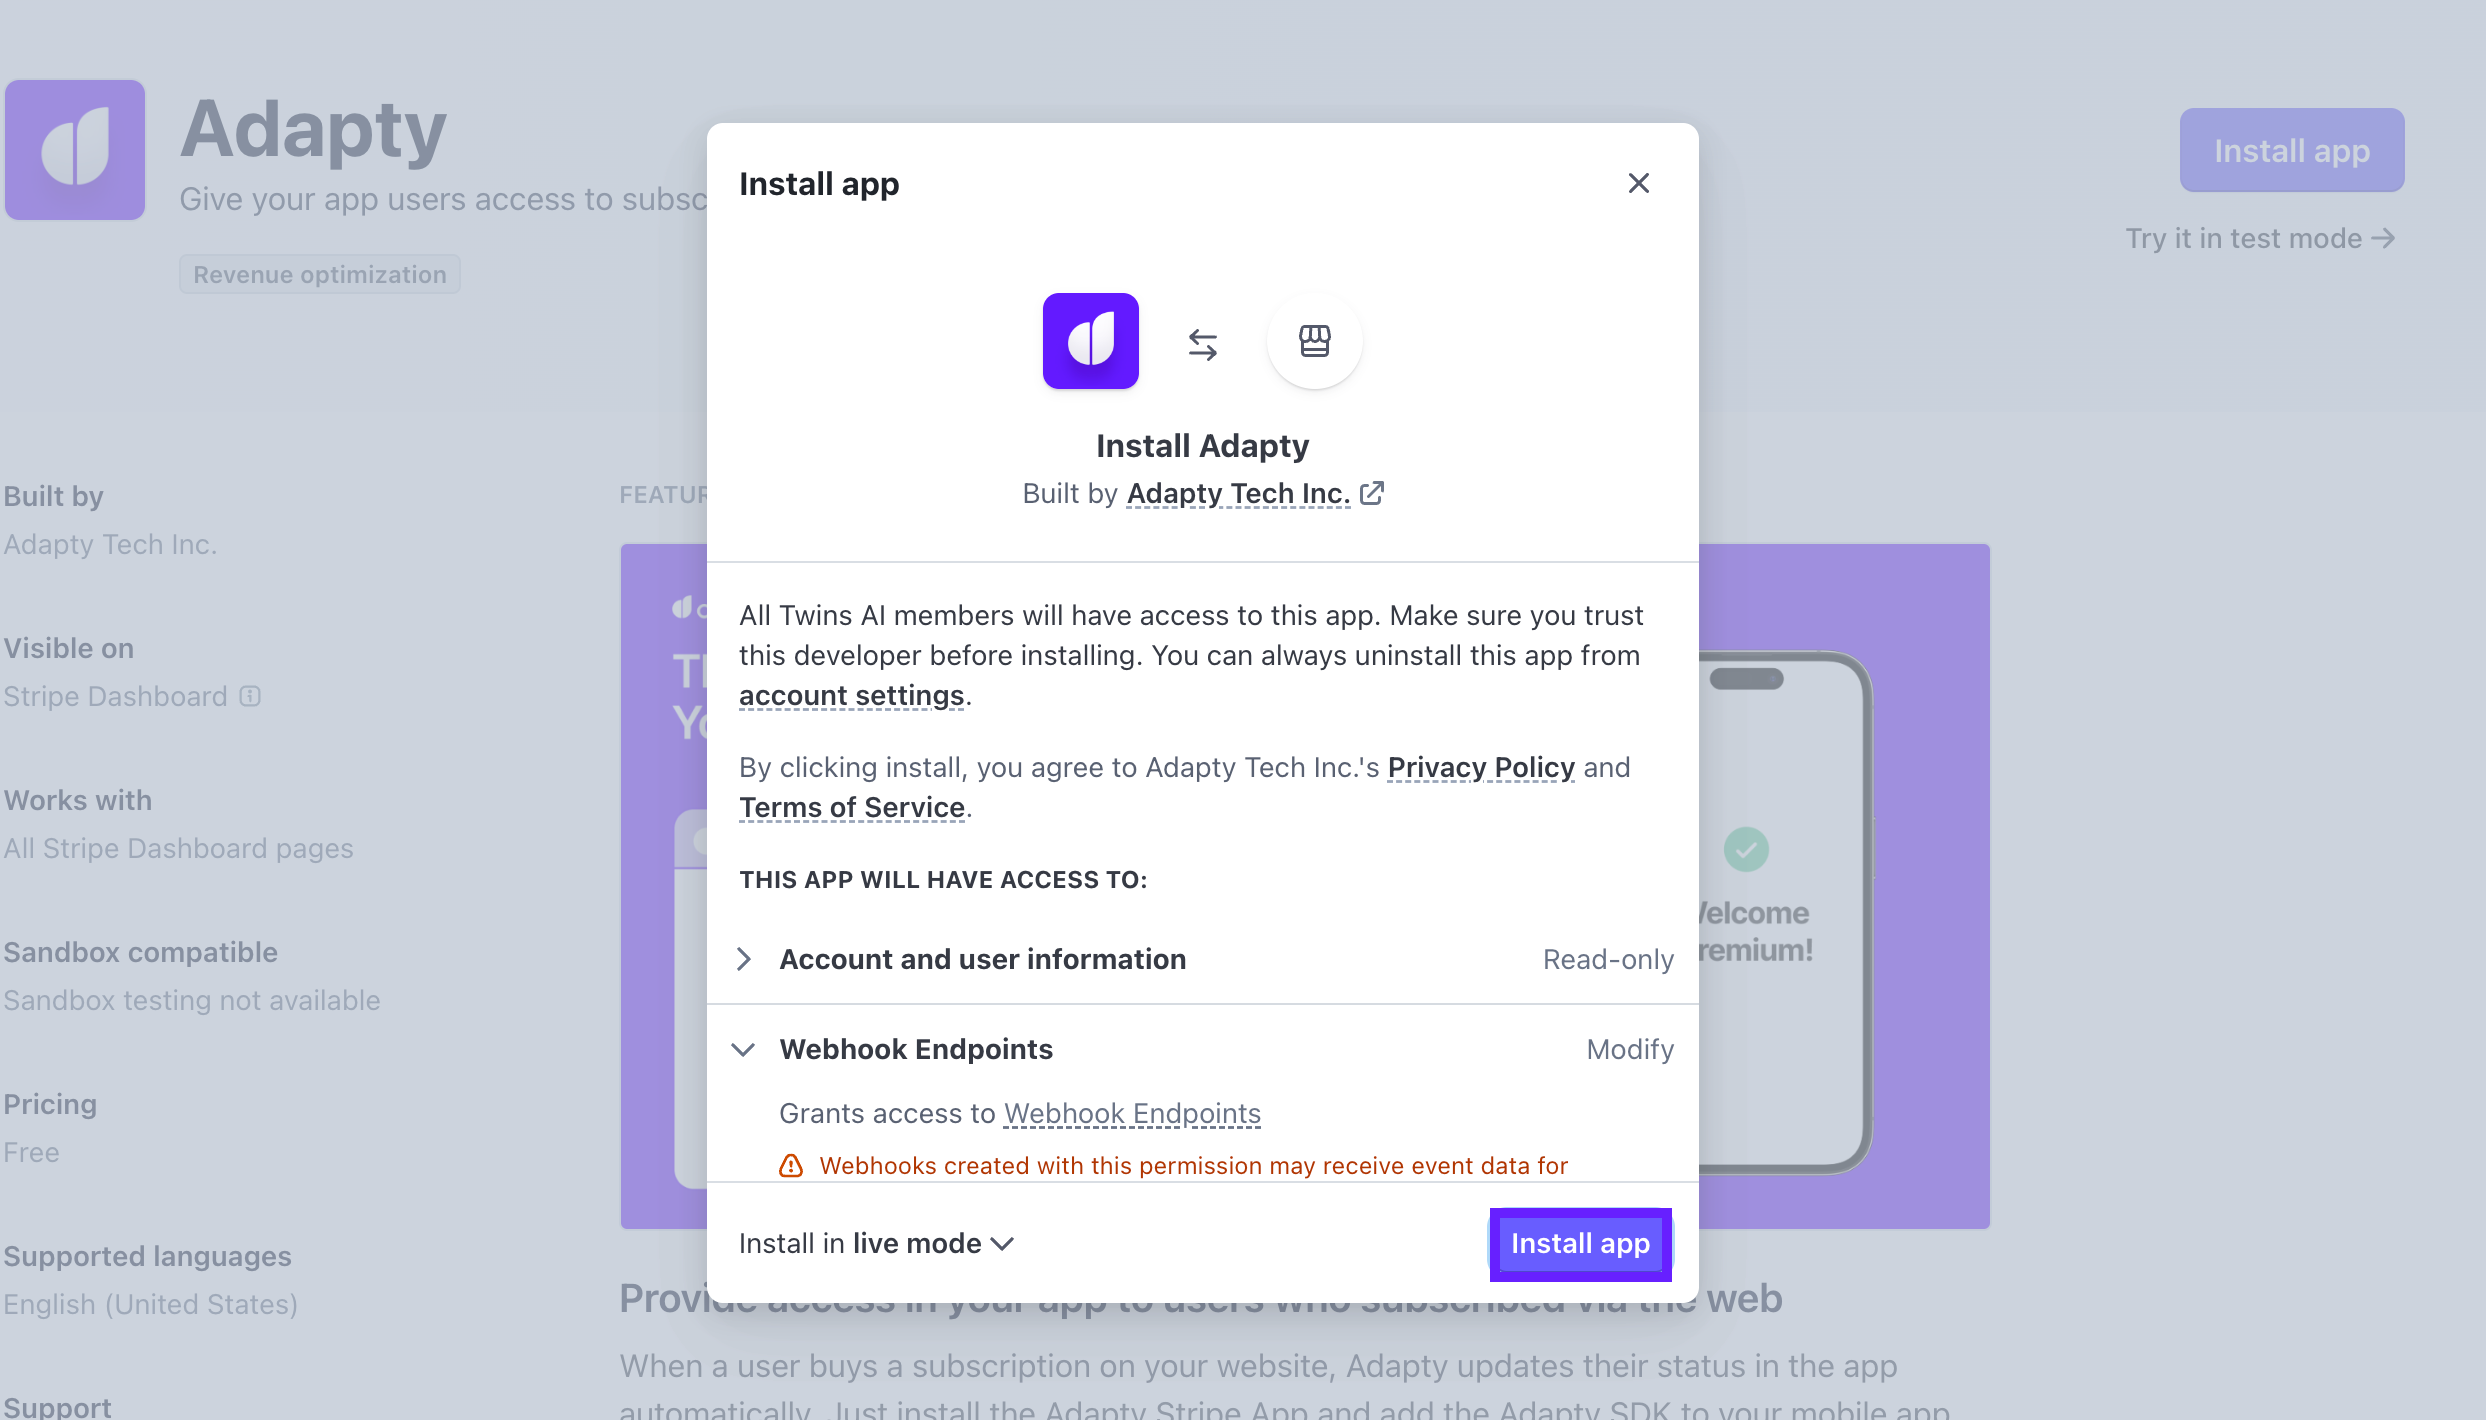
- Give the app the required permissions. This will allow Adapty to access the subscription data and history. Then, click Continue to app settings to proceed.
At the bottom of the permission pop-up, you can select whether to install the app in live or test mode.
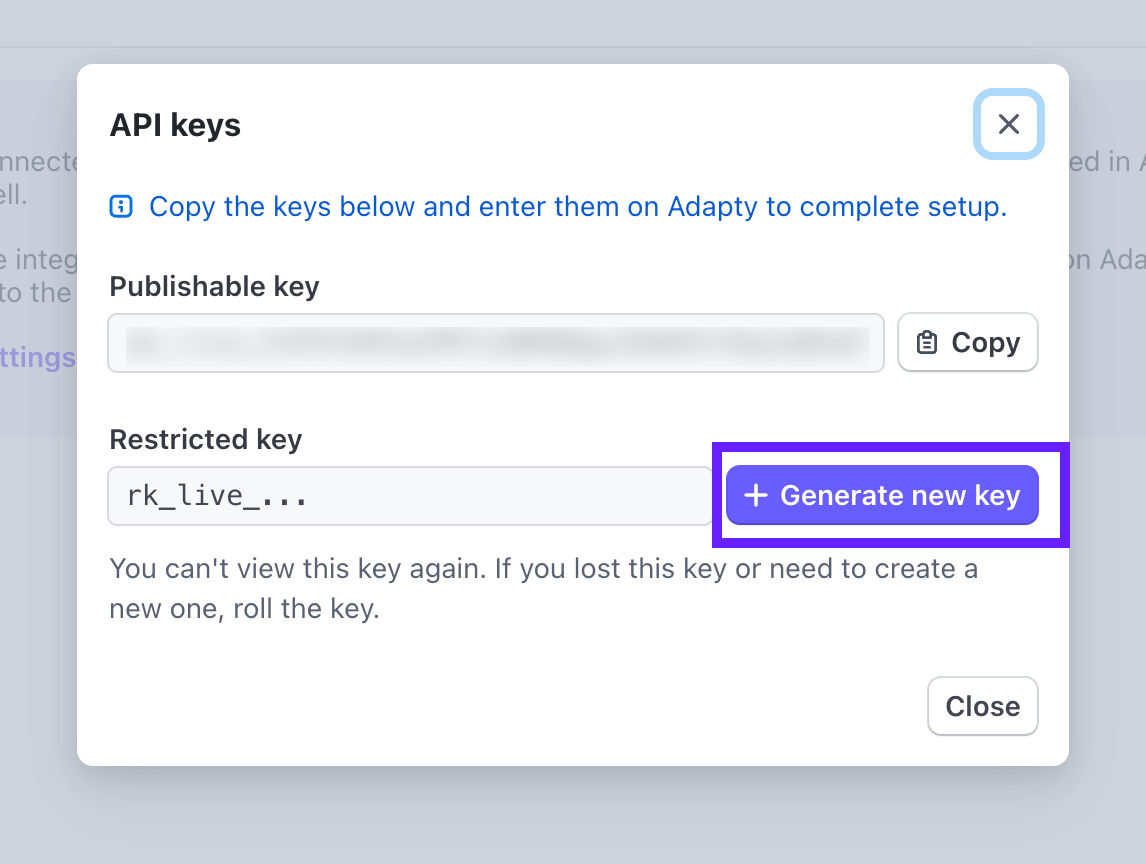
- In the pop-up, generate a new restricted key. You will need to verify your identity using your email, Touch ID, or security key. Once you generate a key, you won’t be able to see it again, so store it securely in a password manager or a secret store.
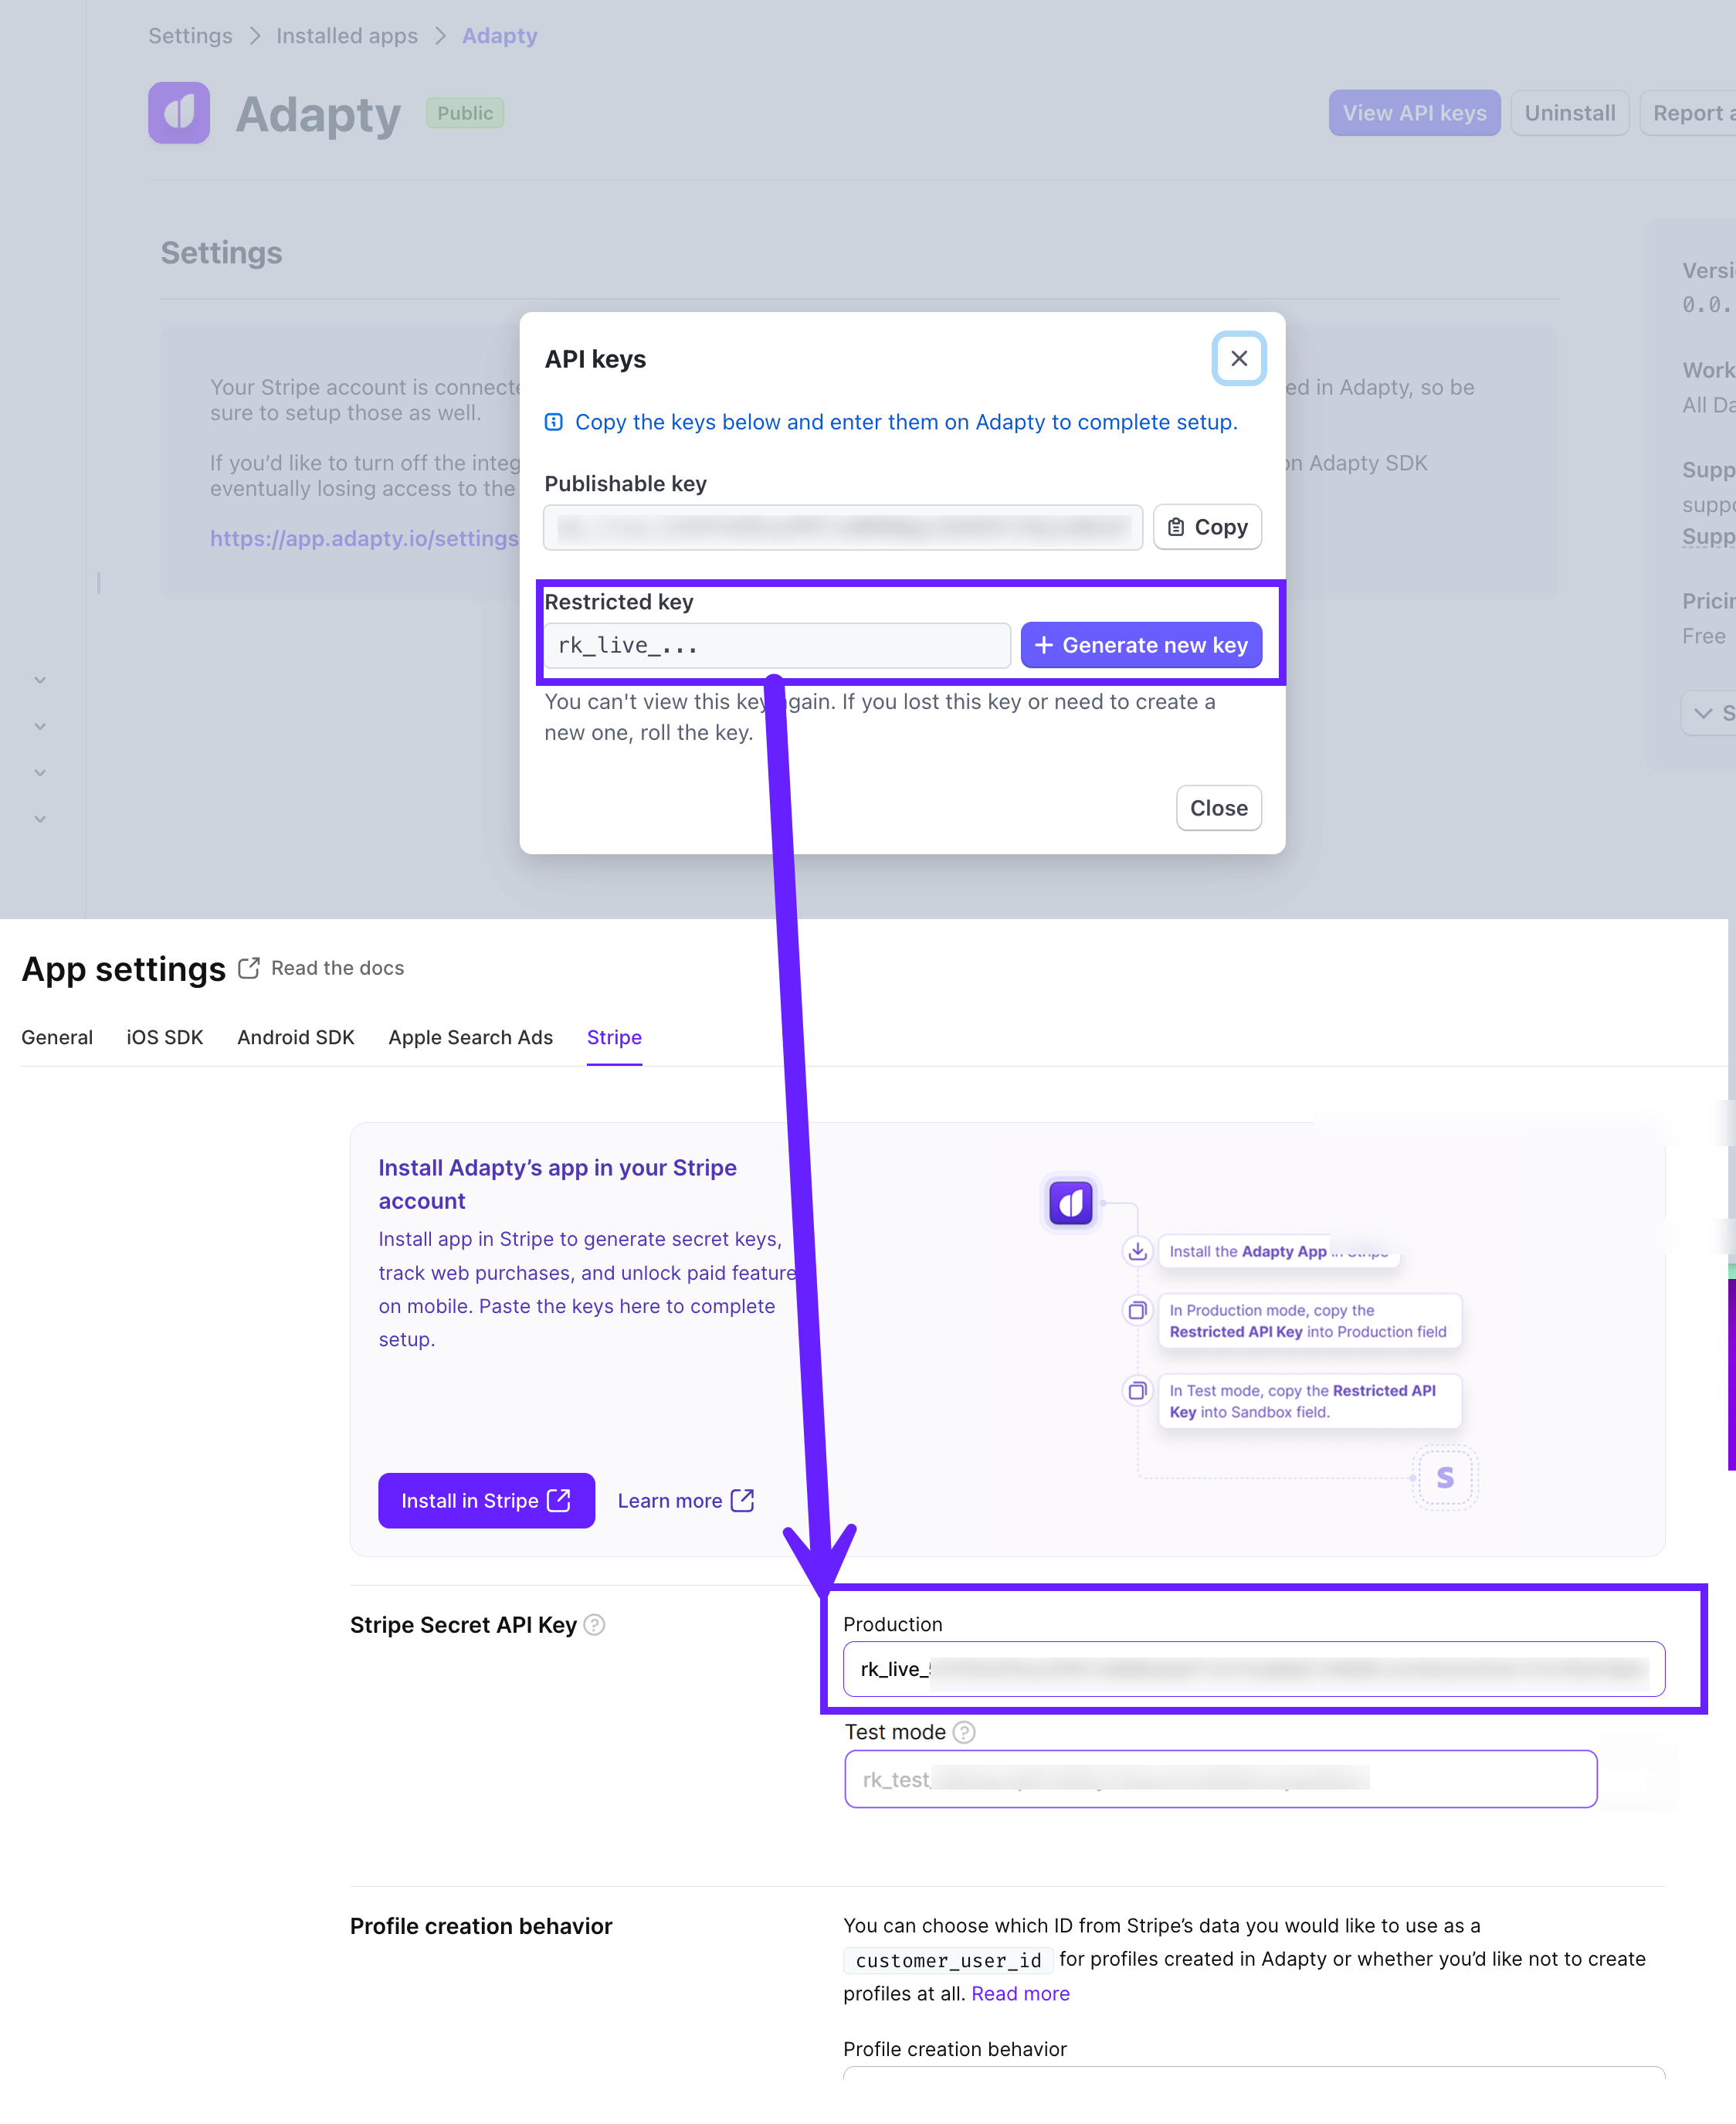
- Copy the generated key from the pop-up and go to Adapty’s App Settings → Stripe. Paste the key in the Stripe App Restricted API Key section depending on your mode. Note that you must generate different keys for test and live modes.
You’re all set! Next, create your products on Stripe and add them to Adapty.
Deprecated installation flow
- Go to Developers → API Keys in Stripe:
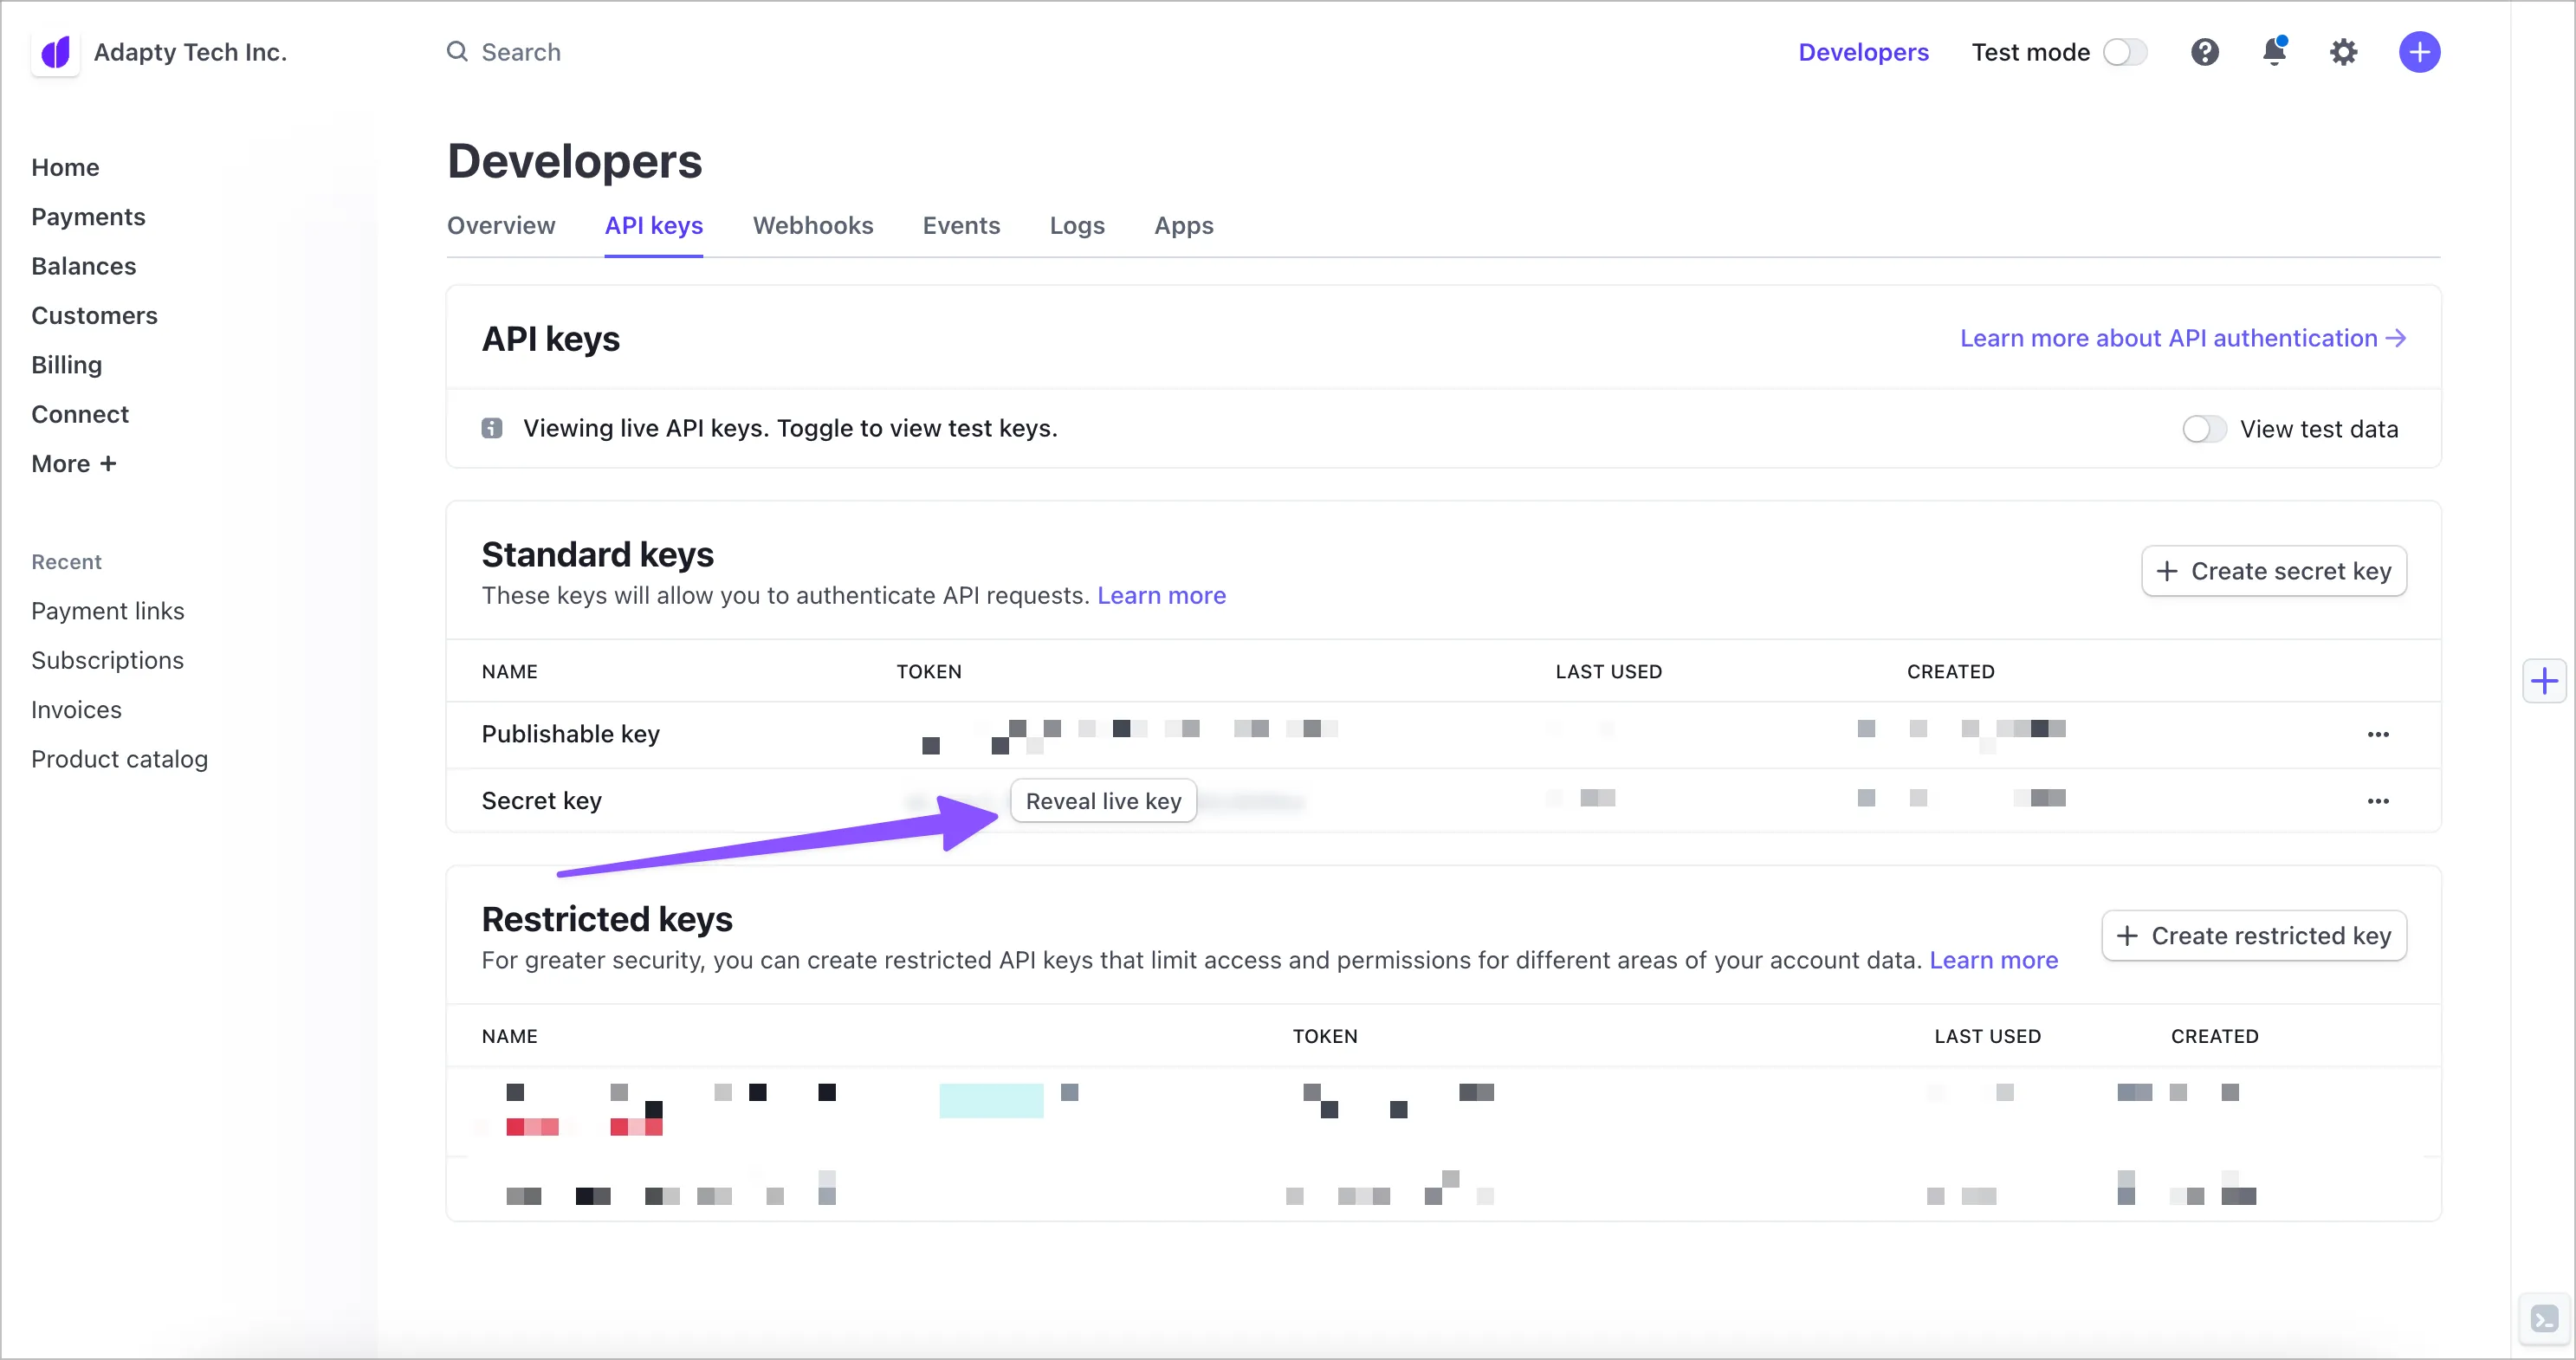
- Click the Reveal live (test) key button next to the Secret key title, then copy it and go to Adapty’s App Settings → Stripe. Paste the key here:
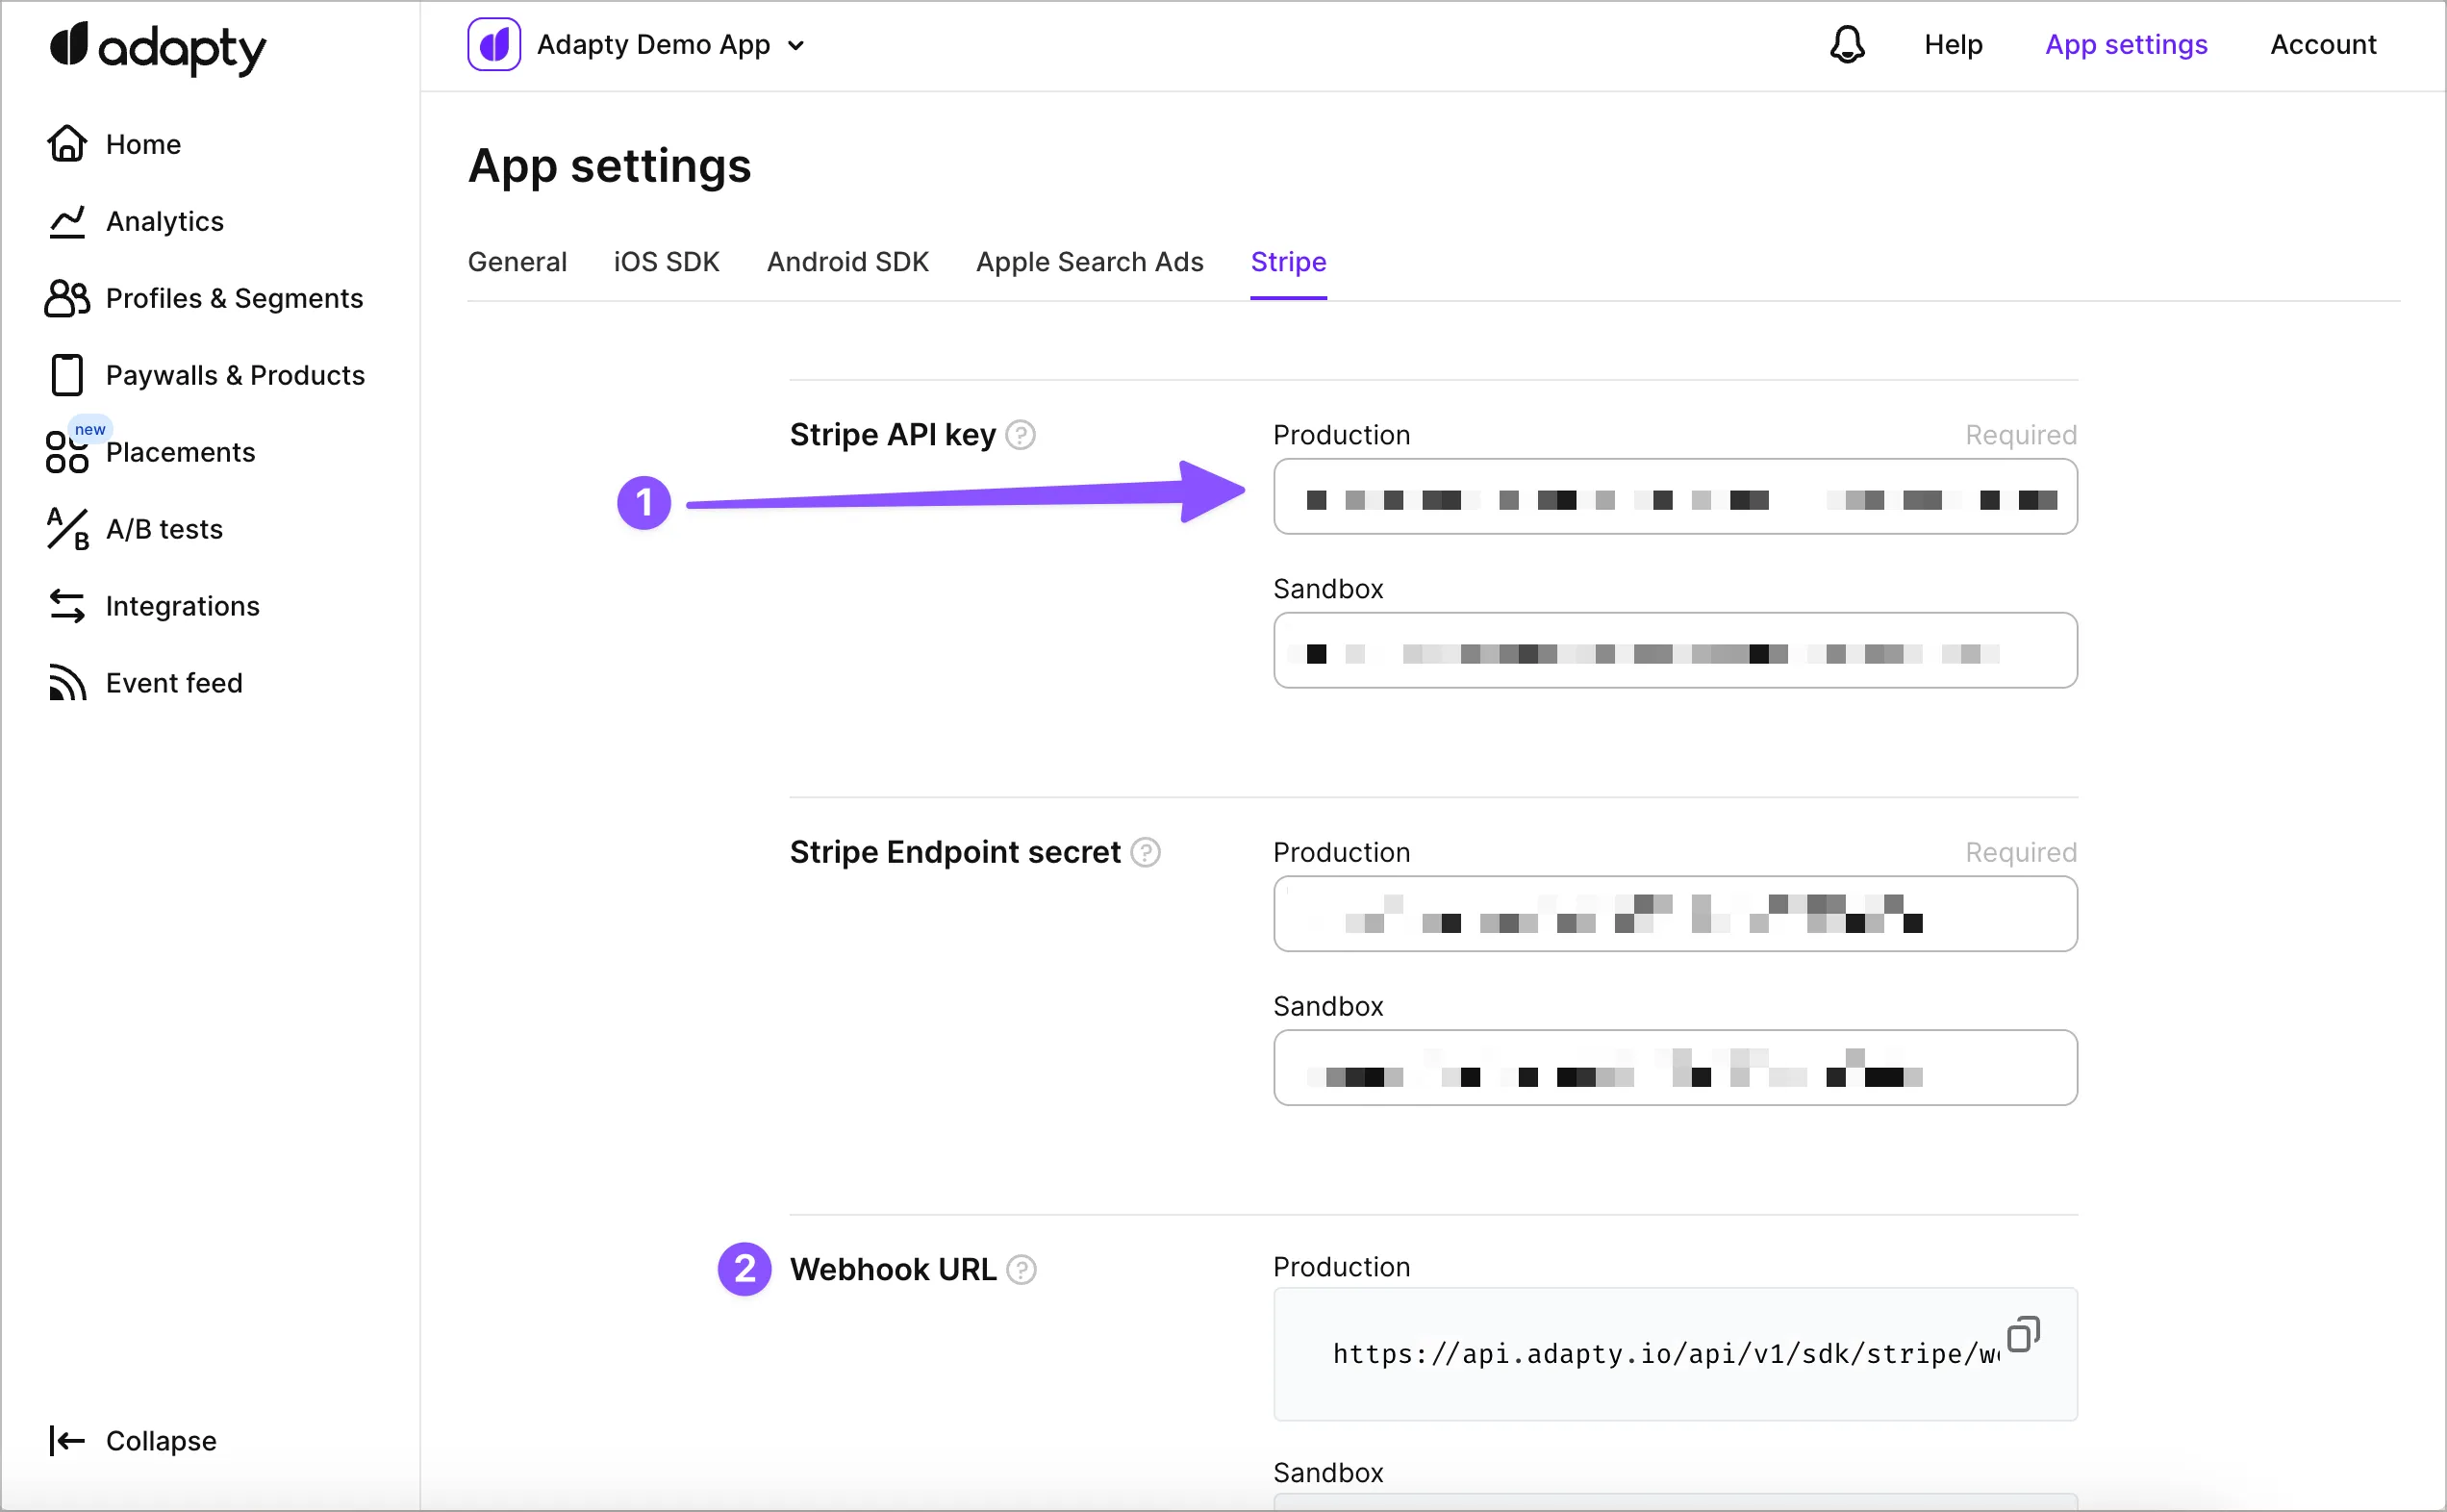
- Next, copy the Webhook URL from the bottom of the same page in Adapty. Go to Developers → Webhooks in Stripe and click the Add endpoint button:
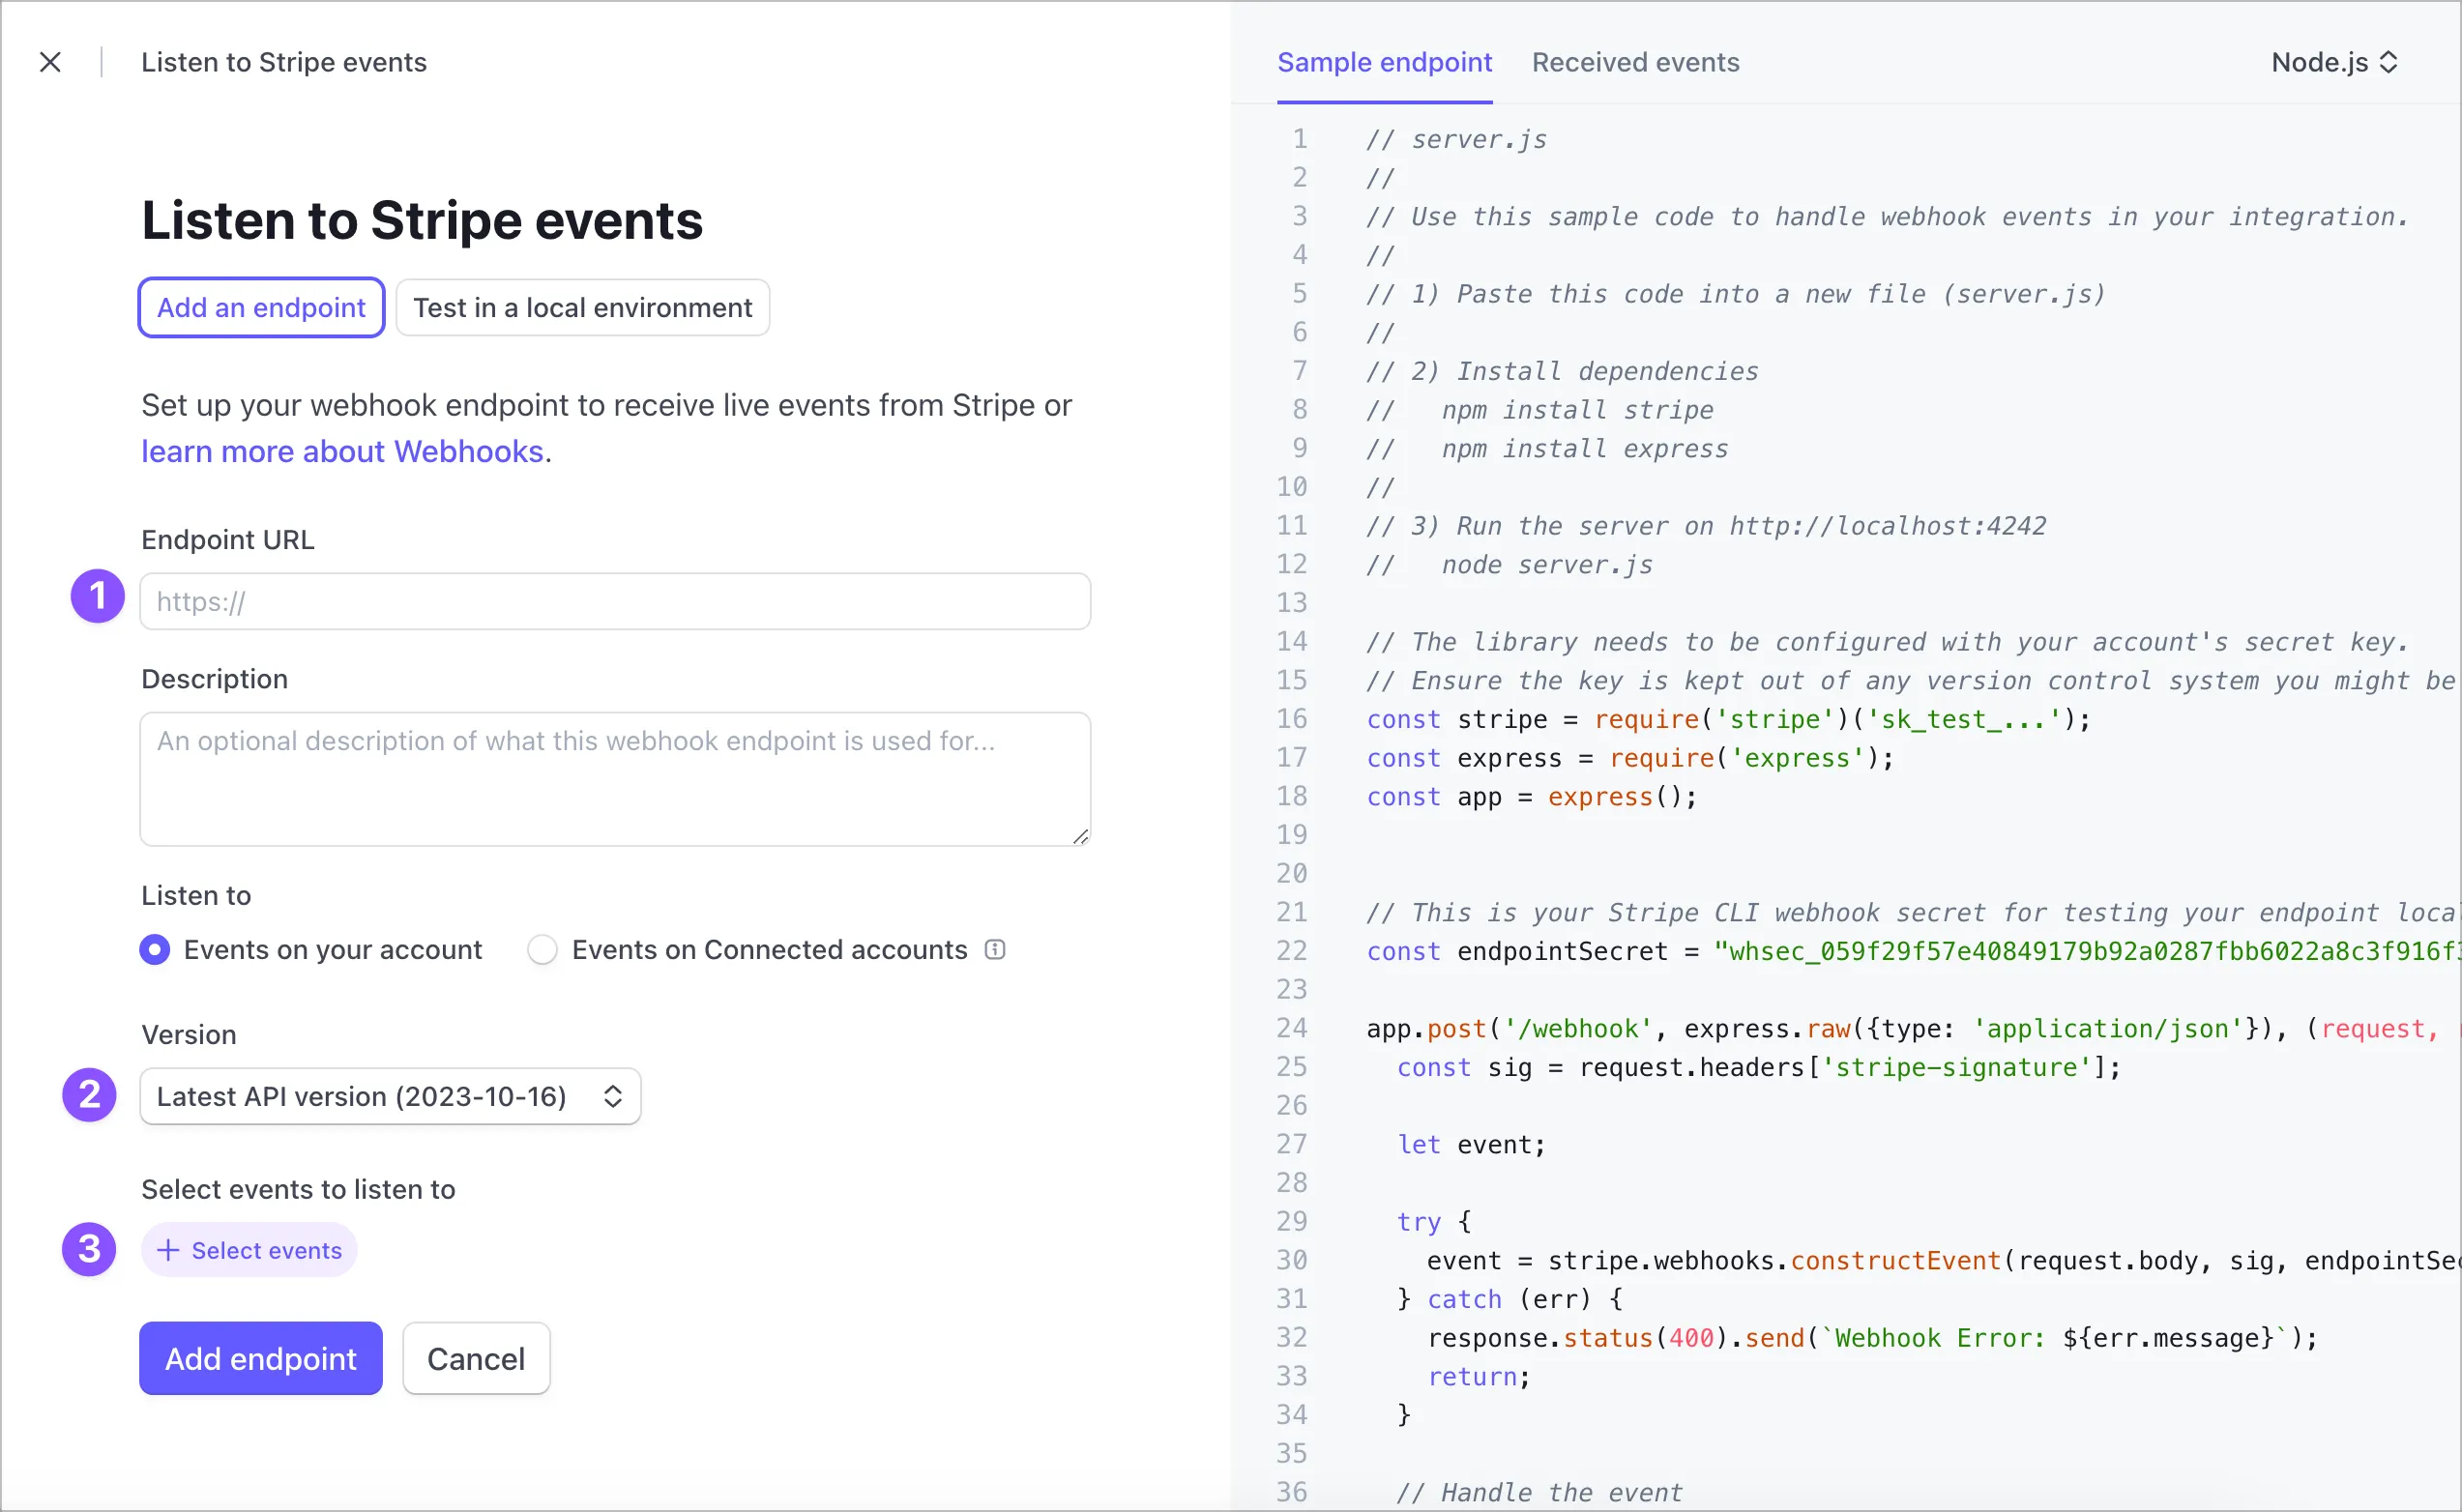
-
Paste the webhook URL from Adapty into the Endpoint URL field. Then choose the Latest API version in the webhook Version field. Then select the following events:
- charge.refunded
- customer.subscription.created
- customer.subscription.deleted
- customer.subscription.paused
- customer.subscription.resumed
- customer.subscription.updated
- invoice.created
- invoice.updated
- payment_intent.succeeded

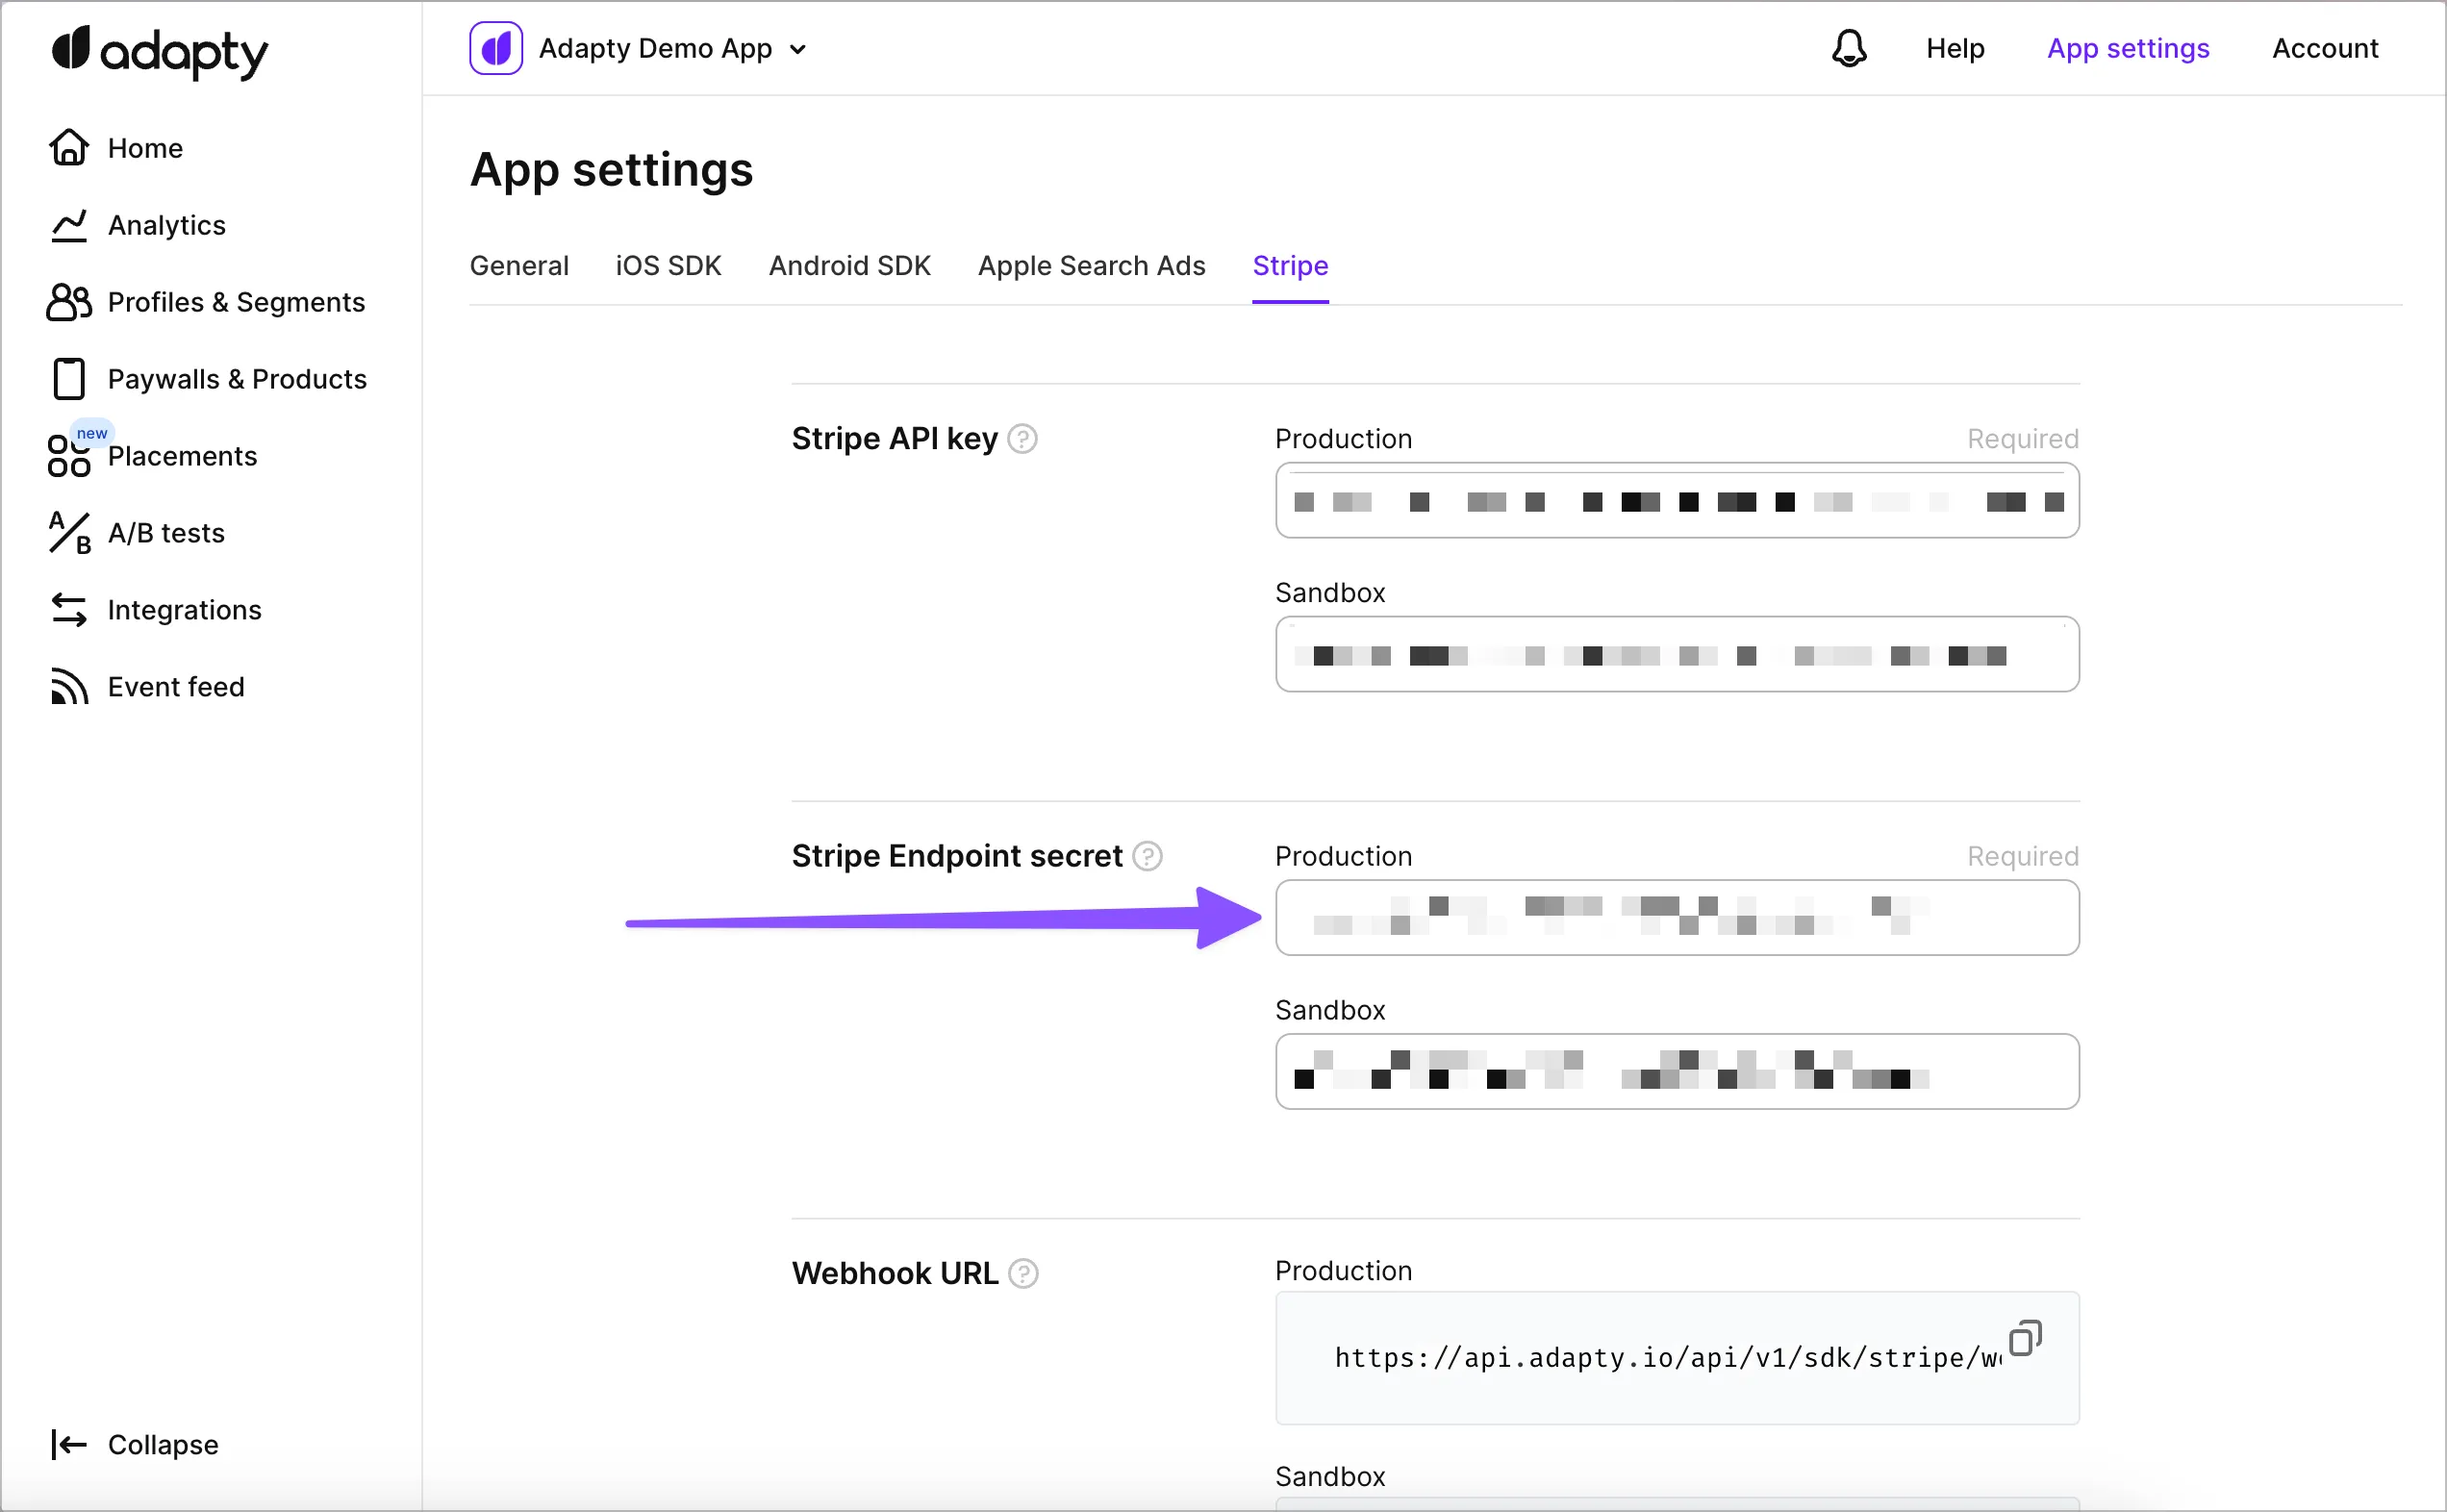
- Press “Add endpoint” and then press “Reveal” under the “Signing secret”. This is the key that is used to decode the webhook data on the Adapty’s side, copy it after revealing:
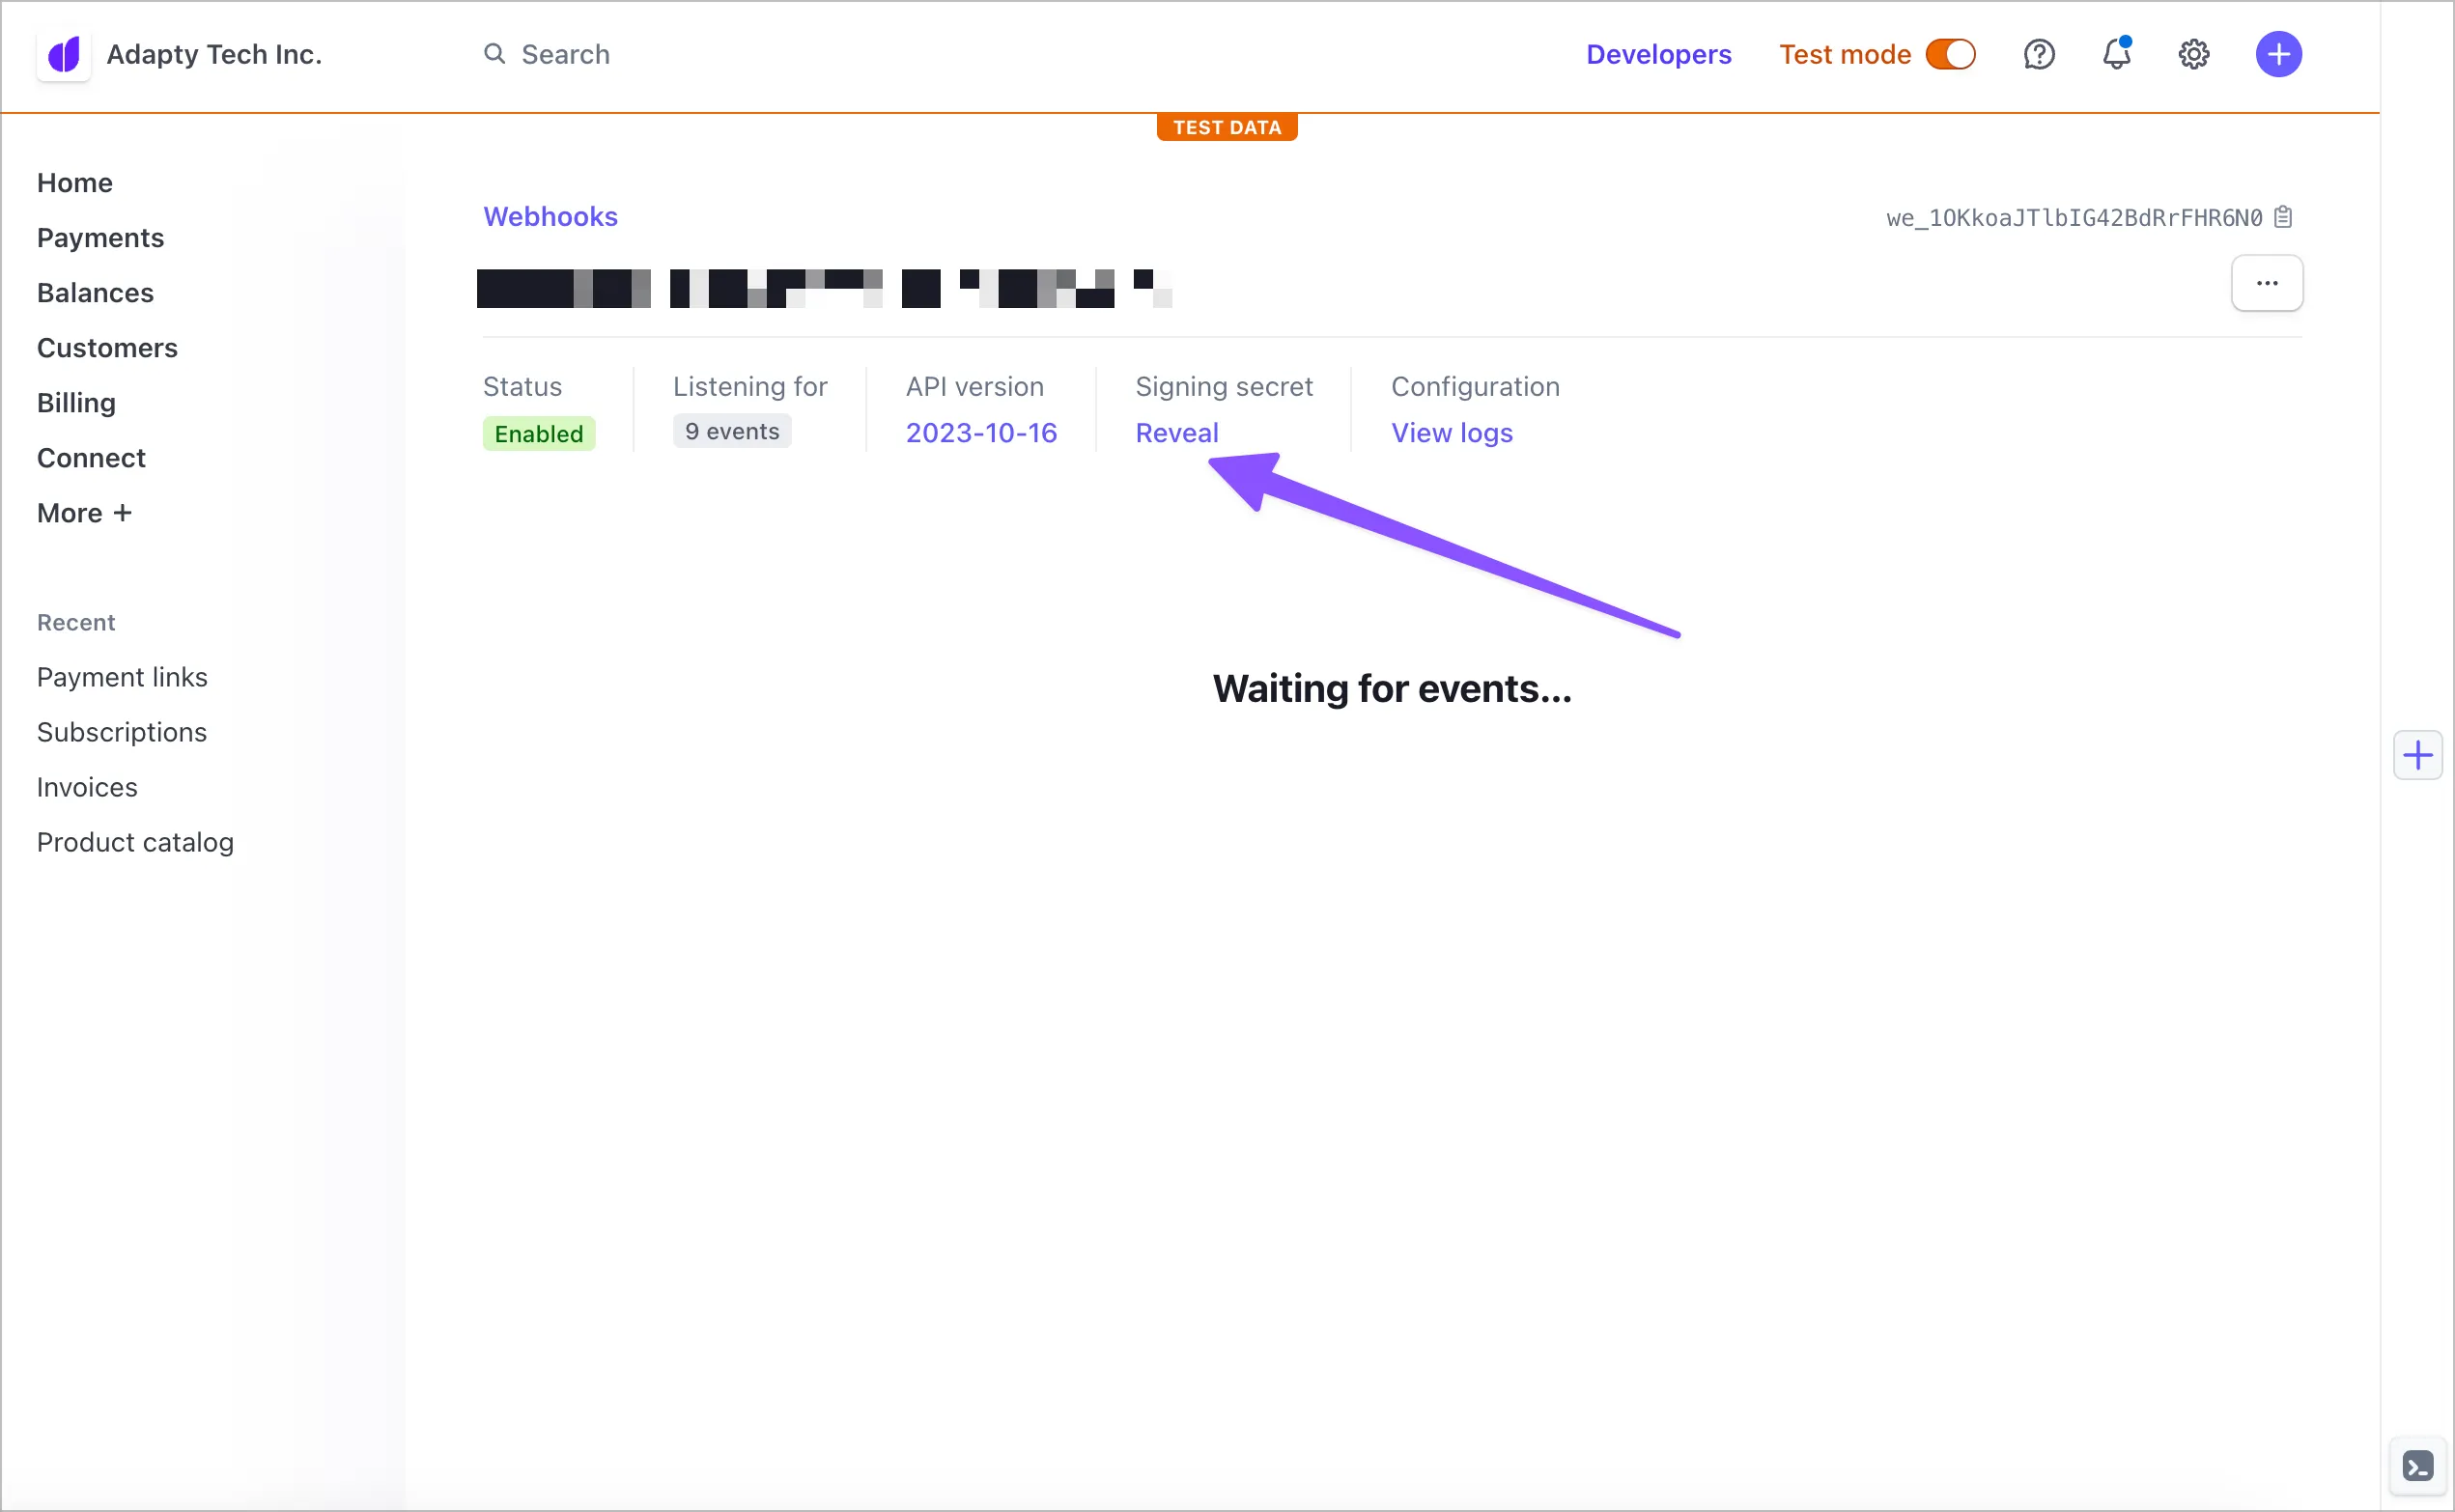
- Finally, paste this key into Adapty’s App Settings → Stripe under “Stripe Webhook Secret”:
2. Create products on Stripe
If you’re setting this up in test mode, make sure Stripe is also switched to Test mode before continuing with this step.
Go to Stripe’s Product catalog and create the products you would like to sell as well as their pricing plans. Note that Stripe allows you to have multiple pricing plans per product, which is useful for tailoring your offering without the need to create additional products.
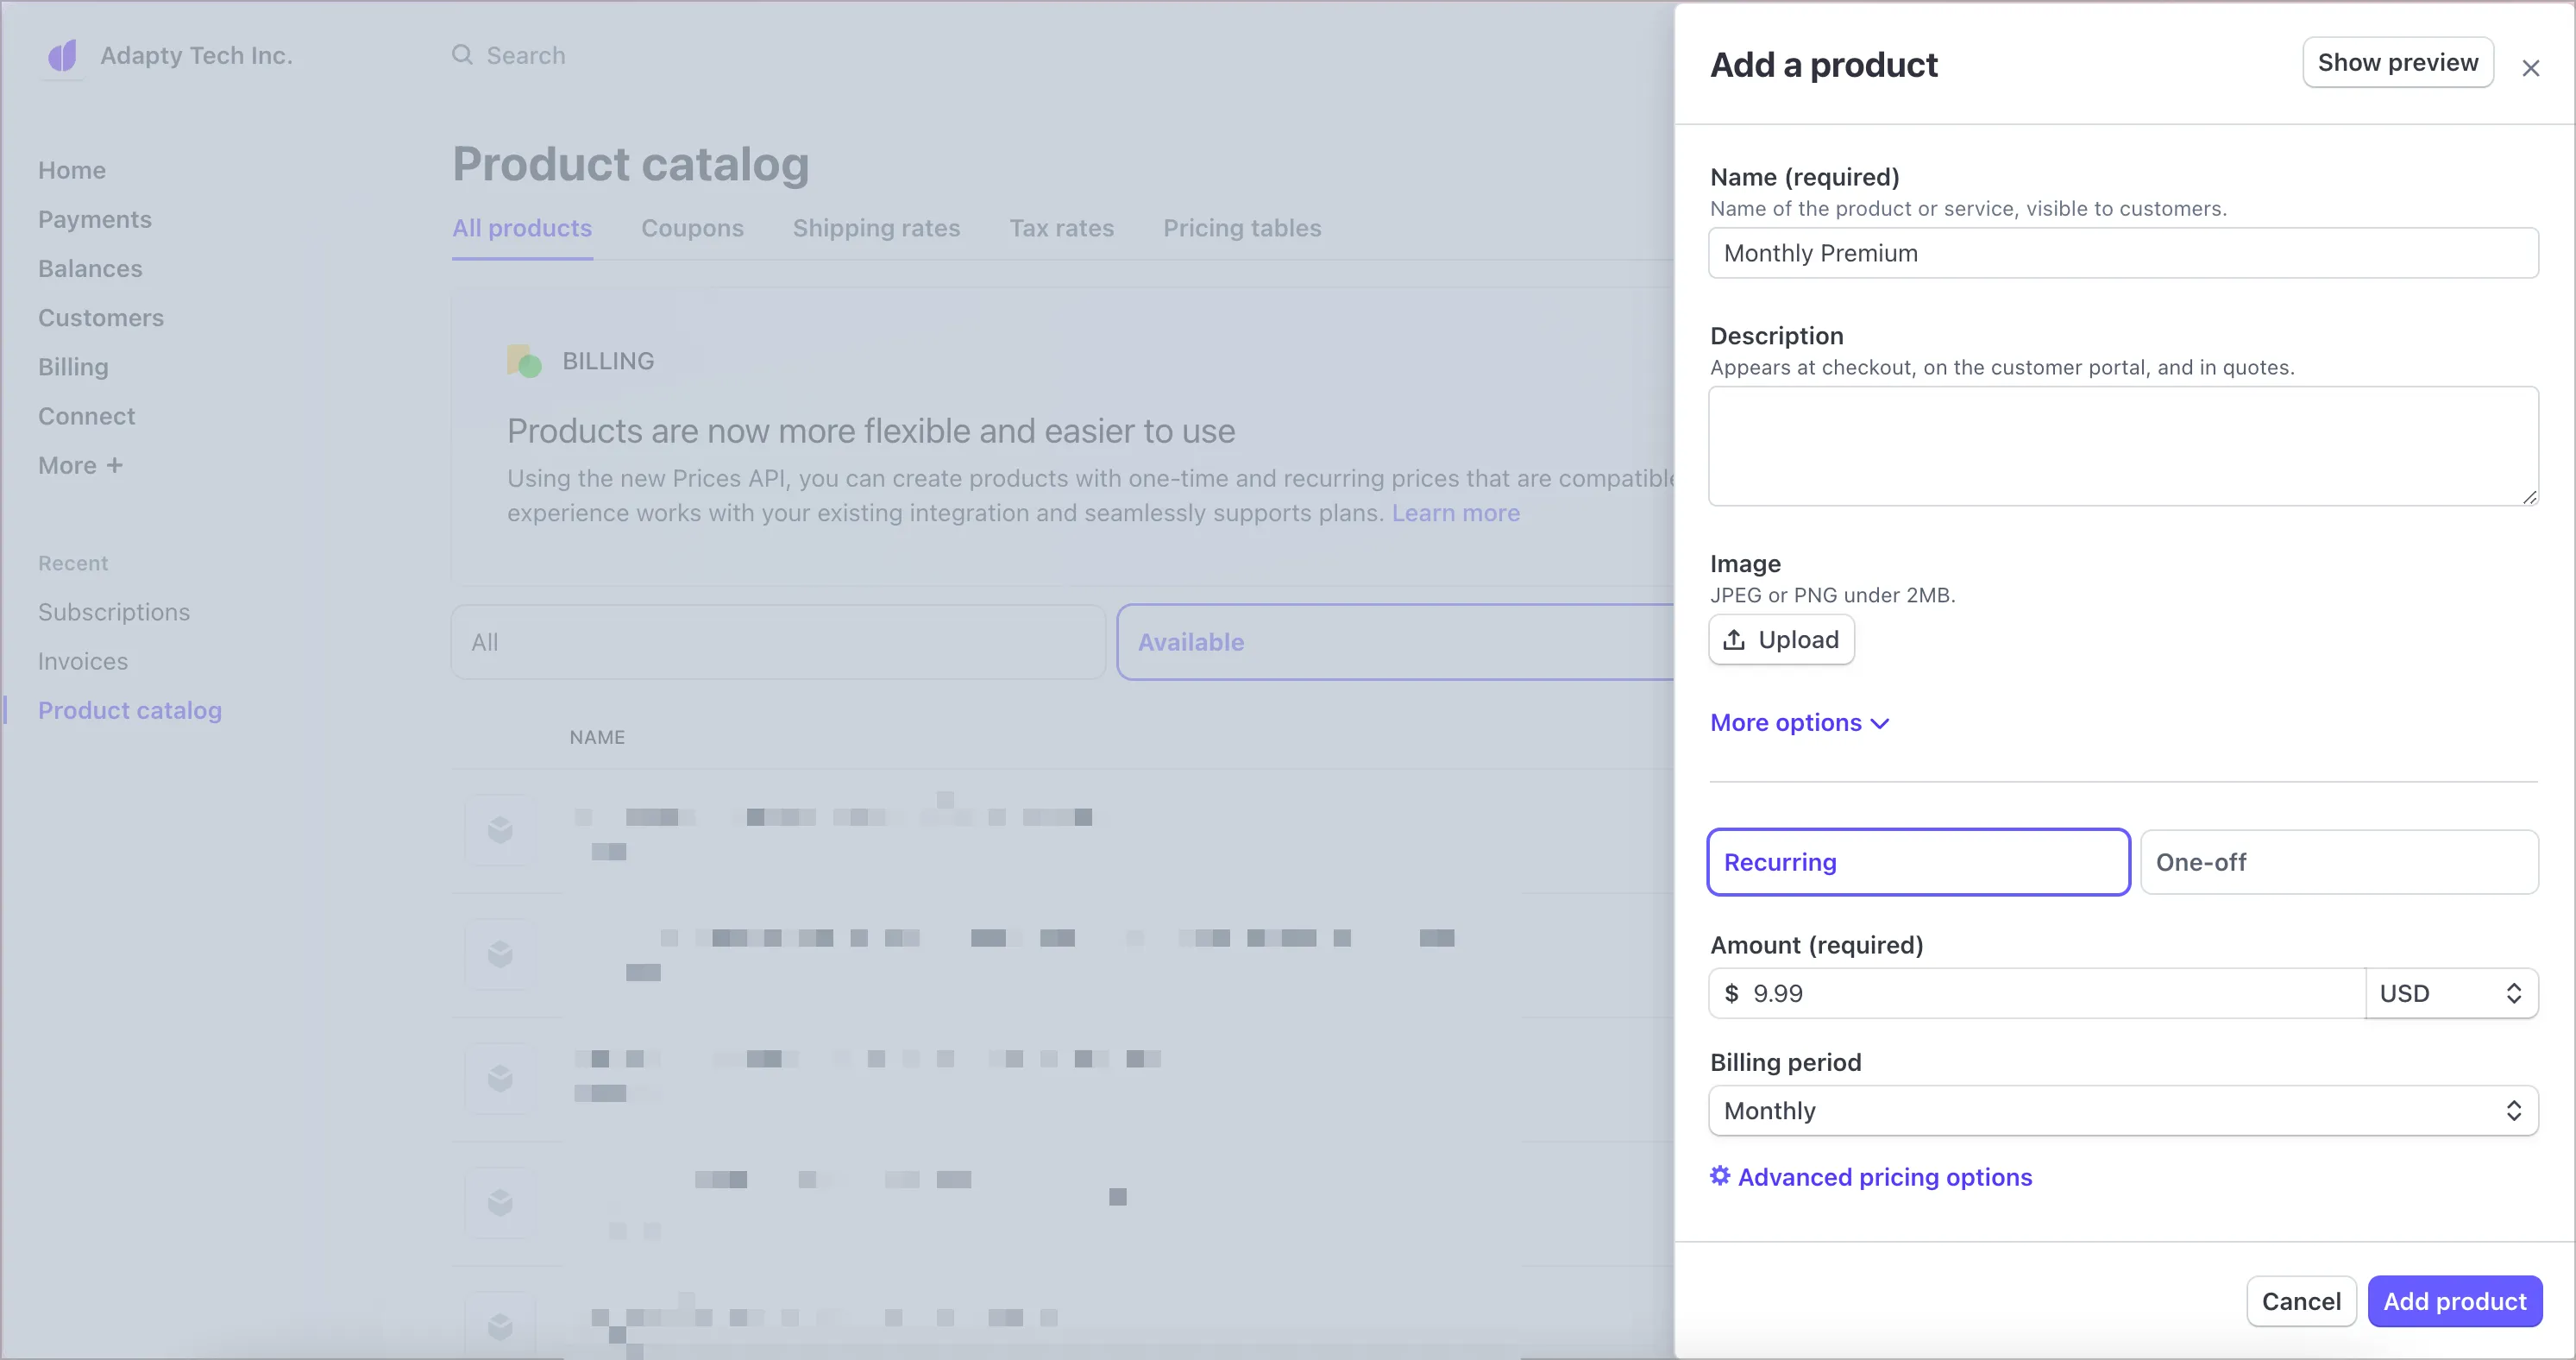
At the moment Adapty only supports Flat rate ($9.99/month) or Package pricing ($9.99/10 units), as those behave similar to app stores. Tiered pricing, Usage-based fee and Customer chooses price options are not supported
3. Add Stripe products to Adapty
Products are required! Be sure to create your Stripe products in the Adapty Dashboard. Adapty only tracks events for transactions linked to these products, so don’t skip this step—otherwise, transaction events won’t be created.
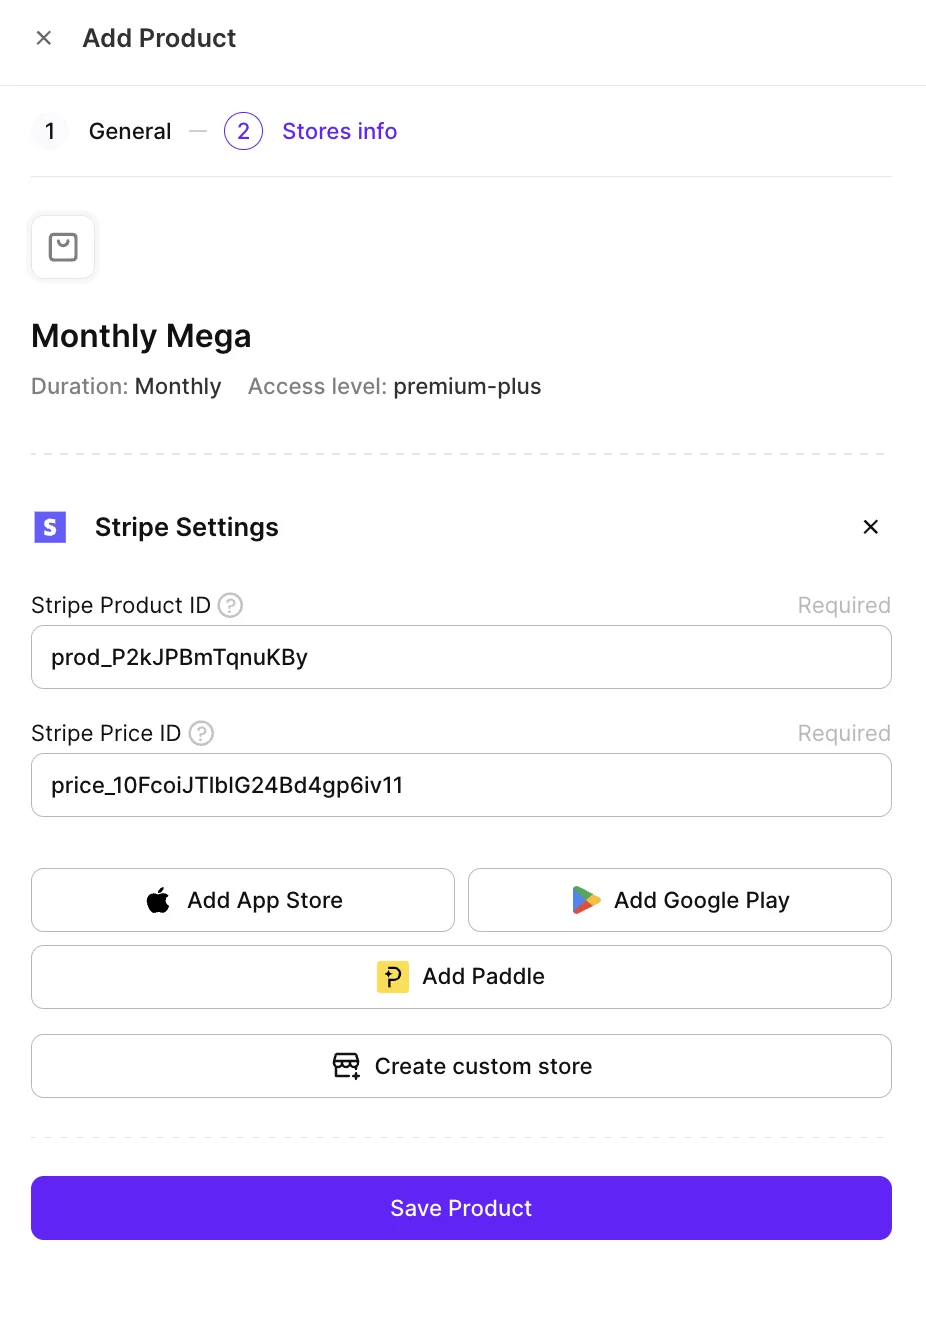
We treat Stripe the same way as App Store and Google Play: it is just another store where you sell your digital products. So it is configured similarly: simply add Stripe products (namely their product_id and price_id) to the Products section of Adapty:
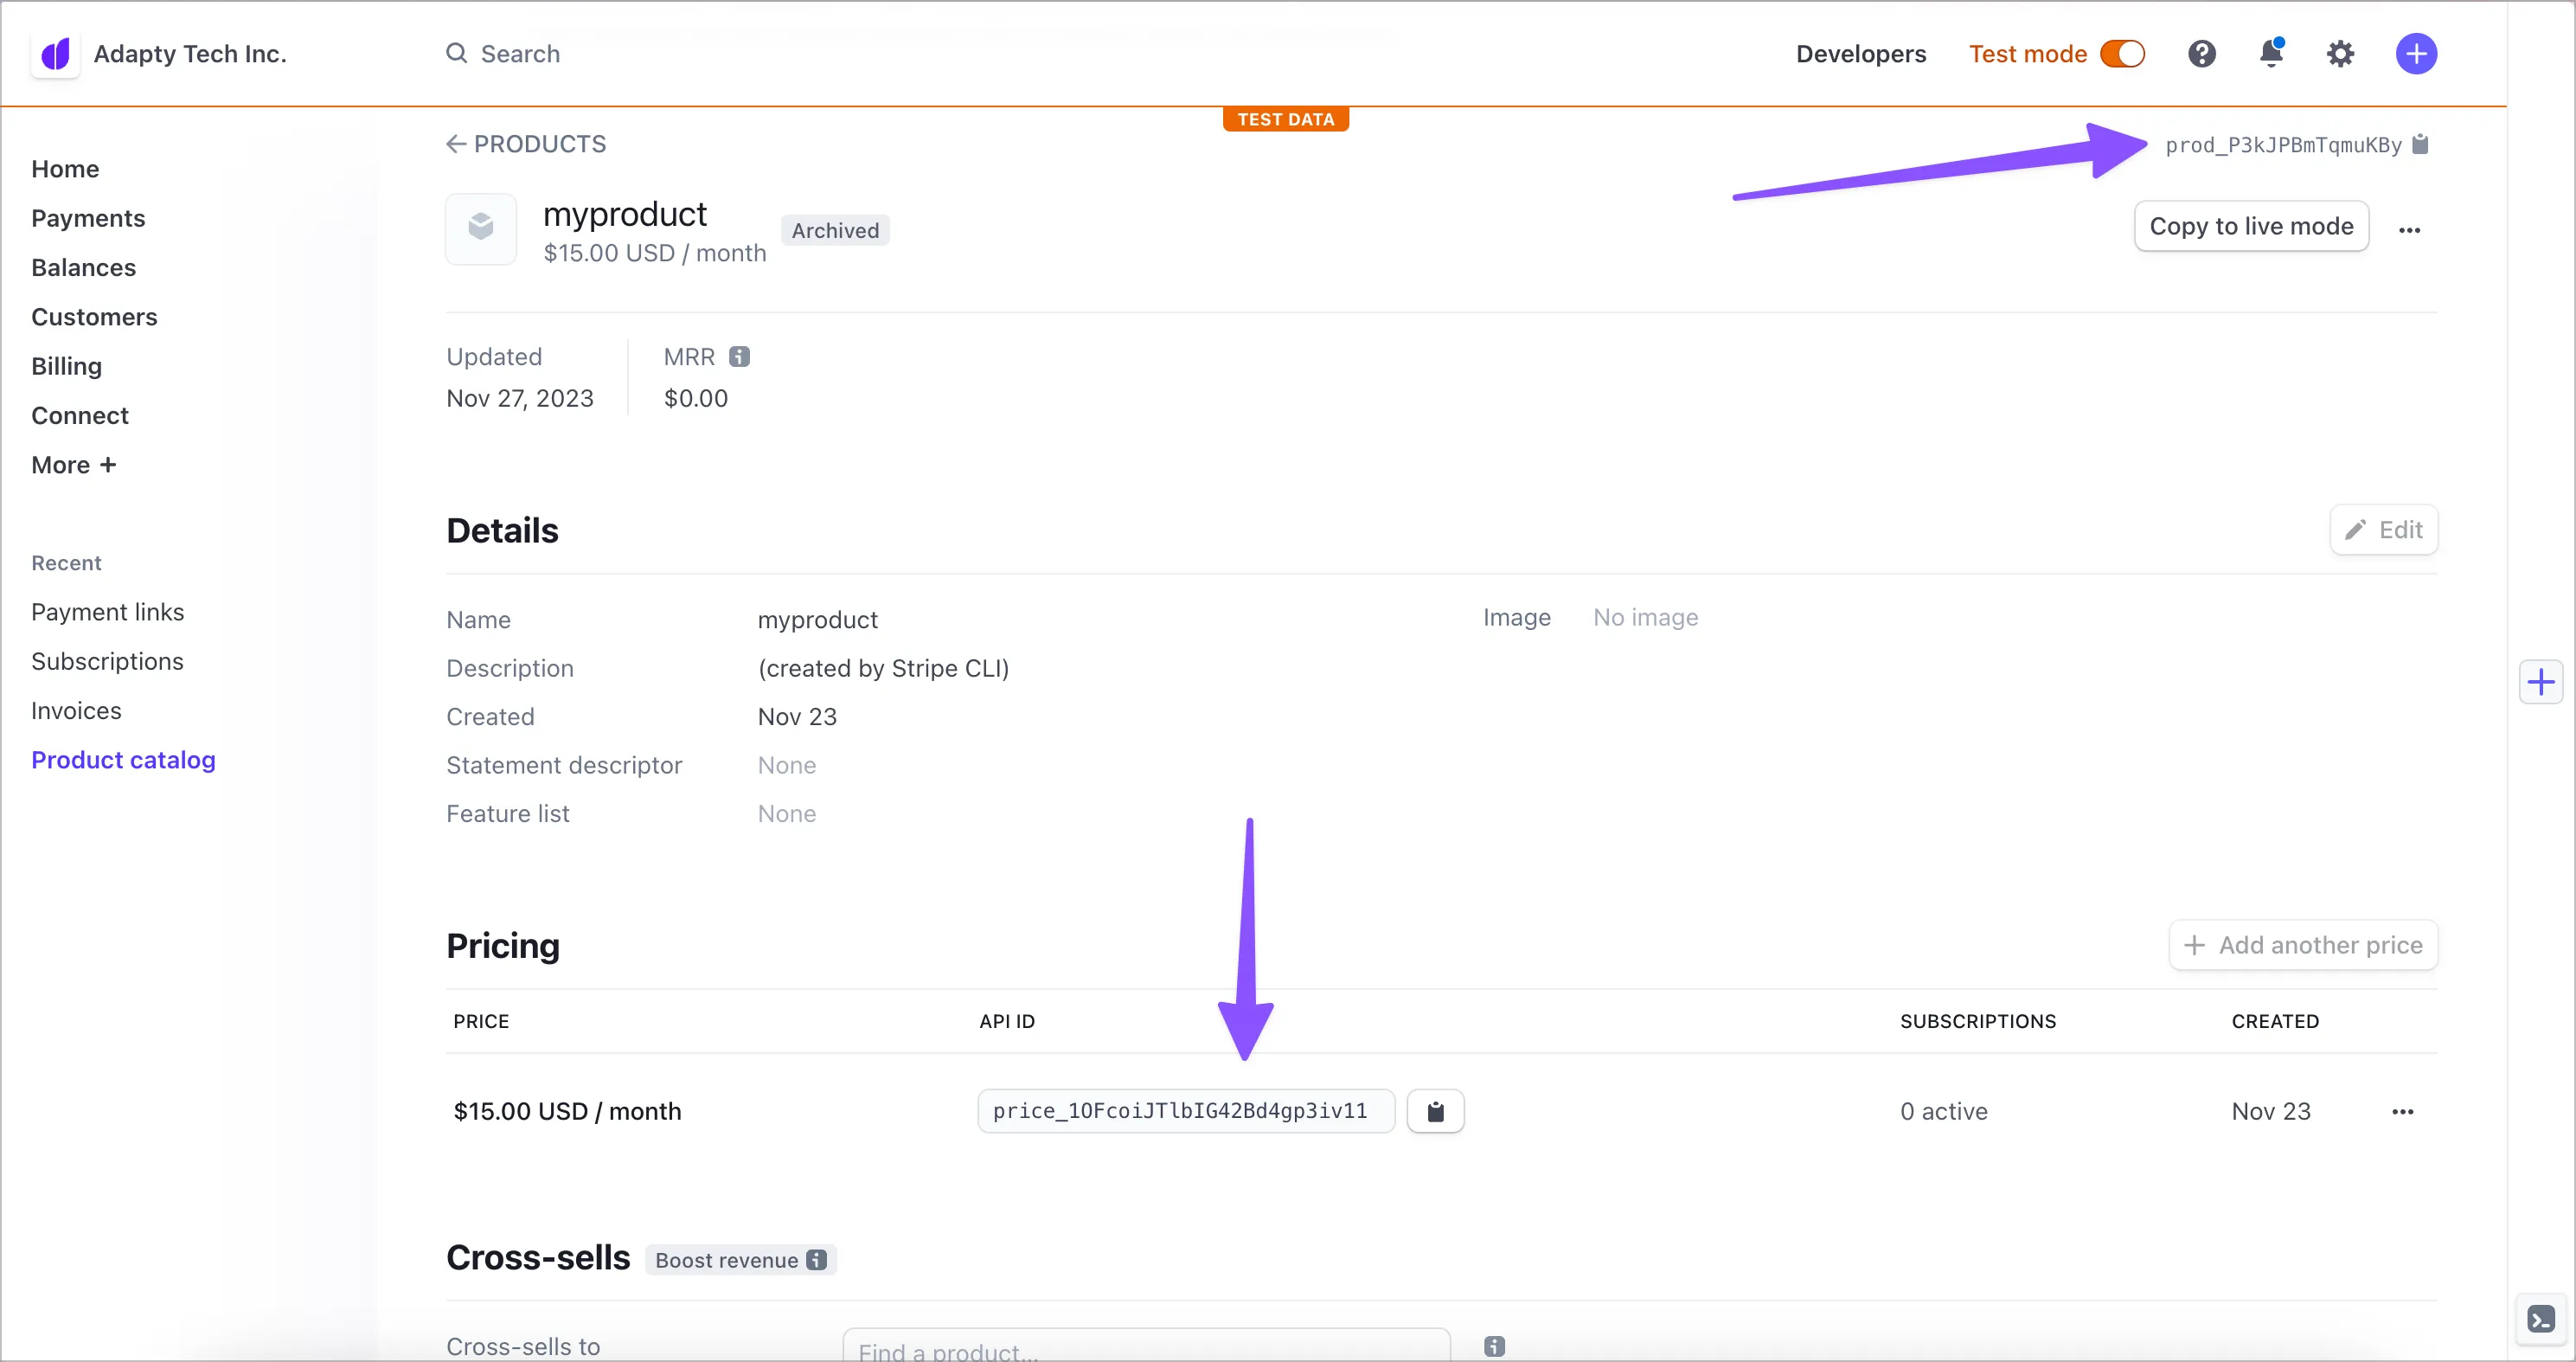
Product IDs in Stripe look like prod_... and price IDs look like price_.... They are pretty easy to find for each product in Stripe’s Product Catalog, once you open any Product:
After you’ve added all the necessary products, the next step is to let Stripe know about which user is making the purchase, so it could get picked up by Adapty!
4. Enrich purchases made on the web with your user ID
Adapty relies on the webhooks from Stripe to provide and update access levels for users as the only source of information. But you have to provide additional info from your end when working with Stripe for this integration to work properly.
For access levels to be consistent across platforms (web or mobile), you have to make sure that there is a single user ID to rely on which Adapty can recognize from the webhooks as well. This could be user’s email, phone number or any other ID from the authorization system you’re utilizing.
Figure out which ID you would like to use to identify your users. Then, access the part of your code that’s initiatilizing the payment through Stripe — and add this user ID to the metadata object of either Stripe Subscription (sub_...) or Checkout Session object (ses_...) as customer_user_id like so:
{'customer_user_id': "YOUR_USER_ID"}This one simple addition is the only thing that you have to do in your code. After that, Adapty will parse all the webhooks it receives from Stripe, extract this metadata and correctly associate subscriptions with your customers.
User ID is required
Otherwise, we have no way to match this user and provide him the access level on the mobile.
If you don’t supply customer_user_id to the metadata, you will have the option to make Adapty look for customer_user_id in other places: either email from Stripe’s Customer object or client_reference_id from Stripe’s Session.
Learn more about configuring profile creation behavior below
Customer in Stripe is also required
If you are using Checkout Sessions, make sure you’re creating a Stripe Customer by setting customer_creation to always.
5. Provide access to users on the mobile
To make sure your mobile users arriving from web can access the paid features, just call Adapty.activate() or Adapty.identify() with the same customer_user_id you’ve provided on the previous step (see Identifying users iOS, Android, React Native, Flutter, and Unity for more).
6. Test your integration
Make sure you’ve completed the steps above for Sandbox as well as for Production. Transactions that you make from Stripe’s Test mode will be considered Sandbox in Adapty.
That’s it!
Your users can now complete purchases on the web and access paid features in your app. And you can also see all your subscription analytics in a single place.
Profile creation behavior
Adapty has to tie a purchase to a customer profile for it to be available on the mobile — so by default it creates profiles upon receiving webhooks from Stripe. You can choose what to use as customer user ID in Adapty:
- Default and recommended:
customer_user_idyou supplied in metadata in step 4 above emailin Stripe’s Customer object (see Stripe’s docs)client_reference_idin Stripe’s Session object (see Stripe’s docs)
You can configure which ID you would like to use in App Settings → Stripe.
Note: if a particular transaction from Stripe does not contain the specified ID, we will not create a profile at all. This transaction will remain anonymous until it gets picked up by some profile (for example, if you use S2S validate afterwards and tell us about this transaction manually).
It will show up in Analytics but not in the sections that rely on counting profiles (LTV, Cohorts, Conversions, etc) and you won’t be able to see it in Event feed.
You also have a fourth option to not create profiles at all but this is not recommended due to the above limitations in Analytics.
Current limitations
Upgrading, downgrading and proration
Subscription changes such as upgrading or downgrading can result in prorated charges. Adapty will not account for these charges in revenue calculations. It would be best to disable these options manually via the Stripe dashboard. You can also disable them by setting the proration_behaviour attribute value to none via the Stripe API.
Cancellations
Stripe has two subscription cancellation options:
- Immediate cancellation: The subscription cancels immediately with or without any proration option
- Cancellation at the end of the period: The subscription cancels at the end of the current billing period (similar to in-app subscriptions on the app stores).
Adapty supports both options, but the revenue calculation for immediate cancellation will disregard the proration option.
Billing Issues and Grace Period
When a customer encounters an issue with their payment, Adapty will generate a billing issue event and access will be revoked. We do not support Stripe’s Grace Period just yet — this will be a part of future releases.
Refunds
Adapty tracks only full refunds. Proration or partial refunds are currently not supported.
Transaction ID uniqueness
Adapty matches profiles and transactions using store_transaction_id and store_original_transaction_id. These must be unique across Test and Production environments.
Why this matters
If the same transaction ID exists in both environments, Adapty treats them as one transaction, causing:
- Production purchases to inherit Test access levels and product IDs
- Wrong product IDs and environments in API responses
- Disrupted profile linking and subscription events
How to ensure uniqueness
Stripe invoice IDs can overlap between Test and Live environments. To prevent cross-environment collisions, choose one approach
Option 1: Account-level numbering with environment prefixes
Configure prefixes separately for each environment:
- In Stripe Dashboard, switch to Test mode.
- Go to Settings → Billing → Invoices.
- Set Invoice numbering to Sequentially across your account.
- Set Invoice prefix to TEST- (or some other prefix that will be specific for the test environment).
- Switch to Live mode and repeat steps 2-4, using LIVE- (or some other prefix that will be specific for the live environment) as the prefix
Option 2: Customer-level numbering
Set Invoice numbering in the Stripe settings -> Billing -> Invoices tab to Sequentially for each customer (customer-level).
Even with the above configuration, if you delete an invoice, Stripe may reuse that ID for new invoices of the same customer. It’s best to avoid deleting invoices whenever possible.
One-time purchases via Stripe Checkout or Payment Links
Adapty tracks one-time (non-subscription) purchases made through Stripe Checkout (mode=payment) or Payment Links only if Stripe generates an invoice for the purchase. By default, Stripe does not create an invoice for one-time Checkout purchases. In this case, payment_intent.succeeded arrives without invoice data, which is not enough for Adapty to record the transaction.
To track one-time Checkout purchases in Adapty, enable invoice creation when you create the session. Stripe then generates an invoice and emits the related invoice.created and invoice.updated events, which Adapty processes to record the transaction.
Get more from your Stripe data
Once you integrate with Stripe, Adapty is ready to provide insights right away. To make the most of your Stripe data, you can set up additional Adapty integrations to forward Stripe events—bringing all your subscription analytics into a single Adapty Dashboard.
For enhanced analytics, you can include a variation_id in your Stripe metadata to attribute purchases to specific paywall instances. This is particularly useful when implementing in-house web paywalls where you want to track which specific paywall showing led to the conversion.
Note that variation_id is only read from metadata in Stripe Subscription (sub_...) and Checkout Session (ses_...) objects:
{
  'customer_user_id': "YOUR_USER_ID",
  'variation_id': "YOUR_VARIATION_ID"
}
Integrations you can use to forward and analyze your Stripe events:
Supported Stripe events
Adapty supports the following Stripe events:
- charge.refunded
- customer.subscription.created
- customer.subscription.deleted
- customer.subscription.paused
- customer.subscription.resumed
- customer.subscription.updated
- invoice.created
- invoice.updated
- payment_intent.succeeded