
Build a paywall with a trial toggle
A trial toggle allows you to switch a paywall between products with a free trial and products without one. But the toggle itself is only a switch: on or off. You write the rules that show the right cards, and the rules that change which product is selected.
This recipe shows you how to set these rules and build a fully working toggle-enabled paywall.
Before you start
- Build a paywall screen — for example, follow the Create a basic paywall screen recipe.
- Create your products and add the trial offer to them.
If you want to make the trial optional (which is necessary to use the trial toggle), do not create an introductory offer. On iOS, introductory offers apply automatically to every eligible user. You cannot turn them off. Use a promotional offer instead. See How Adapty works with offers.
1. Add the product cards
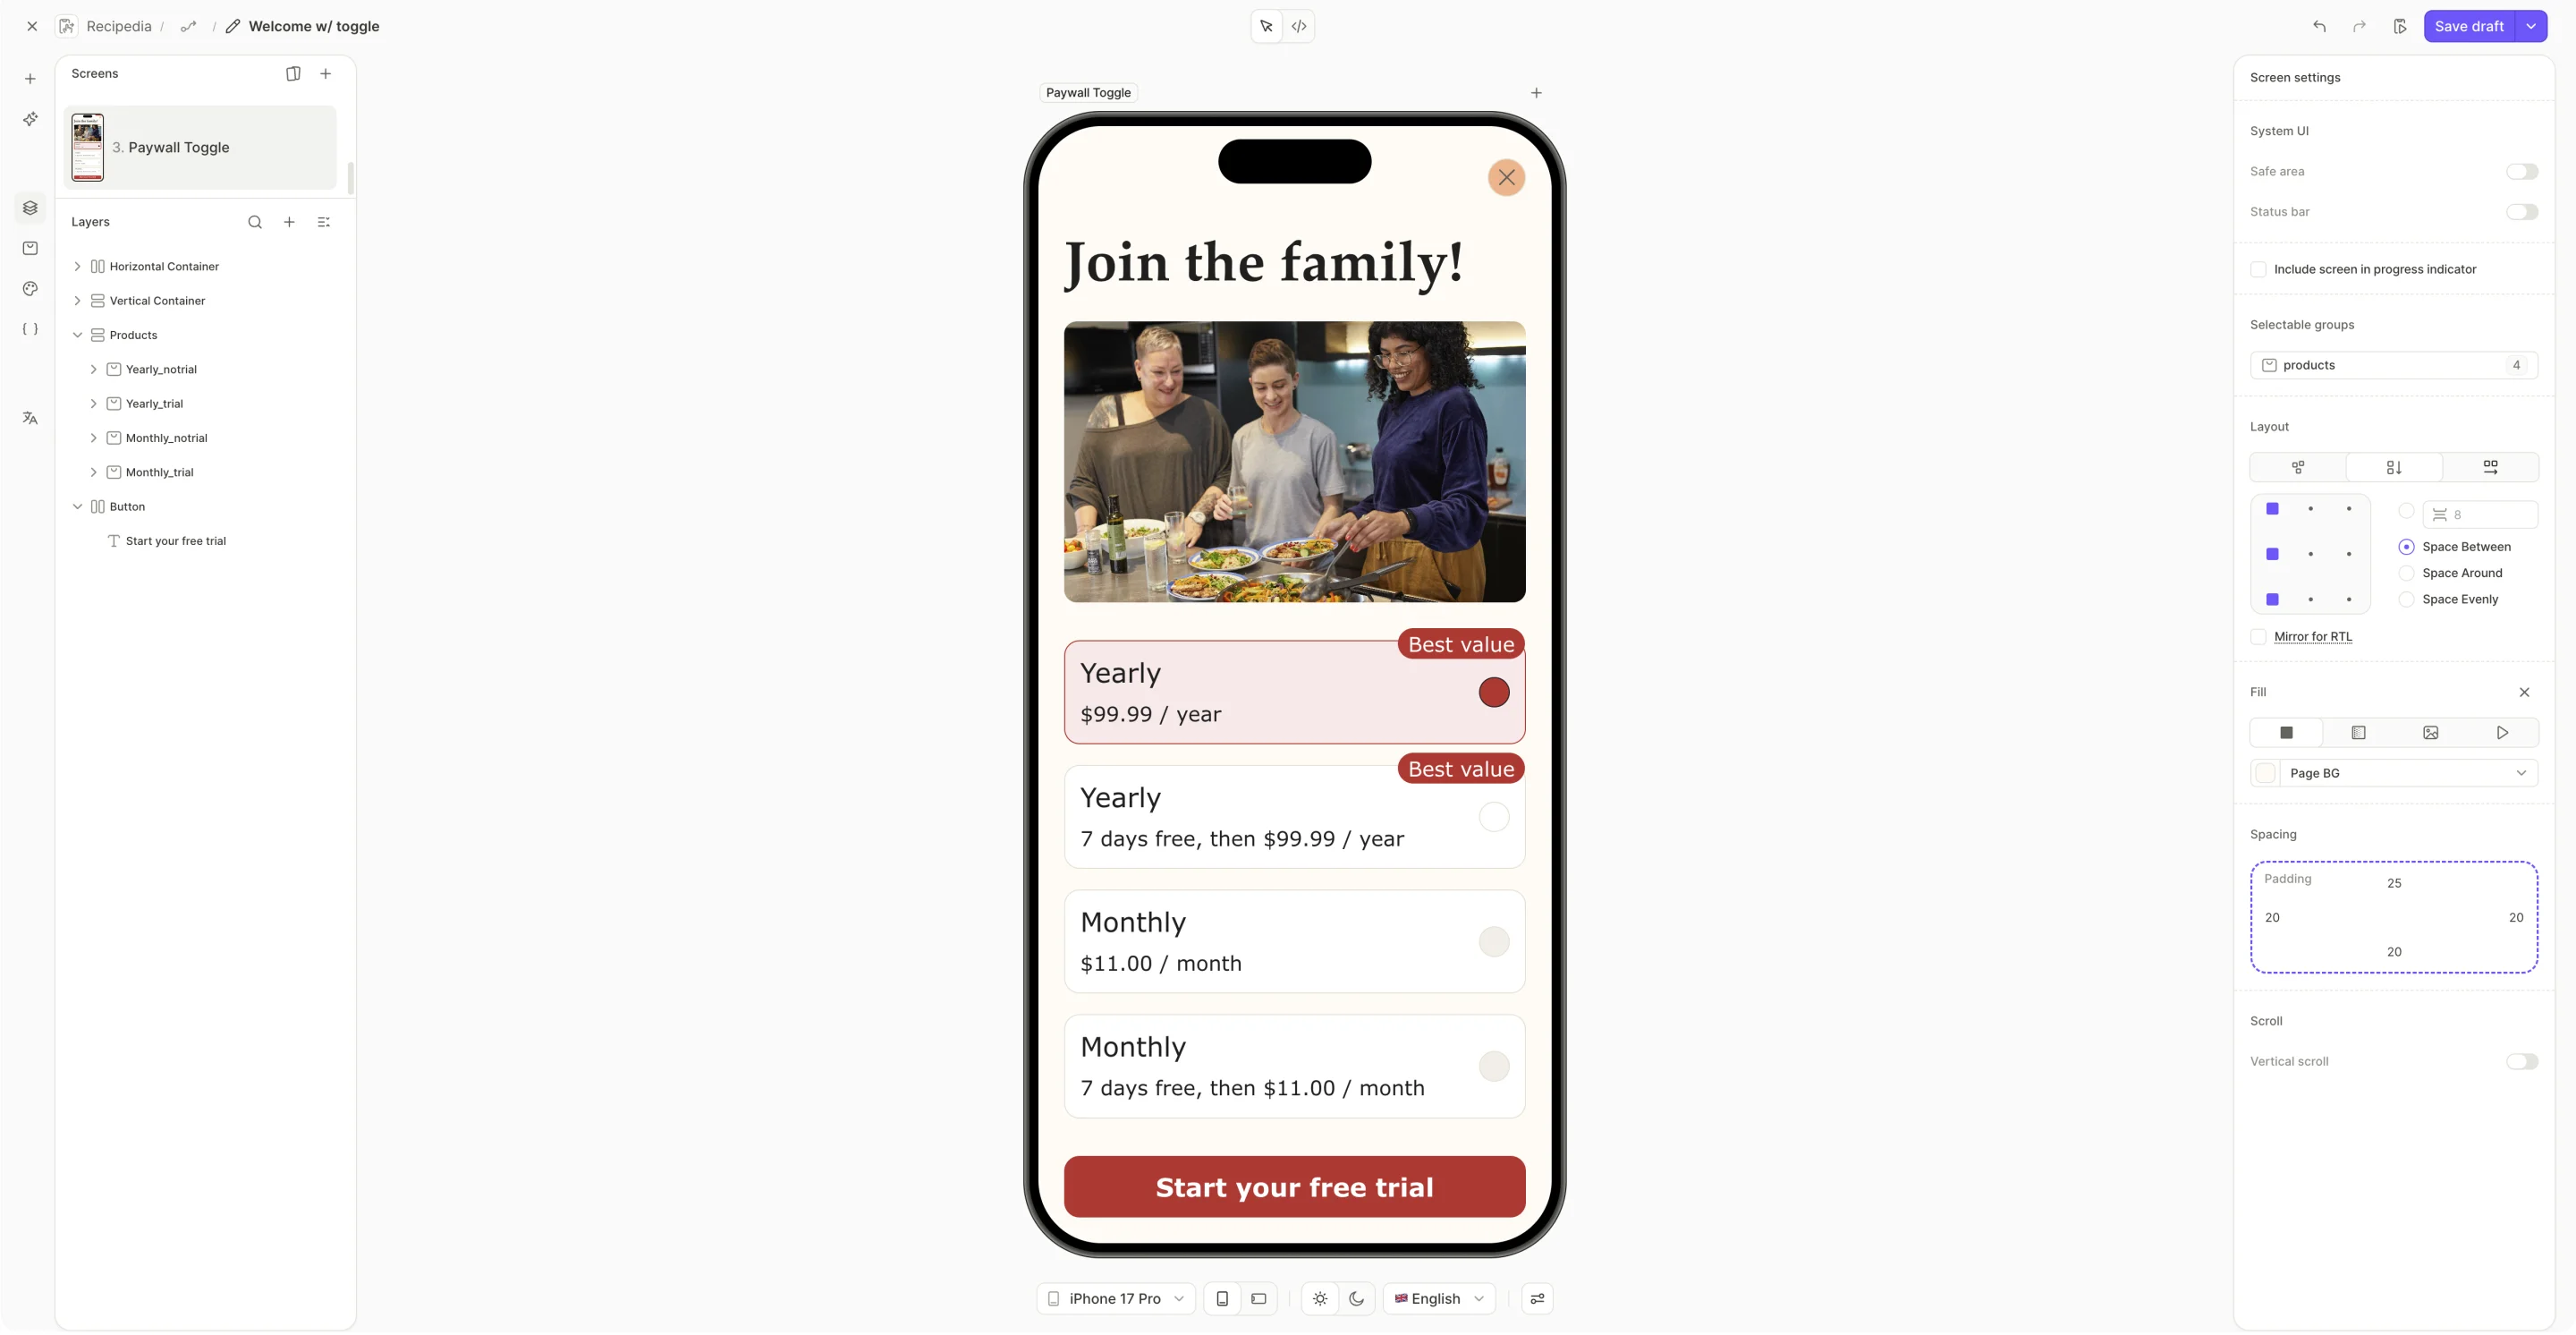
- Click the Add Element menu + > Paywall & Commerce > Products and choose a preset.
- Select a card — on the canvas or in the Layers panel. Assign a product to the card, and leave the offer dropdown on No offer.
- Repeat for each plan you sell — one card per plan, without the trial.
- Duplicate every card. On each copy, pick the trial offer from the offer dropdown.
Each plan now has two cards that point at the same product — one with the offer, and one without.
2. Add the trial toggle
-
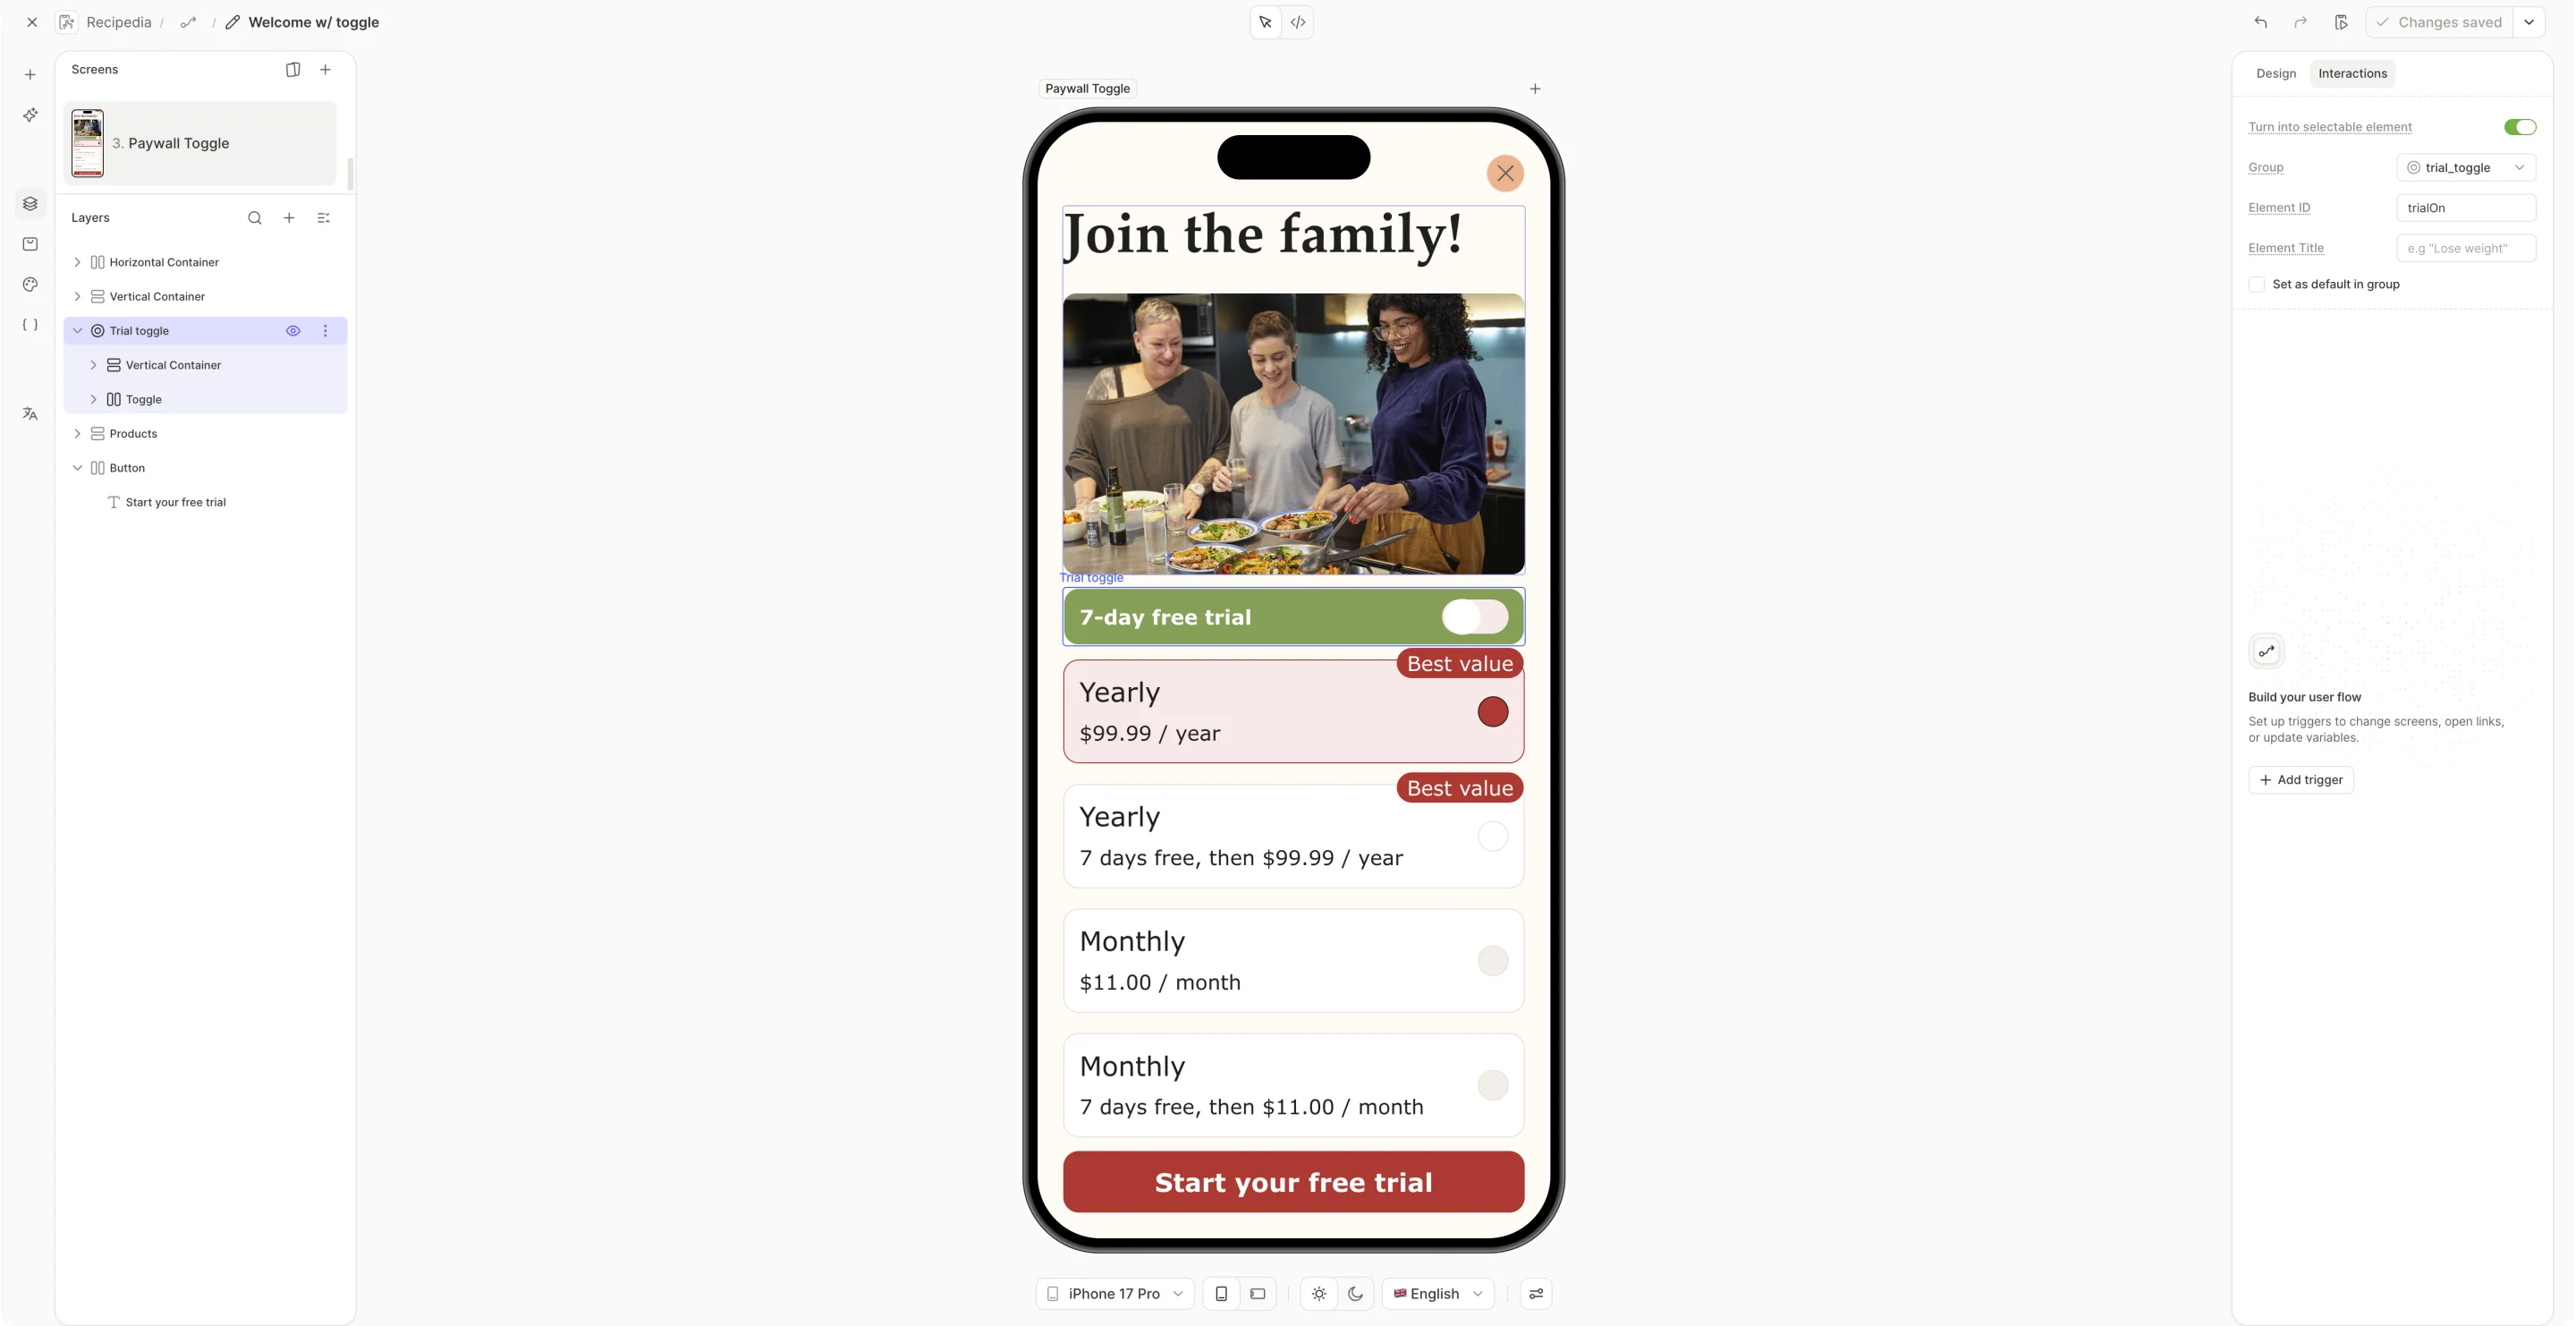
Click + > Paywall & Commerce > Toggle > Trial toggle.
-
Ensure the toggle belongs to a selectable group of the correct type. Click an empty area of the canvas to open Screen settings. Under Selectable groups, open
trial_toggle, set Group Type to Toggle, and click Save. The dialog displays the variable we’ll use to detect if the toggle is on:trial_toggle.isActive.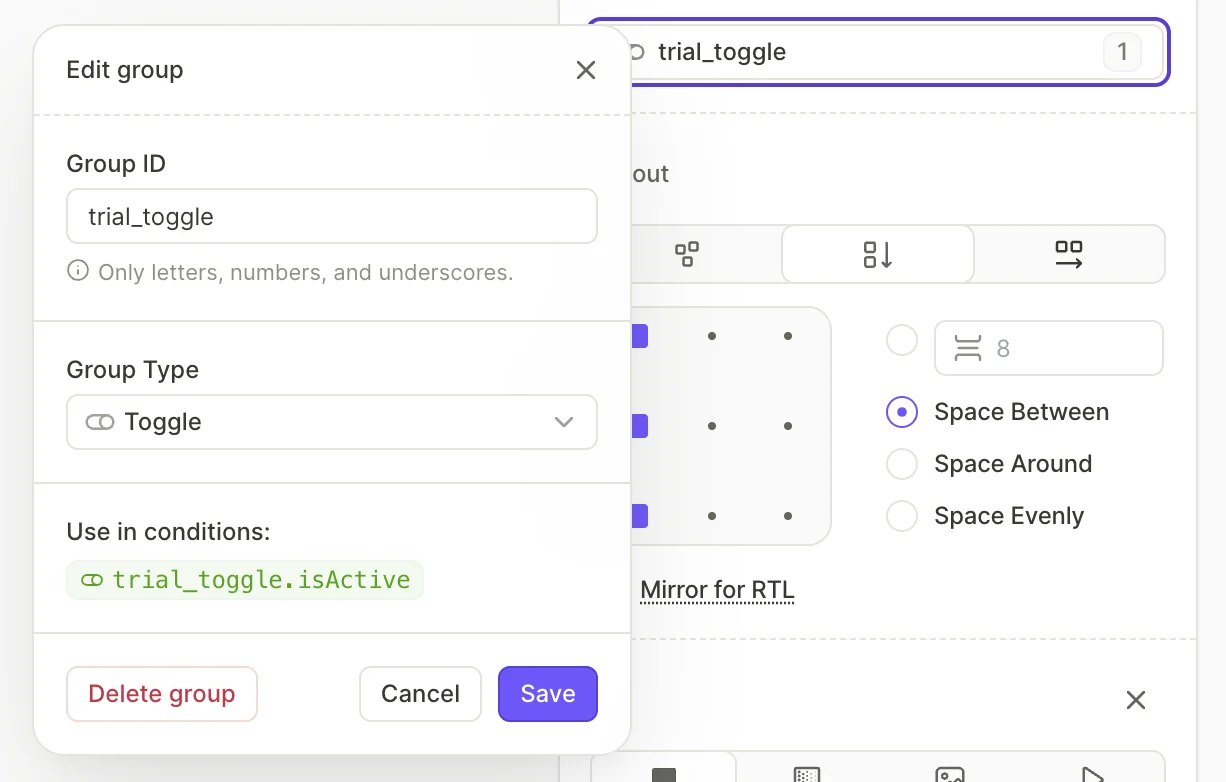
-
Edit the toggle’s label.
Leave the toggle off by default. A pre-selected trial toggle risks App Store rejection as a dark pattern — see Toggles and checkboxes.
3. Show the right cards for each toggle state
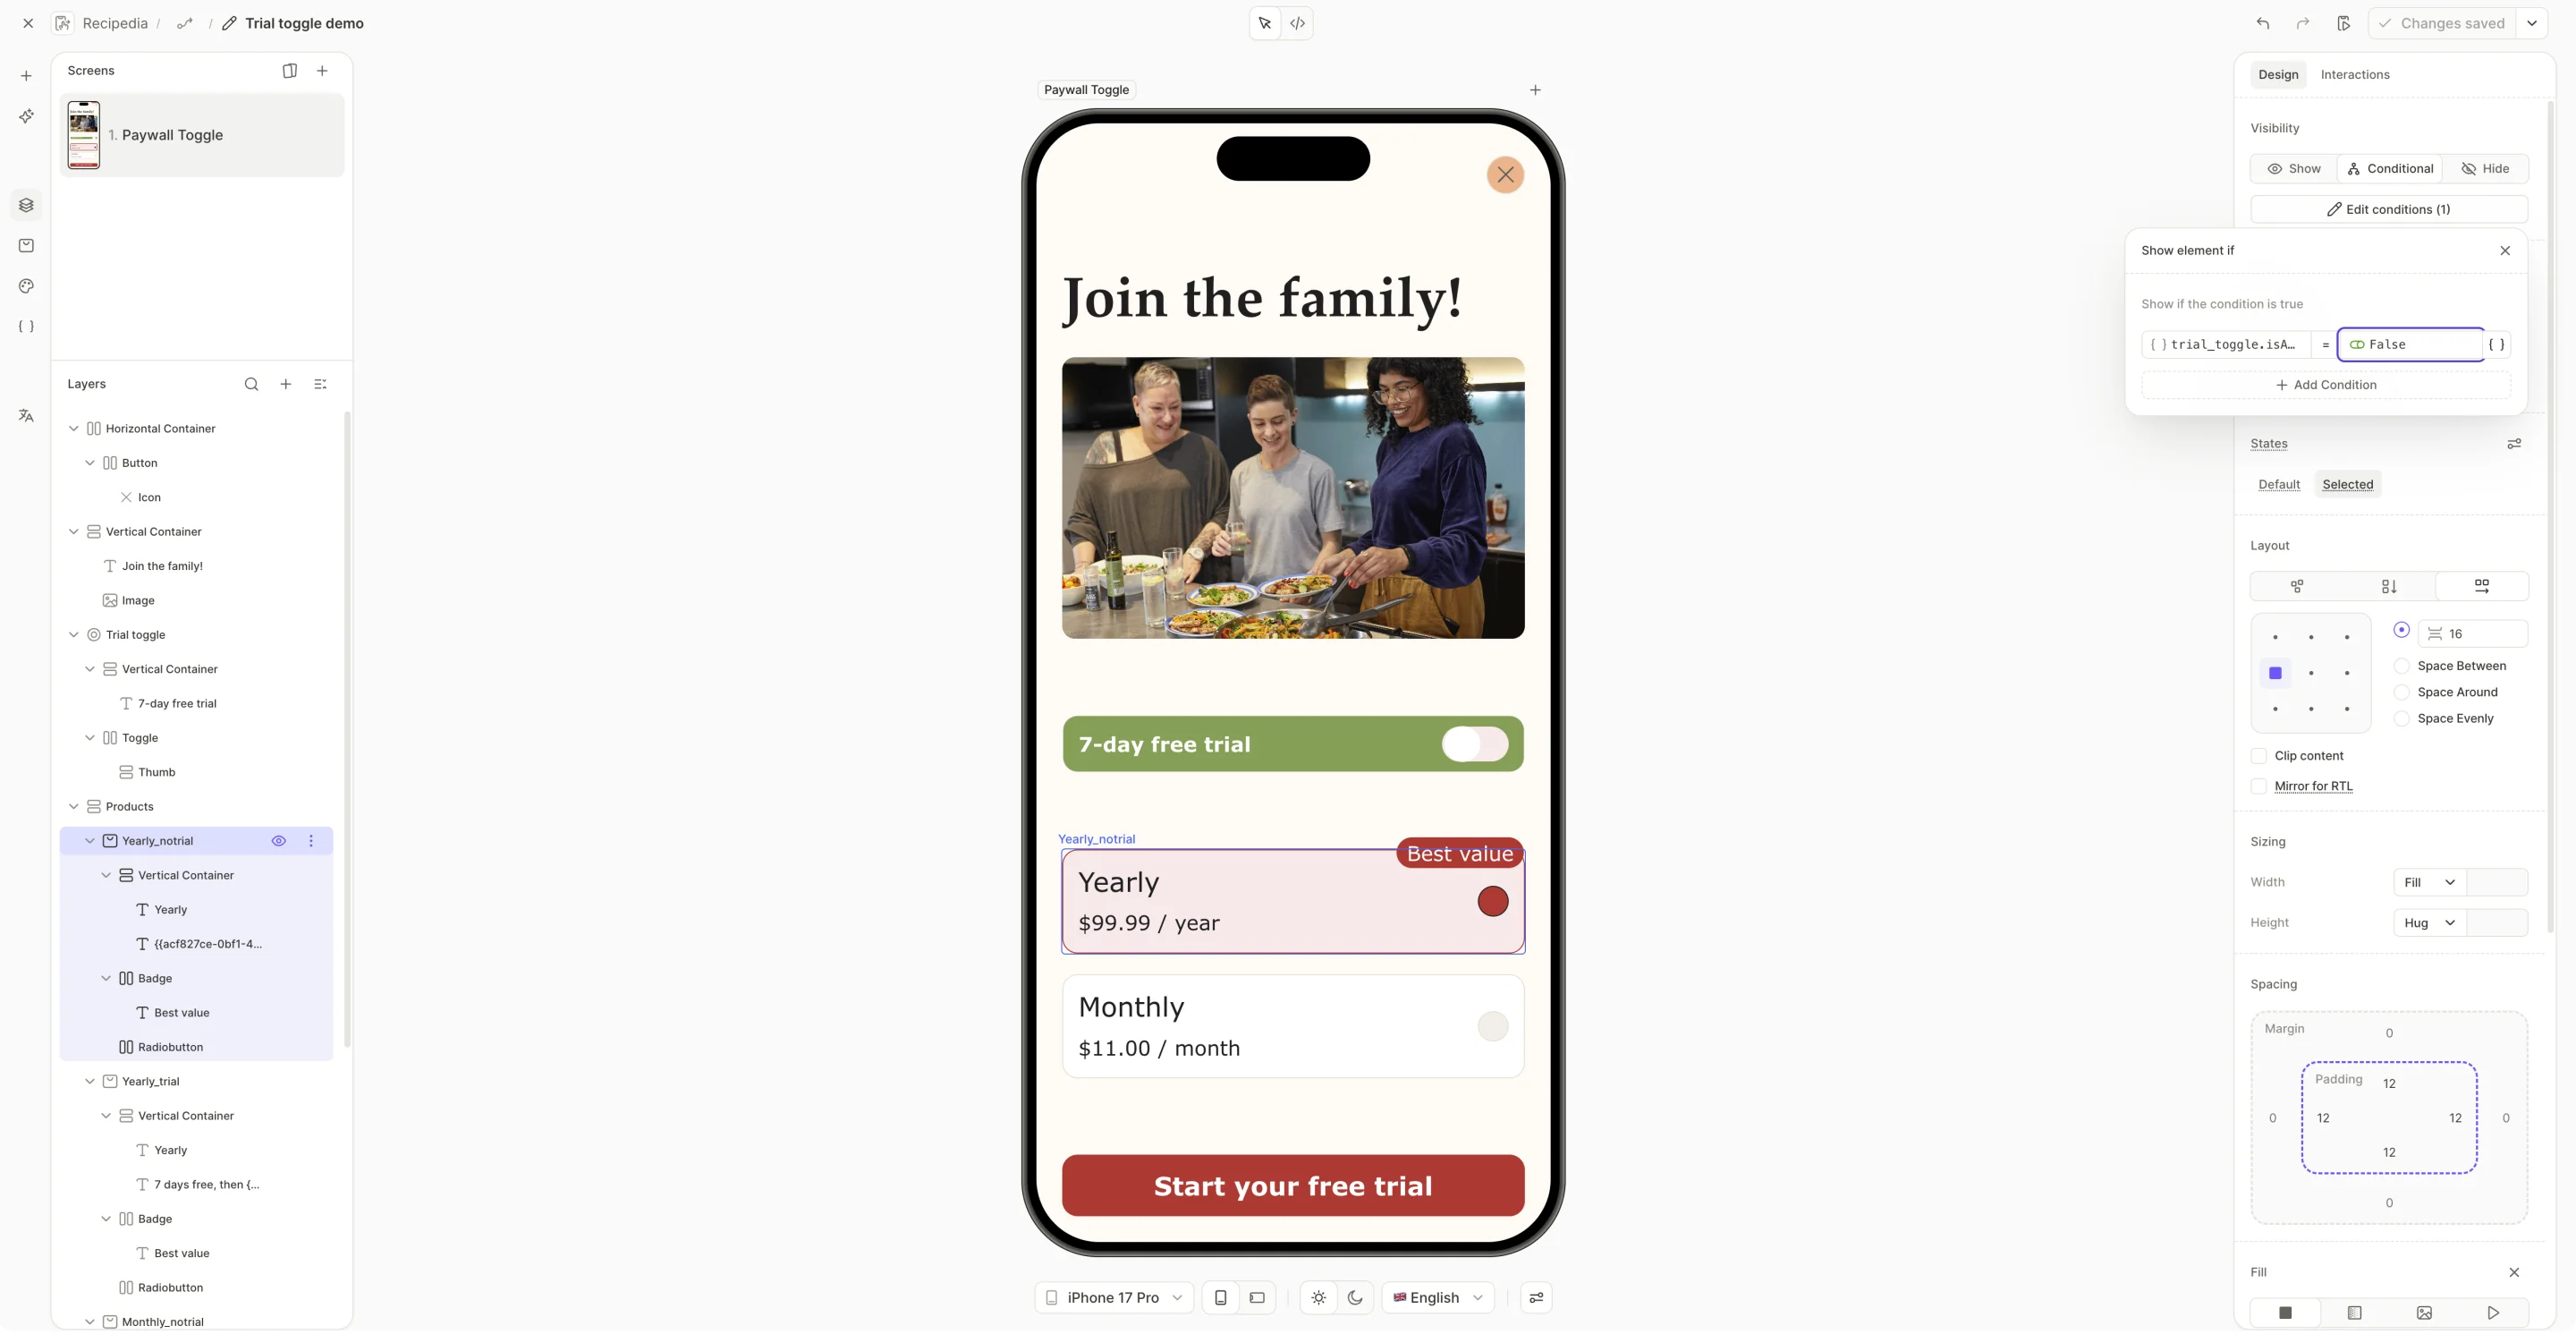
On the Design tab of each card, under Visibility, select Conditional and build its condition:
| Card | Condition |
|---|---|
| With the trial | trial_toggle.isActive Equals True |
| Without the trial | trial_toggle.isActive Equals False |
4. Select a visible card when the toggle changes
The cards now change with the toggle, but the selected product doesn’t. A card that becomes invisible stays selected, and the Purchase action still targets it — so a user who enables the trial can still be charged.
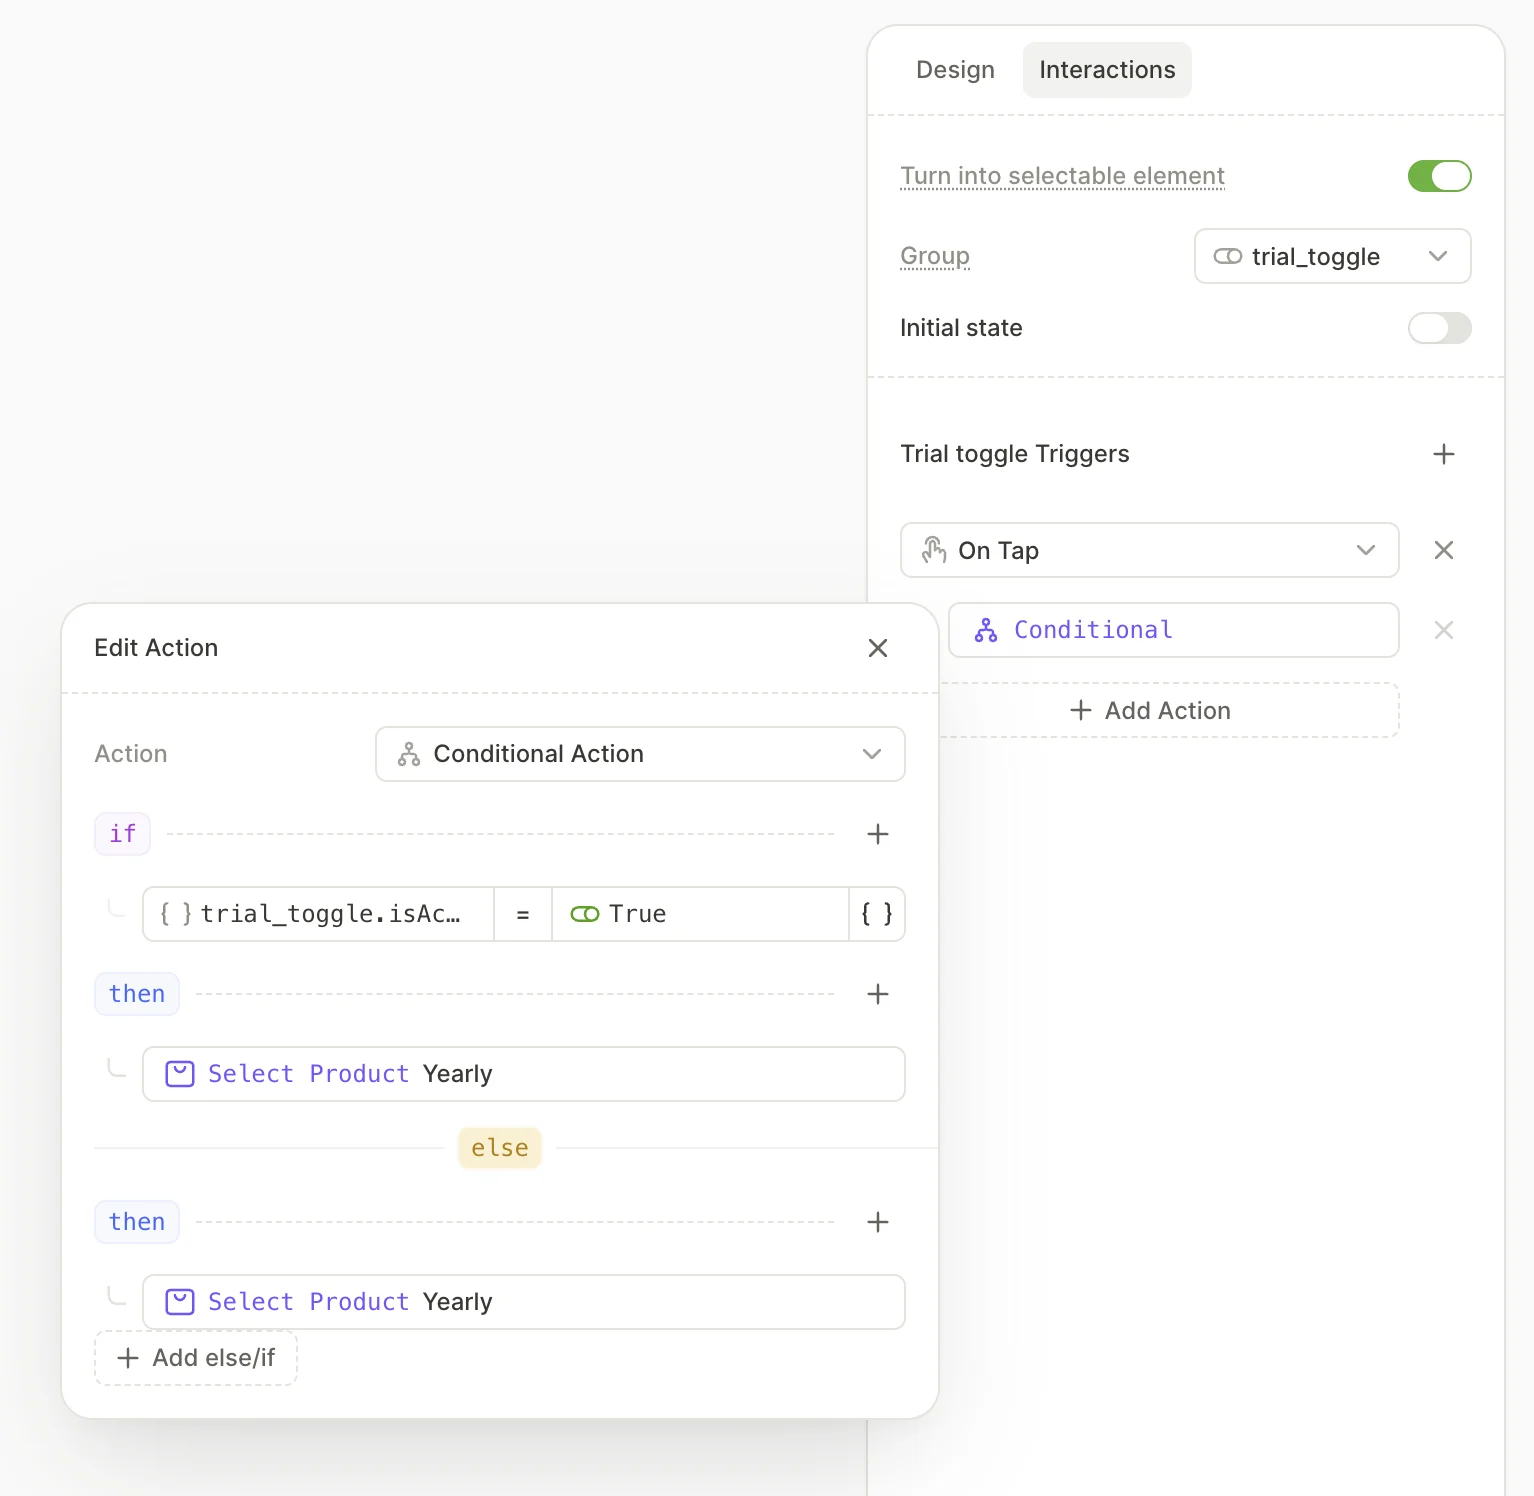
Add a Conditional Action to the toggle, so that it resets the selection to a visible card on every tap.
-
In the Layers panel, select the Trial toggle container.
-
Open the Interactions tab, add the On tap trigger, and a Conditional Action:
Block What to configure if trial_toggle.isActiveEquals Truethen Select Product, pointing at a card with the trial else Select Product, pointing at the same product without the trial
5. Update the button label
The call to action should read differently once the trial is on.
-
Select the button’s text element.
-
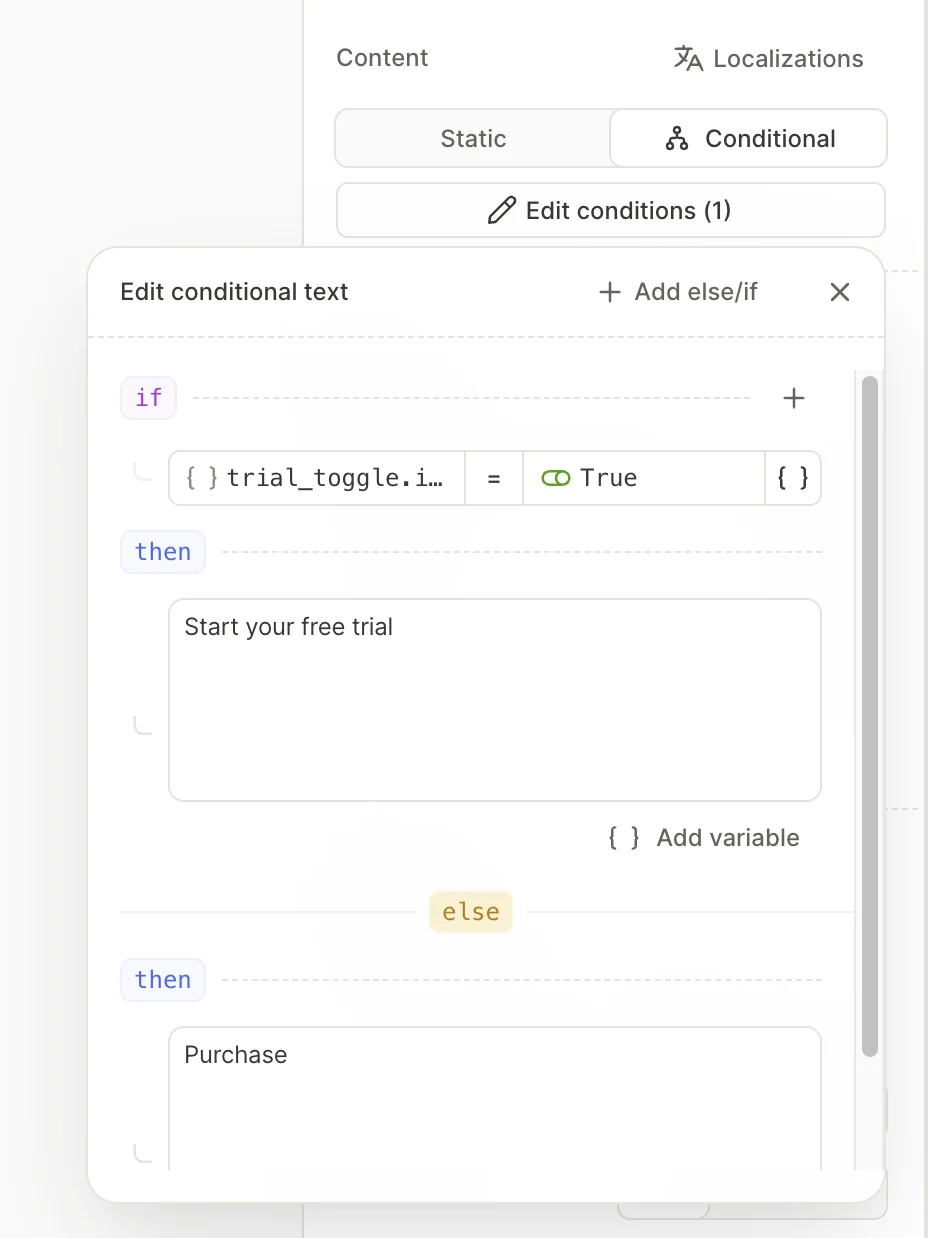
On the Design tab, under Content, select Conditional and click Edit conditions.
-
Fill the blocks:
Block What to configure if trial_toggle.isActiveEquals Truethen The trial label, such as Start your free trialelse The standard label, such as Purchase
For more on conditional text, see Add conditional text.