Test in-app purchases in Google Play Store
Testing in-app purchases (IAPs) in your Android app can be a crucial step before releasing your app to the public. Sandbox testing is a safe and efficient way to test IAPs without charging real money to your users. In this guide, we’ll walk you through the process of sandbox testing IAPs on the Google Play Store for Android.
Sandbox transactions are excluded from all analytics charts. They still appear on individual profile pages and in the event feed.
Testing environment
To ensure optimal performance of your Android app, it’s recommended that you test it on a real device instead of an emulator. While we have successfully tested on emulators, Google recommends using a real device.
If you do decide to use an emulator, make sure that it has Google Play installed. This will help ensure that your app is functioning properly.
1. Set up test account for app testing
To facilitate testing during later stages of development, you’ll need to set up a test user for in-app purchase testing. This user will be the first account you log in with on your Android testing device.
Note that the primary account on an Android device can only be changed by performing a factory reset, which wipes all your data. Therefore, it’s important to set up your test user account properly to avoid needing a factory reset.
The way you set up a test account will depend on the device you’re using:
- If you have a dedicated testing device, create a separate test account (a new Gmail account).
- If you don’t have a dedicated testing device, you can use your own personal account and temporarily enable License testing for it.
- If you don’t have an Android device at all, you can create a separate test account and use it with an emulator. However, this approach is not recommended since it doesn’t let you catch all the possible real device issues.
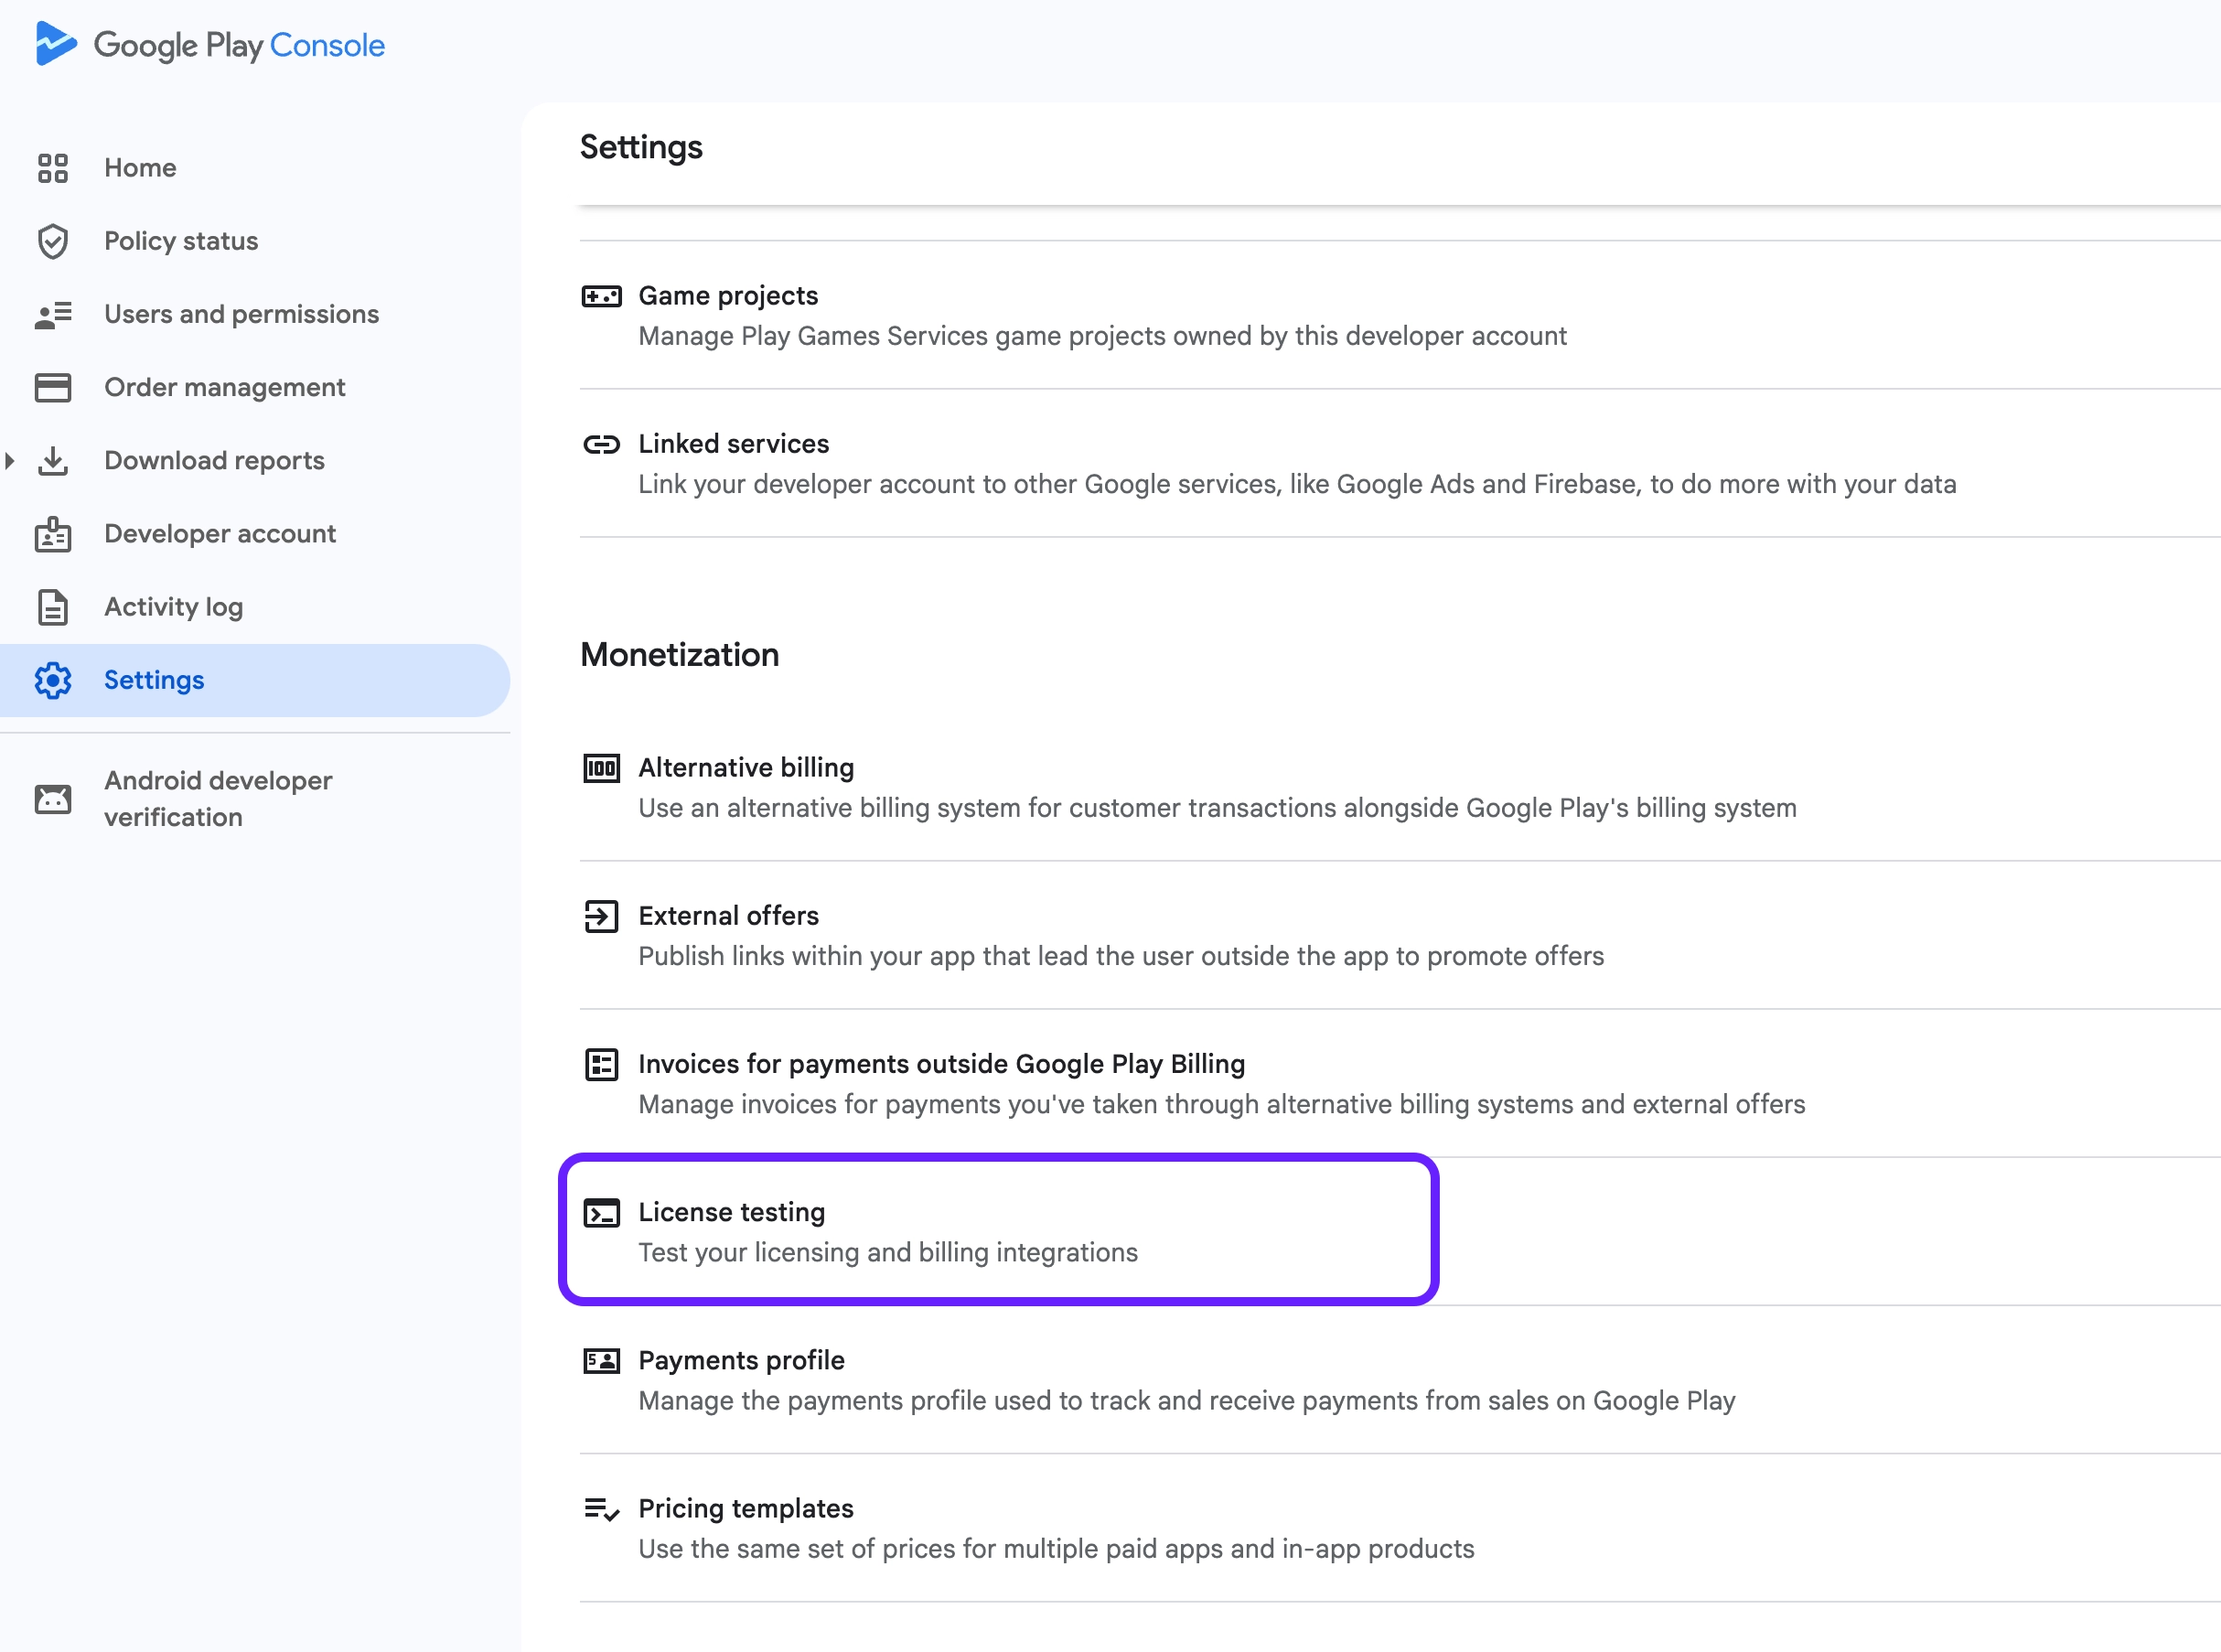
2. Enable License testing
Once you’ve set up a test user account, you’ll need to configure licensing testing for your app. To do this, follow these steps:
- In the Google Play Console sidebar, navigate to Settings and select License testing in the Monetization section.
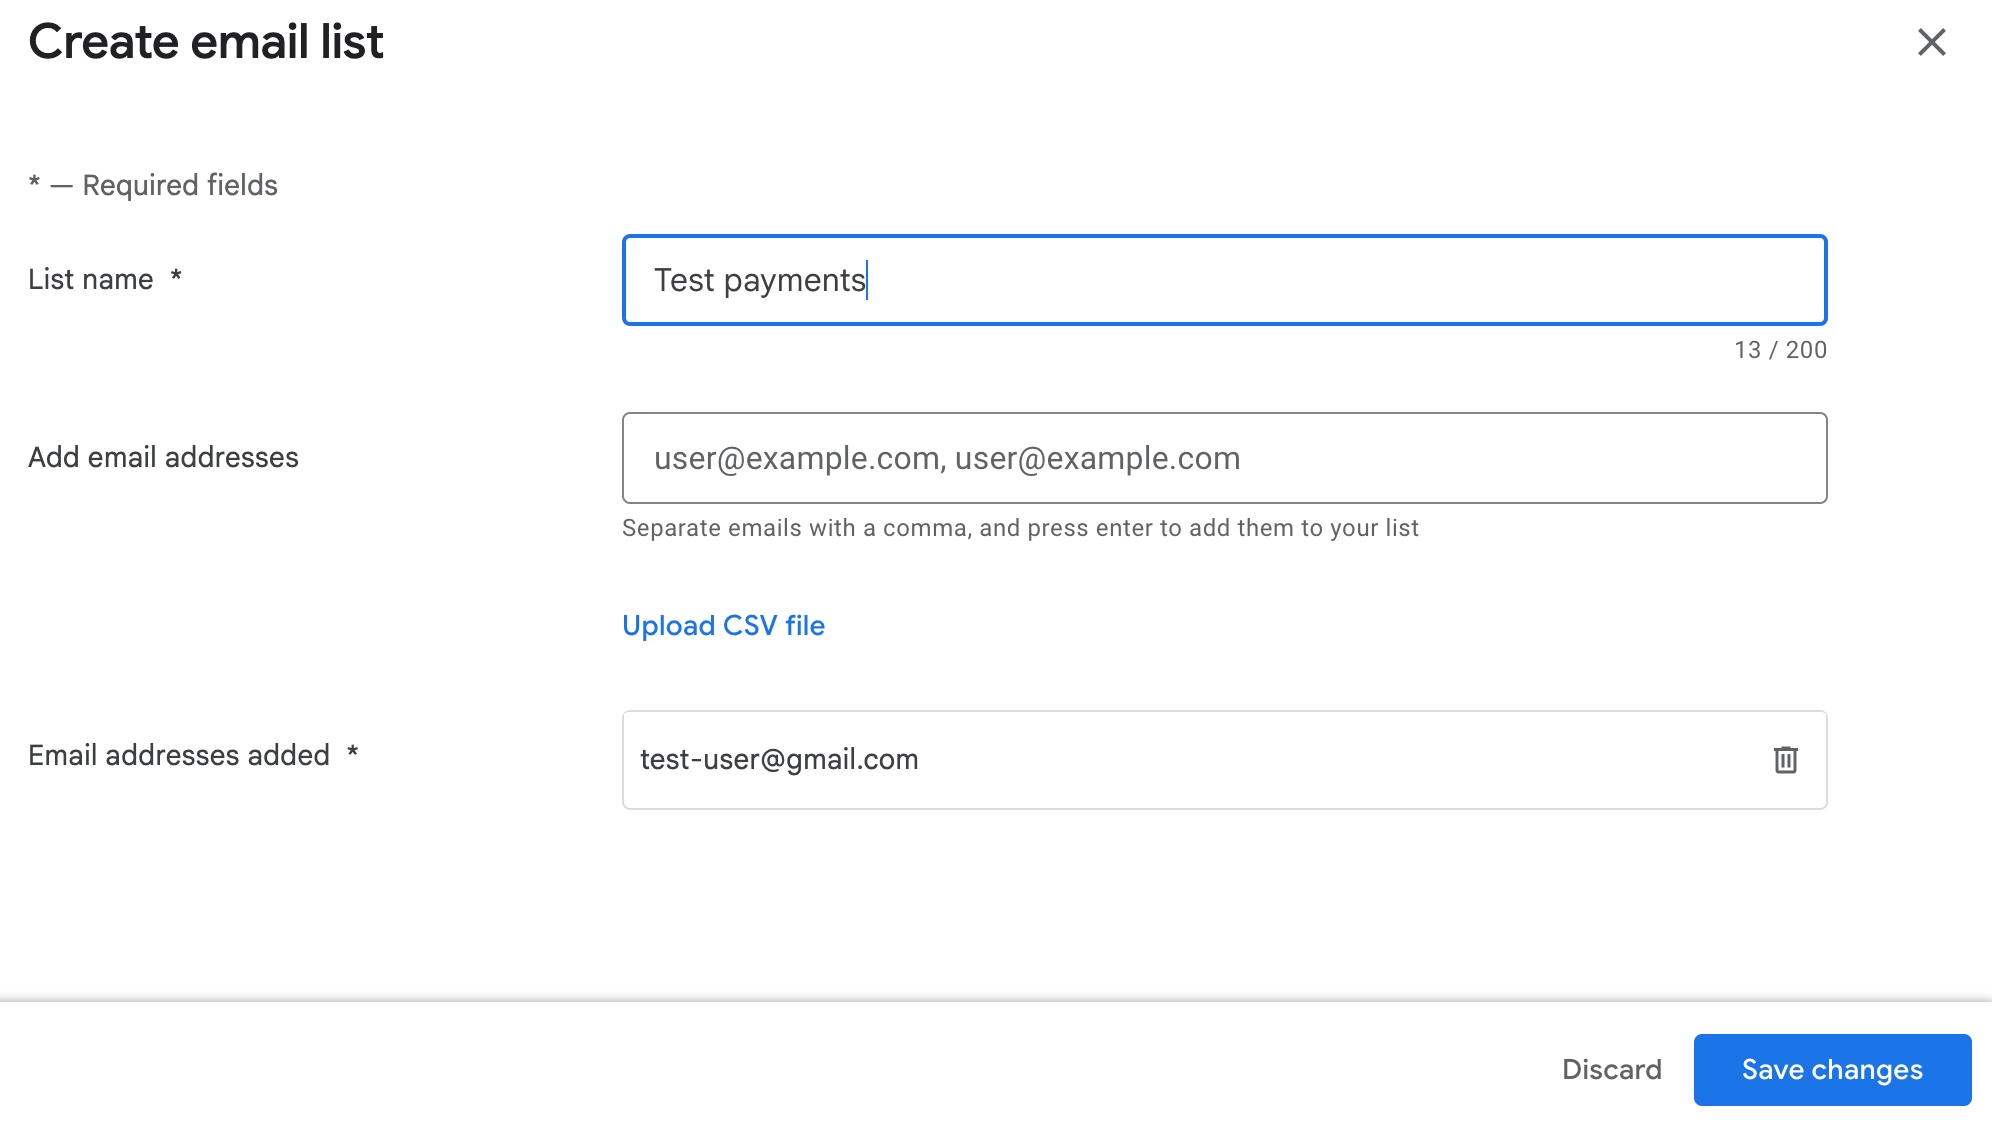
- Select an existing license testers list or create a new one.
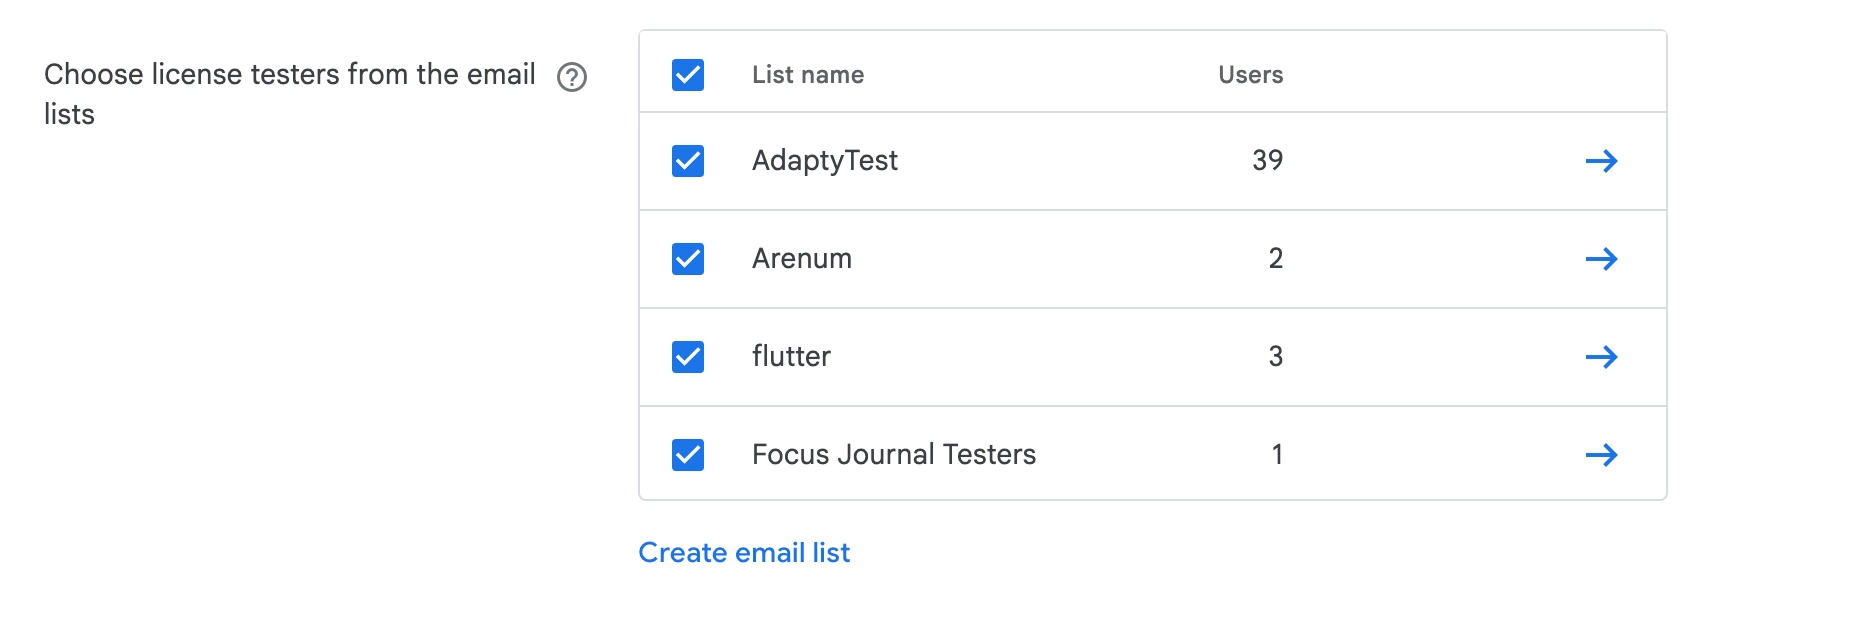
- Add the account you will be using for testing to the list and save changes. If your team members need to test the app as well, you can add their emails to the list, so access ig given to the whole group.
3. Create closed track and add test account to it
To start testing, you need to publish a signed version of your app to a closed track:
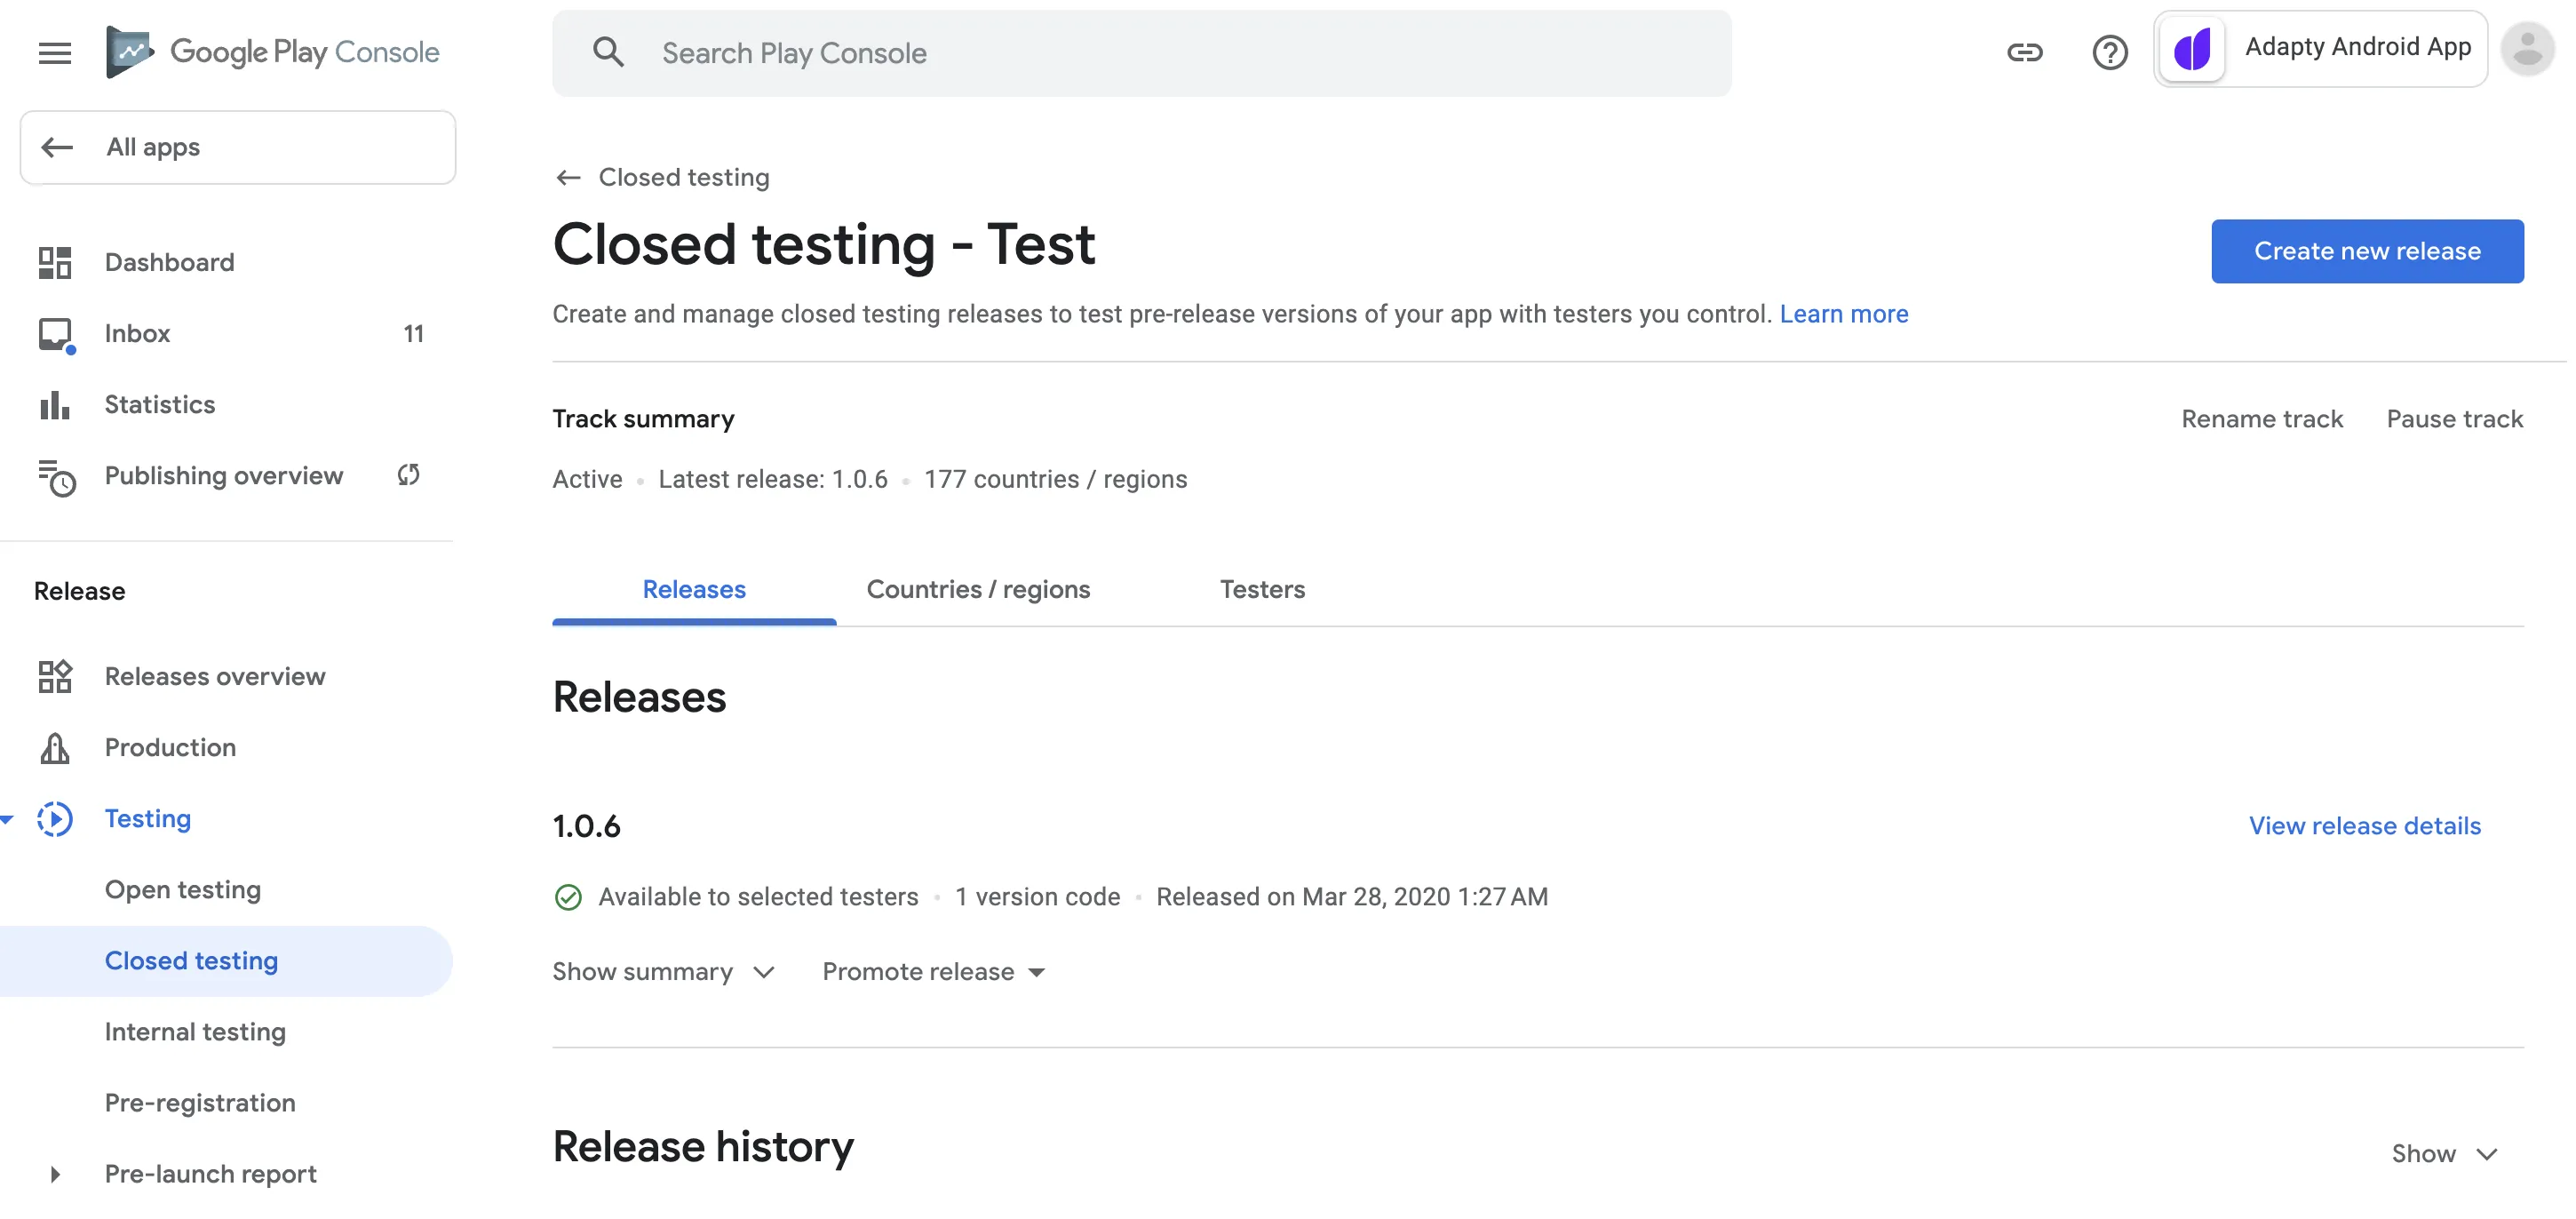
- Open your app and select Test and release > Testing > Closed testing in the menu. There, click Create track.
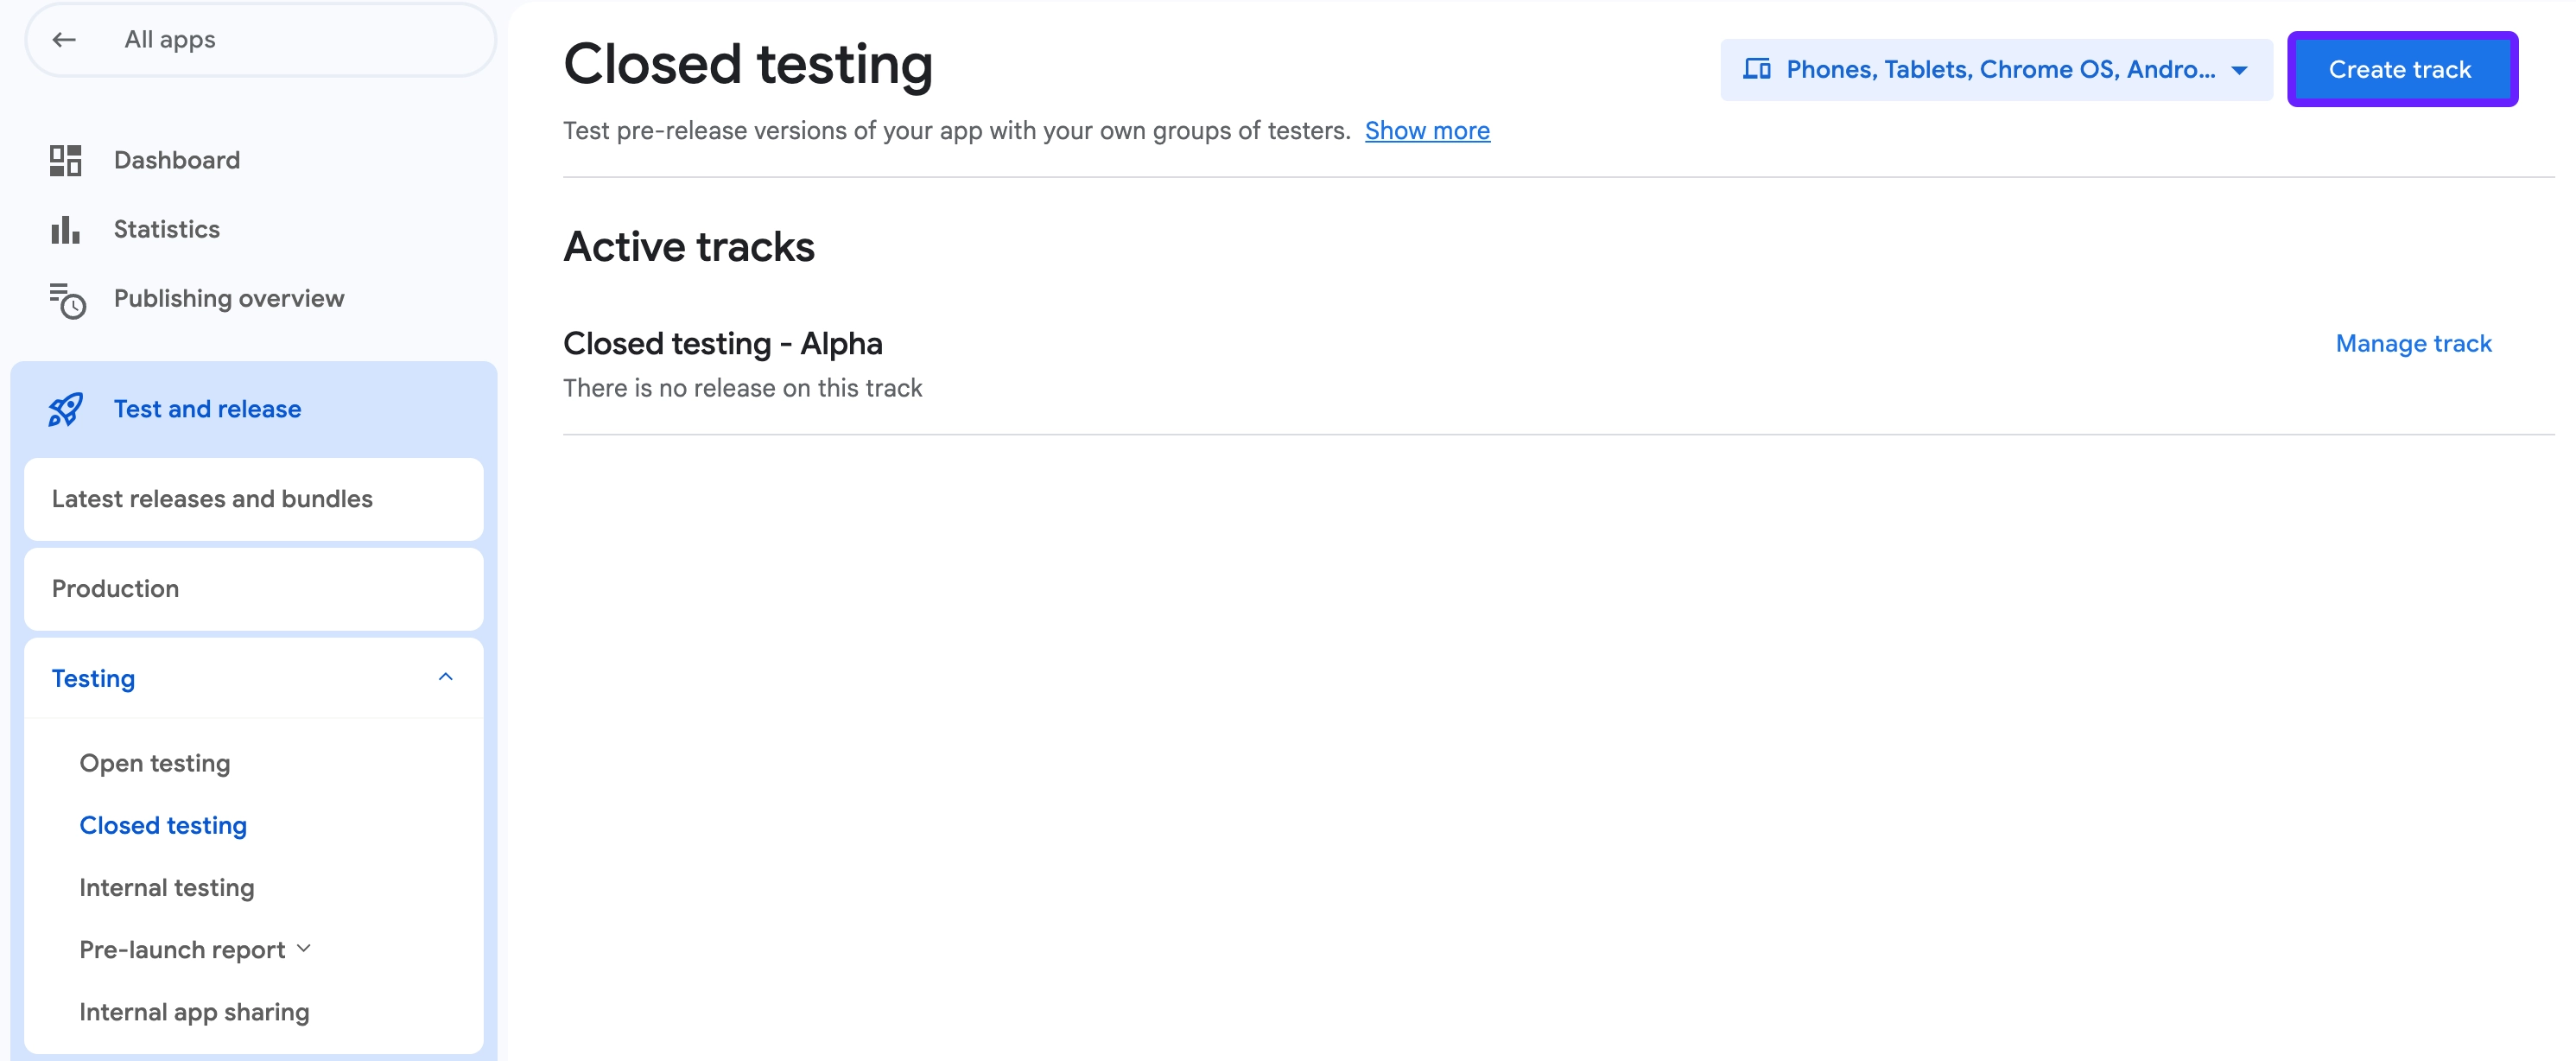
- Enter the closed testing track name and click Create track.
- Add a testers list to the track.
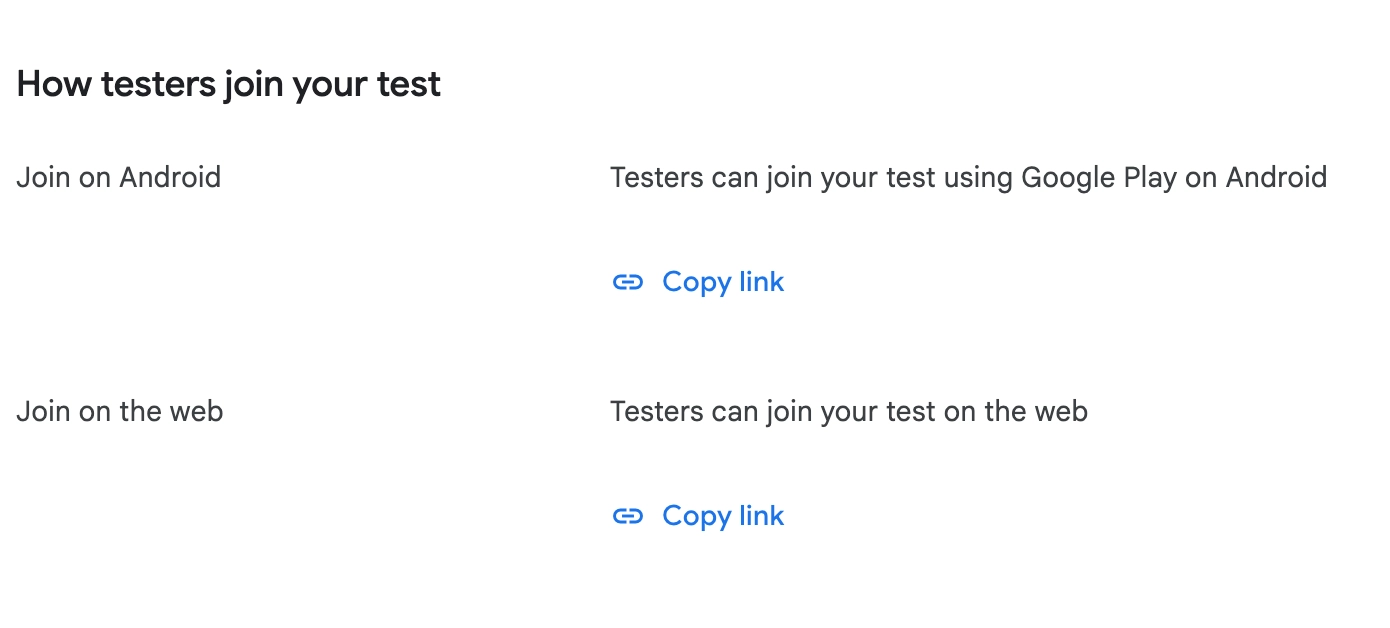
- From the How testers join your test section, copy the link and send it to the device logged into the test account. Open the link on your testing device to make the user a tester.
Consider the following to ensure successful testing:
- Opening the opt-in URL marks your Play account for testing. If you don’t complete this step, products will not load.
- Often developers will use a different application ID for their test builds. This will cause you problems since Google Play Services uses the application ID to find your in-app purchases.
- There are cases where a test user may be allowed to purchase consumables, but not subscriptions, if the test device does not have a PIN. This may manifest in a cryptic “Something went wrong” message. Make sure that the test device has a PIN, and that the device is logged into Google Play Store.
4. Upload a signed APK to the closed track
Generate a signed APK or use Android App Bundle to upload a signed APK to the closed track you just created. You don’t even need to roll out the release. Just upload the APK. You can find more information about this in this support article.
If your app is new, you may need to make it available in your country or region. To do so, go to Testing > Closed testing, click on your test track, and go to Countries/regions to add the desired countries and regions.
5. Test in-app purchases
After you’ve uploaded the APK, wait a few minutes for the release to process. Then, open your testing device and sign in with the email account you added to the Testers list. You can then test in-app purchases as you would on a production app.
Read more
Read the following resources to learn more about testing in-app purchases in Android apps: