Enable purchases
Install agent tools
Run the whole Adapty SDK integration from your AI coding tool. Learn more
Installs into any agent that supports skills. To update later, run npx skills update.
After installing, run the skill in your project:
To proceed with this guide, make sure you’ve completed the store integration and created at least one product as described in the previous guide on adding products.
Now that you have products, you need a way to show them to users. Adapty gives you three options:
- Flow Builder (recommended): No-code visual editor for the full purchase journey. The Adapty SDK renders the result natively, so there’s no UI code to write.
- Manual paywall: You create a paywall, attach products to it, and render the UI yourself in app code.
- Adapty Paywall Builder (Legacy): No-code paywall editor.
Both options end the same way: you attach what you built to a placement. The placement is what your app calls at runtime to fetch the right content for the right user.
The Flow Builder currently supports iOS, Android, React Native, Flutter, and Capacitor SDK v4 and later. Support for other platforms is coming soon.
A flow is one or more screens with products embedded directly. You design it in the Flow Builder — no code required.
The Adapty SDK renders flows natively on each platform. Your app calls getFlow, and the SDK presents the screens, handles purchases, and reports events. No separate UI code, no paywall to maintain alongside.
1. Build the flow
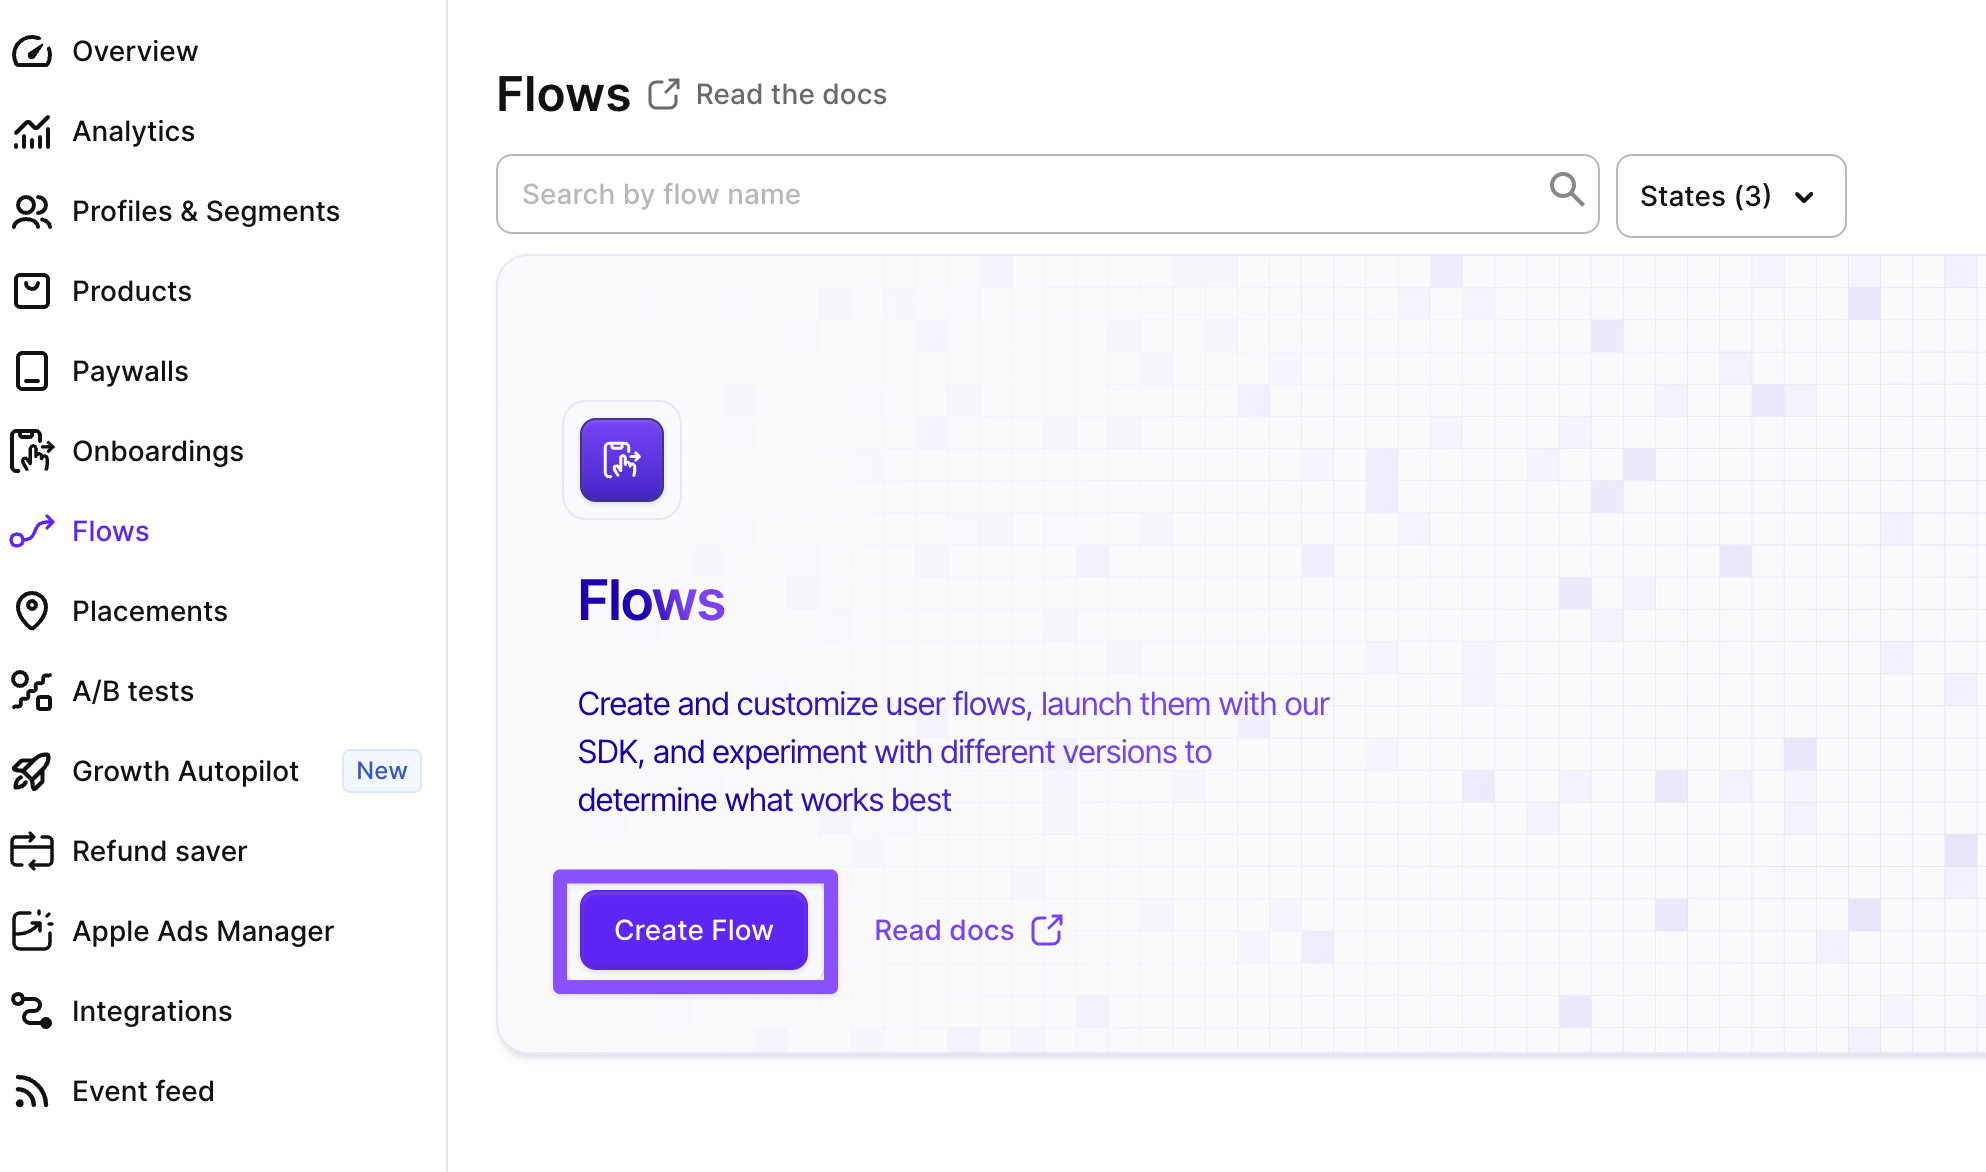
- Go to Flows in the Adapty main menu.
- Click Create flow and design your flow.
Learn more about the Adapty Flow Builder.
The template guides below walk through the most common patterns step by step:
Create a basic paywall screen
Step-by-step guide to building a standard paywall screen in the Flow Builder.
Show all plans in a bottom sheet
Build a hero paywall with a single CTA, a 'Show all plans' link, and a bottom sheet that reveals the full product list.
Create a paywall with tabs
Build a paywall screen with two tabs that switch between different feature lists, product groups, and purchase actions.
Show different features per product
Show a different feature list depending on which product the user selects, using conditional visibility.
Build a personalized onboarding flow
Walk through the full process of building a multi-screen onboarding flow — screens, content, navigation, and conditional branching — using a worked example.
Once your flow is saved and published, move on to wiring it into a placement.
Don’t forget to publish the flow! If you don’t publish it, you can’t add it to a placement.
2. Add the flow to a placement
Create a placement A placement is a specific point in your app where you show a flow, paywall, onboarding, or A/B test. Placements let you target specific audiences with your content. Learn more about placements. so your app can request the flow at runtime.
Let’s start with the most essential one — the onboarding placement. Later, you can add more meaningful placements throughout the user journey.
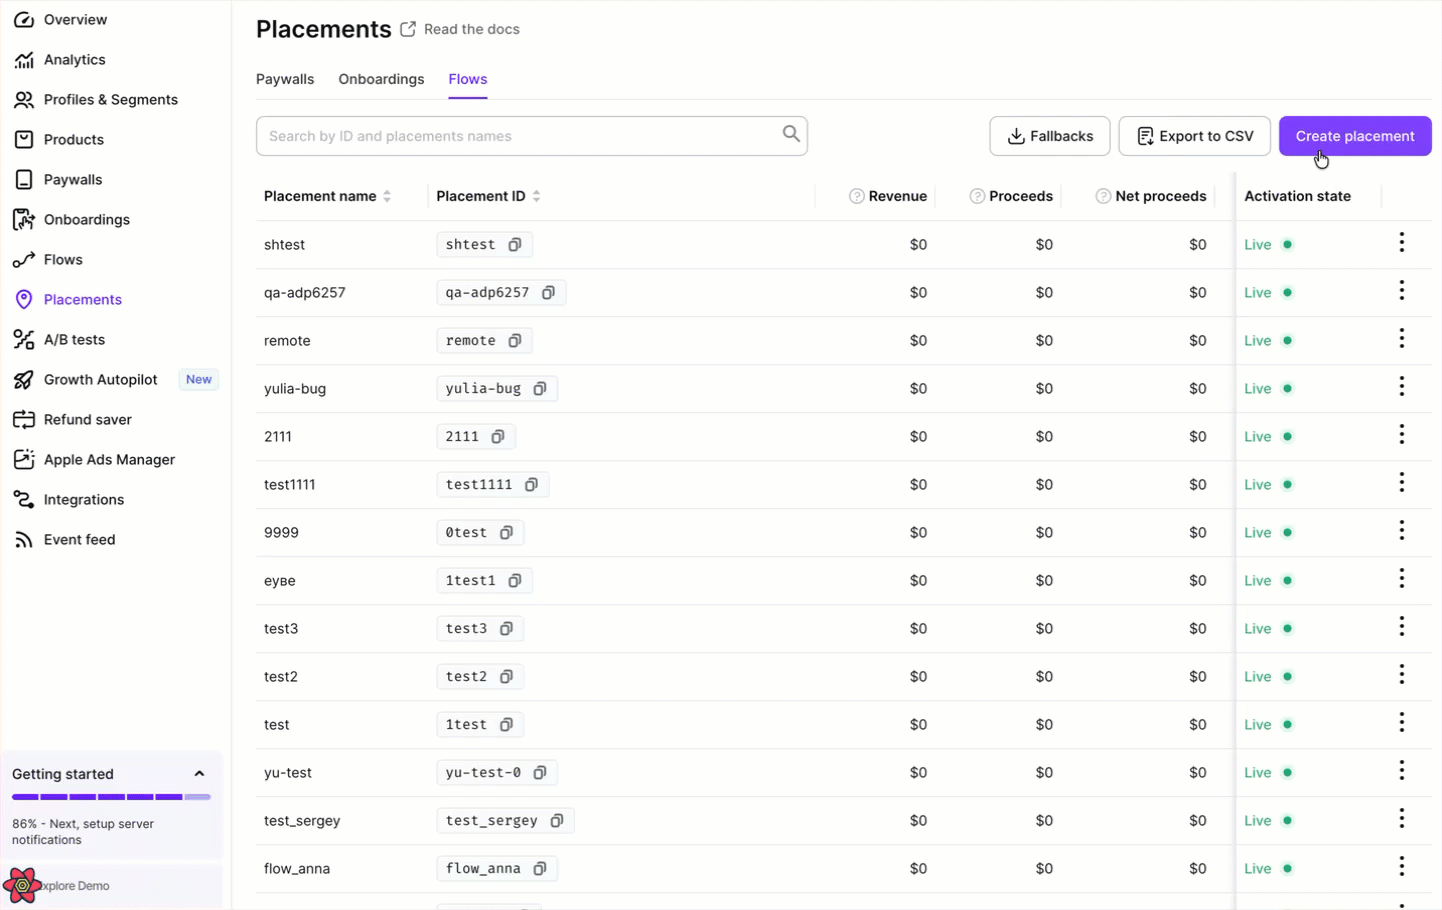
- Go to Placements in the Adapty main menu and switch to the Flows tab.
- Click Create placement.
- Enter a Placement name (e.g.,
mainoronboarding). This is an internal identifier in the Adapty Dashboard. - Enter a Placement ID. You’ll use this ID in the Adapty SDK to load the placement’s flow.
- Click Run flow and choose the flow you just built.
- Click Save & publish.
In your app code you hardcode only the placement IDs. Everything else — which flow runs, which products it sells, how it looks — is configured in the Adapty Dashboard and can be changed anytime without an app update.
A paywall is a remotely configured container for one or more products. Adapty serves the product list and an optional remote config JSON payload — your app code reads them and draws the UI.
Setting up Adapty programmatically? You can complete this step using the Developer CLI.
1. Create a paywall
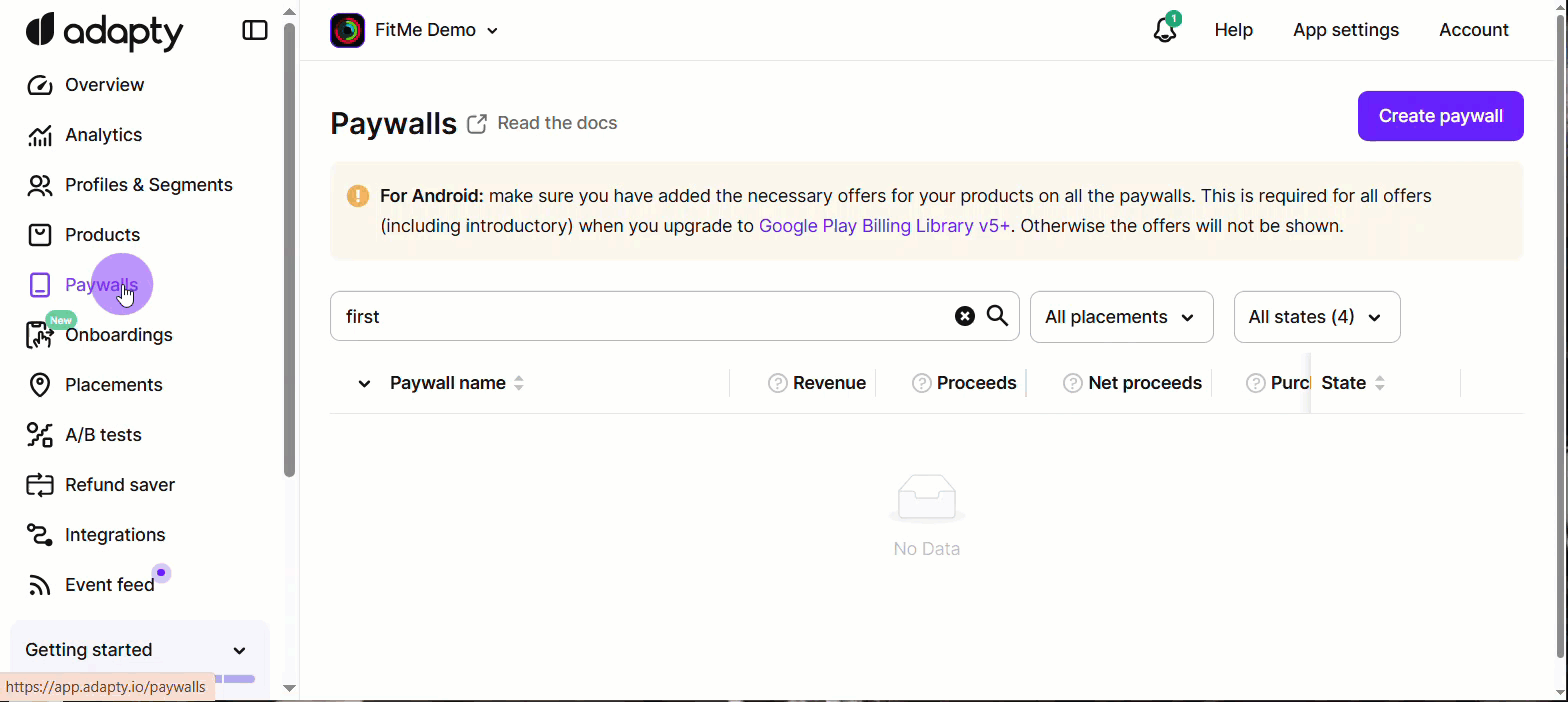
- Go to Paywalls in the Adapty main menu.
- Click Create paywall.
- Enter a Paywall name. This is an internal identifier in the Adapty Dashboard.
- Click Add product and pick the products to display on the paywall.
- (Optional) Open the Remote config tab and add any JSON payload your app needs (titles, copy, feature flags). See Design paywall with remote config for details.
- Click Create as a draft, then publish when ready.
You’ll render this paywall in your app code. implementing paywalls manually Follow the guide for your platform: iOS, Android, React Native, Flutter, Unity.
2. Add the paywall to a placement
Create a placement A placement is a specific point in your app where you show a flow, paywall, onboarding, or A/B test. Placements let you target specific audiences with your content. Learn more about placements. so your app can request the paywall at runtime.
Let’s start with the most essential one — the onboarding placement. Later, you can add more meaningful placements throughout the user journey.
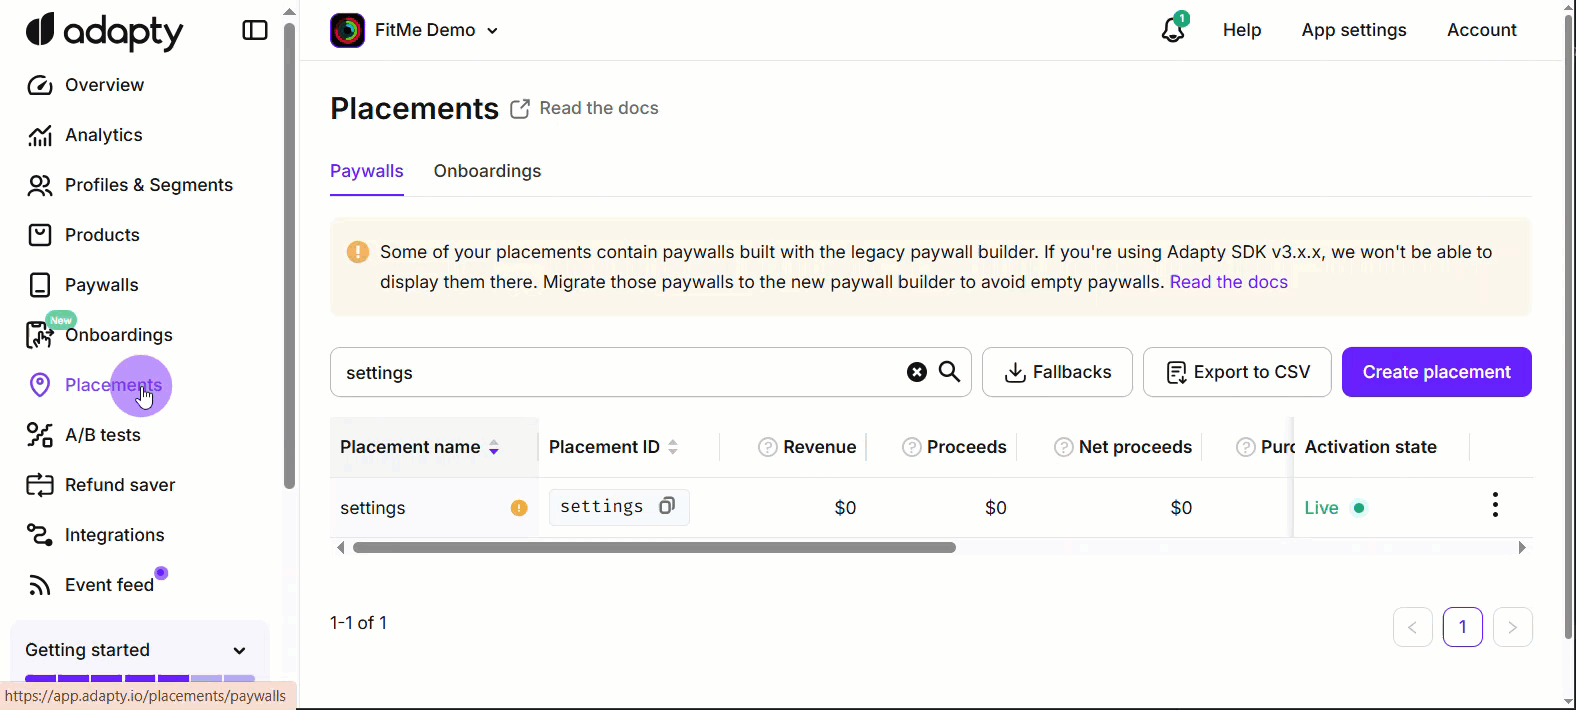
- Go to Placements in the Adapty main menu and switch to the Paywalls tab.
- Click Create placement.
- Enter a Placement name (e.g.,
mainoronboarding). This is an internal identifier in the Adapty Dashboard. - Enter a Placement ID. You’ll use this ID in the Adapty SDK to load the placement’s paywall.
- Click Run paywall and choose the paywall you just created.
- Click Save & publish.
In your app code you hardcode only the placement IDs. Everything else — which paywall runs, which products it sells, the remote config — is configured in the Adapty Dashboard and can be changed anytime without an app update.
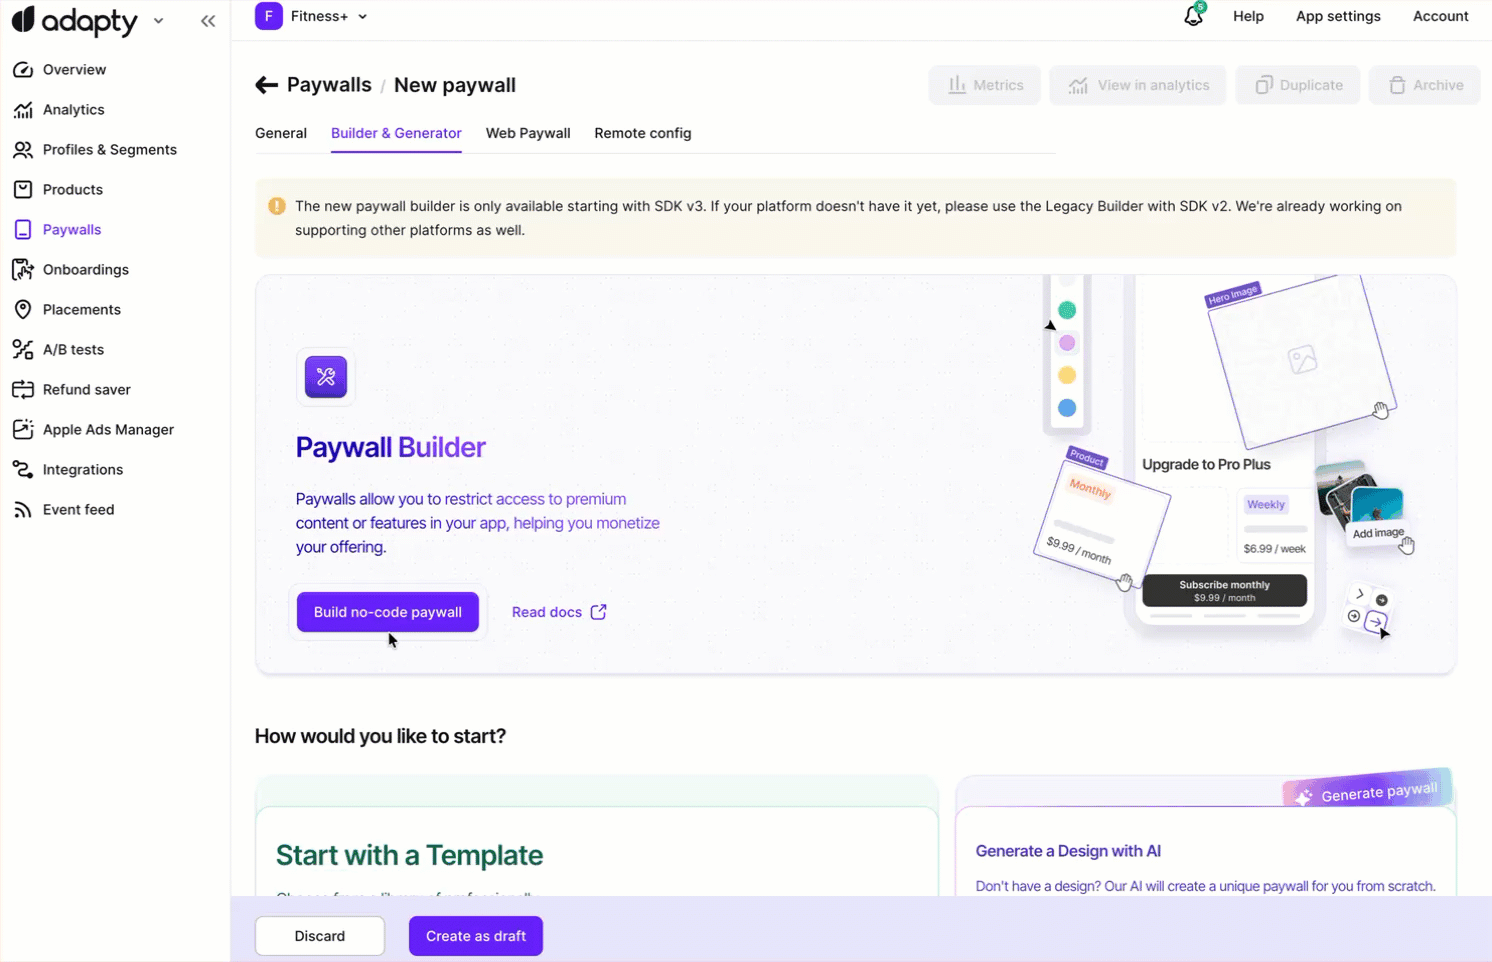
A paywall built in the Paywall Builder is a no-code screen with products embedded directly. The Adapty SDK renders it natively, so there’s no UI code to write.
The Paywall Builder is fully functional, but Adapty is no longer adding features or shipping updates for it. For new projects, use the Flow Builder instead.
1. Build the paywall
- Go to Paywalls in the Adapty main menu.
- Click Create paywall.
- Enter a Paywall name. This is an internal identifier in the Adapty Dashboard.
- Click Add product and pick the products to display on the paywall.
- Open the Builder & Generator tab. Create a paywall from a template or generate it using AI.
- Switch on the Show on device toggle so the SDK can render it.
2. Add the paywall to a placement
Create a placement A placement is a specific point in your app where you show a flow, paywall, onboarding, or A/B test. Placements let you target specific audiences with your content. Learn more about placements. so your app can request the paywall at runtime.
- Go to Placements in the Adapty main menu and switch to the Paywalls tab.
- Click Create placement.
- Enter a Placement name (e.g.,
mainoronboarding). This is an internal identifier in the Adapty Dashboard. - Enter a Placement ID. You’ll use this ID in the Adapty SDK to load the placement’s paywall.
- Click Run paywall and choose the paywall you built.
- Click Save & publish.
In your app code you hardcode only the placement IDs. Everything else — which paywall runs, which products it sells, how it looks — is configured in the Adapty Dashboard and can be changed anytime without an app update.
Next steps
You now have something for the SDK to deliver. Next, integrate the Adapty SDK into your app and start fetching the placement.