Target onboardings to different user groups
You can display different onboarding flows based on user attributes: acquisition source, campaign, geography, device type, lifecycle state, or user intent. Matching onboarding content to specific user groups improves activation rates and early engagement. The setup involves both developer work and dashboard configuration.
Before you start
- SDK version: Your app must use Adapty SDK v3.8.0+ (iOS, Android, React Native, Flutter), v3.14.0+ (Unity), or v3.15.0+ (Kotlin Multiplatform, Capacitor). See Onboardings for details.
- Onboardings: Create at least two onboardings in Adapty before starting — one default and one per segment. See Create onboarding.
- Attribution tools: If your app uses AppsFlyer, Adjust, Branch, or another attribution integration, campaign and source data may already be available as user attributes in Adapty. You can use this data directly in segments — skip to Step 2.
Step 1. Assign custom attributes to users (Developer)
Call updateProfile early in the user’s session, before the onboarding is displayed. The attribute must be available when Adapty evaluates which onboarding to show.
For available attribute types and key/value limits, see the set user attributes guide for your platform: iOS | Android | React Native | Flutter | Unity | Kotlin Multiplatform | Capacitor
Step 2. Add users to segments (Dashboard)
Group users by the assigned attributes into segments:
- In the dashboard, go to Profiles & Segments and switch to the Segments tab. There, click Create segment.
- Fill in the segment name and description.
- Click Add users attributes and select an attribute from the list.
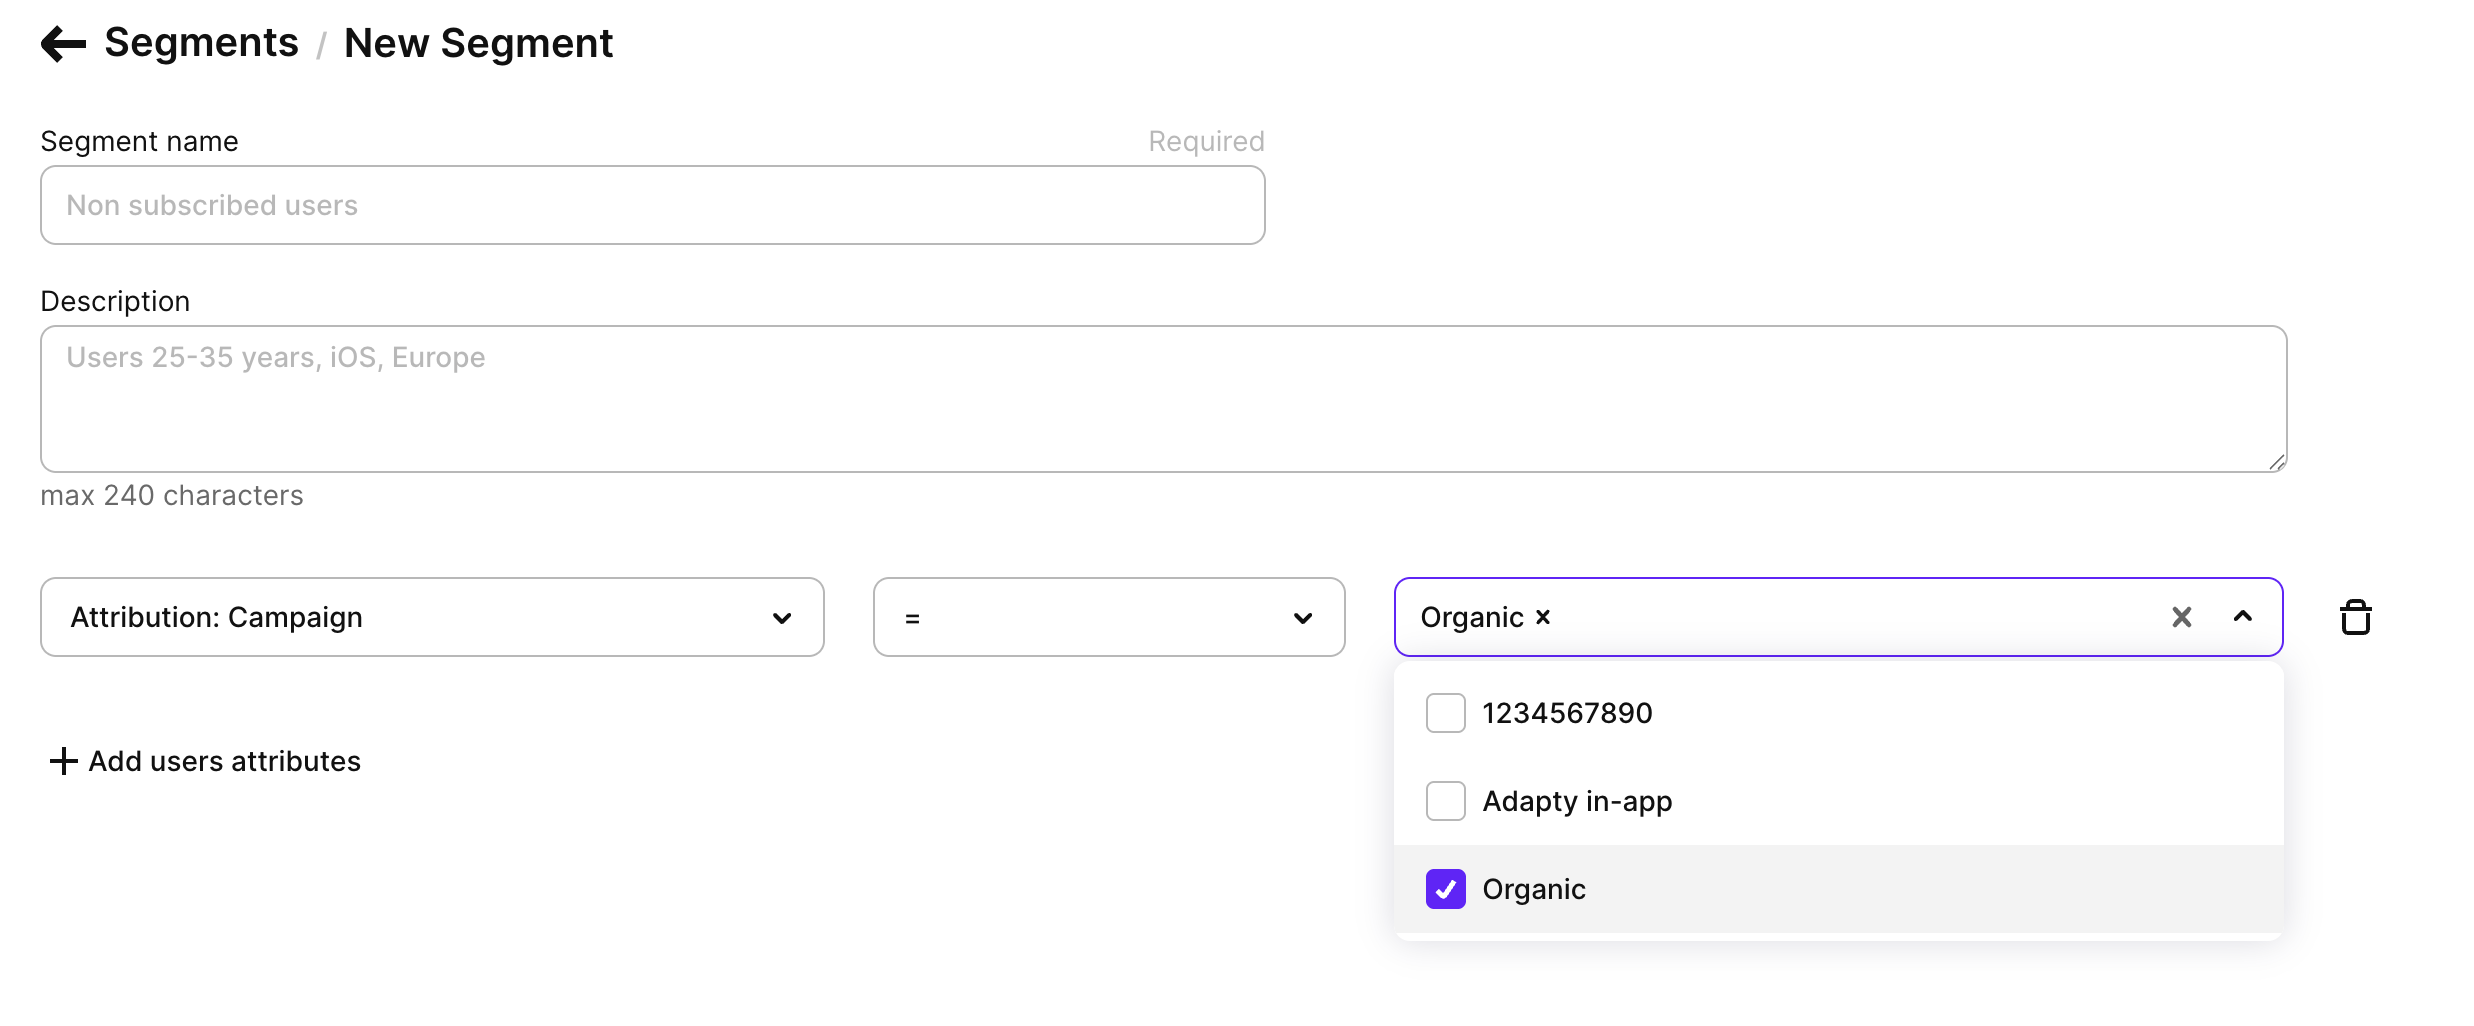
- Create one segment for each attribute you plan to use.
For a custom attribute to appear in the list, it must be assigned to at least one profile. Add a custom attribute to any profile from the Adapty Dashboard to make it available in the list.
Step 3. Set up placement (Dashboard)
For Adapty to decide which onboarding to display, create a placement and add all the segments as audiences to it:
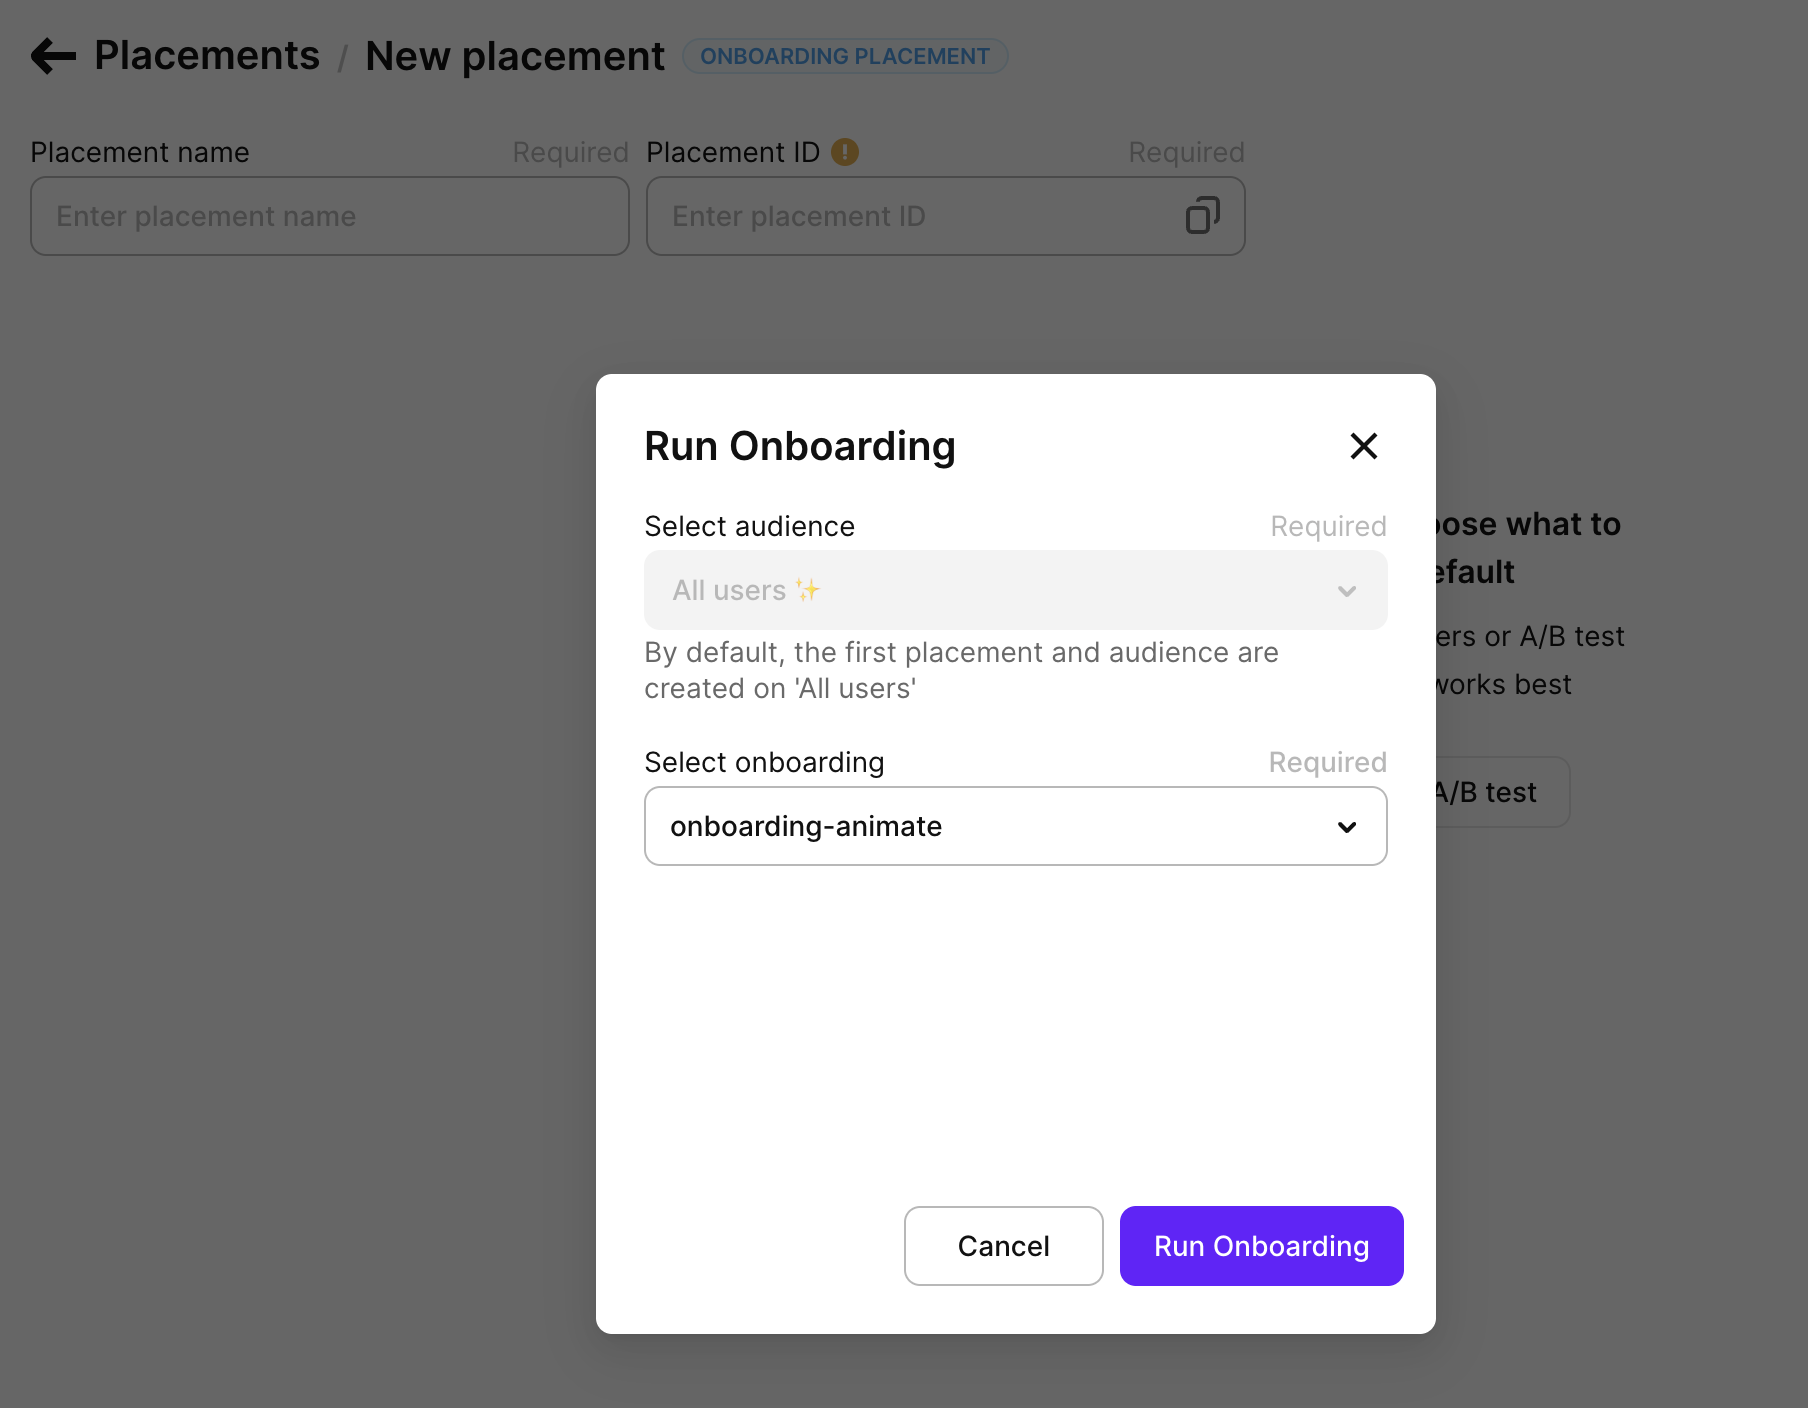
- In the dashboard, go to Placements, and switch to the Onboardings tab. There, click Create placement.
- Fill in the placement name and ID.
- Click Run onboarding. In the dialog, select the onboarding to show by default to users not included in any segment. Click Submit.
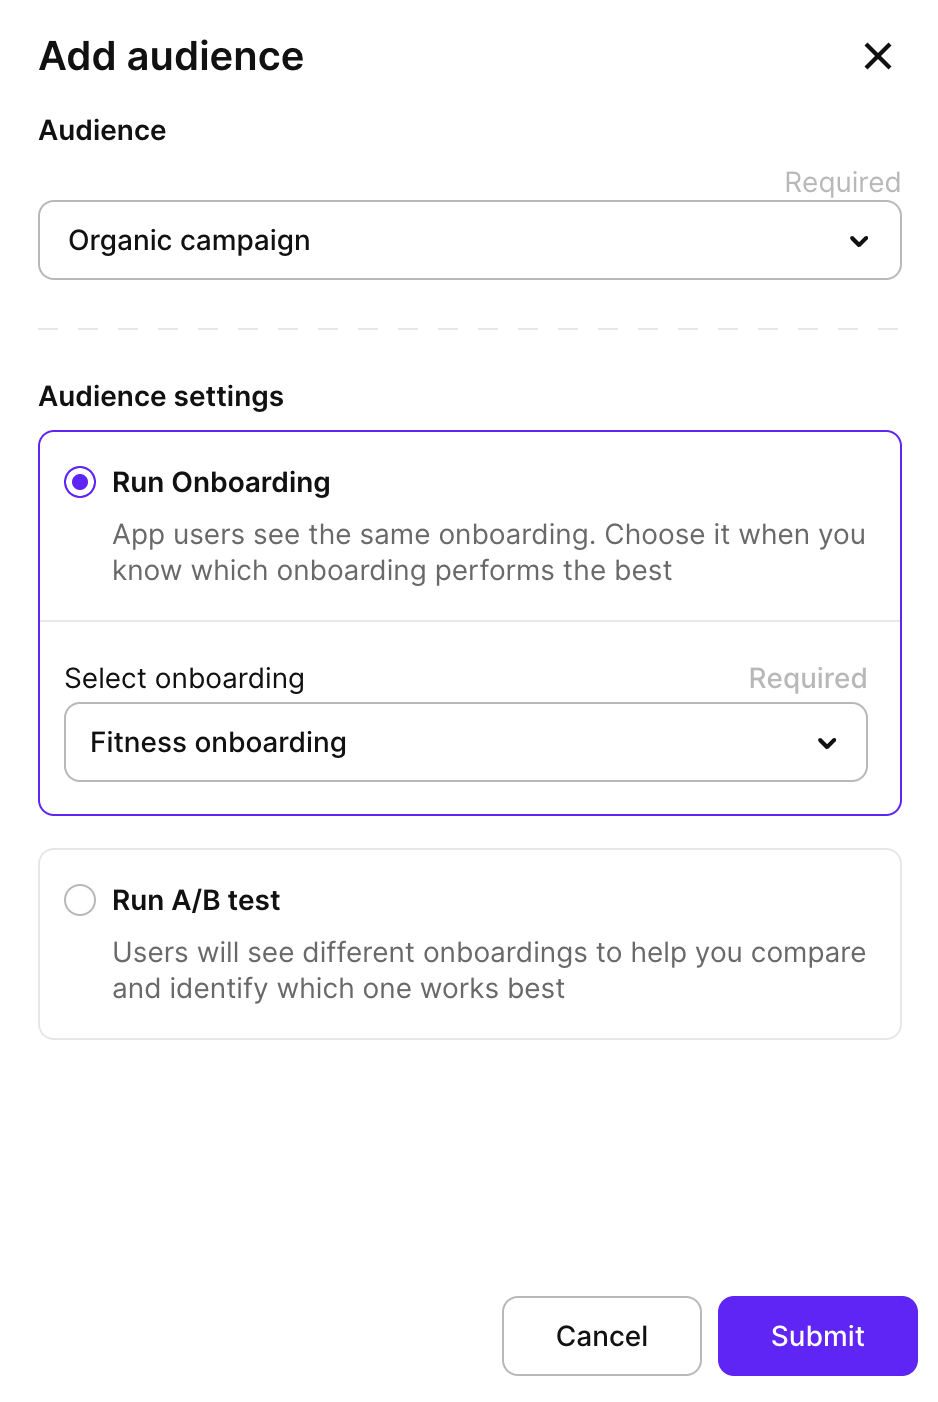
- At the top right, click Add audience. Select a segment and the onboarding to display to users in that segment. Click Submit.
- Add audiences for all the segments and onboardings you need.
- Click Save & Publish to make this placement available to the Adapty SDK.
Step 4. Display onboardings (Developer)
Use the placement ID to retrieve and display onboardings in your app. Follow the platform-specific guide: iOS | Android | React Native | Flutter | Unity | Kotlin Multiplatform | Capacitor
To verify targeting is working: use a test user profile with a custom attribute assigned and confirm the correct onboarding is displayed. In the Adapty Dashboard, check Profiles & Segments to confirm the user appears in the expected segment.