Buttons in the Flow builder
This section describes the new Flow Builder, which works with Adapty SDKs version 4.0 or higher.
Buttons are the interactive elements in the Flow Builder that respond to user taps. Use them for:
- Purchase CTAs that connect to products and process transactions automatically
- Navigation — move users between screens (Next, Back, Close, Skip)
- Utility links — Restore Purchases, Terms of Service, and Privacy Policy
Place purchase CTAs, restore links, and legal links inside a Footer — it is pinned to the bottom of the screen and obscures the scrolling elements underneath.
Add buttons
To add any button:
- Click + and select Button.
- Select a button type.
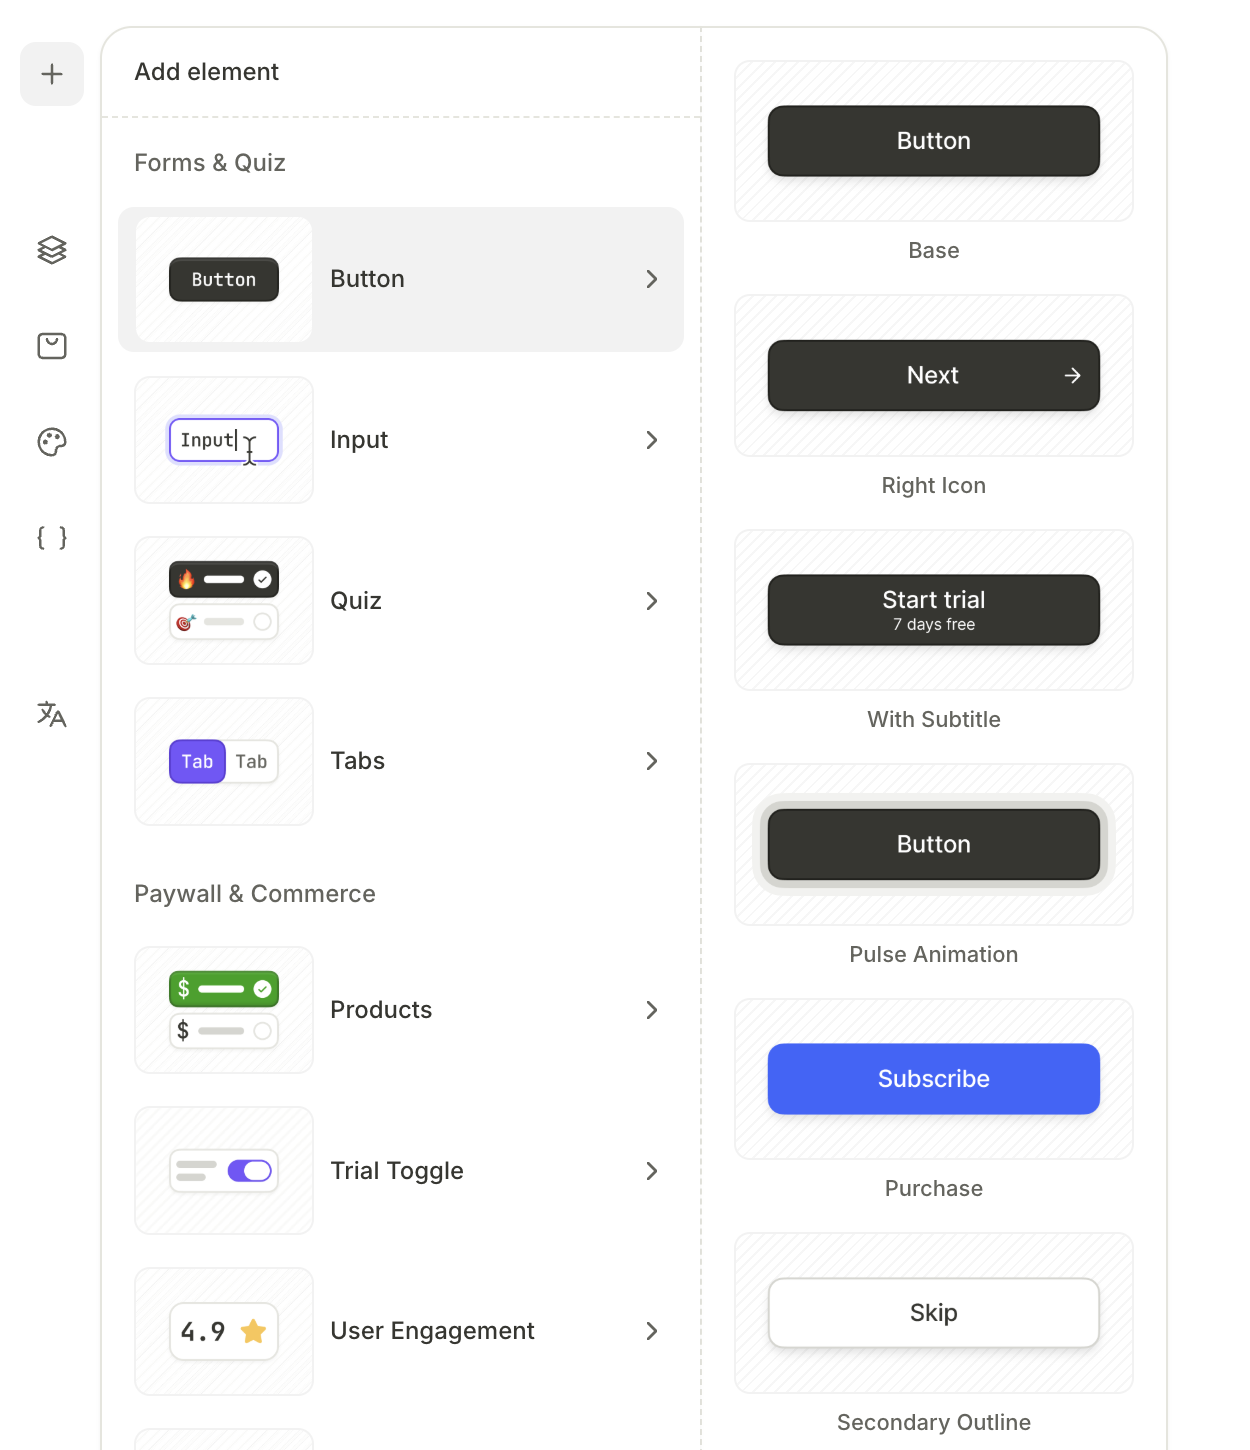
- Purchase buttons, links, and close buttons come with preconfigured actions. For links, configure URLs to navigate users to. For other button types, go to the Interactions panel. There, in the Button triggers section, set up actions that the button must perform.
- Configure the button design in the Design panel.
Button types
Purchase buttons
For purchase buttons to work, bind products to screens and add the Products element. See the guide.
A purchase button starts the in-app purchase for whichever product the user has selected on the screen. The SDK processes the transaction automatically, so you don’t need to handle purchases in the app code.
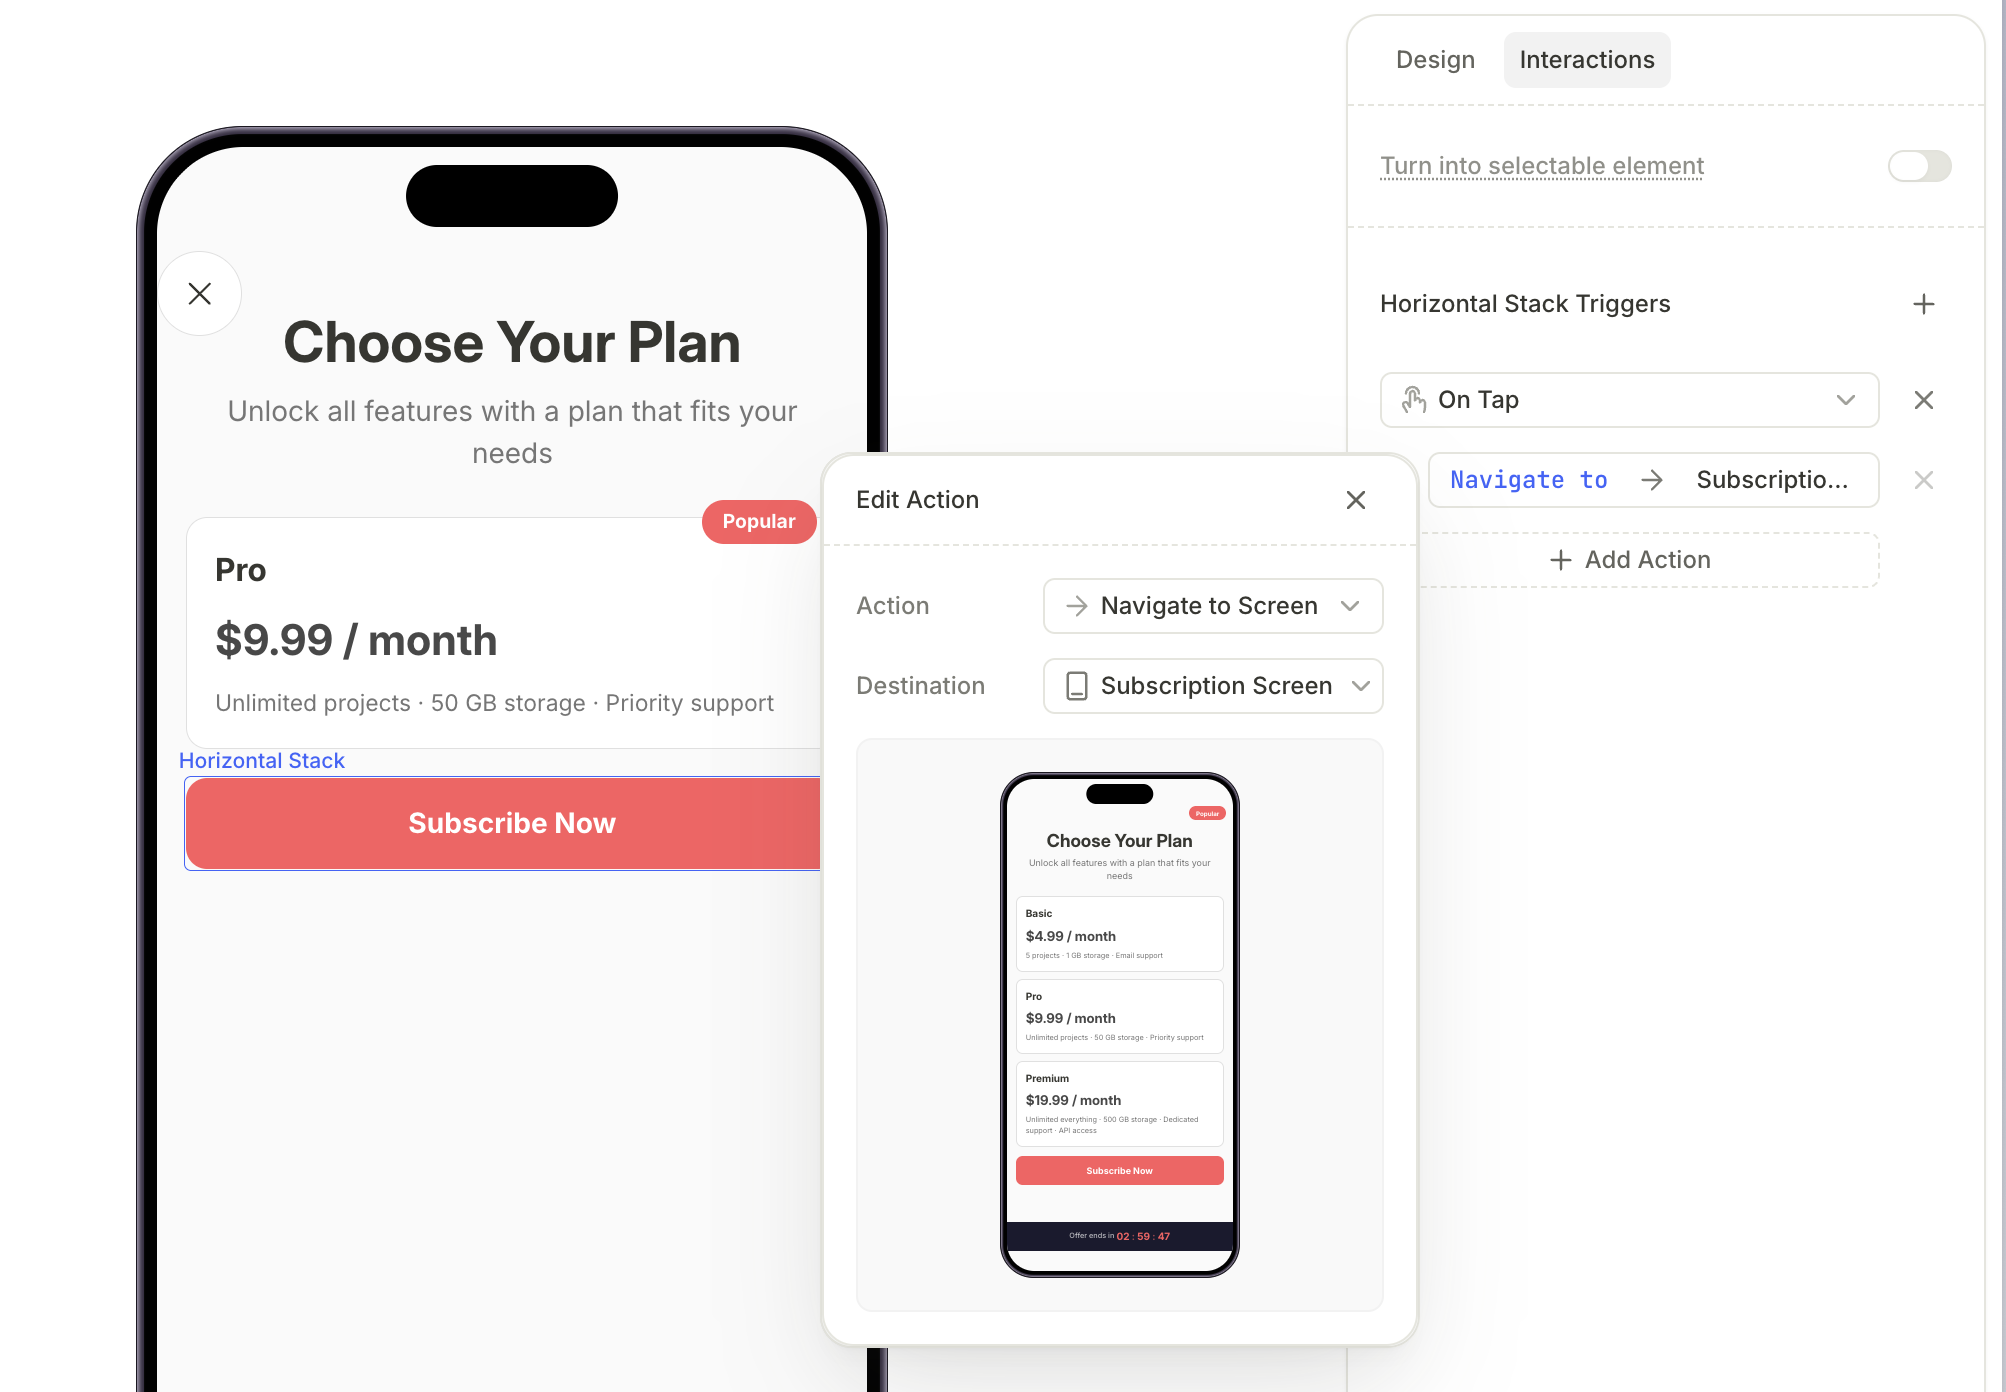
To add a purchase button:
- Click + and select Button, then choose a button preset.
- With the button selected, open the Interactions tab in the right panel.
- Click Add trigger > On tap, then click Add action.
- Set Action to Purchase and Product to
products.selectedProduct. Theproducts.selectedProductvariable always resolves to the currently selected product on the screen.
You can attract more attention to purchase buttons by animating them. The Paywall builder currently supports the Pulse animation type.
Configure the animation style in the Design panel.

Links
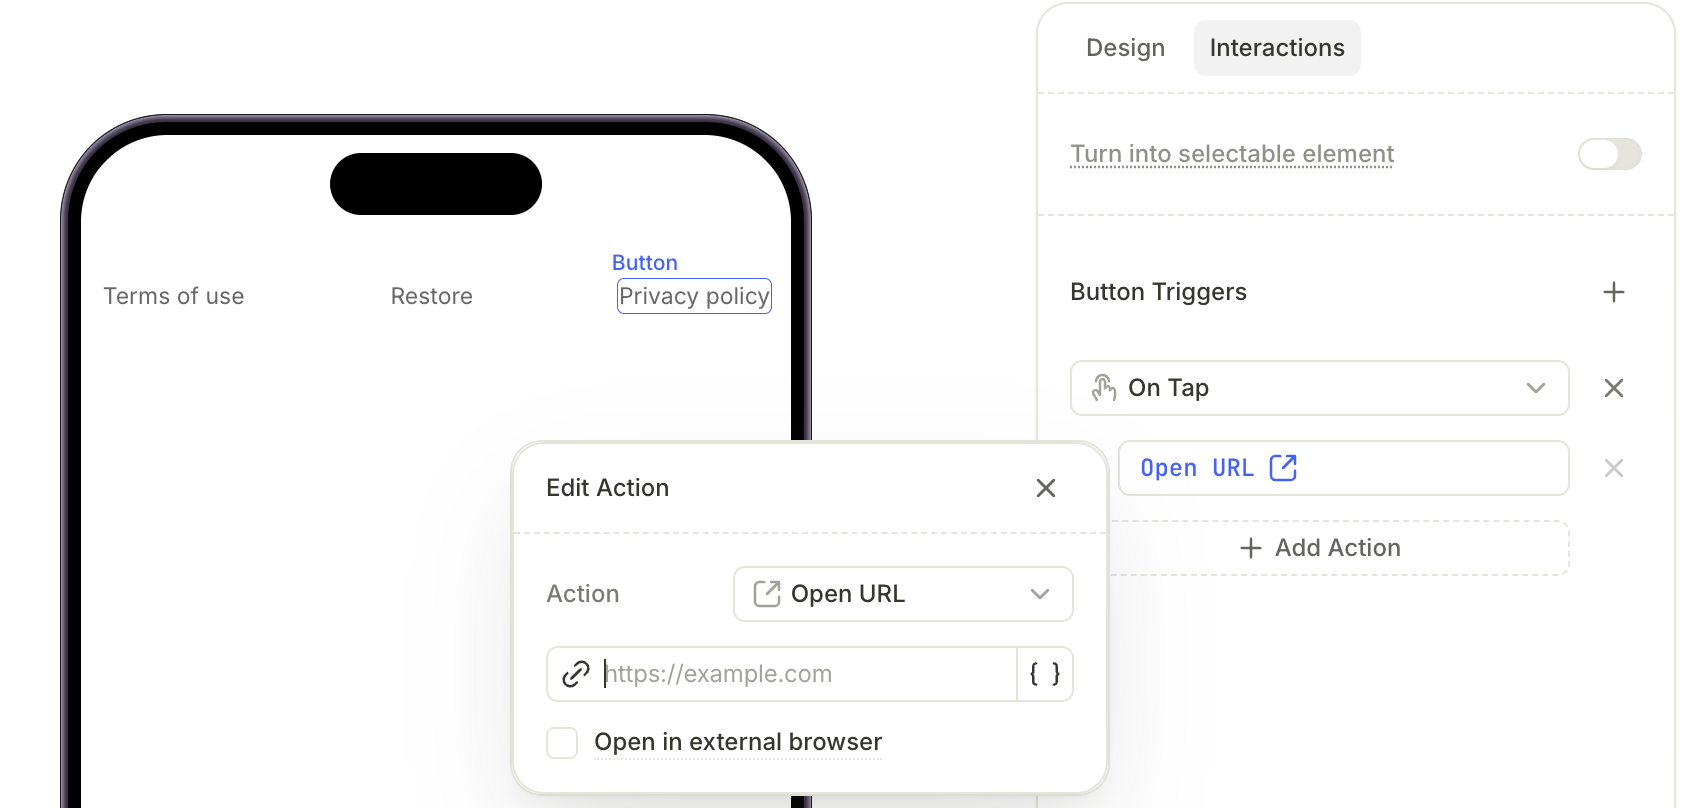
The Terms of Use and Privacy Policy buttons have a built-in Open URL action. Set the destination URL there. Empty Open URLs and inline links block previewing and publishing.
To comply with some store requirements, you can add links to:
- Terms of service
- Privacy policy
- Purchase restoration
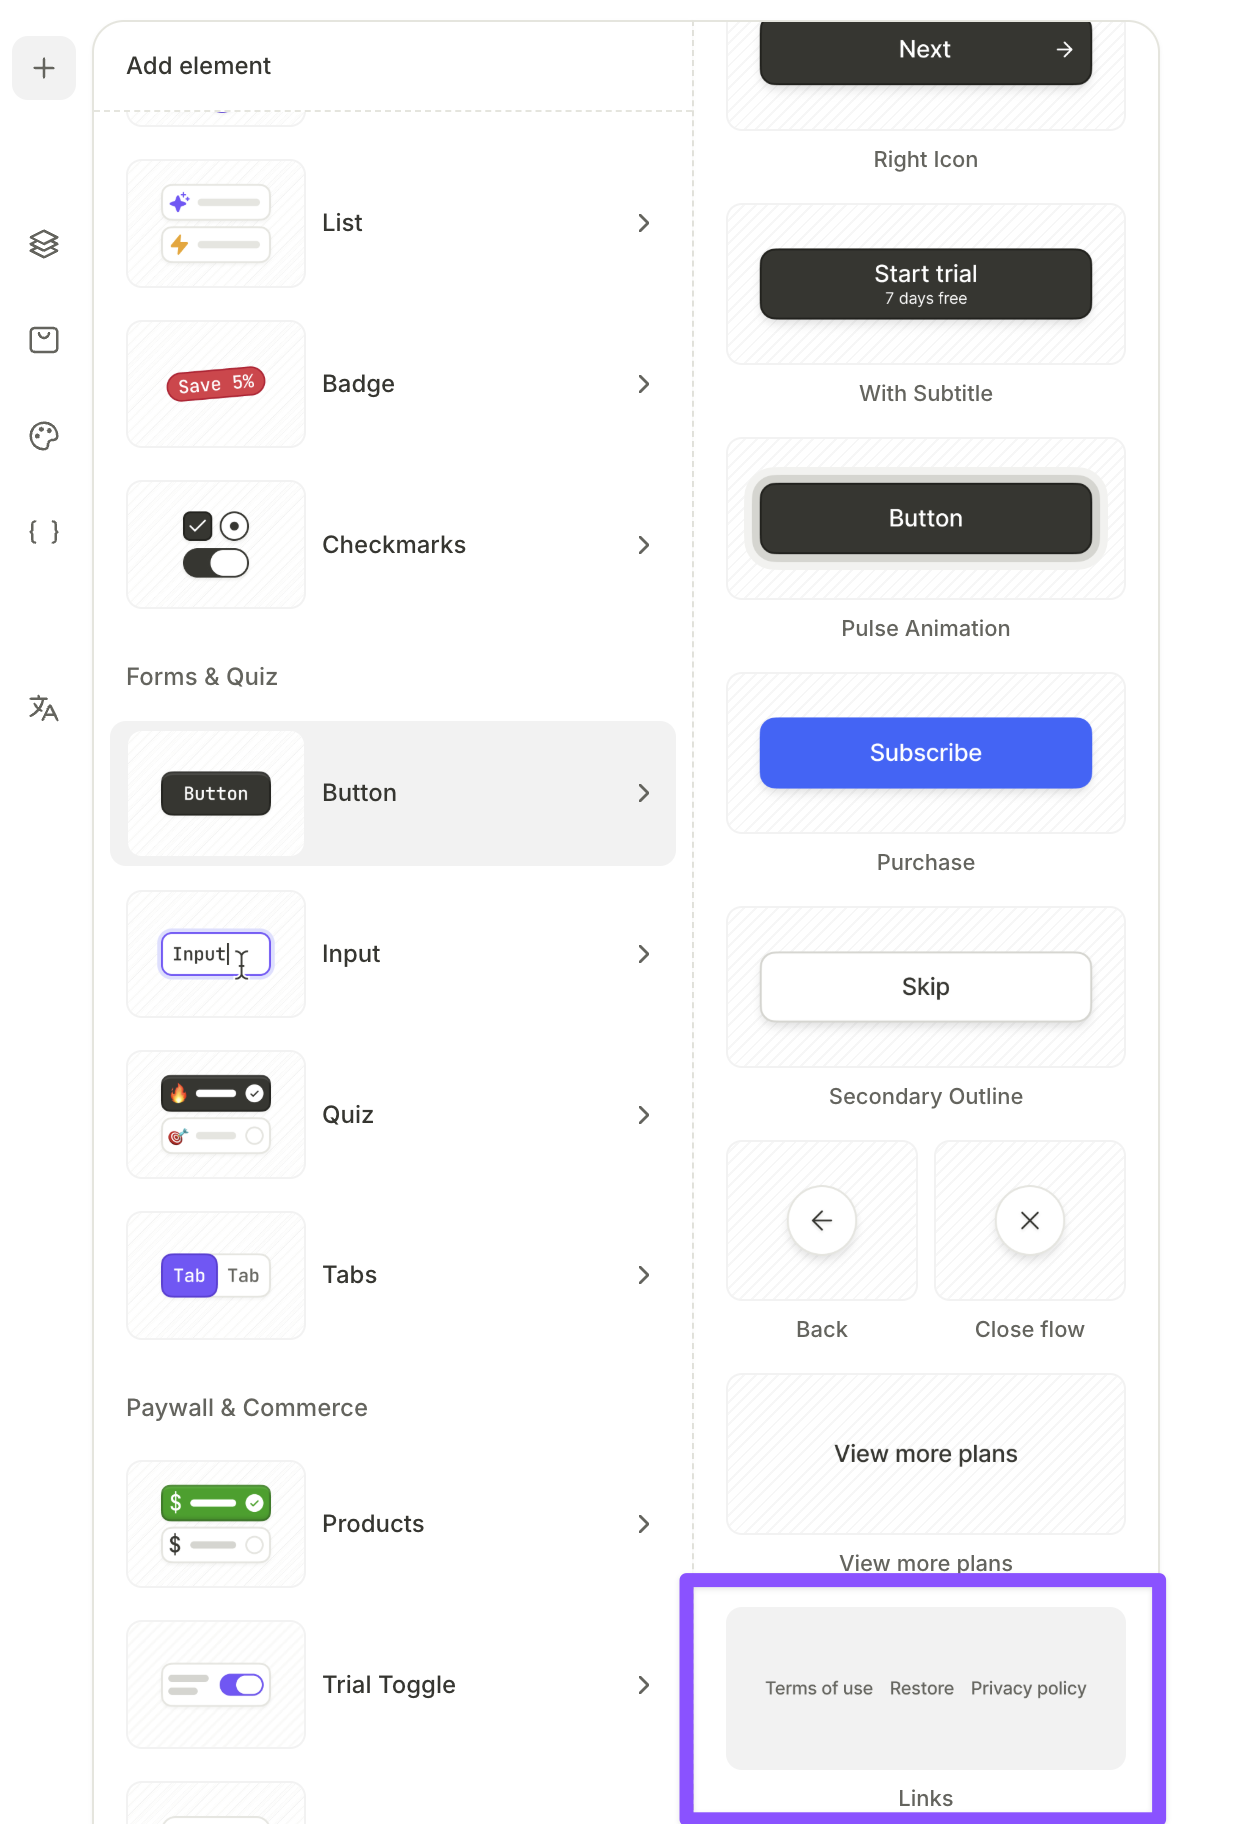
To add links:
- Click + and select Button > Links. This will add a row of inline buttons with pre-defined actions: restoring purchases or opening a URL. If you don’t need all of the included buttons, delete the unnecessary ones in the layers panel.
-
Now, set up the button actions:
- The Restore purchases button already handles purchase restorations.
- For each remaining link:
- Click the button to select it and switch to the Interactions tab on the right.
- Paste the URL to the field.
- By default, the URL opens in an in-app browser for seamless user experience. If you want to navigate to users to an external browser, select the Open in external browser checkbox.
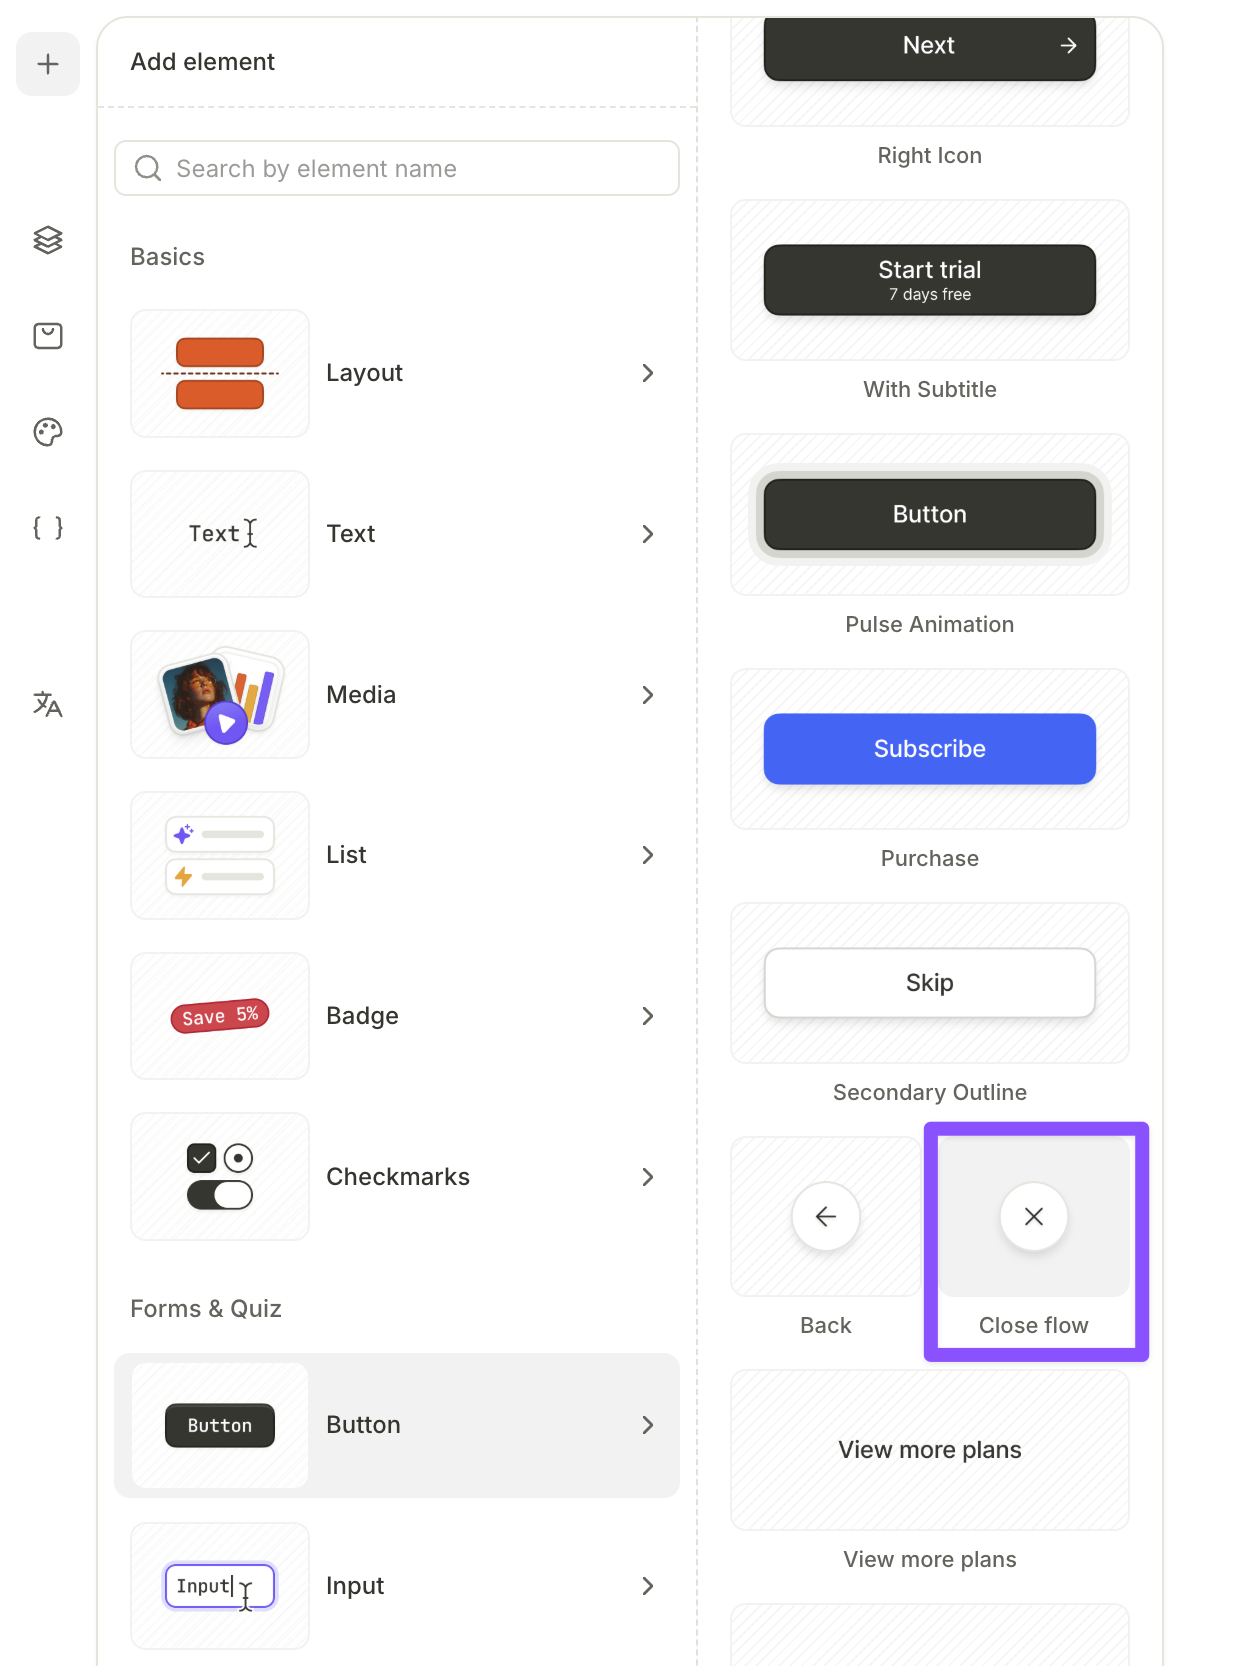
Close flow
The Close button closes the flow automatically.
To add a close button, click + and select Button > Close flow.
Use Absolute position to place your close button in the screen corner.
You can also configure any other button to close the flow using actions.
Custom buttons
Any button you can add can be configured to perform any action on tap:
- Navigate to the next screen
- Show alert
- Set variable
- Show or hide screen elements
- Open URLs
- Restore purchases
- Perform conditional actions