Variables
Variables let you display dynamic content in your flows — product pricing, offer details, and other data that updates based on each user’s context. Use them to control element visibility and personalize screen content.
To open the variable panel, click the { } icon in the left panel. The panel has three tabs:
- Custom: Variables you create and manage yourself.
- Product: Built-in variables that pull localized product and offer data from the store.
- Element: Variables bound to element states on the canvas.
Custom variables
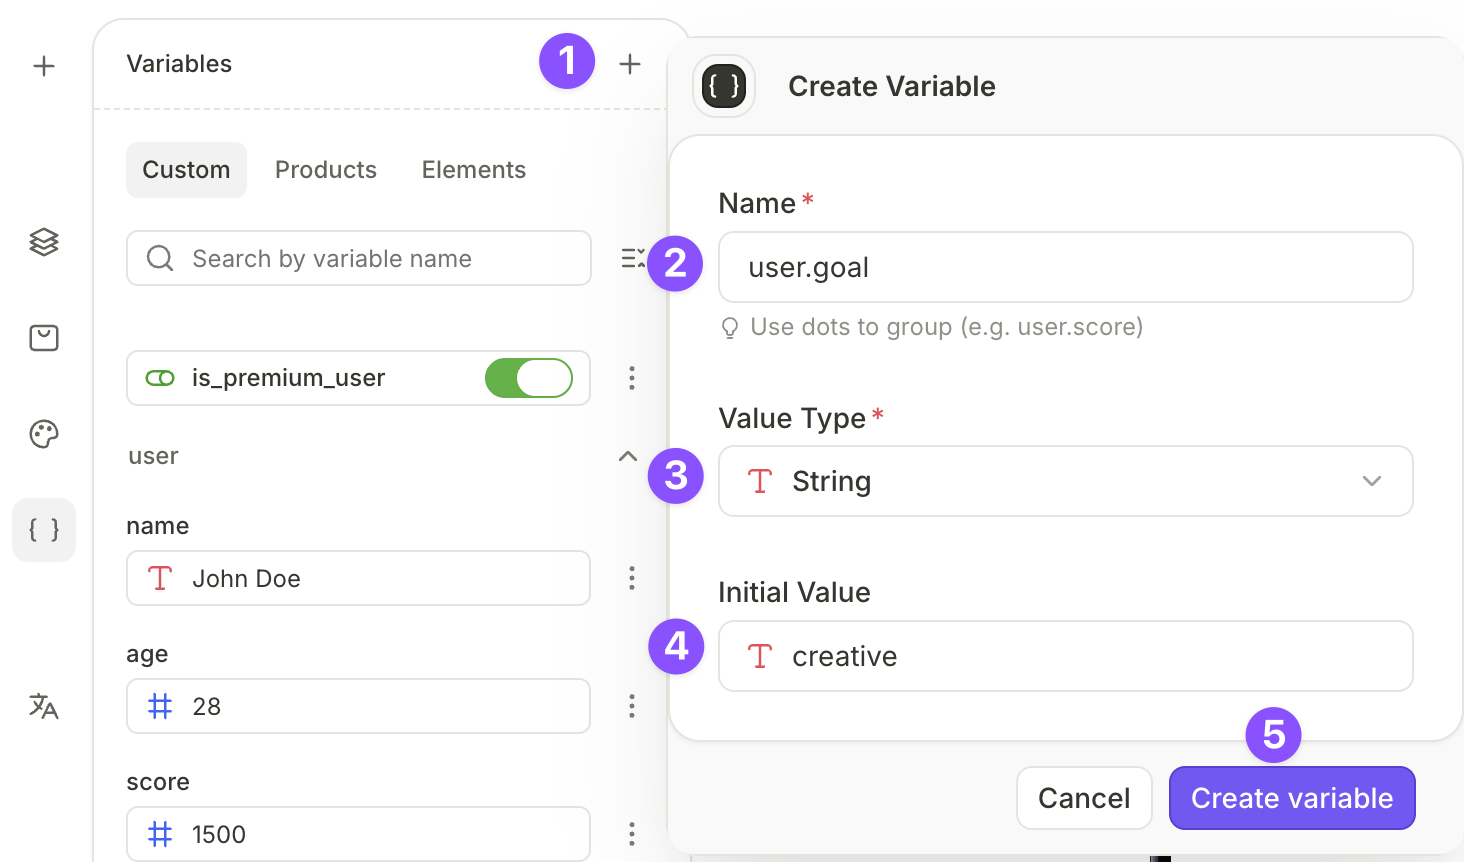
Create a custom variable
- In the variable panel, click +.
- Enter a name for the variable.
- Select a type: String, Number, or Boolean.
- Set an initial value. This is the value the variable holds when the flow starts.
- Click Create variable.
Use dots in names to group related variables — for example, user.score or user.goal.
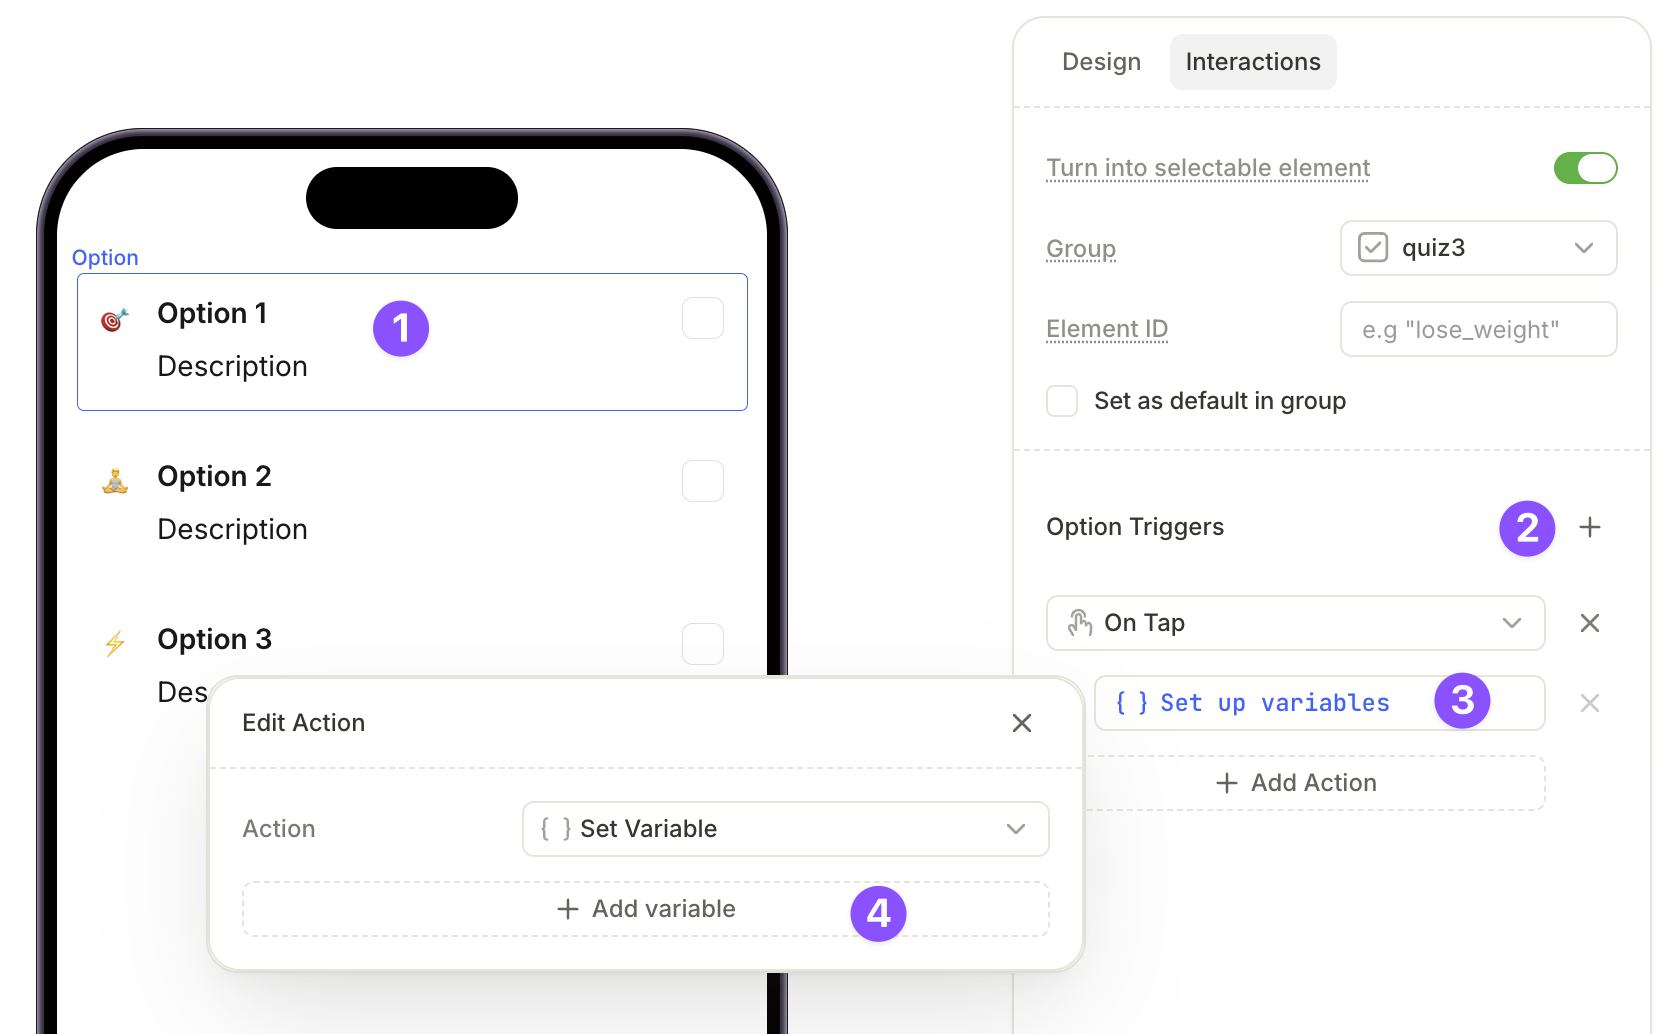
Update a variable via an interaction
See the Actions article for more details.
You can update a variable value at runtime by adding a Set up variables action to any element.
- Select an element on the canvas.
- In the Interactions tab, click Add trigger.
- Select On tap and click Add action. From the Action type dropdown, select Set up variables.
- Click Add variable. Select the variable and set the new value.
For example, you can assign a different value to user.goal based on which quiz answer a user selects, then use that variable to navigate them to a different screen.
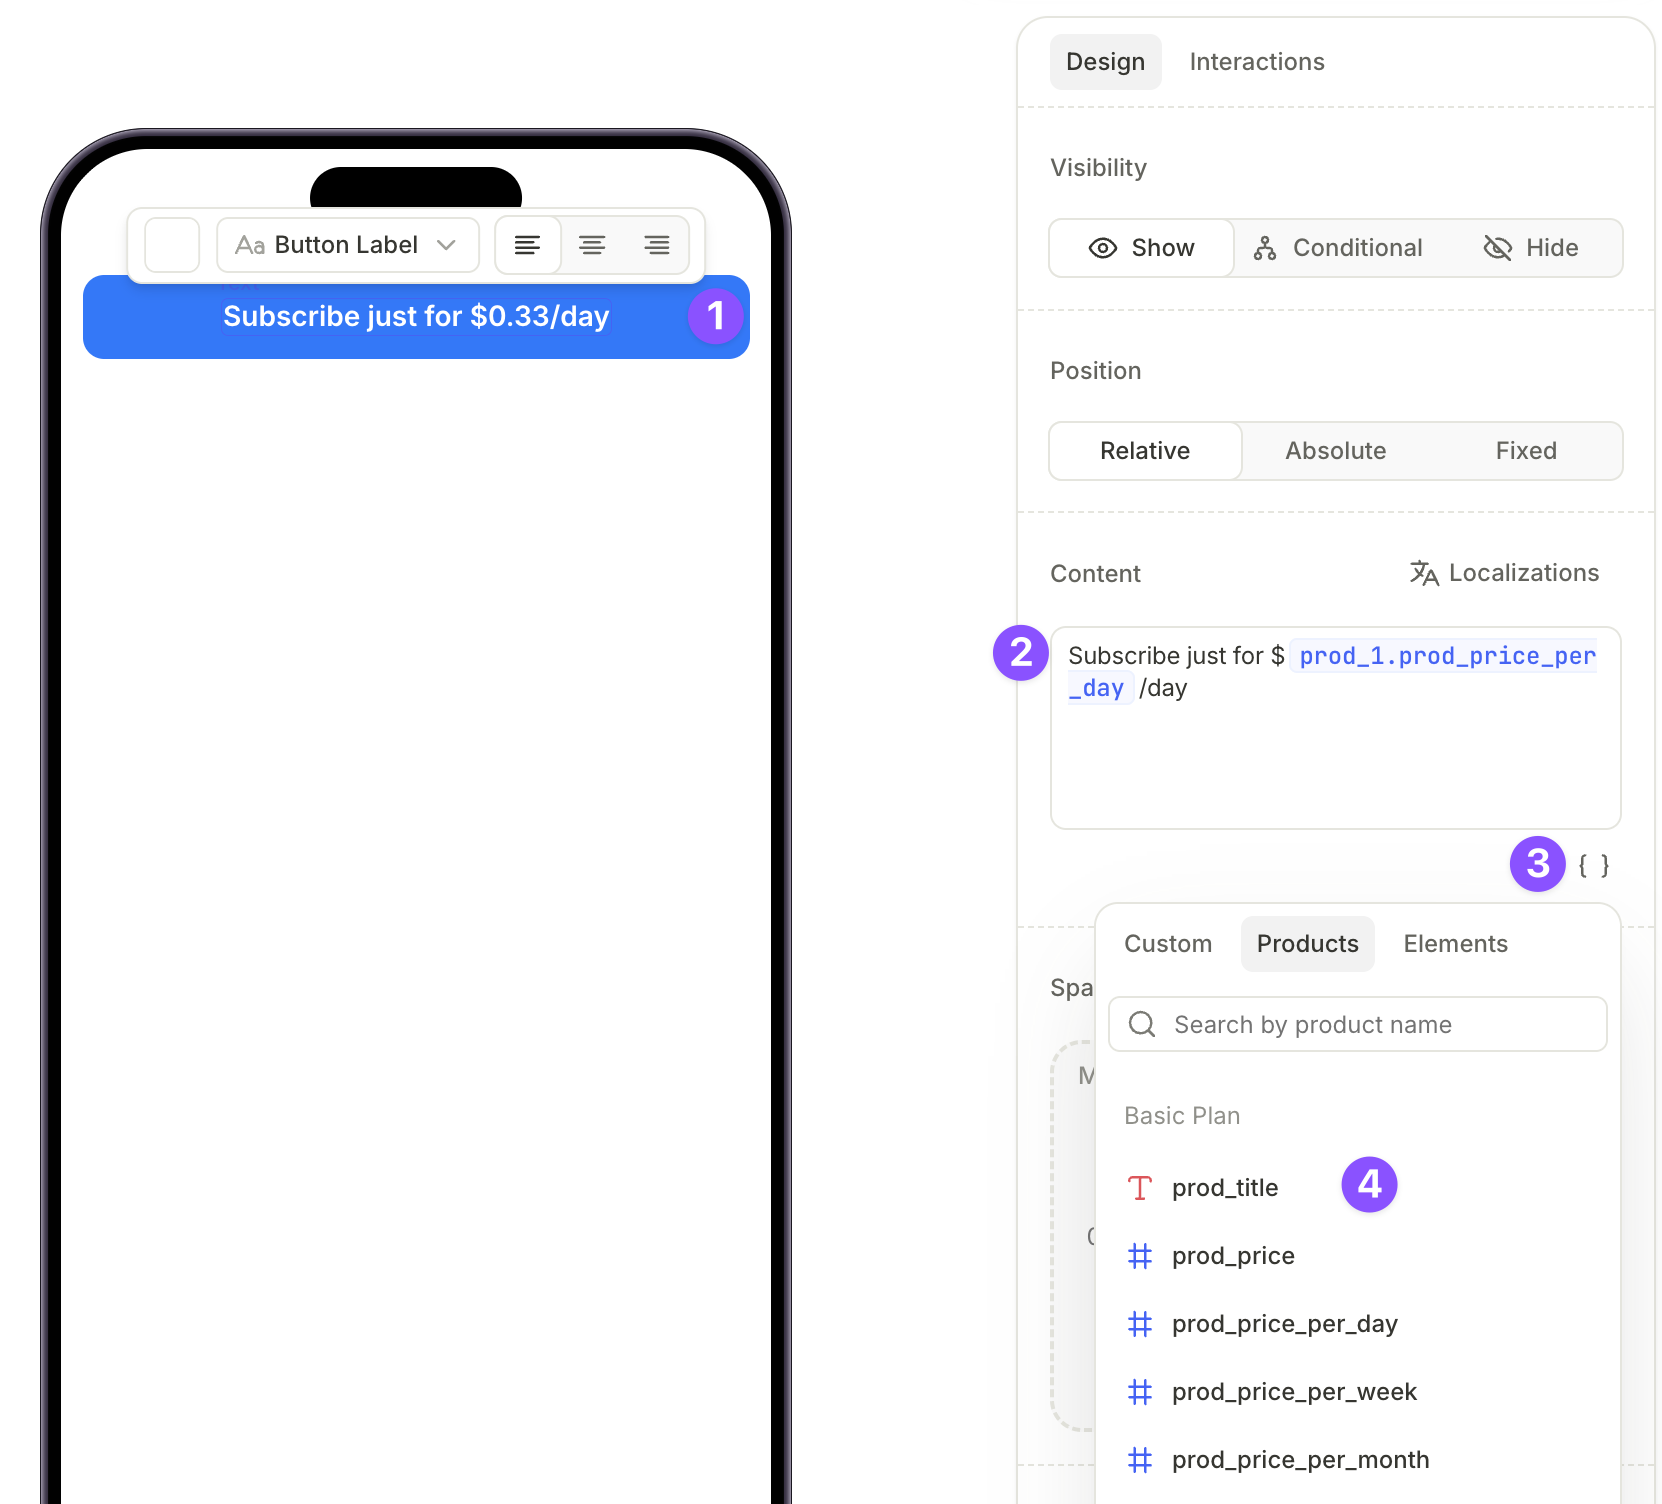
Product variables
Product variables pull localized data directly from the app stores. Use them in text fields to display localized prices, titles, and offer details, or in conditions to show or hide content based on offer eligibility.
| Variable | Description | Example |
|---|---|---|
prod_title | Localized title of the product | Premium Subscription |
prod_price | Localized price for one billing period | $9.99 |
prod_price_per_day | Subscription price divided by days in the billing period. Empty for non-subscriptions. | $0.33 |
prod_price_per_week | Subscription price divided by weeks in the billing period. Empty for non-subscriptions. | $2.33 |
prod_price_per_month | Subscription price adjusted to one month. Empty for non-subscriptions. | $9.99 |
prod_price_per_year | Subscription price adjusted to one year. Empty for non-subscriptions. | $119.88 |
offer_price | Localized price of an intro or promo offer. Empty if the user is not eligible for any offer. | $0.99 |
offer_billing_period | Localized billing period of an offer. Same as offer_full_duration for trial and pay-upfront offers. Empty if the user is not eligible. | 1 week |
offer_full_duration | Localized full duration of an offer. Empty if the user is not eligible. | 1 month |
is_free_trial | Returns true if the user is eligible for an offer with a free trial. | true |
is_pay_up_front | Returns true if the user is eligible for a pay-up-front offer. | true |
is_pay_as_you_go | Returns true if the user is eligible for a pay-as-you-go offer. | true |
Use is_free_trial, is_pay_up_front, and is_pay_as_you_go with conditional visibility to show or hide elements based on the offer a user is eligible for. For example, show a free-trial timeline only when is_free_trial is true.
Offer variable values depend on the offer type the user is eligible for. To illustrate, take a weekly subscription called “Premium Subscription” at $5, with three possible offers:
- Pay As You Go: First 3 weeks for $3 (billed weekly), then $5/week.
- Pay Up Front: First 3 weeks for $8 (billed immediately), then $5/week.
- Free Trial: First week free, then $5/week.
In this example, prod_title returns “Premium Subscription” and prod_price returns $5. The offer variable values depend on which offer the user is eligible for:
| Variable | Pay As You Go | Pay Upfront | Free Trial |
|---|---|---|---|
offer_price | $3 | $8 | $0 |
offer_billing_period | 1 week | 3 weeks | 1 week |
offer_full_duration | 3 weeks | 3 weeks | 1 week |
For Pay Upfront and Free Trial offers, offer_billing_period and offer_full_duration return the same value. For Pay As You Go, they differ because the billing period is one week but the full duration is three weeks.
To learn more about offers and how to configure them, see Offers.
Element variables
Element variables capture the user’s choices — what they selected in quizzes, which tab they are on, and whether the trial toggle is on.
Element variable types depend on the group:
- Single choice: Single choice quizzes and tabs:
selected_id: Element ID to use in conditionsselected_title: Element title to use in dynamic text
- Multi-choice: Multi-choice quizzes:
selected_ids: Element IDs to use in conditionsselected_titles: Element titles to use in dynamic text
- Toggle: Trial toggle:
is_selected: Boolean value
Common use cases include:
- Displaying different content based on whether the trial toggle is enabled.
- Navigating users to different screens based on their quiz answers
Use variables in text
To insert a variable into a text element:
- Select a text element on the canvas.
- In the Design tab, find the Content field and write your text.
- Click the { } icon in the field.
- Select a variable from the list.
You can also use variables in other elements:
- Use variables in links and alerts to make them dynamic
- Create dynamic conditions based on variables. For example, the condition can be
if experience.current > experience.target, navigate to...
Style variables
You can’t apply rich text formatting to a variable on its own. Selecting a variable in the Content field and applying bold, italic, underline, strikethrough, or a color change has no effect.
Rich text settings apply only to the whole text block. To style the text, use the Typography section of the Design tab, or apply a saved text style.
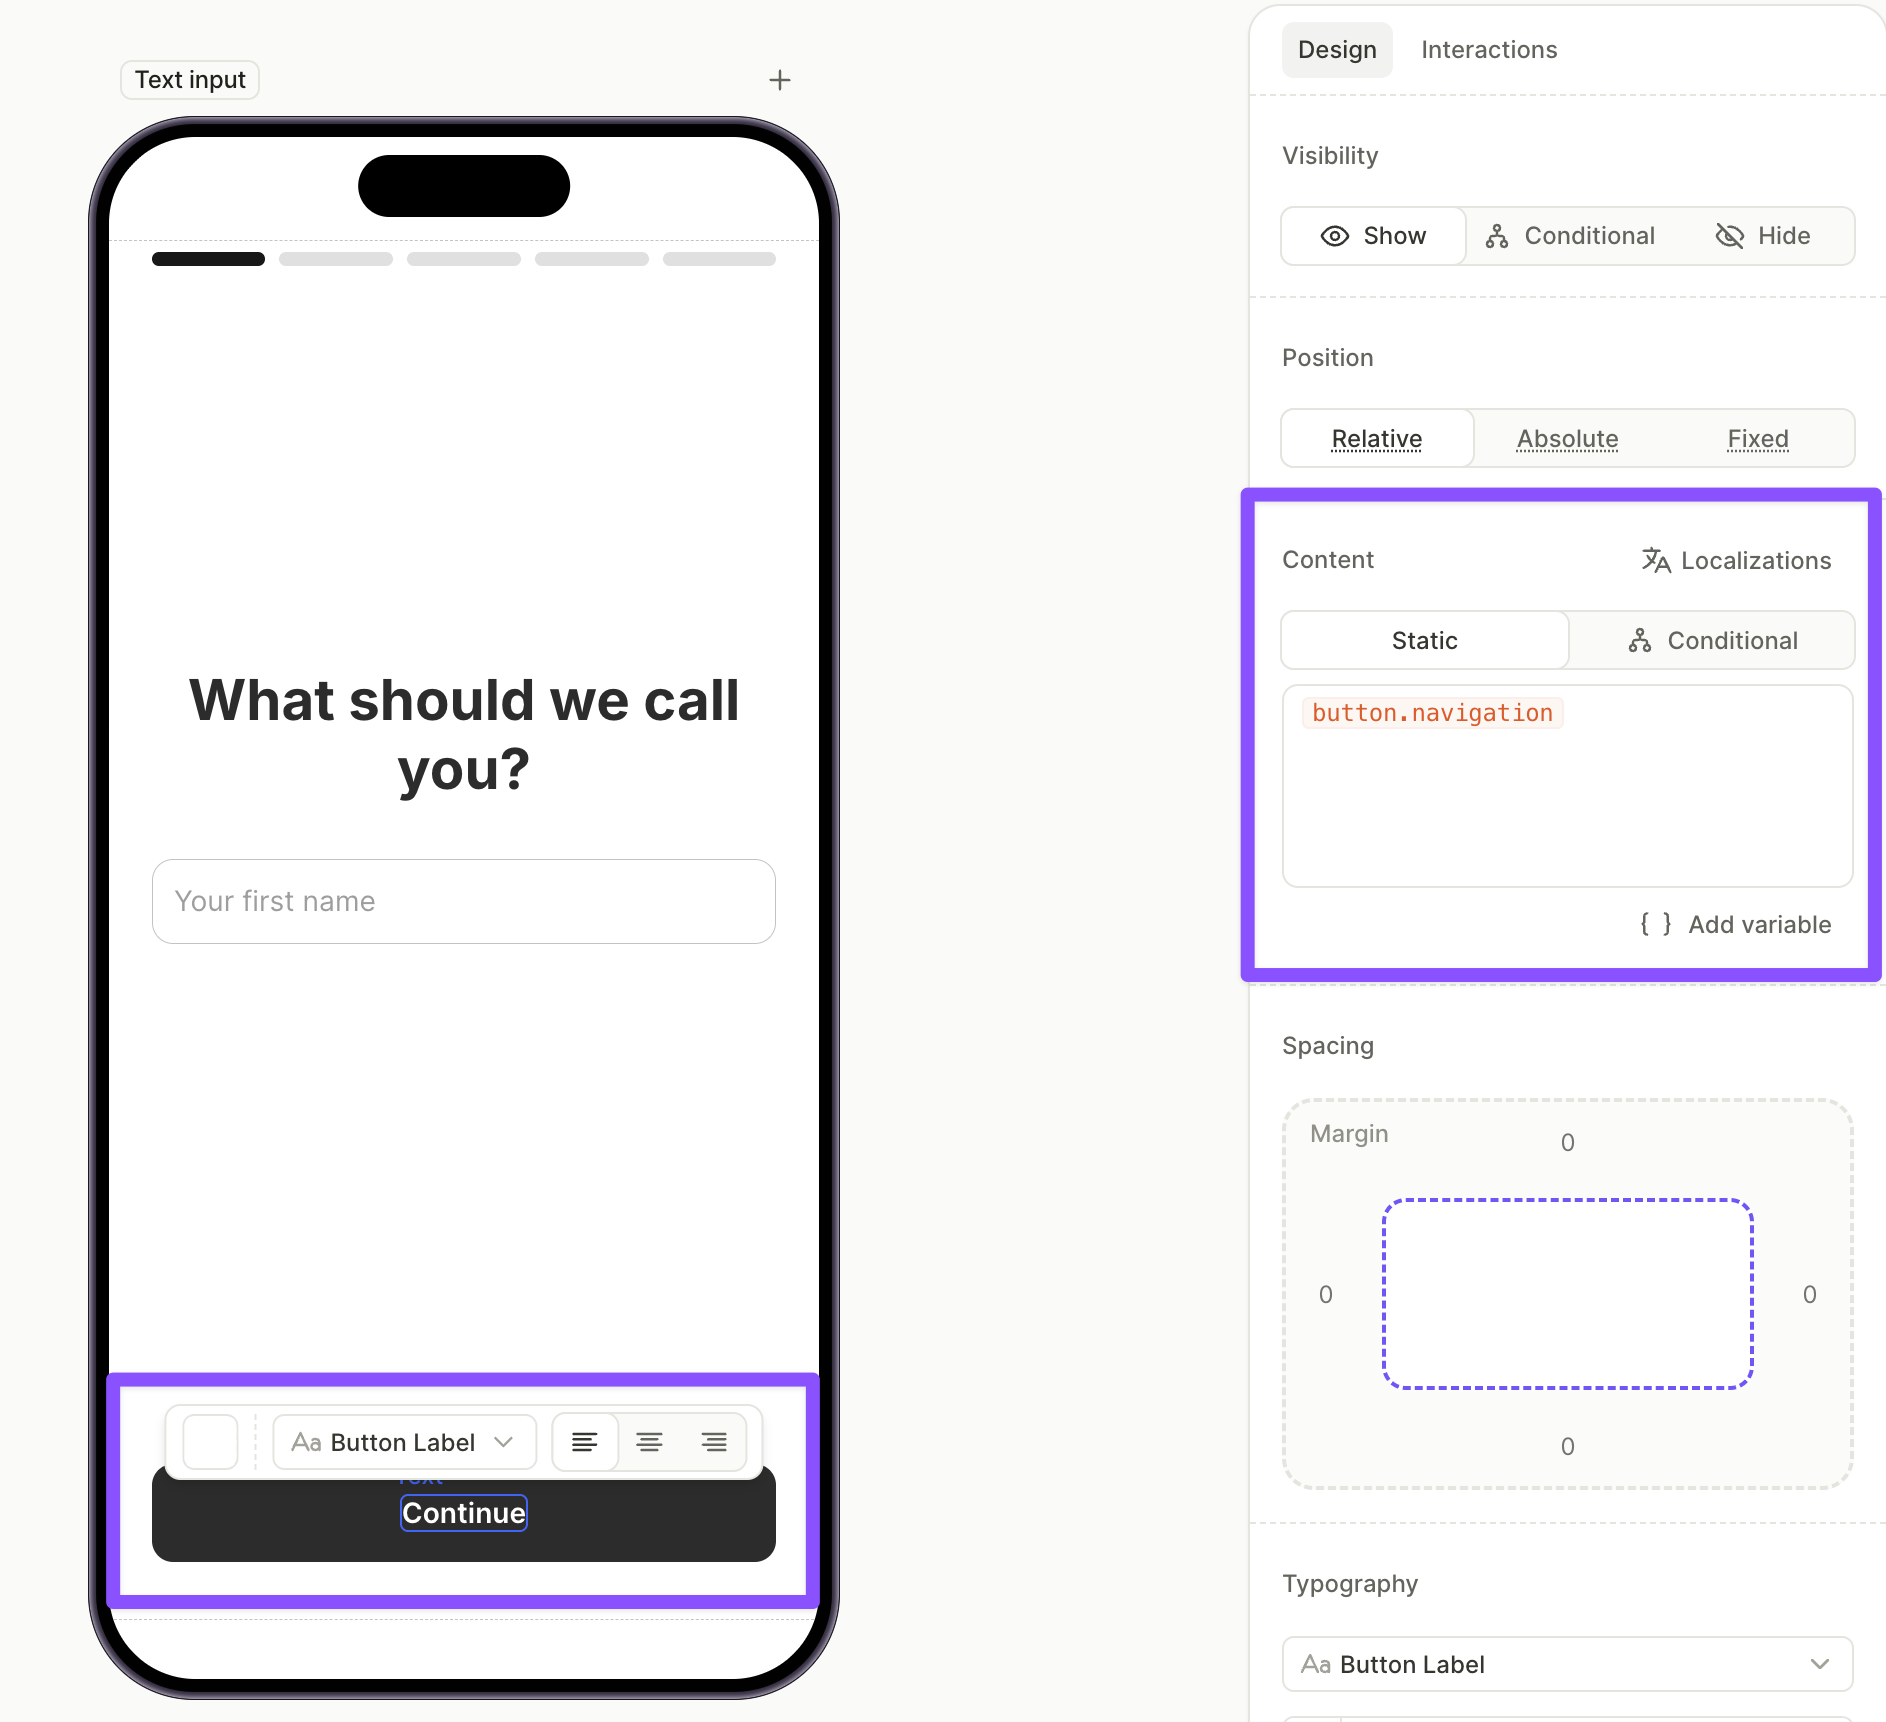
Reuse content across screens
Some content repeats across your flow — a button label like “Continue”, a recurring call to action, or a disclaimer shown on several screens. The same applies to longer text, such as a feature description reused across multiple screens. Instead of typing this content into each element, store it in a custom variable. This helps when you navigate different users to different screens but want consistent wording across them.
- Create a custom variable of type String and set its initial value to the text you want to reuse. For example, name it
button.navigationand set the value toContinue.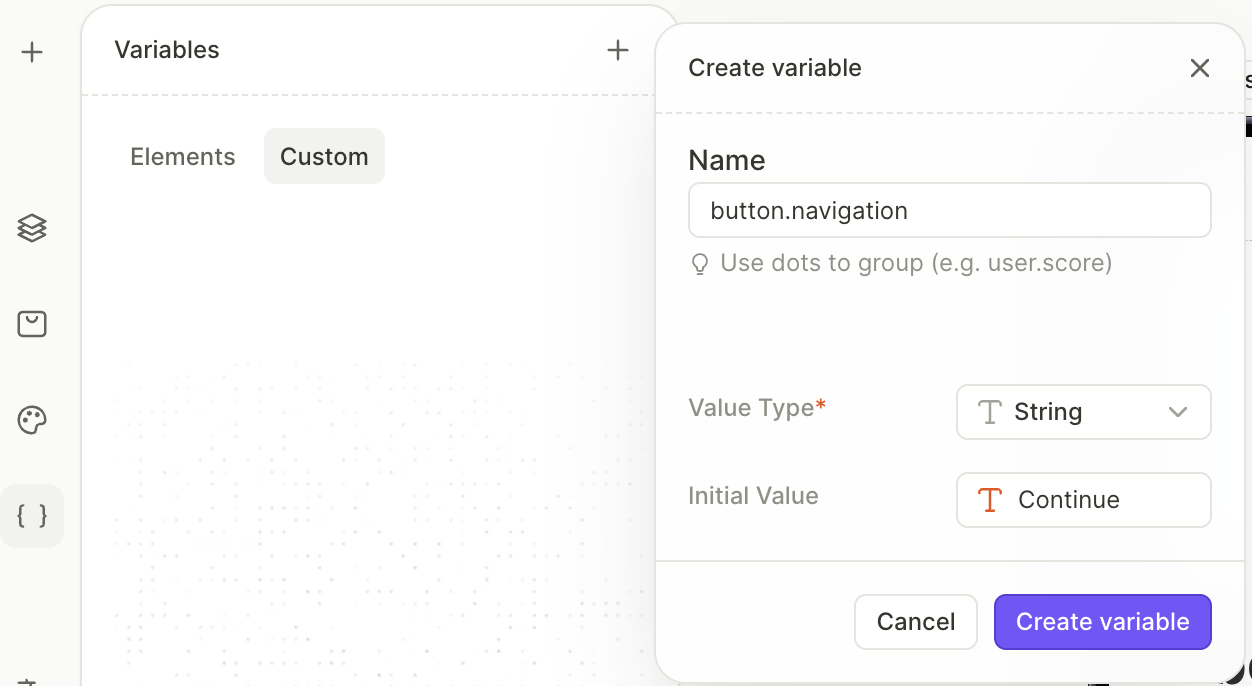
- Insert this variable into the Content field of each element where the text should appear.
To change the text everywhere, update the variable’s initial value once. Every element that uses the variable updates automatically, so you don’t edit each screen by hand.