Quizzes in flows
Use quizzes to present users with predefined choices. Unlike inputs, quizzes don’t have typed fields — users select from the options you define. Use them to collect preferences, segment users, or branch the flow based on their answers.
Add a quiz
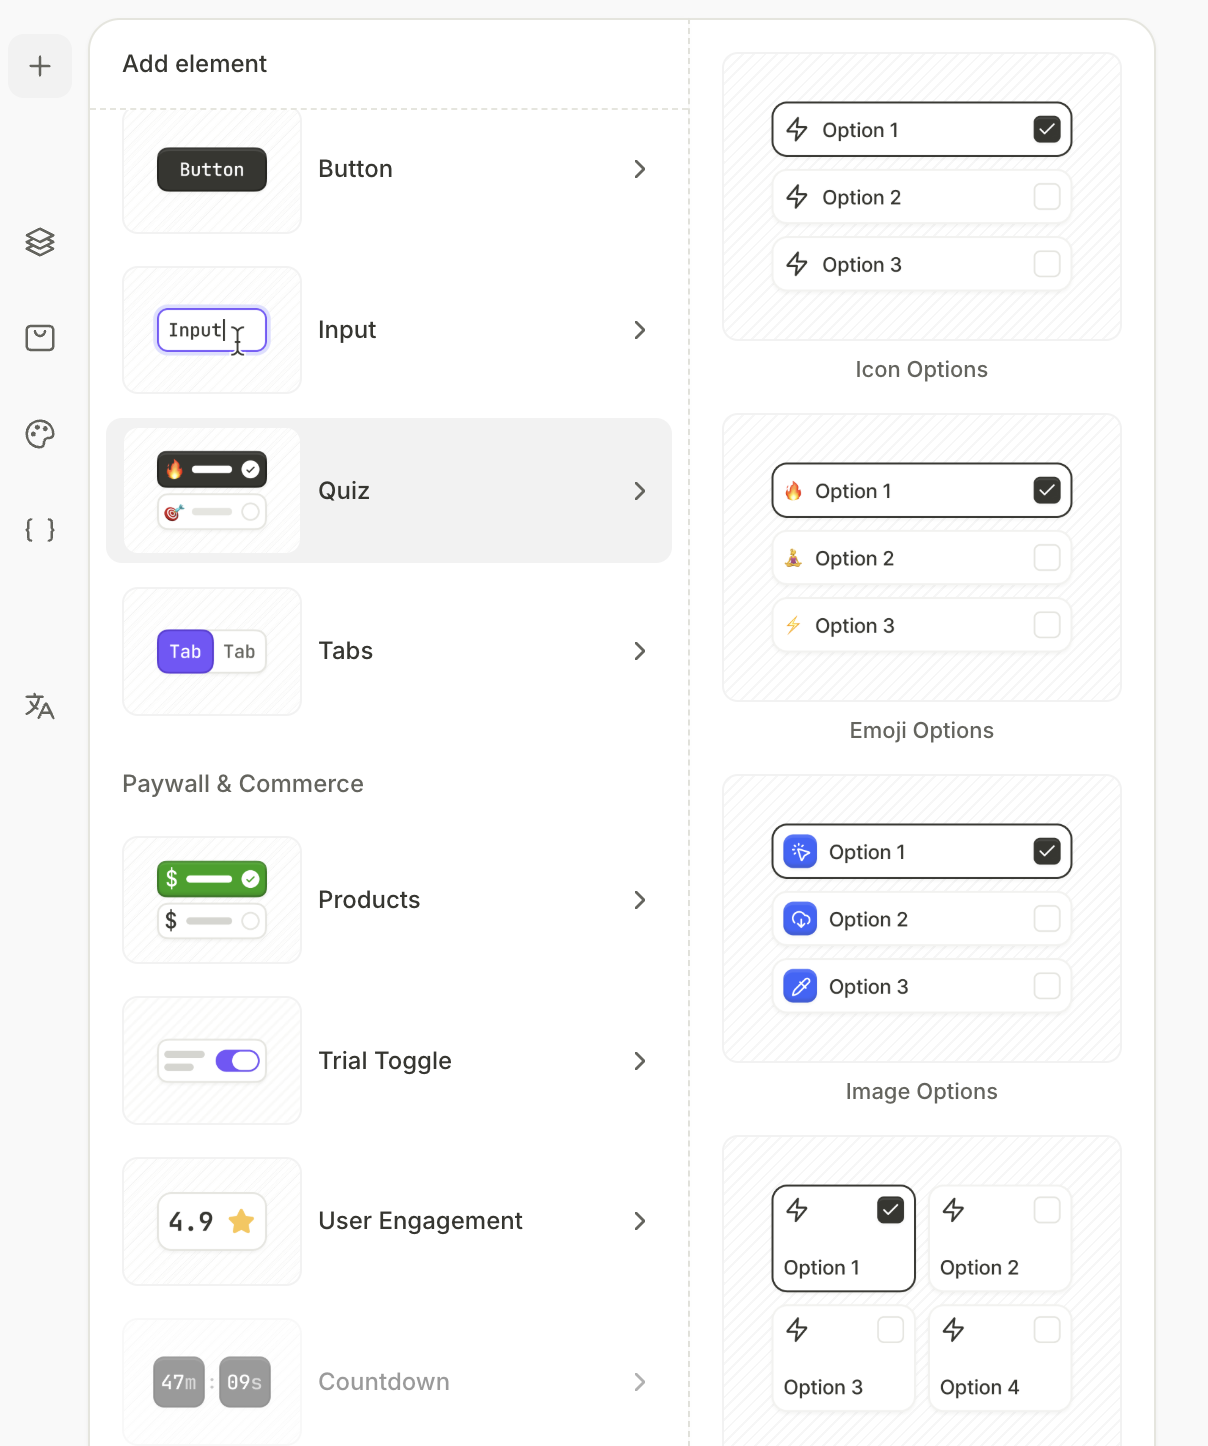
- Click + at the top left.
- Select Quiz.
- Choose the quiz type:
- Icon/image/emoji options: A vertical list of selectable options, each with an icon, image, or emoji alongside a text label.
- Icon/image/emoji grid: A grid of selectable options, each with an icon, image, or emoji.
- Rating: A scale for users to express a rating — numeric or star-based.
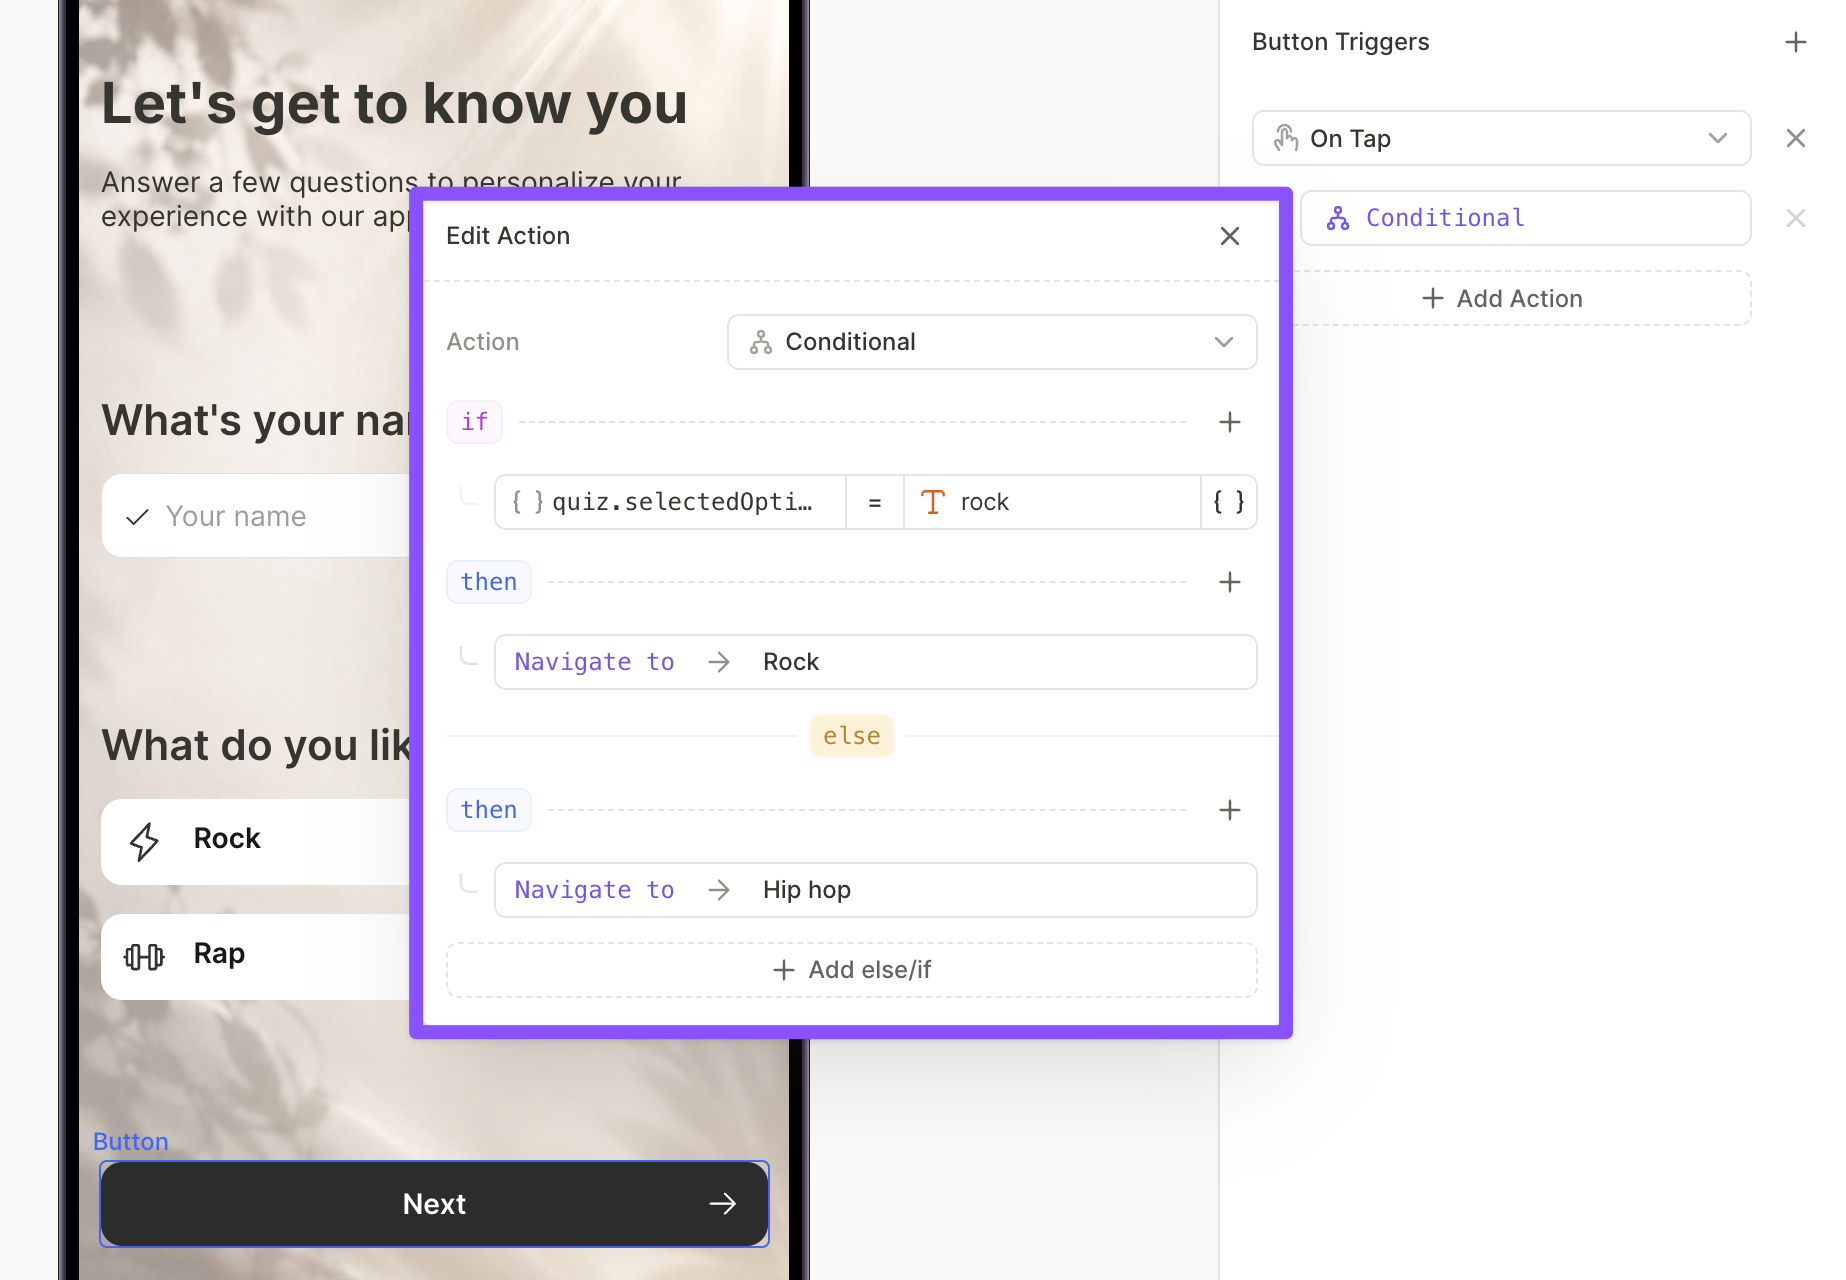
Set up conditional navigation
To route users differently based on their selection, set a conditional action on the navigation button, not the quiz option:
- Select the navigation button.
- In the Interactions panel, add an On Tap trigger with a Conditional action.
- In the Edit Action dialog, build the if row:
- On the left, click
{}and select Elements → Screen →<quizElementId>.selectedOptionIdto reference the user’s selection. - Keep the operator as
=. - On the right, enter the elementId to match — for example,
rock.
- On the left, click
- Under then, set the action to Navigate to and pick the destination screen.
- Under else, set a fallback Navigate to destination, or click + Add else/if to add more conditions for other options.
See the relevant guides to understand how to use quiz answers:
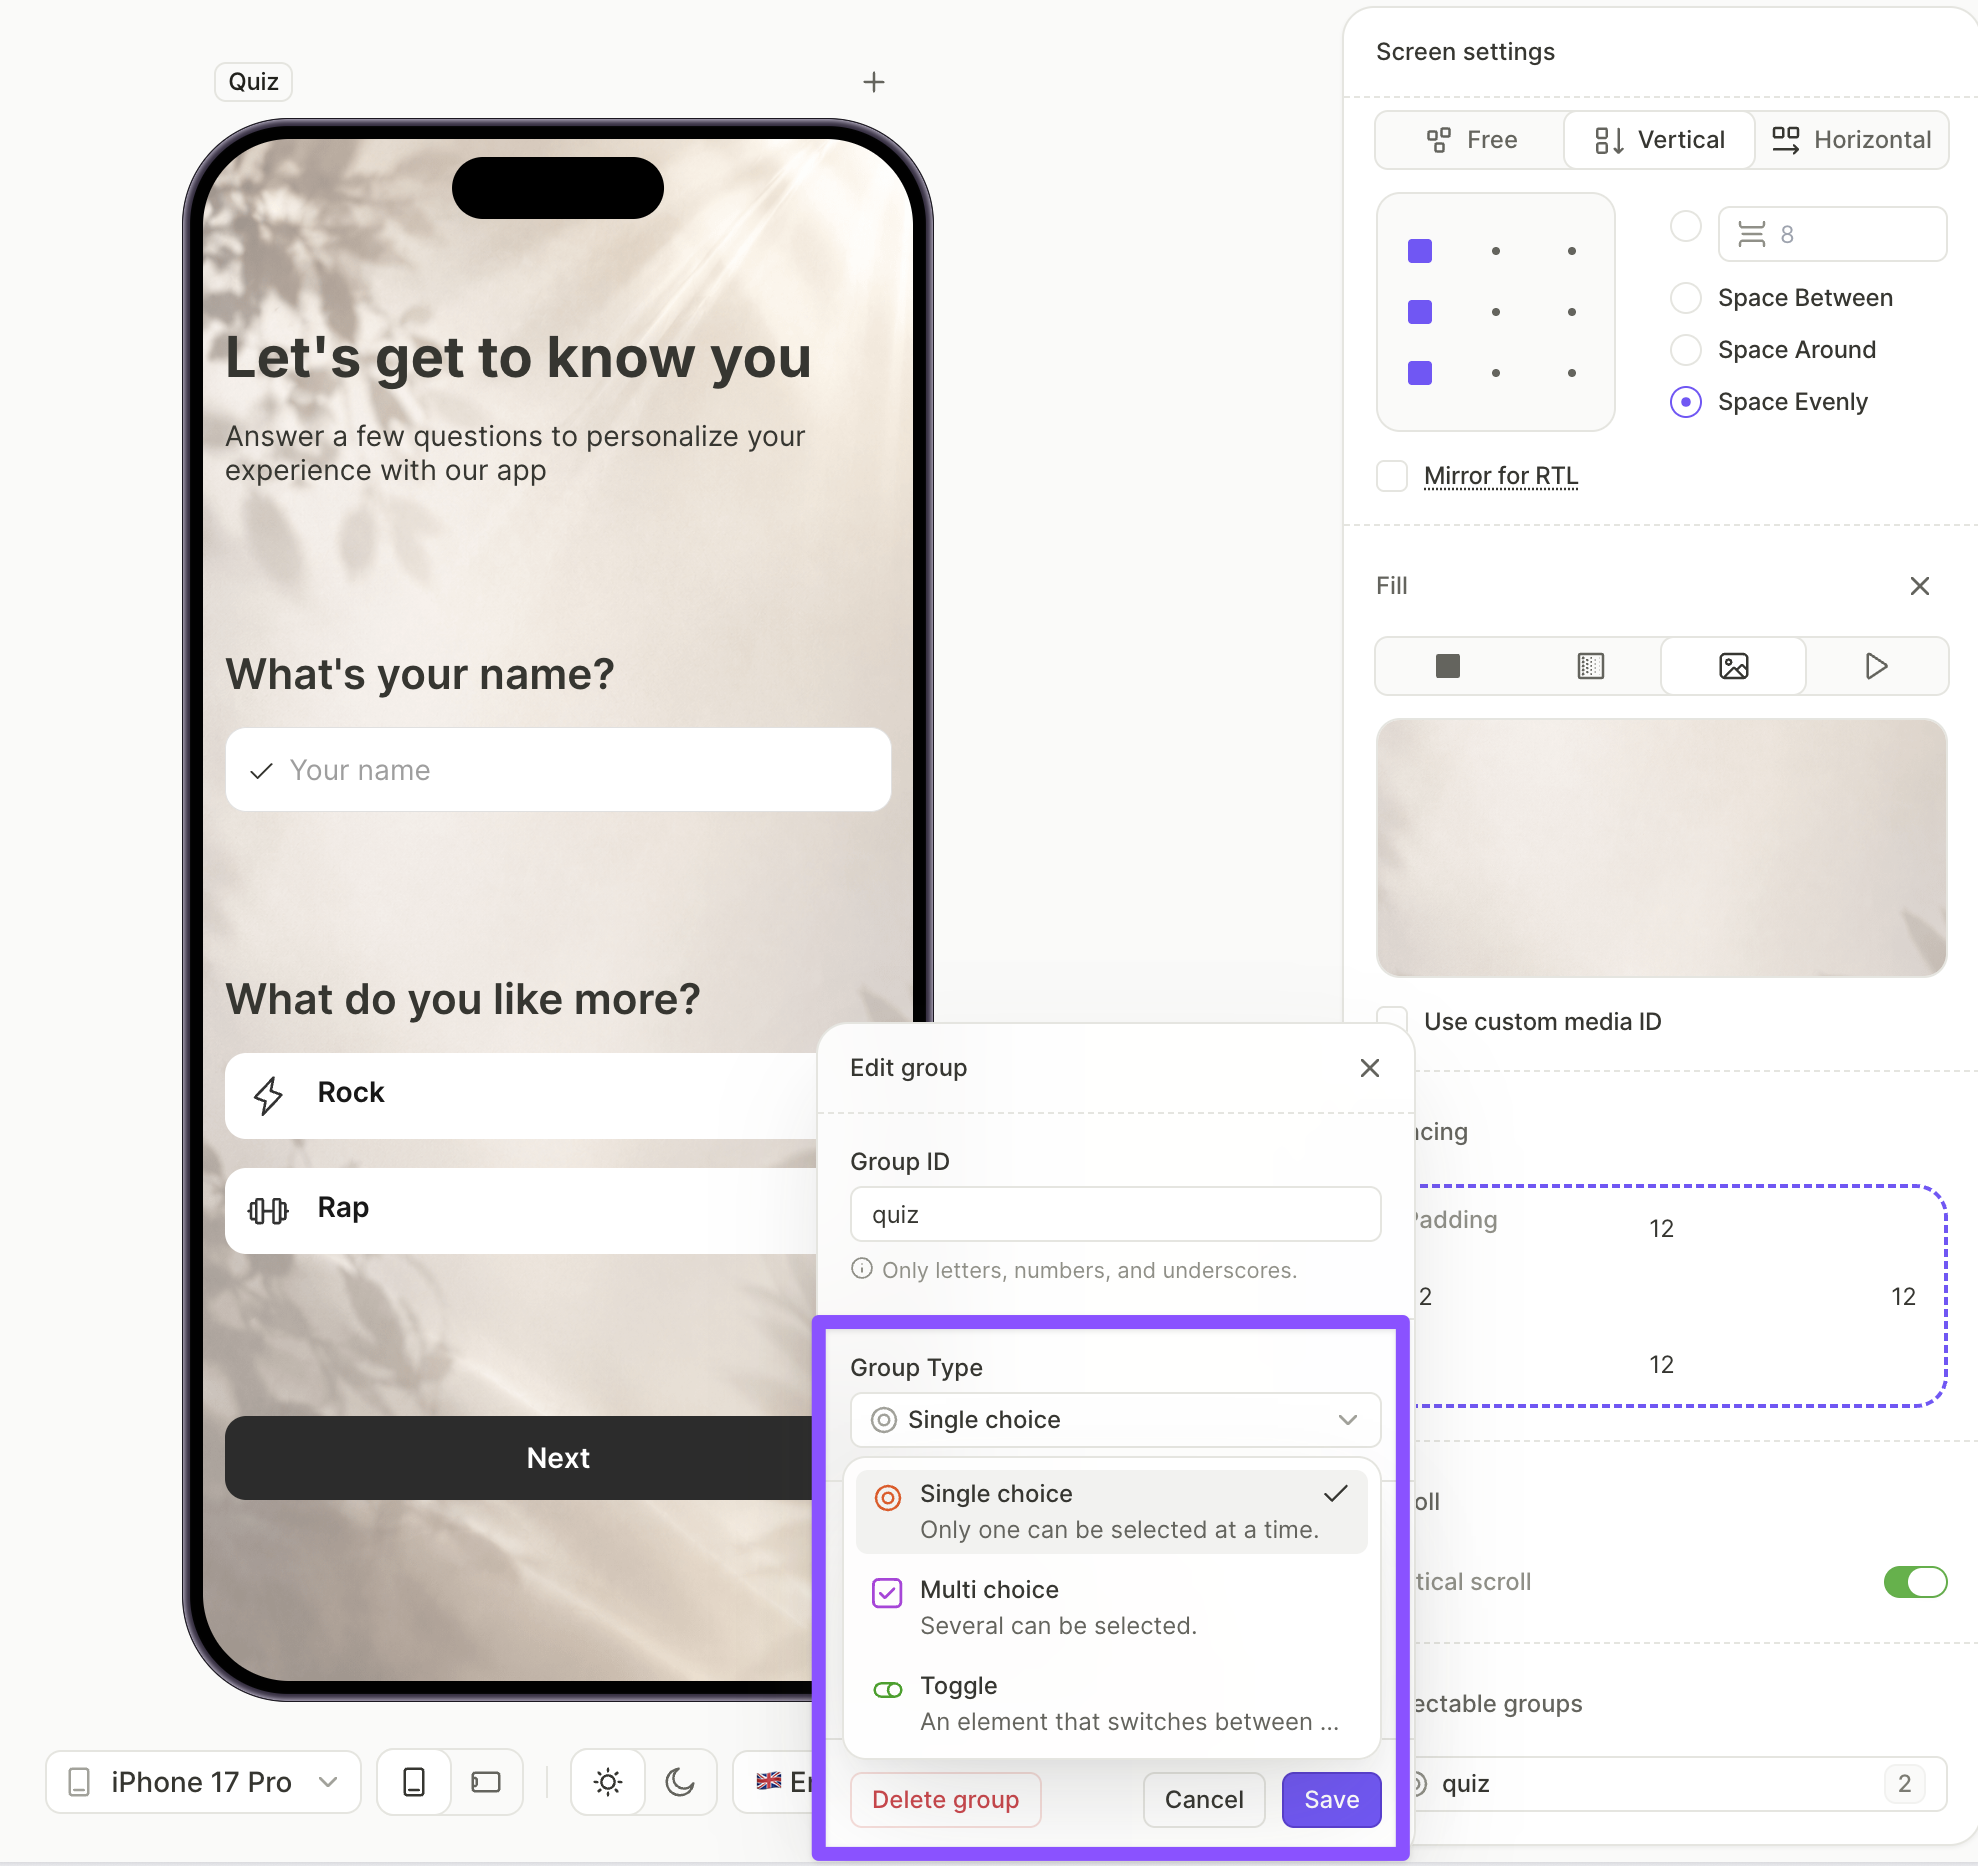
Change quiz type
By default, a quiz is multi choice — users can select several options at once. Switch it to single choice if you want users to pick only one option.
- Select the screen containing the quiz.
- In Screen settings, scroll to Selectable groups and click your quiz.
- In the Edit group dialog, open Group type and choose:
- Single choice — only one option can be selected at a time.
- Multi choice — users can select several options.
- Click Save.