Build a personalized onboarding flow
A multi-screen flow in the Flow Builder is a sequence of screens connected by navigation actions. The flow can stay linear, or branch based on user input collected on an earlier screen. This tutorial walks through the end-to-end process — creating screens, building their content, wiring navigation, and adding conditional branching — using a four-screen onboarding flow as the worked example.
The example uses:
- A name input that exposes the user’s name as a variable for personalization.
- A single-choice quiz whose answer drives which screen the user sees next.
- Two branching paths with tailored copy for each audience segment.
- A paywall as the final screen.
The same pattern applies to any flow that personalizes content based on user input.
Prefer the video format? This quickstart tutorial walks through the same process, end to end:
Before you start
- Create products in the Adapty Dashboard. The example flow uses two — an Annual and a Monthly subscription.
- Connect Adapty to the App Store and Google Play.
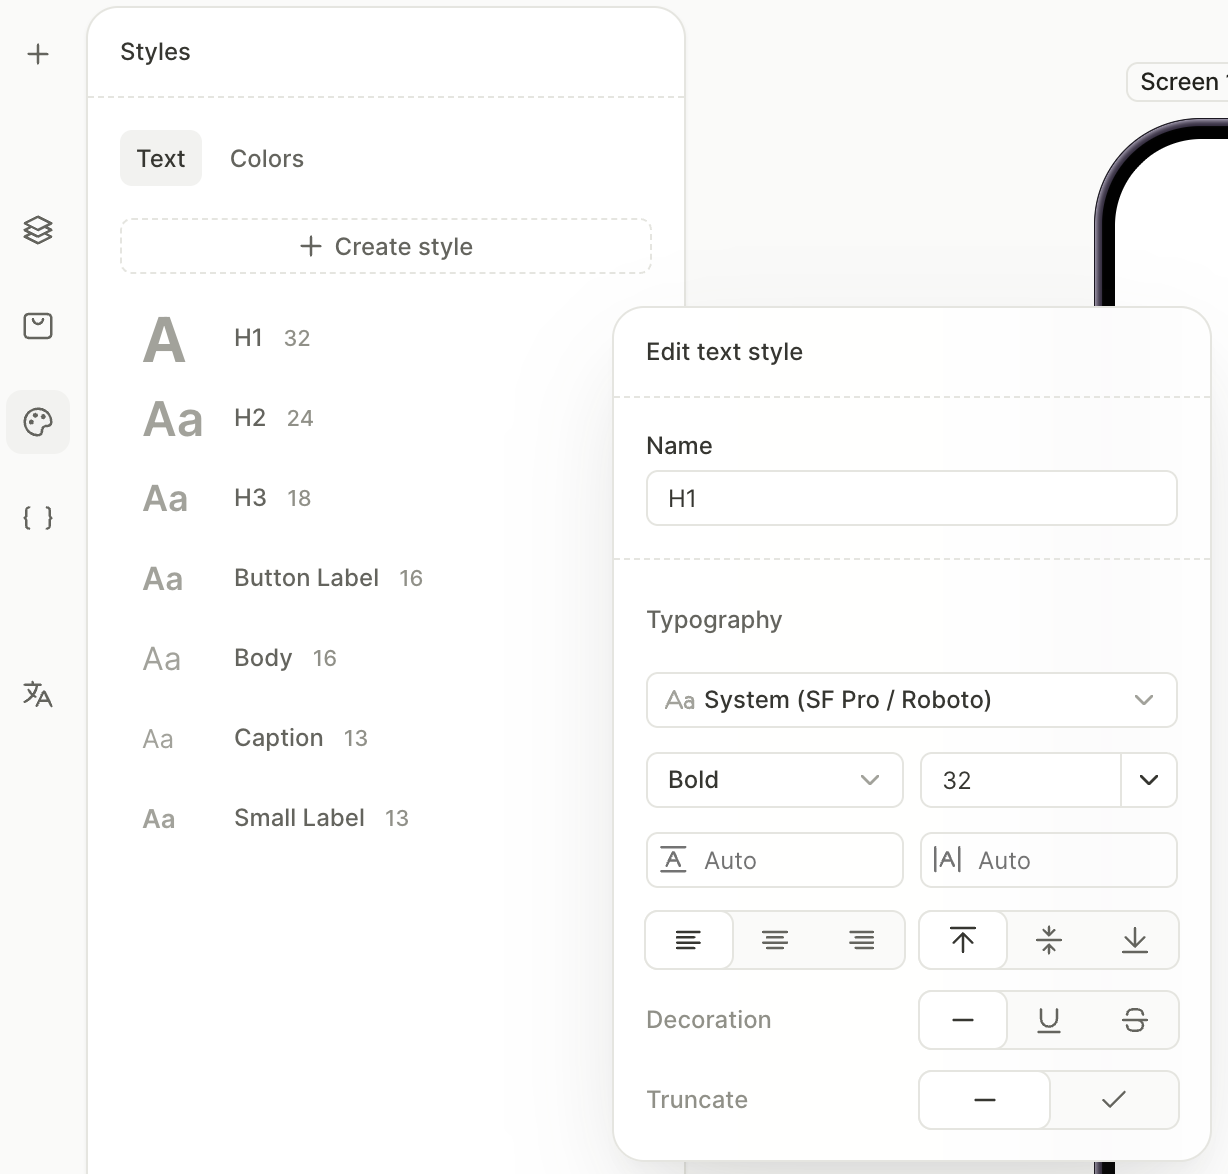
1. Set up reusable styles
Reusable styles let you apply consistent typography and colors across every screen with a single click. Color styles hold a Light and a Dark variant, so the flow automatically supports both themes.
For full instructions, see Styles and appearance — Reusable styles.
To set up the styles:
- In the left panel, open the Styles panel.
- On the Colors tab, click Create style and add the colors you’ll reuse. For each color, pick a Light value, switch to the Dark tab, and pick a Dark value.
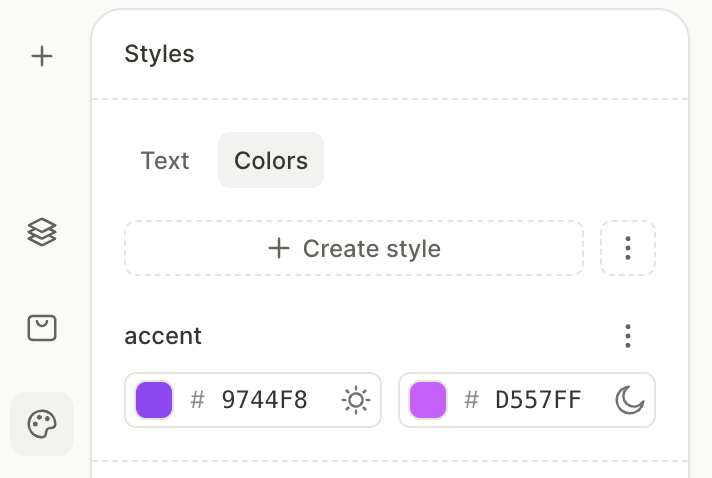
- On the Text tab, click an existing style to edit its font, weight, and size, or click Create style to add custom presets.
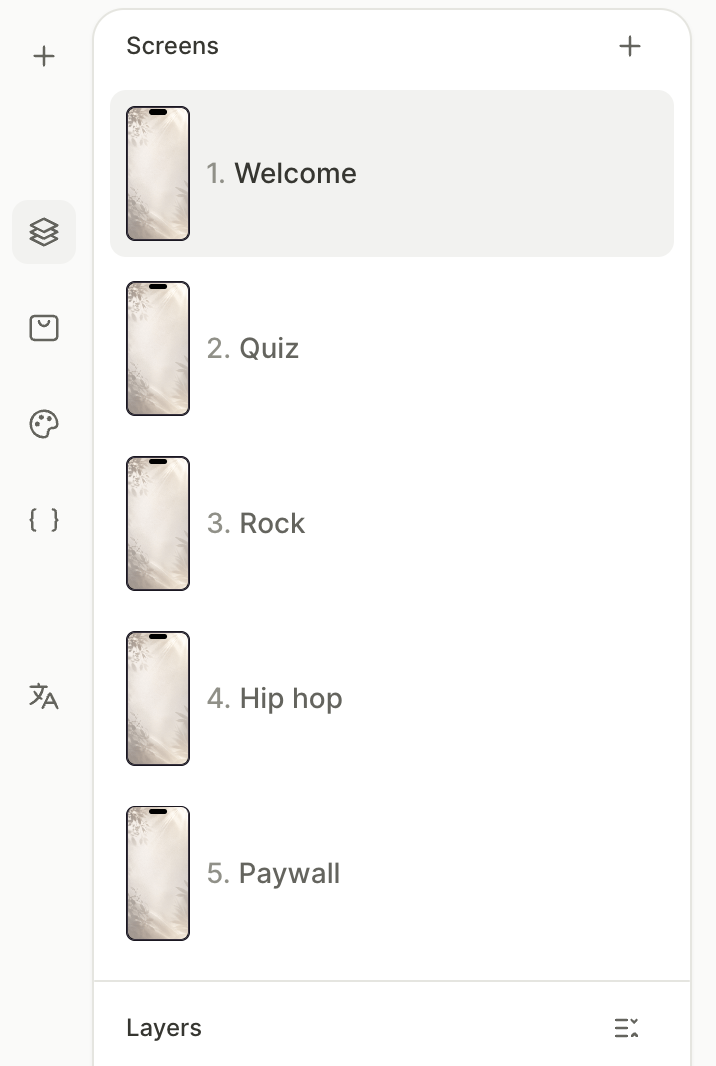
2. Create the screens
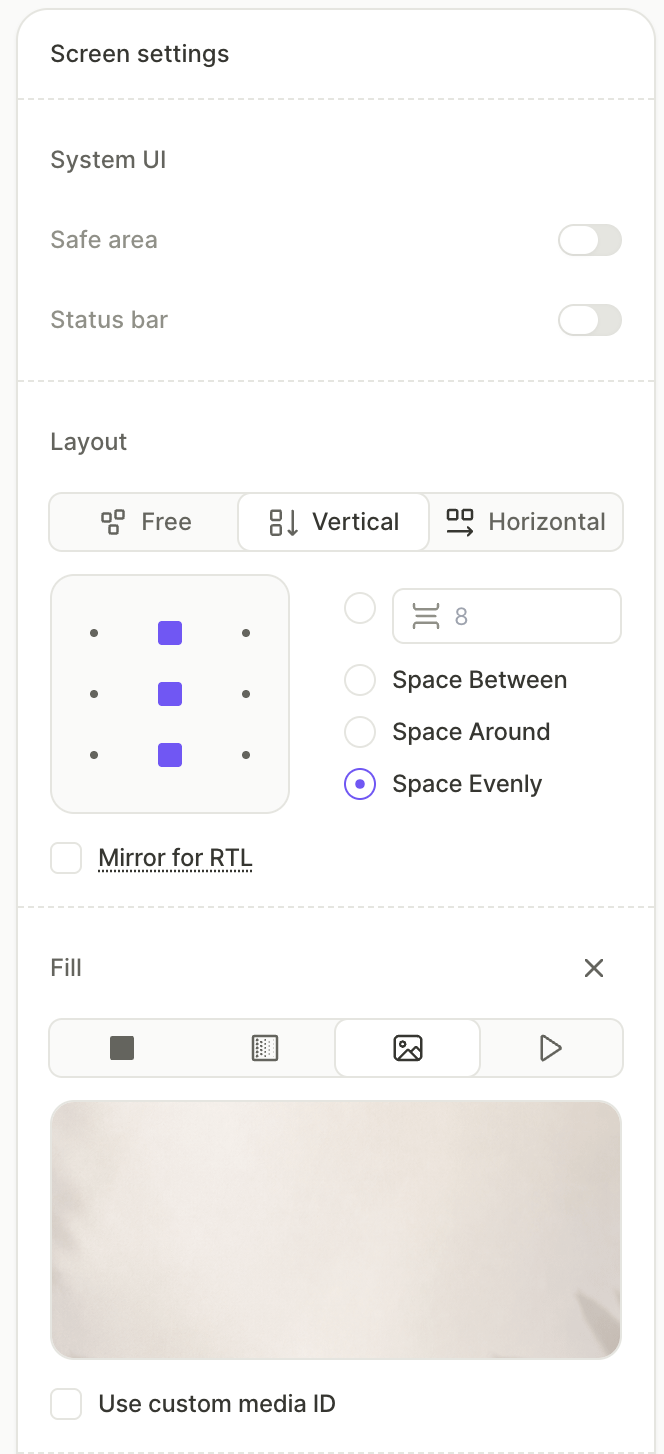
A flow is a sequence of screens. Configure the first screen with the shared base — layout, background, and safe area — then duplicate it for the rest. This way, every screen shares the same foundation and you only set it up once.
For more on managing screens, see Screens and Layers — Manage screens.
To set up the screens:
- Click an empty area of the canvas on the first screen to open the screen settings.
- Under System UI, disable Safe area so backgrounds and edge-aligned elements can extend to the screen edges.
- Under Fill, choose a background type and configure it — for example, an Image that sits behind every screen of the flow.
- Under Layout, set the direction to Vertical and pick a distribution that fits your design.
- In the Screens section of the left panel, click the three-dot menu on the first screen and choose Duplicate. Repeat until you have four screens in total — the second branching path will be added later by duplicating the first one.
- Rename each screen to match its role — in our example:
Welcome,Quiz,Rock path, andPaywall.
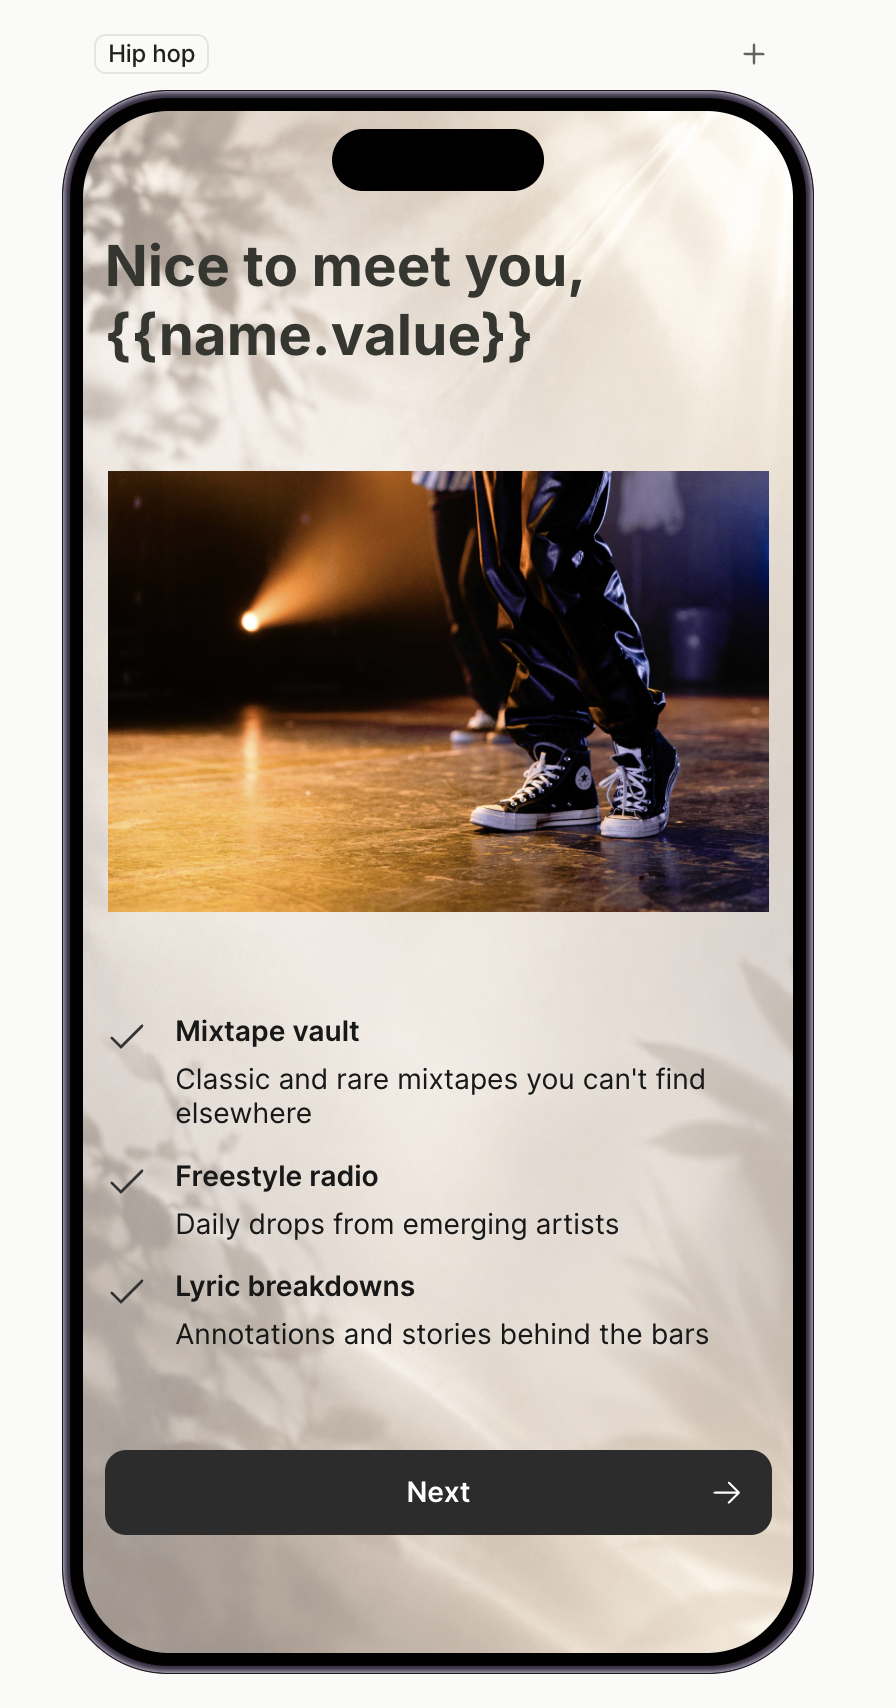
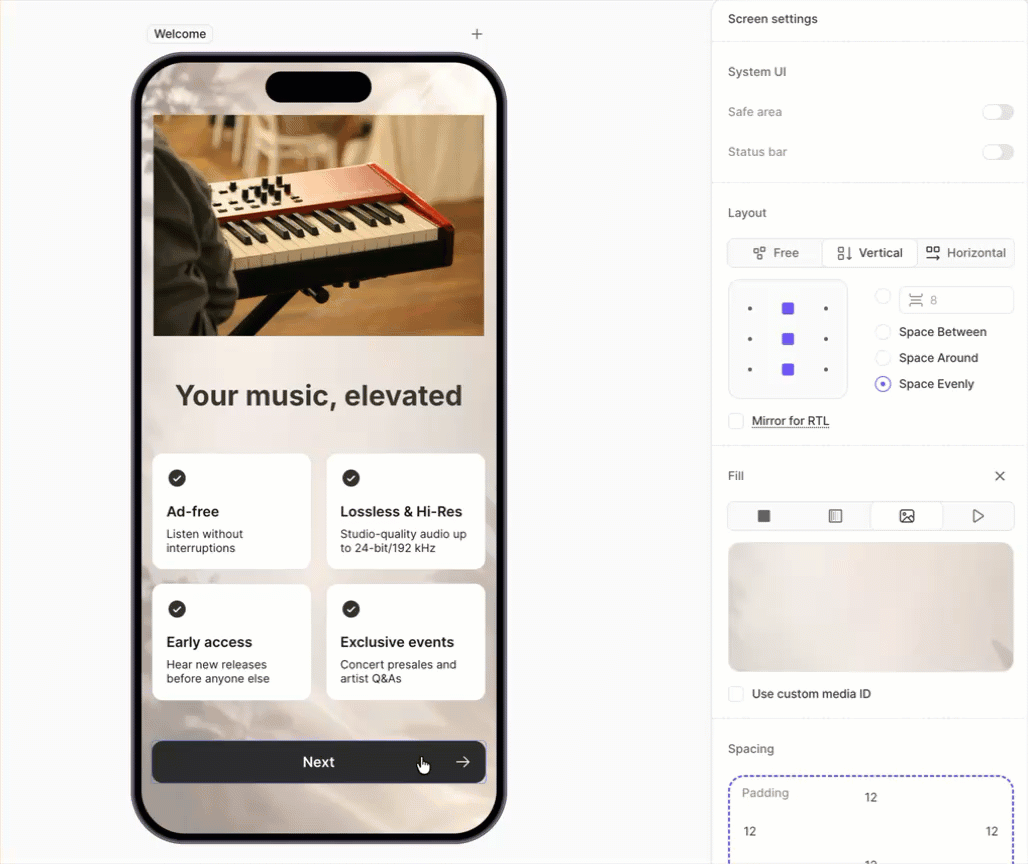
3. Build the introduction screen
The first screen usually sets the tone — a headline, a feature list, and a call to action that opens the rest of the flow. In our example, this is the Welcome screen.
Click the Welcome screen in the Screens panel, then add the elements:
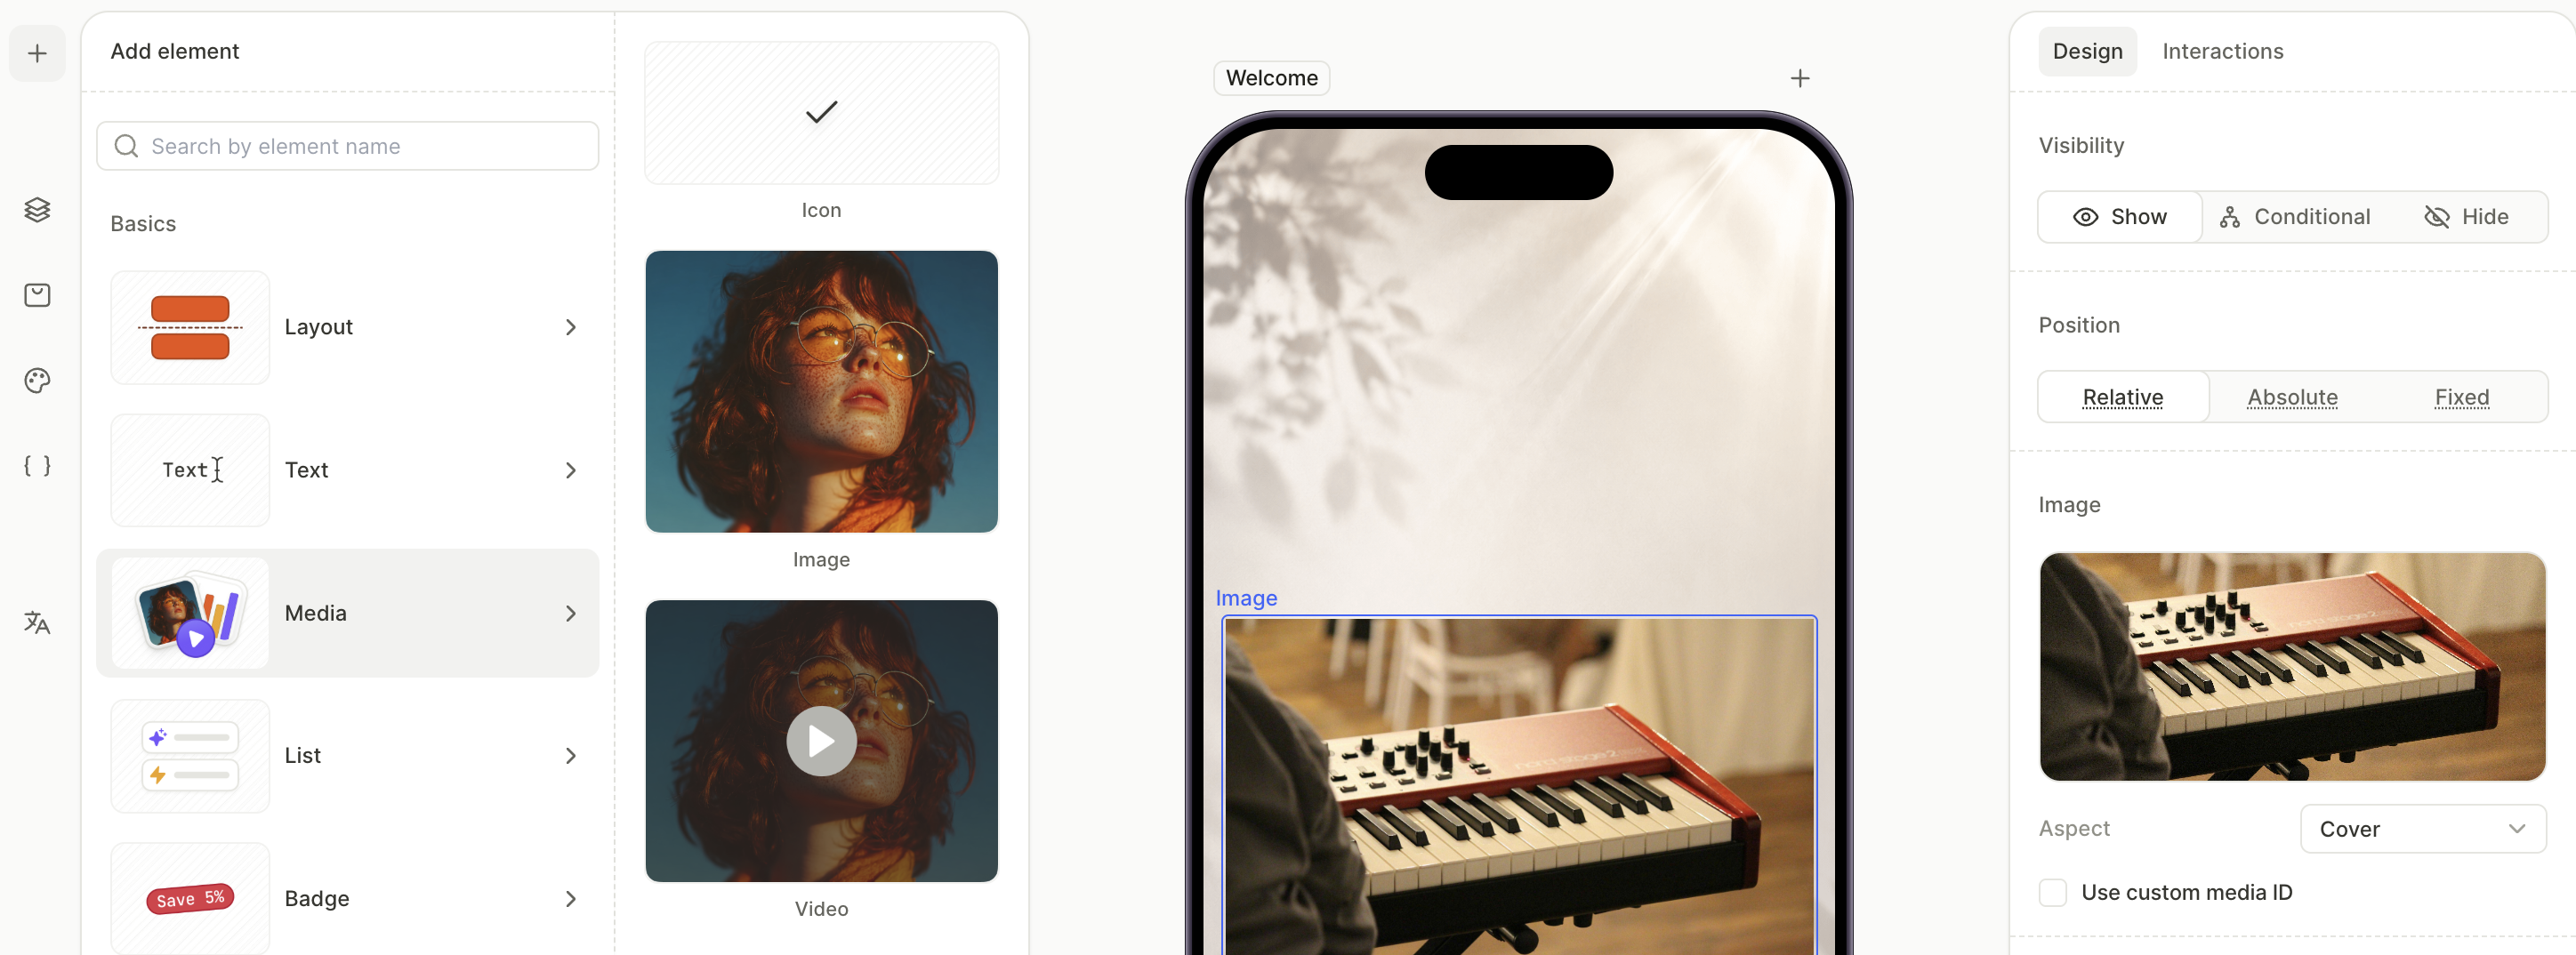
- Add the main image. Click + > Media > Image, upload your image, and adjust margins if needed.
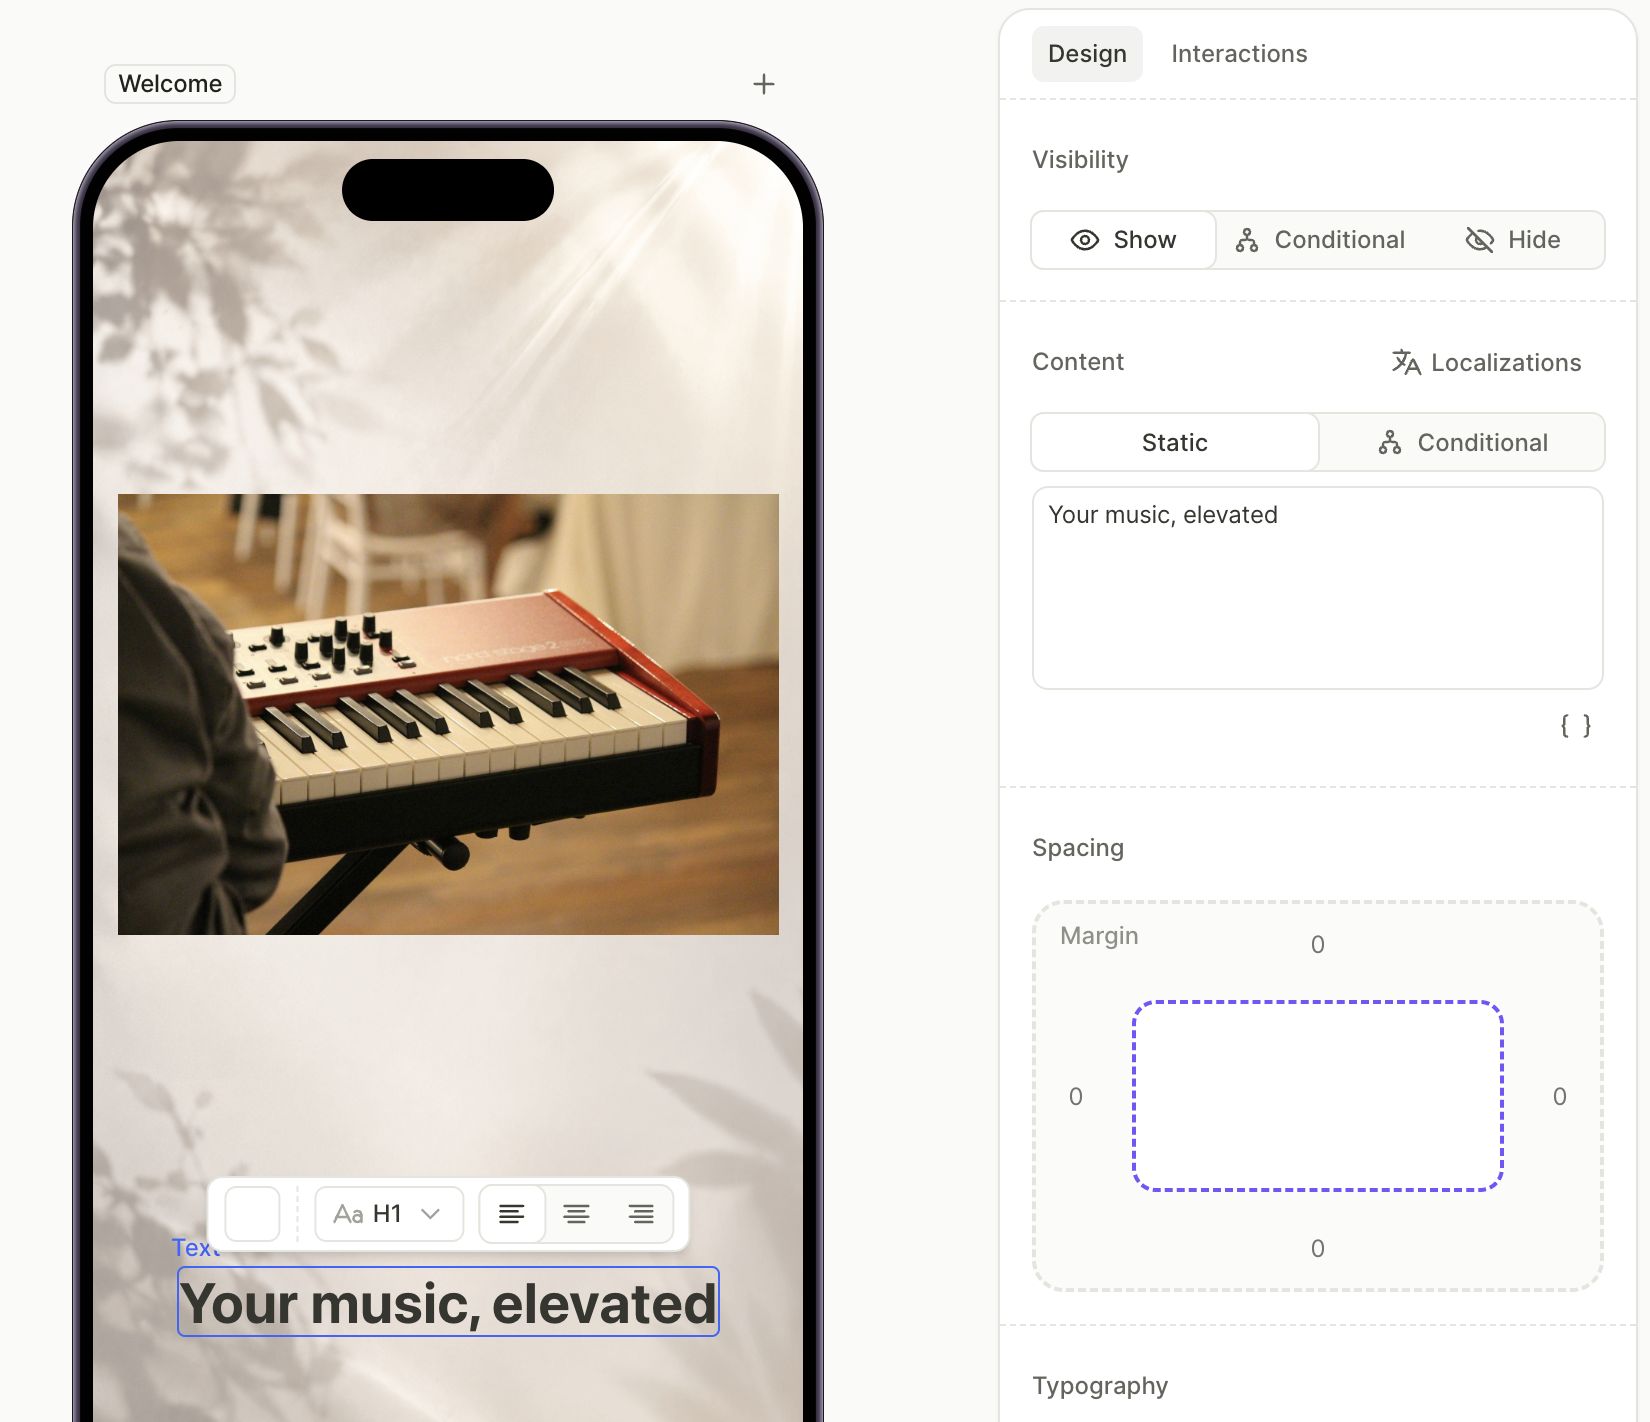
- Add a headline: click + > Text, pick a heading style from your saved text styles, and edit the Content field.
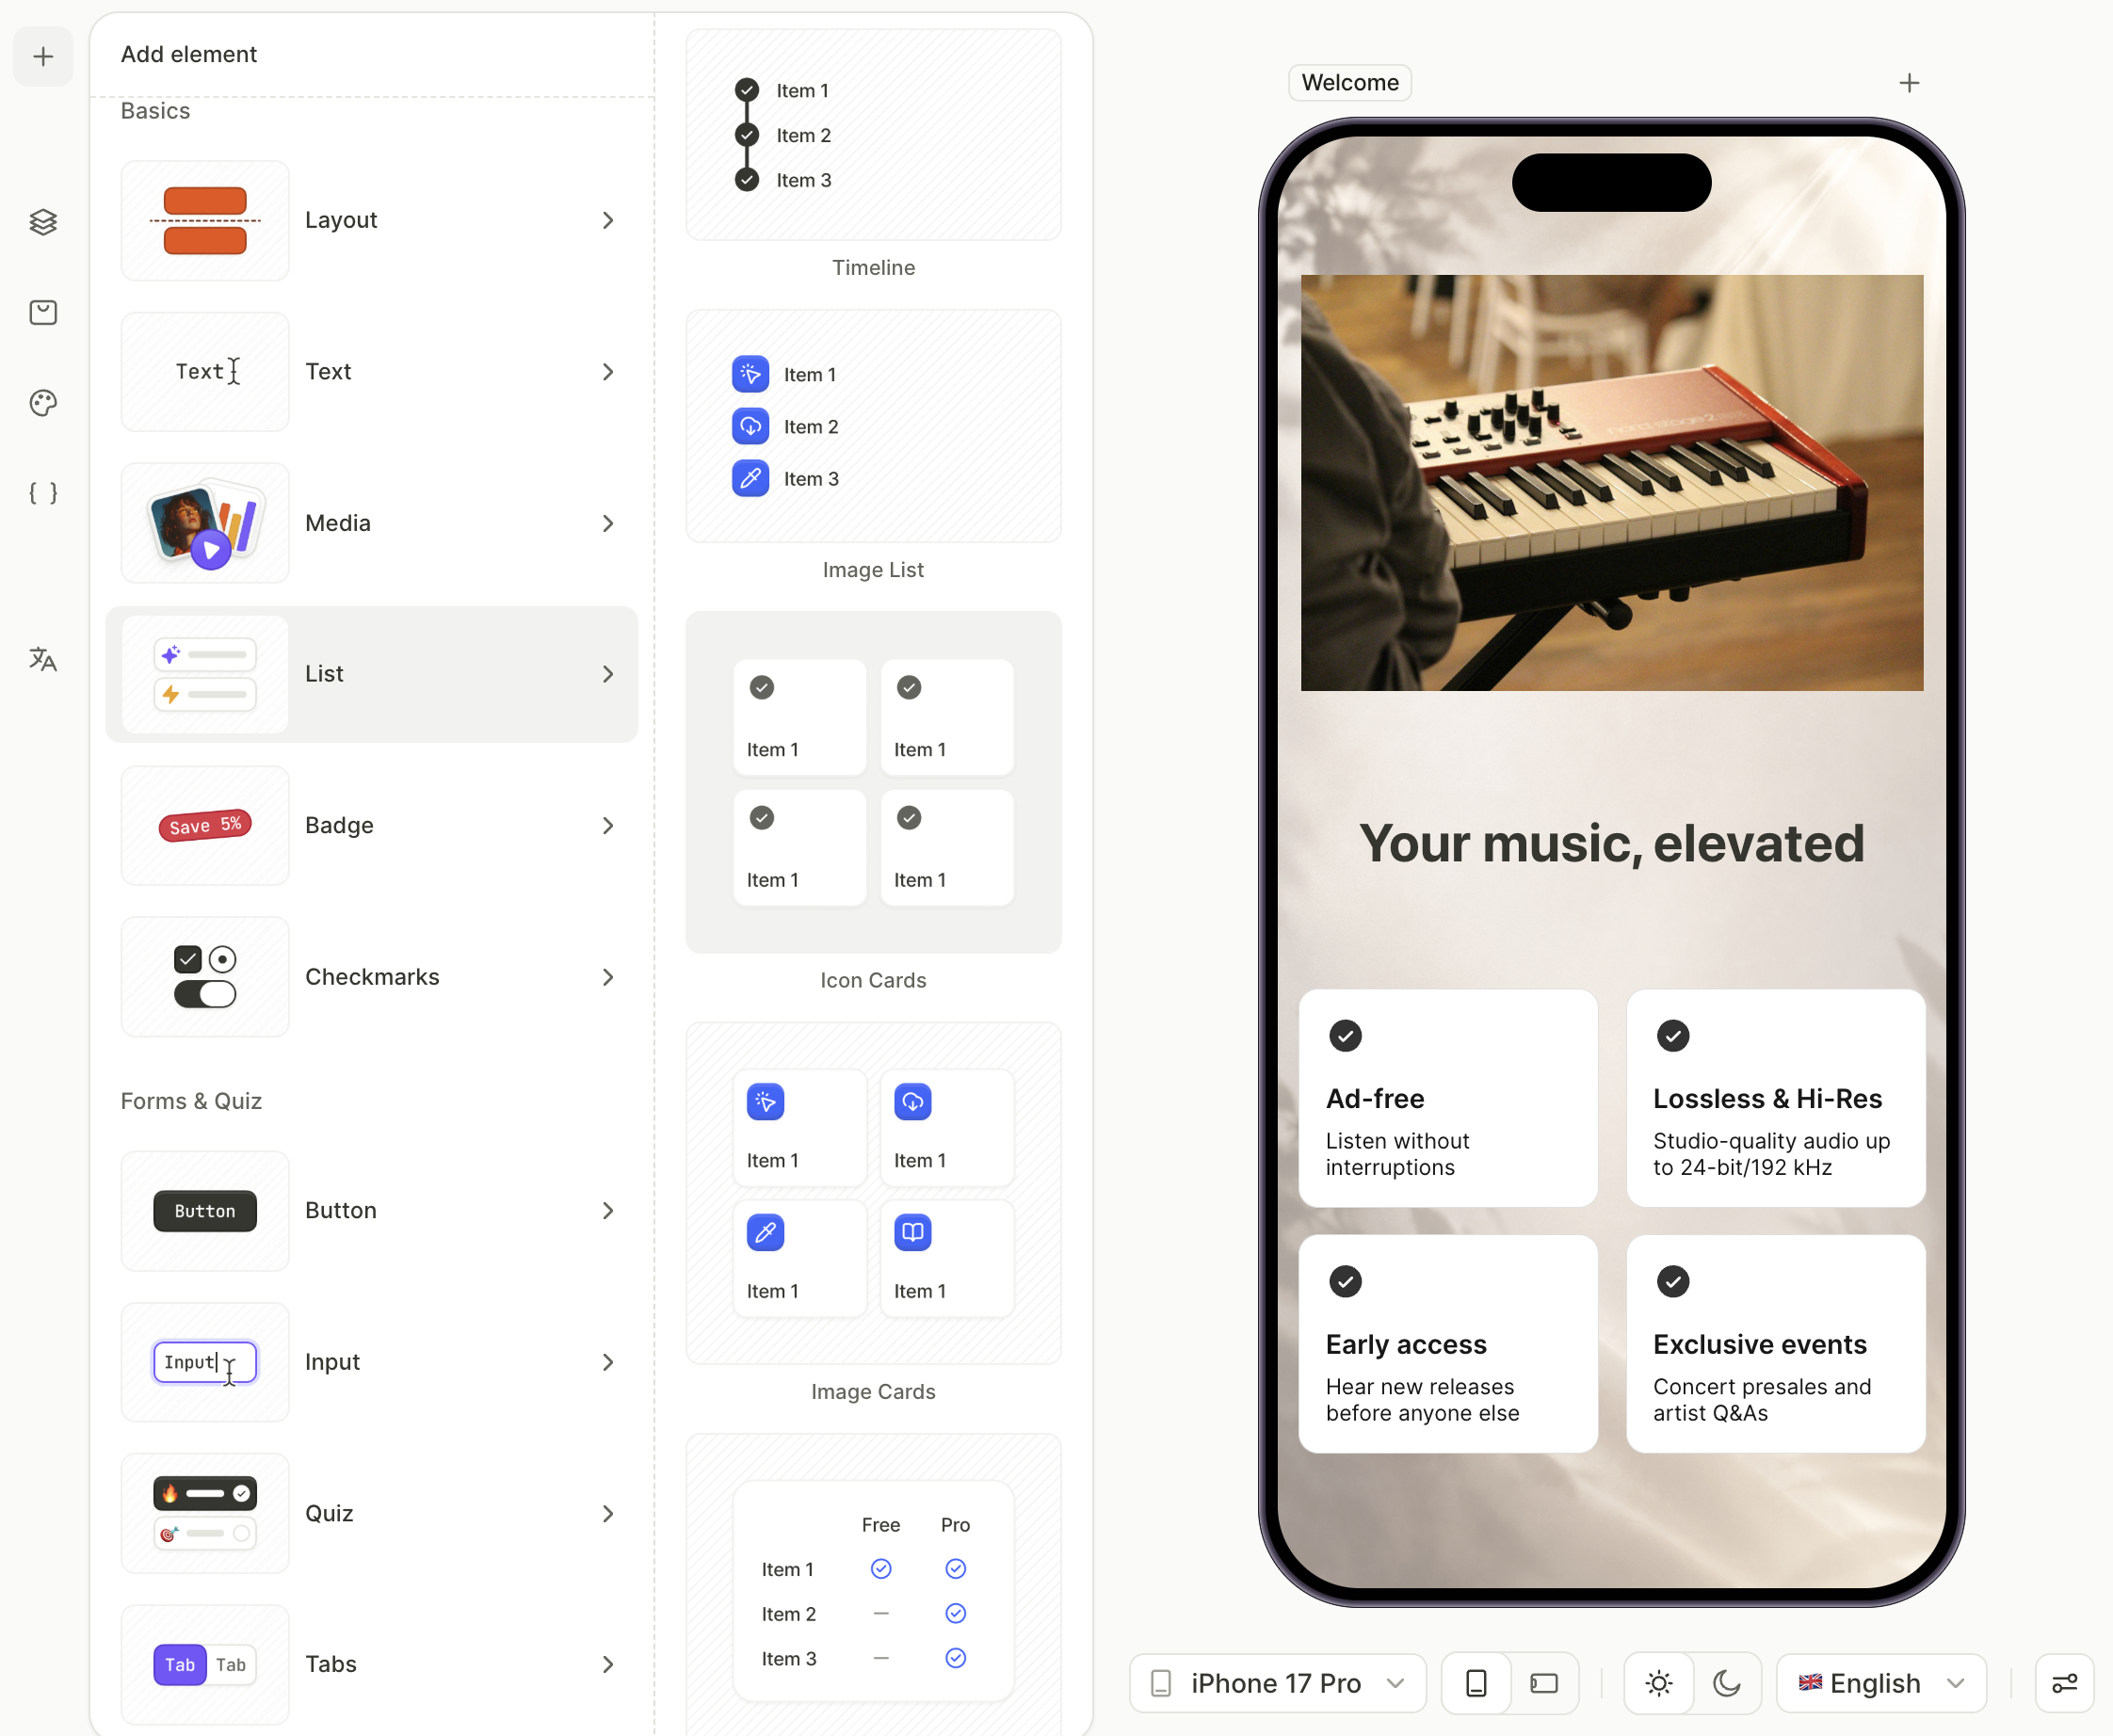
- Add the feature list. Click + > List > Icon Cards, then edit the icon and label in each card.
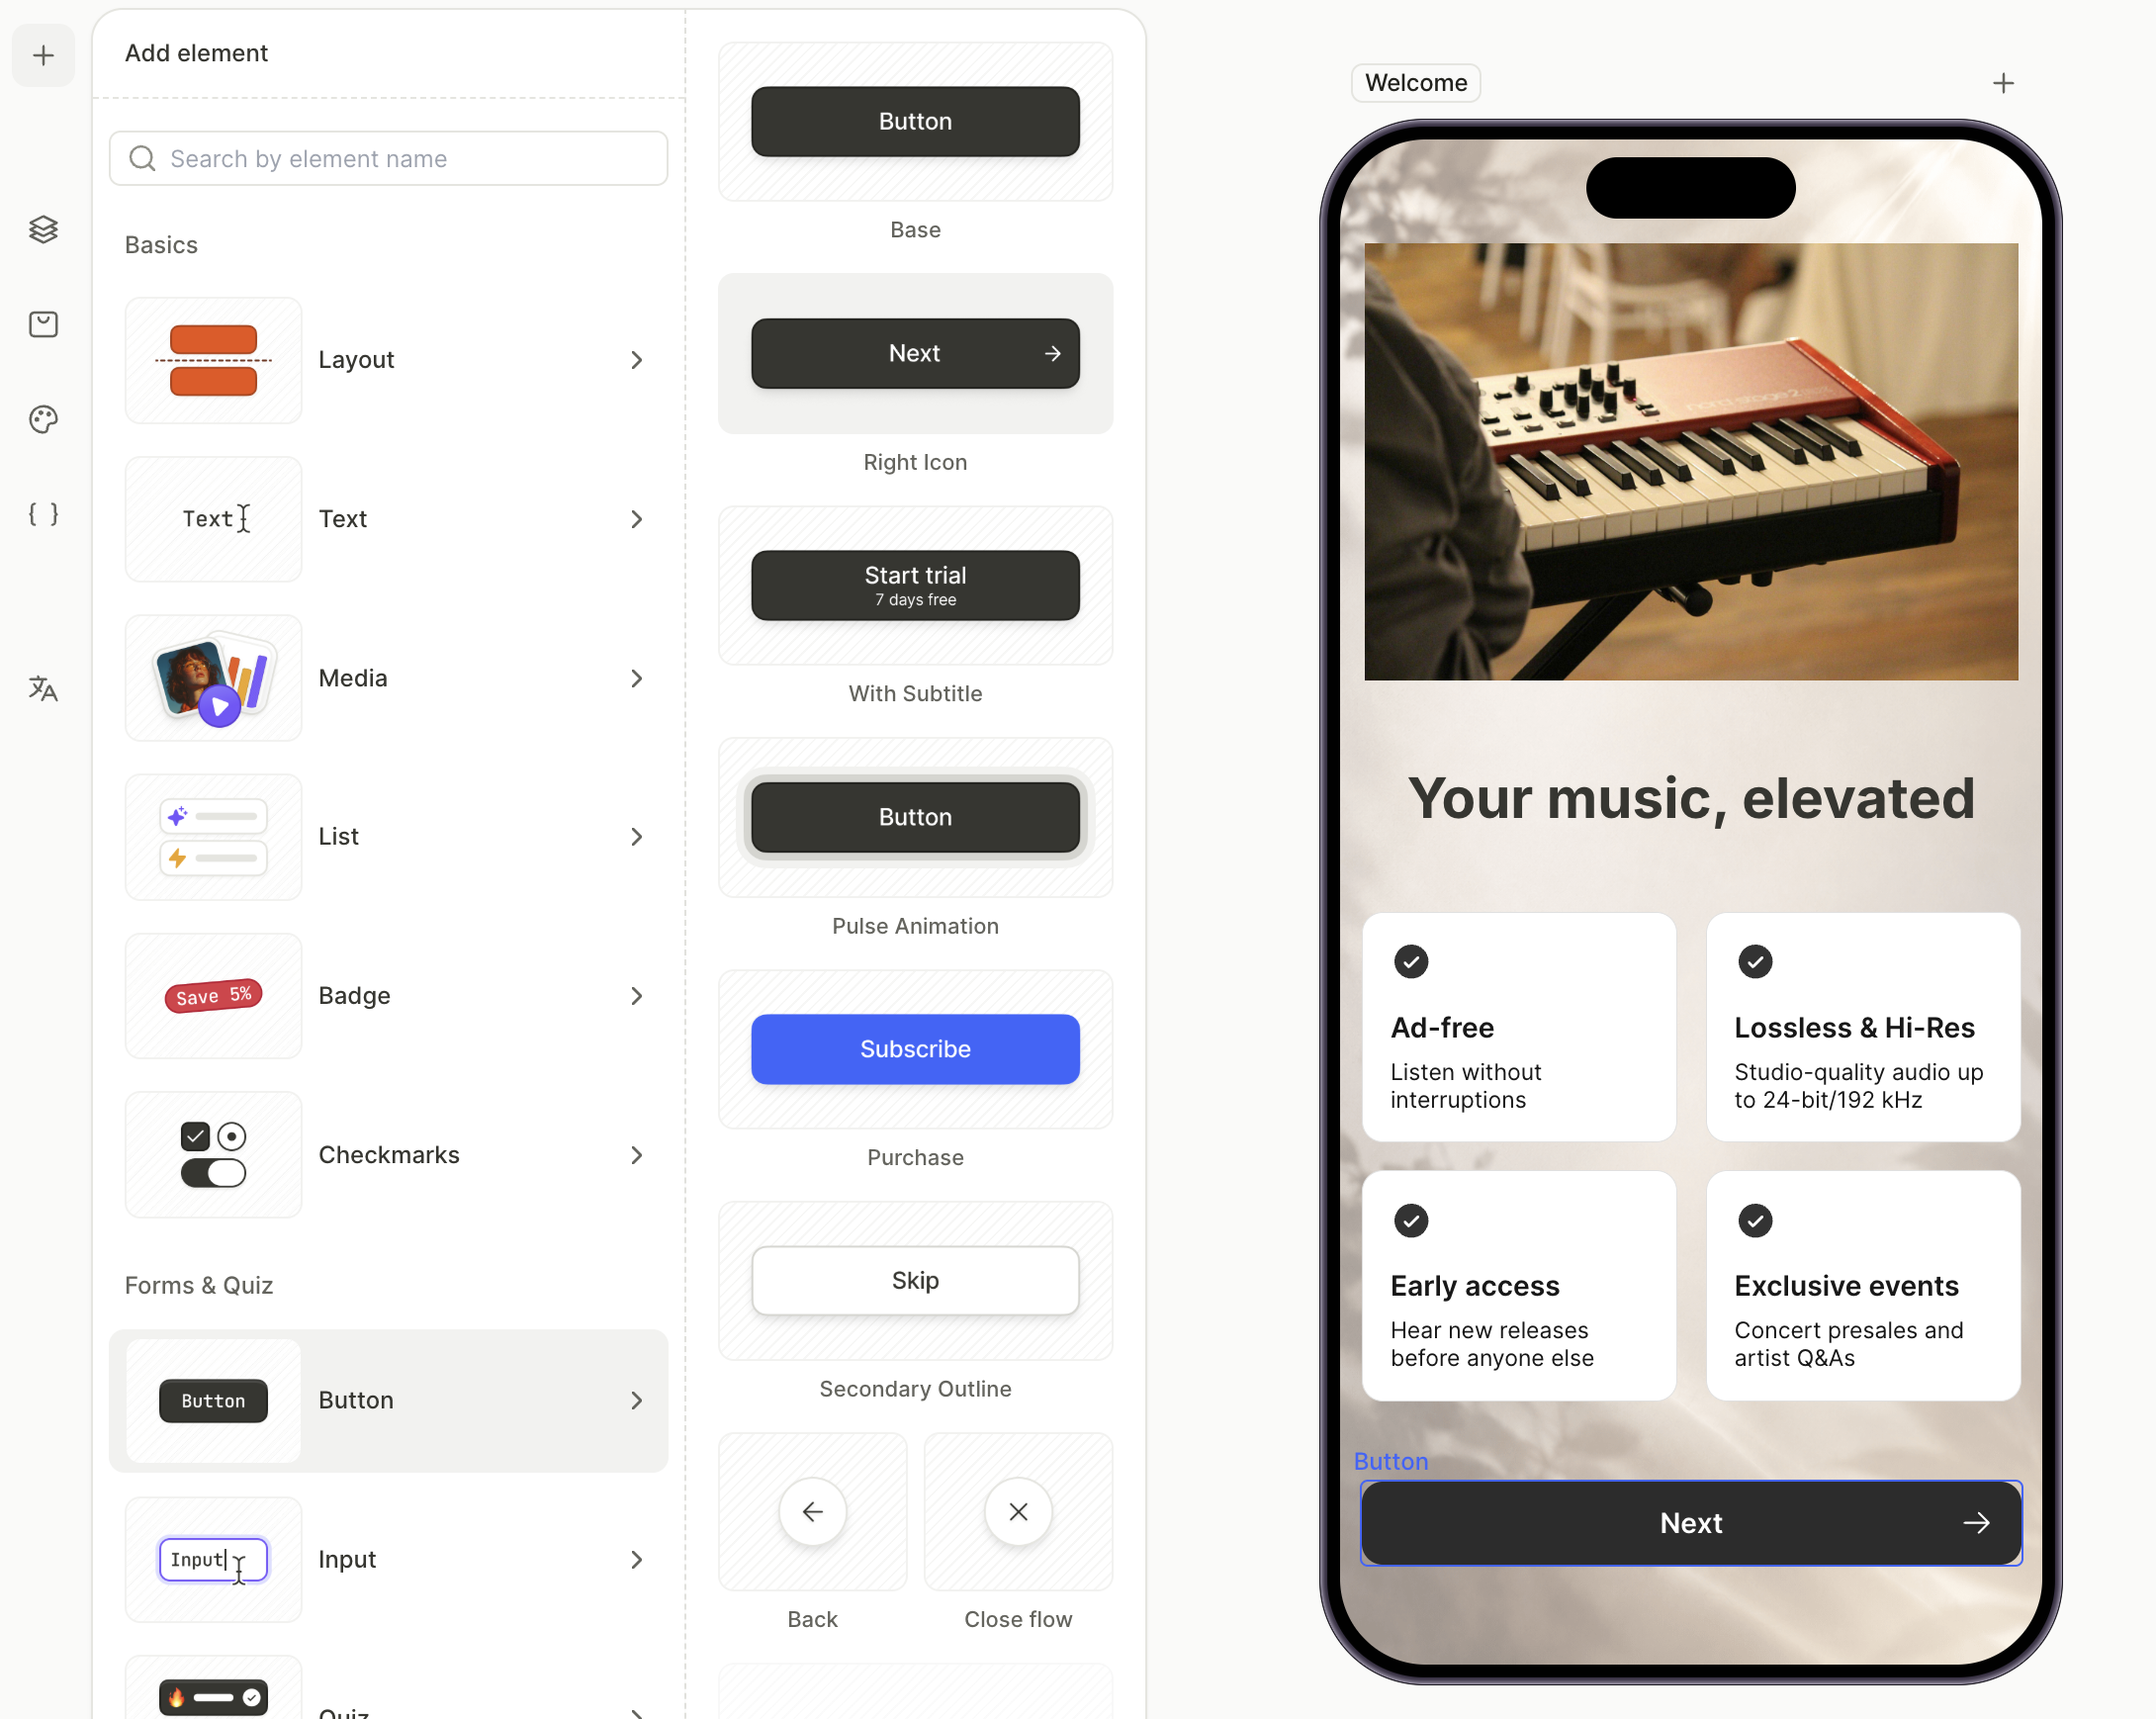
- Add a primary navigation button at the bottom. It’ll get an action wired up in the navigation step.
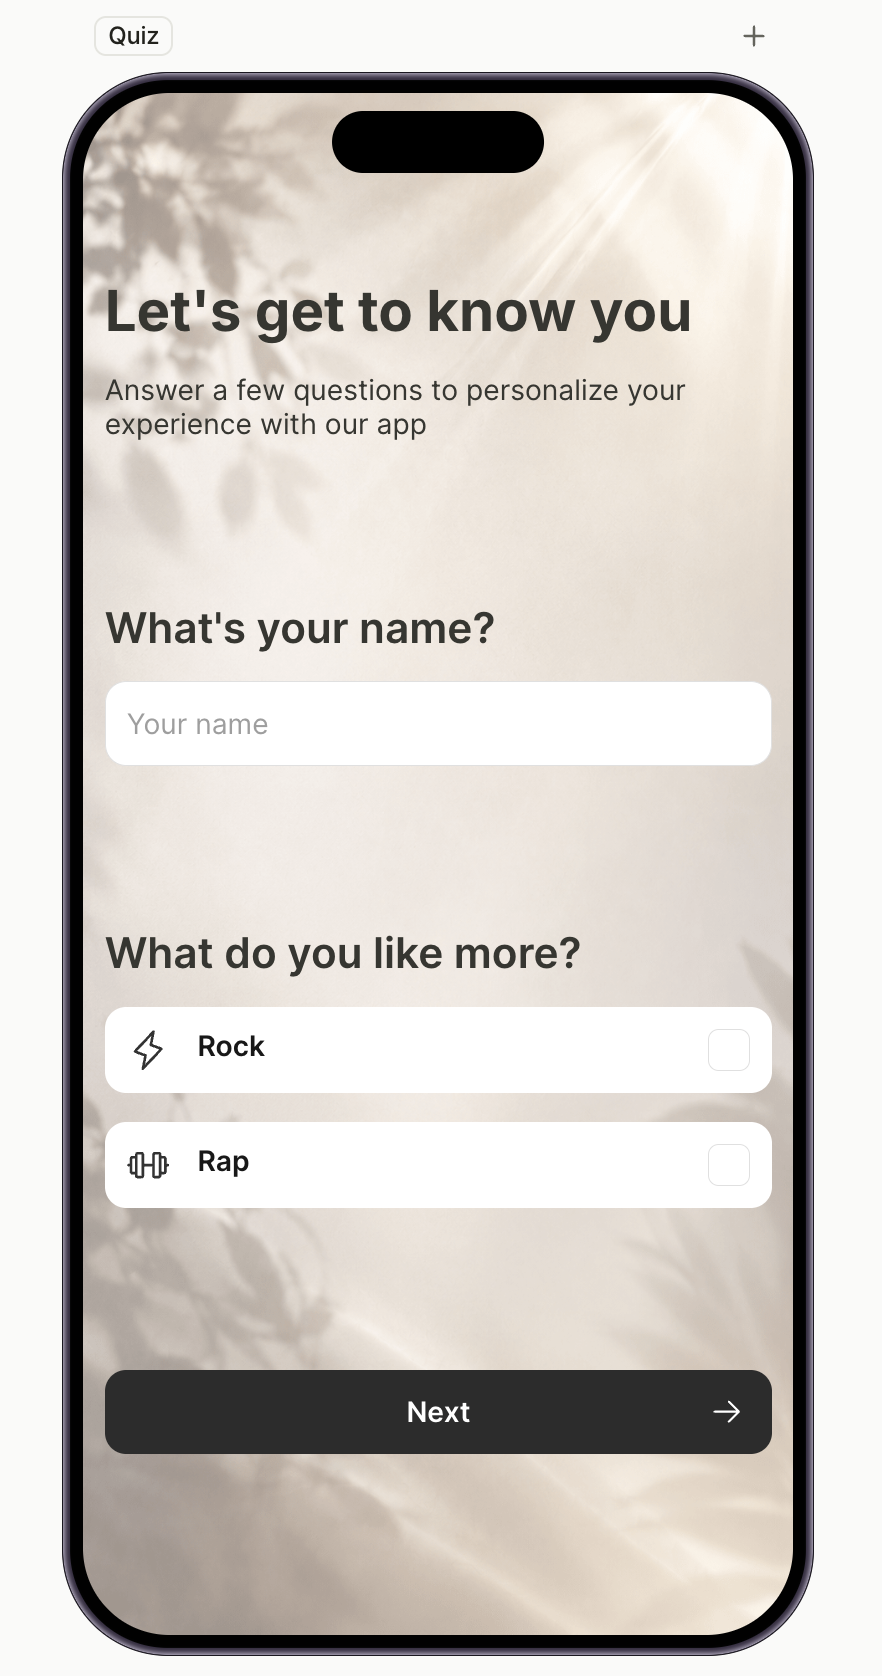
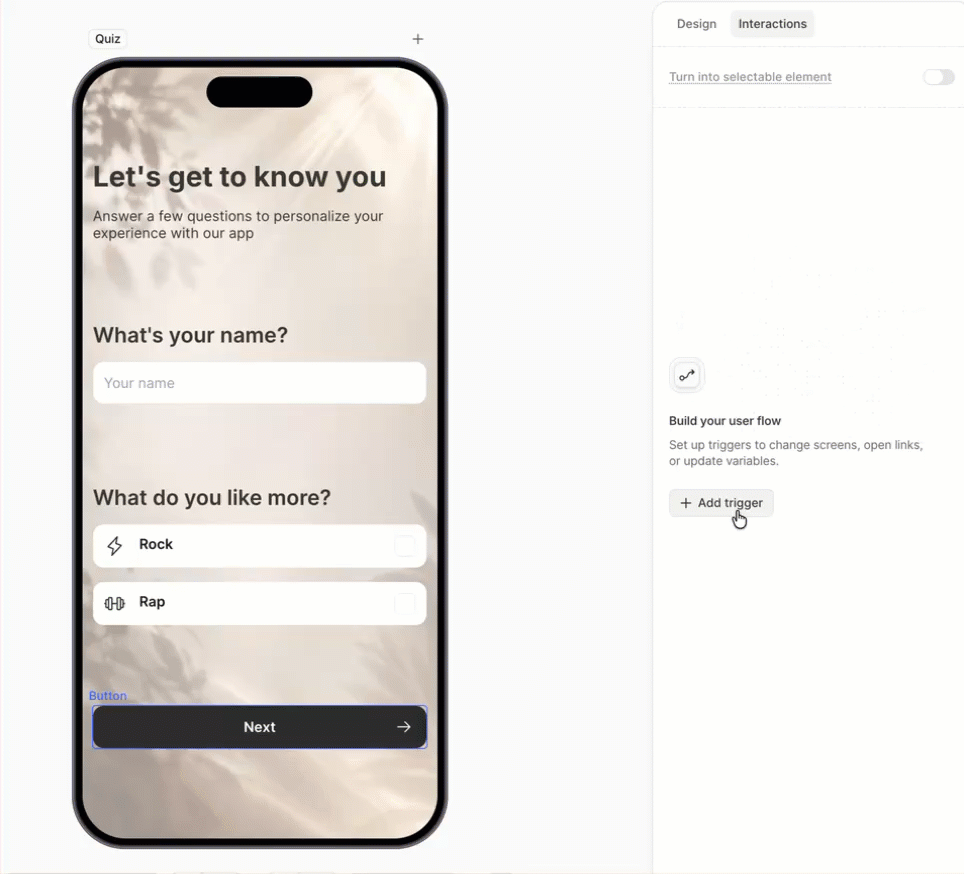
4. Build the input and quiz screen
The second screen collects input from the user. In our example, it asks for a name and a single-choice answer that drives which path the user sees next.
For more on inputs and quizzes, see Inputs and forms and Surveys and quizzes.
Click the Quiz screen in the Screens panel, then add the elements. Each group on the screen — intro, question + input, question + quiz — sits in its own Vertical Container so related elements stay together visually.
- Add the intro headline and body. Click + > Text > H1 for the headline and + > Text > Body for the supporting copy.
- Group the intro. Click + > Layout > Vertical Container, drag the new container to the top of the layer tree, then drag the H1 and body inside it.
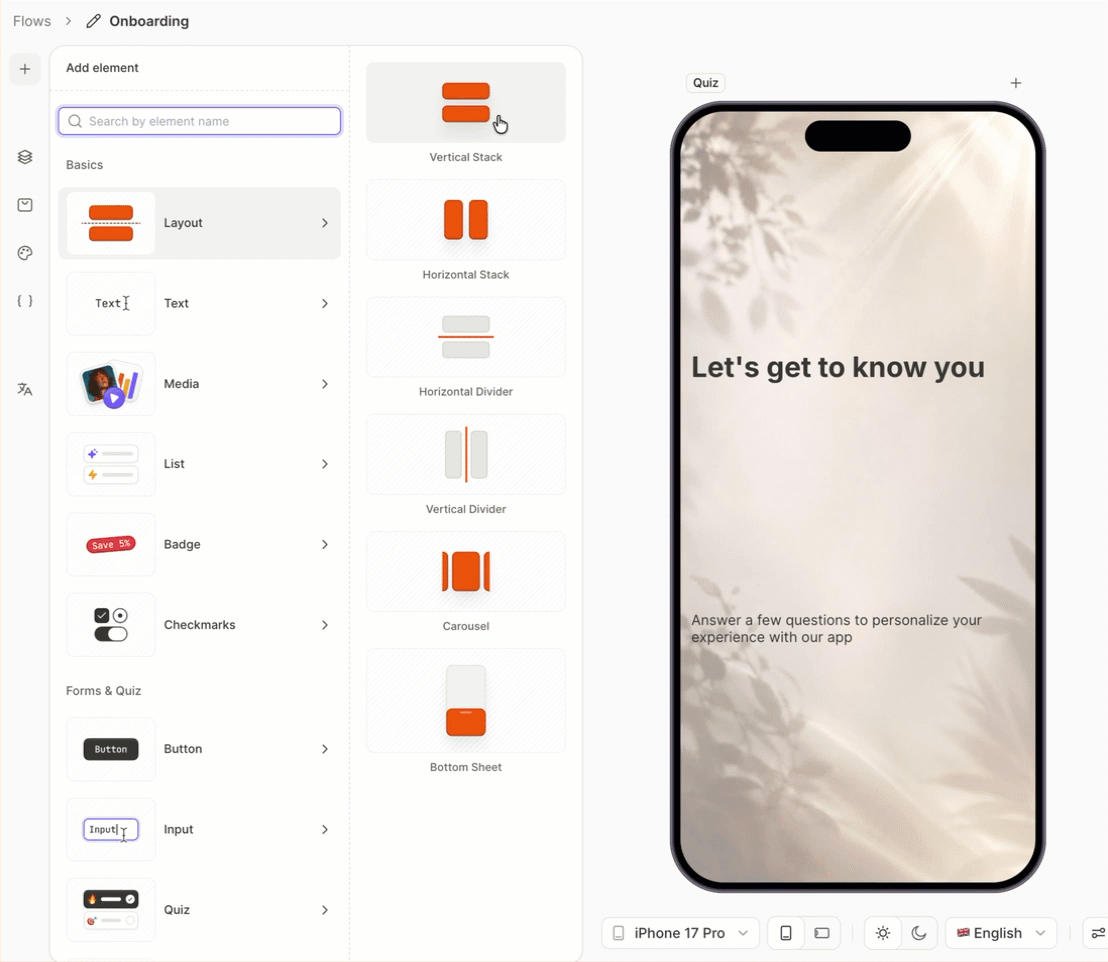
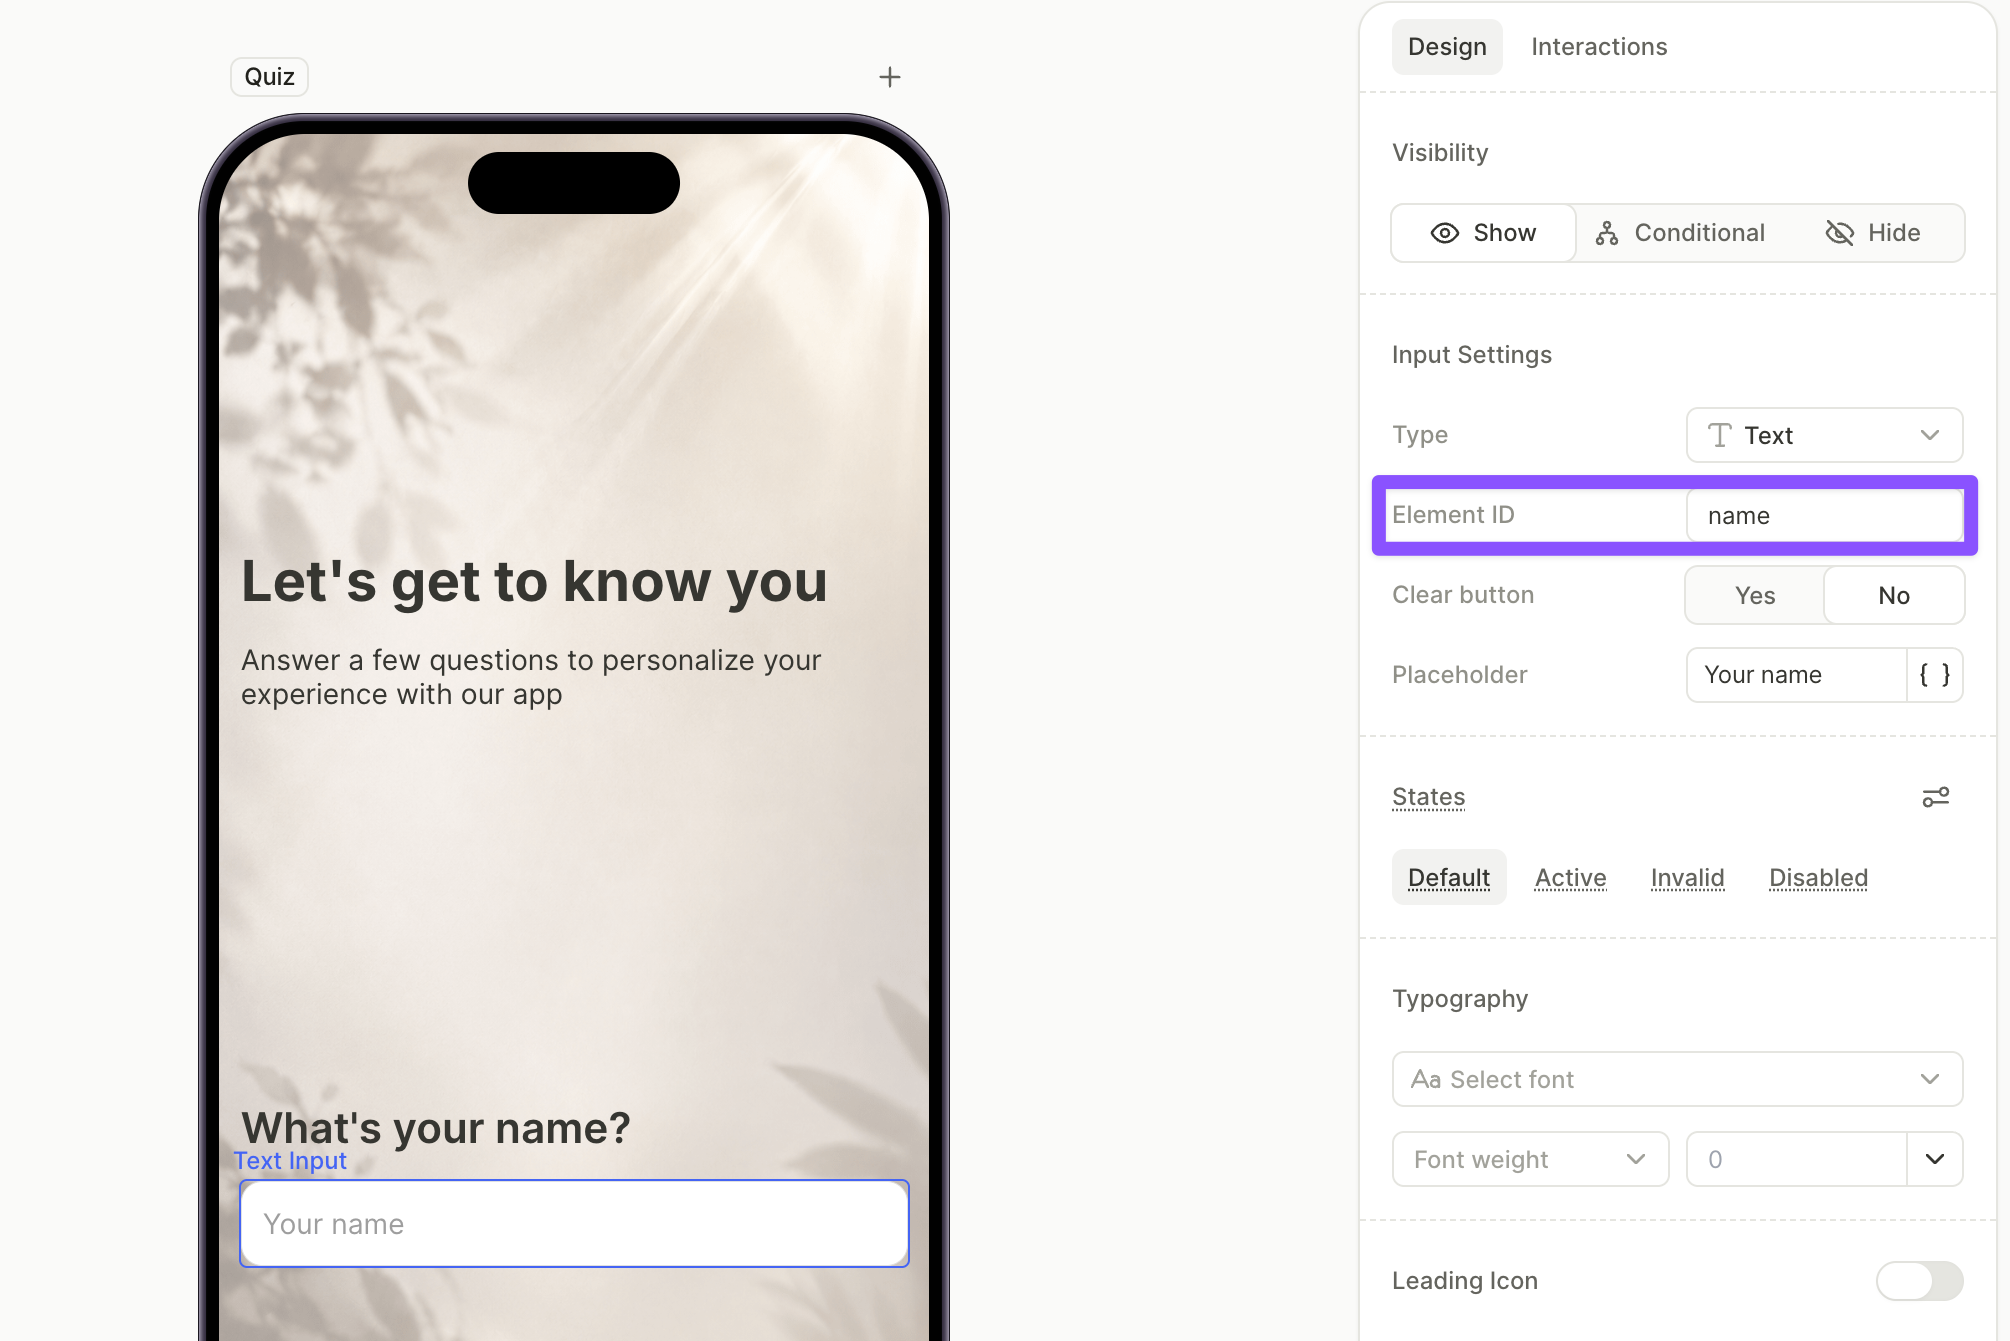
- Add the first question and input. Click + > Text for the question caption, then click + > Inputs > Text for the field.
- Set the input’s Element ID in the Design tab — in our example,
name. This exposes the value as a variable other screens can reference.
- Group the caption and input in a Vertical Container the same way as the intro.
- Add the second question and quiz. Click + > Text for the caption, then click + > Quiz and pick a layout preset like Icon Options. Configure the options — in our example,
RockandHip hop. - Group the caption and quiz in a Vertical Container the same way.
- Set the option IDs. Select each quiz option, open the Interactions tab, and set its Element ID. These IDs are referenced in the conditional navigation later.
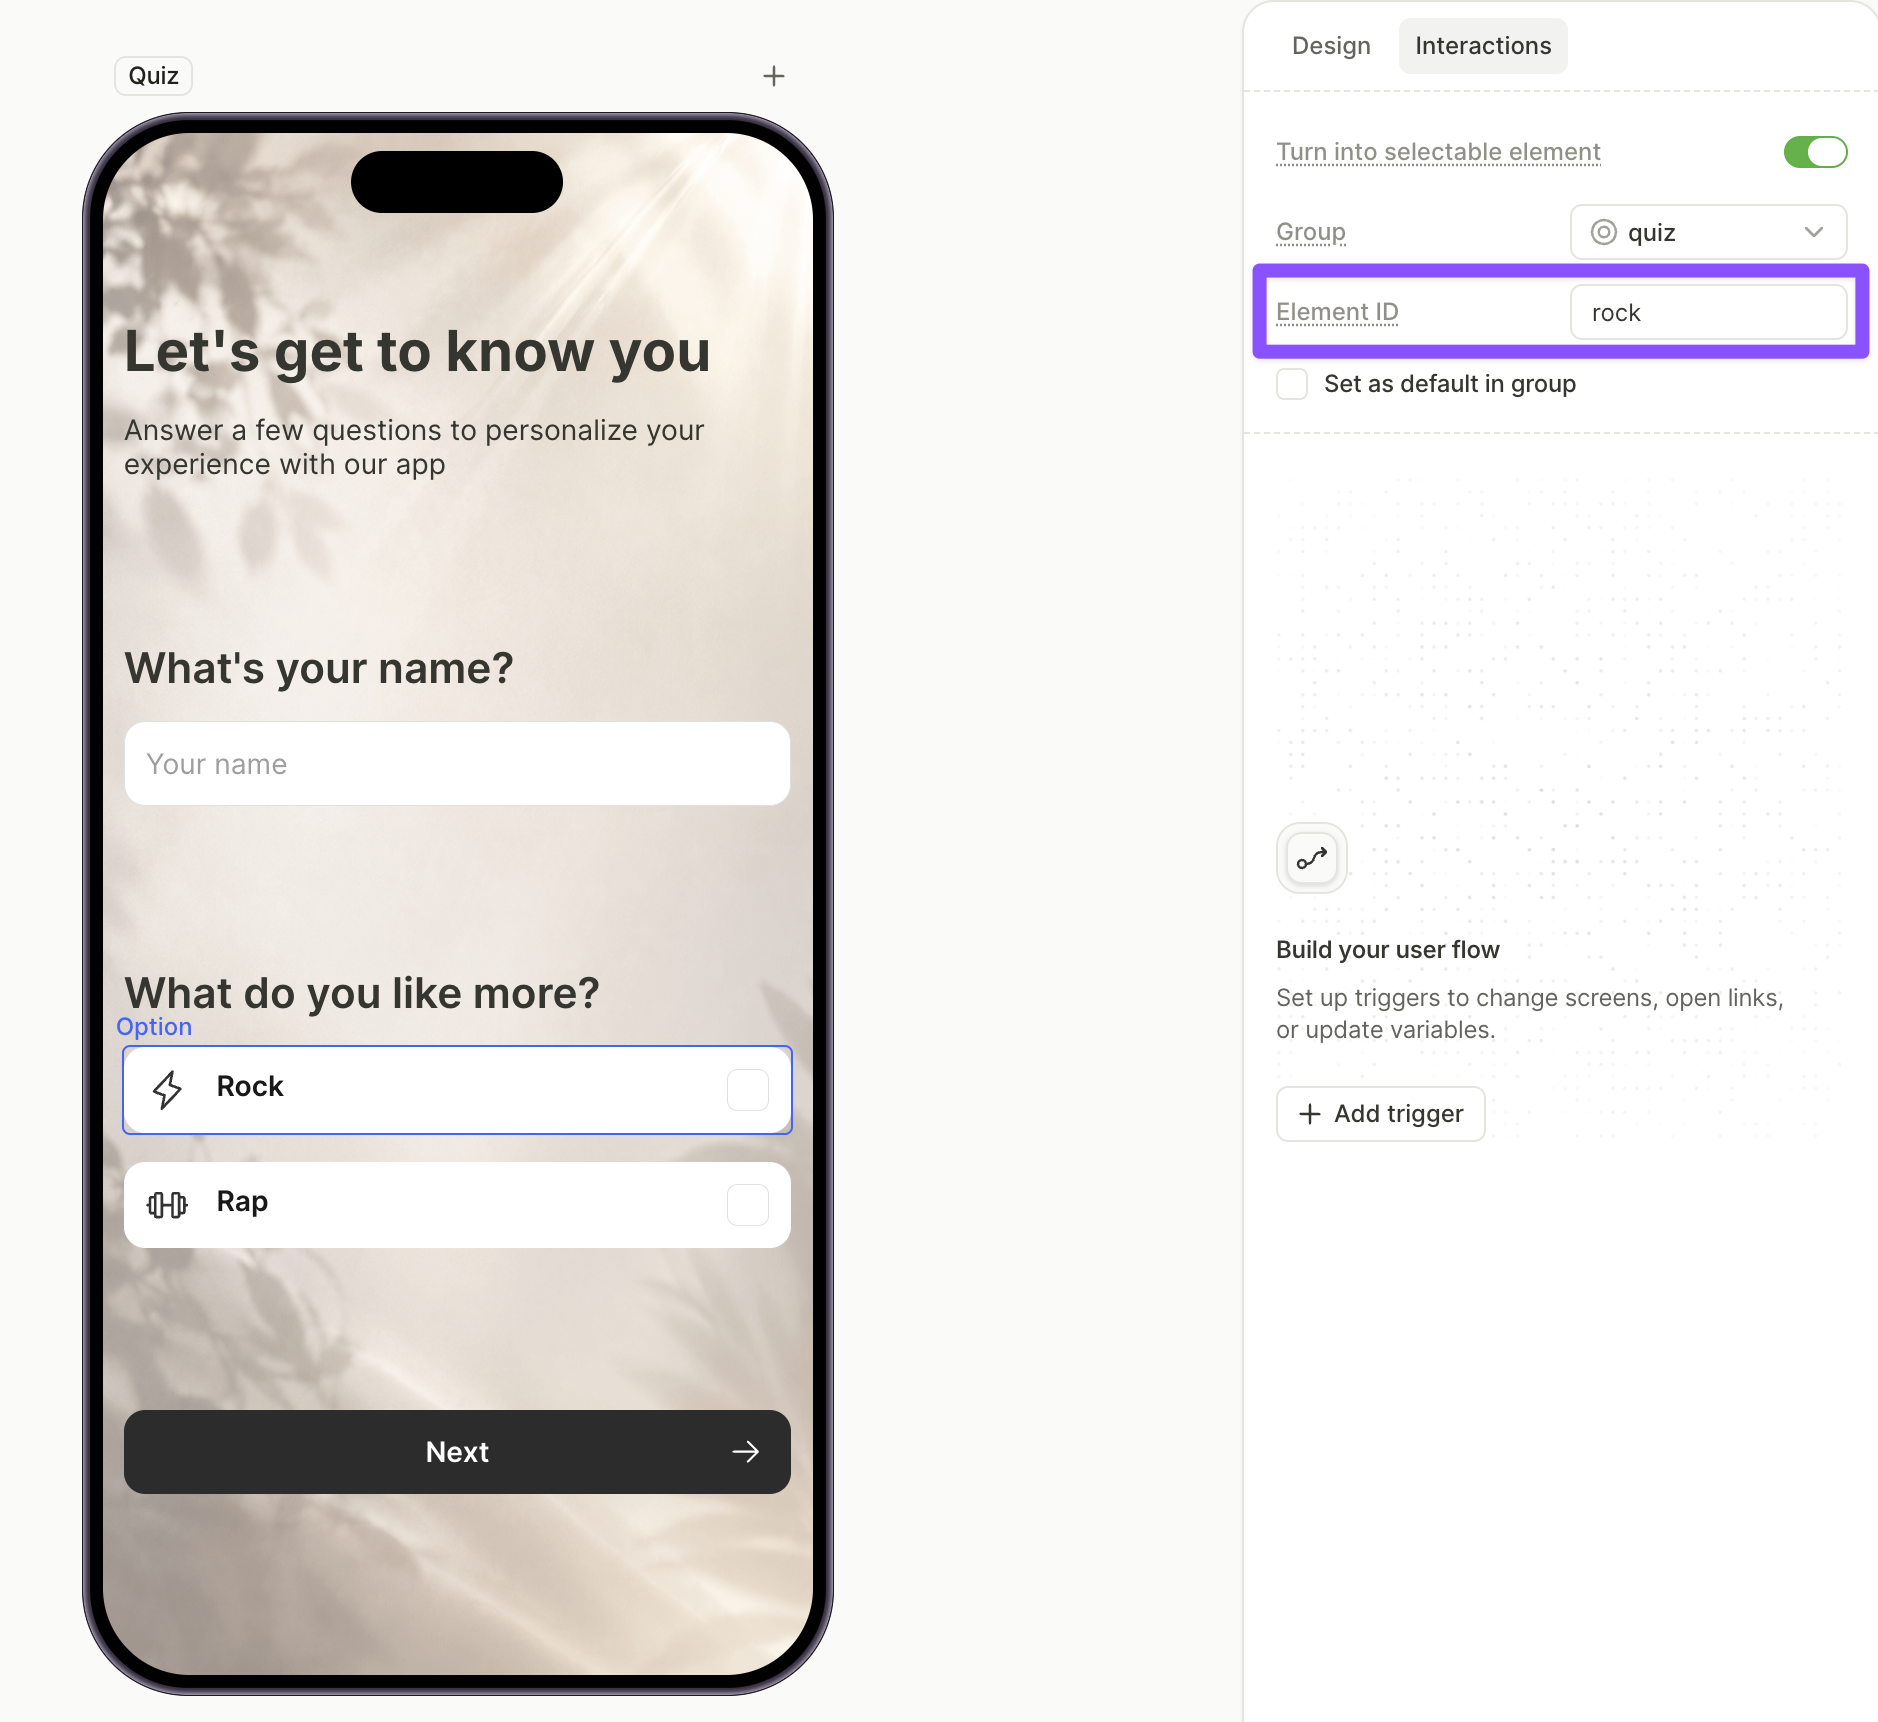
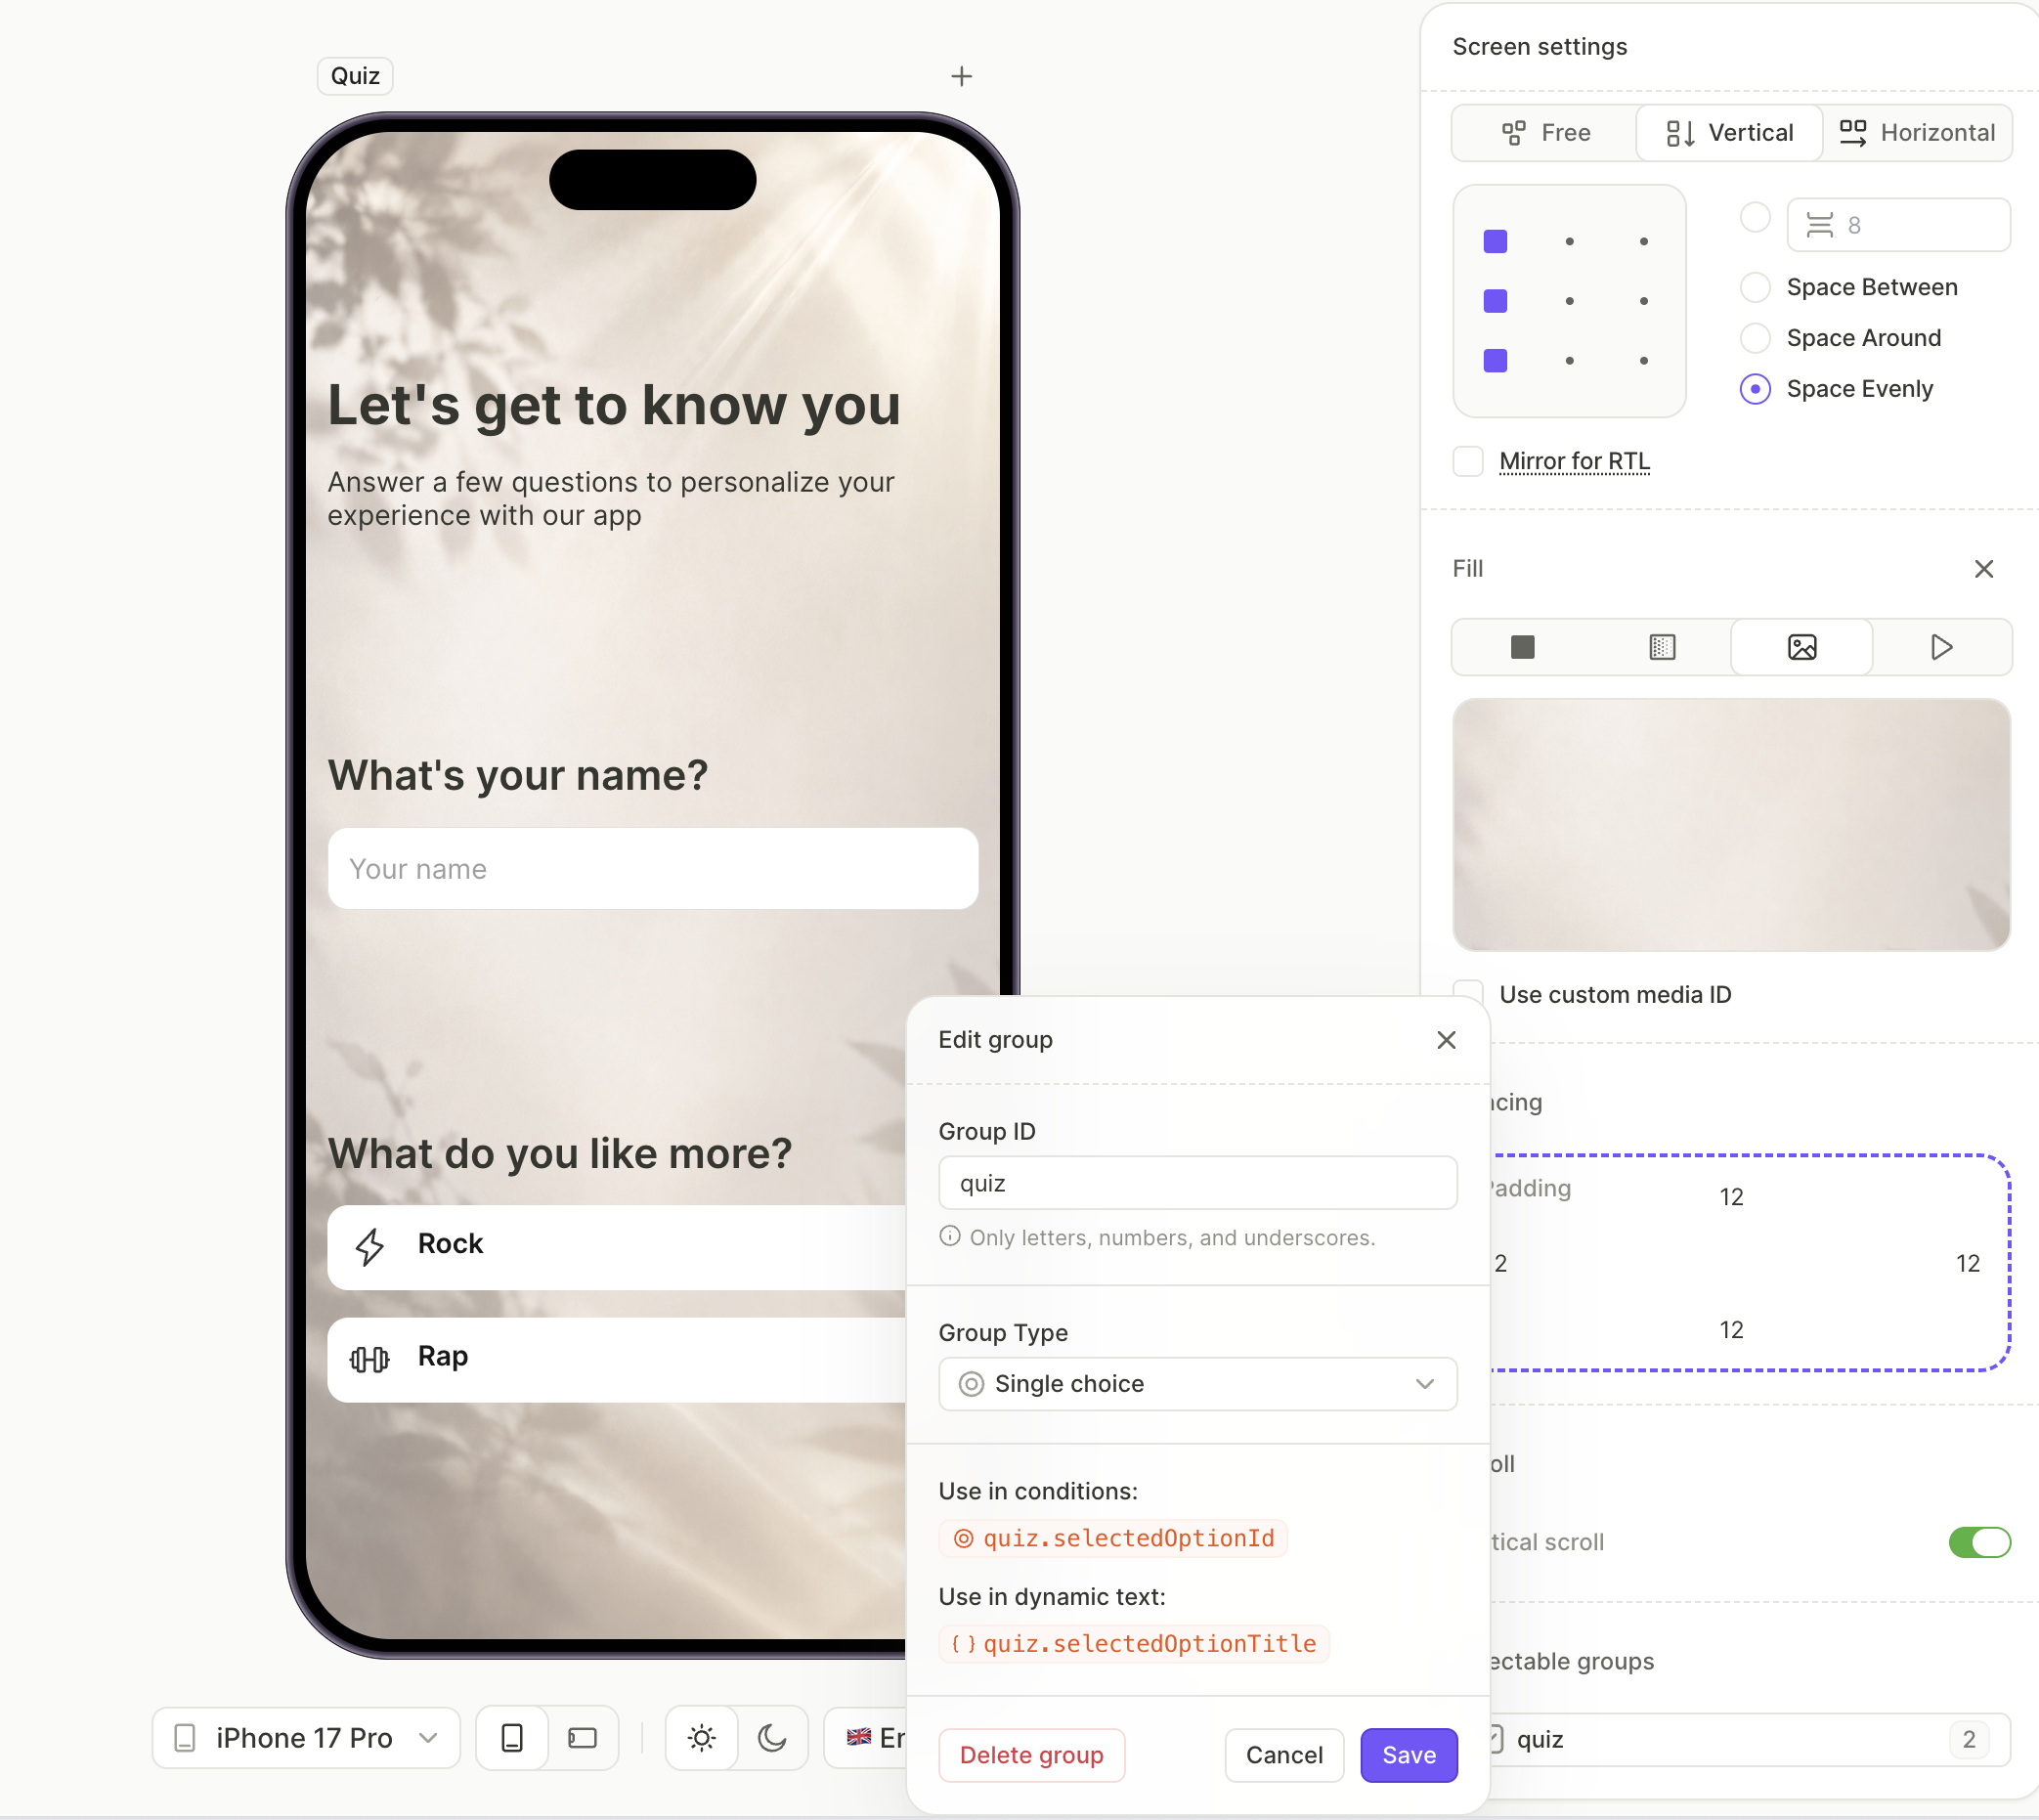
- Switch the quiz to single choice: click an empty area of the canvas to open Screen settings, scroll down to Selectable Groups, click the quiz group’s name, and set the type to Single choice.
- Add a primary button at the bottom — this is the Next button that triggers the branching.
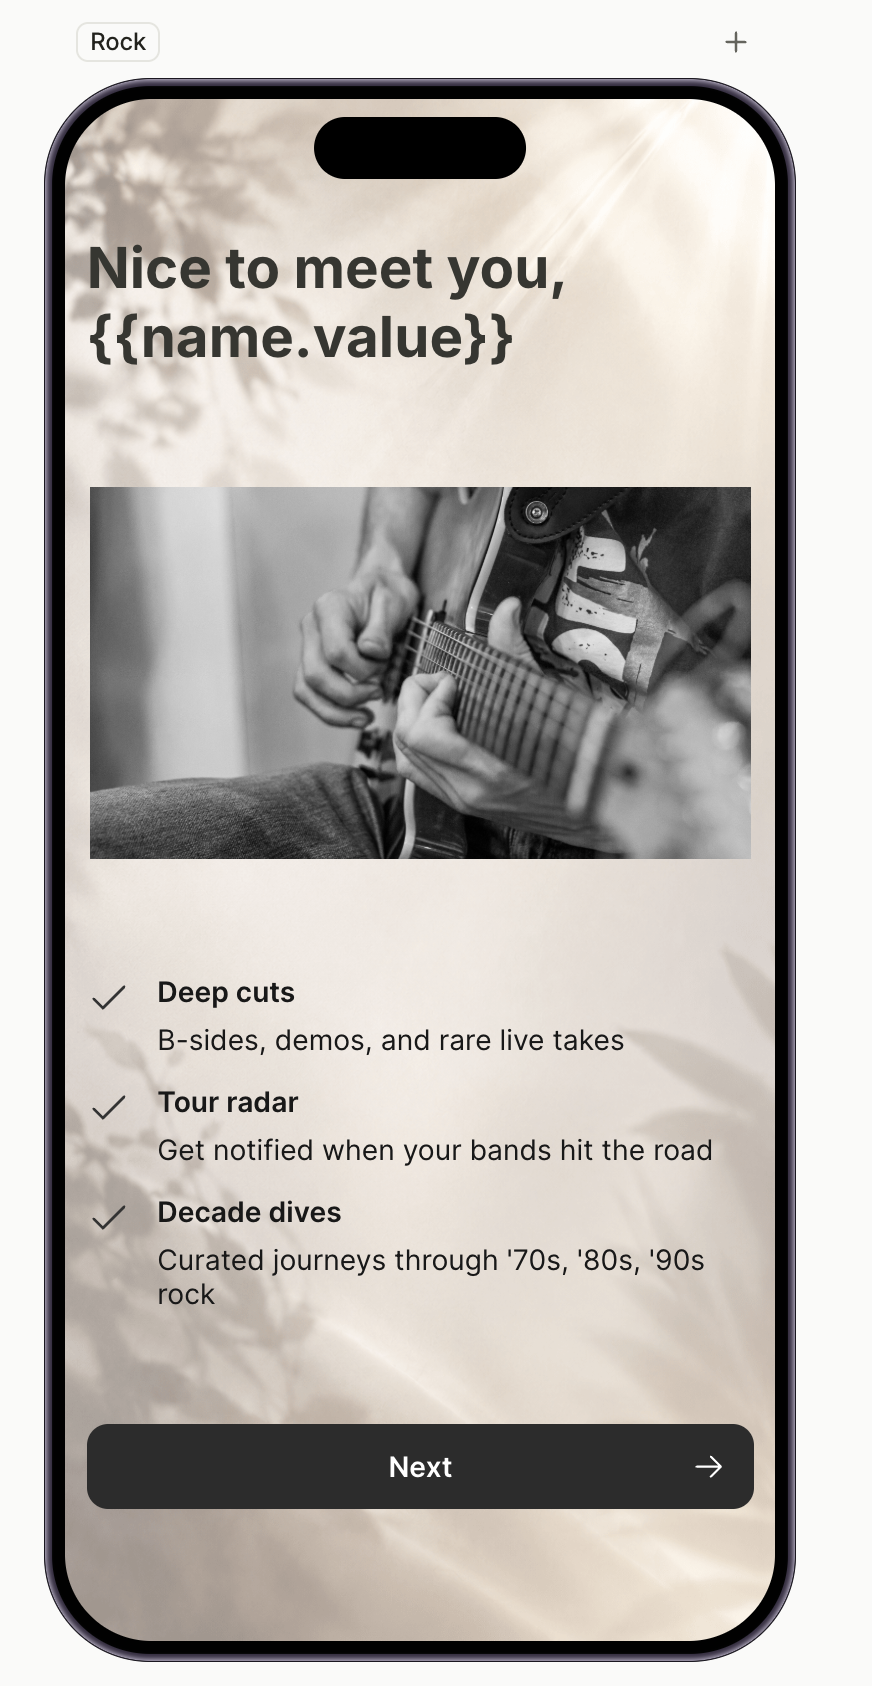
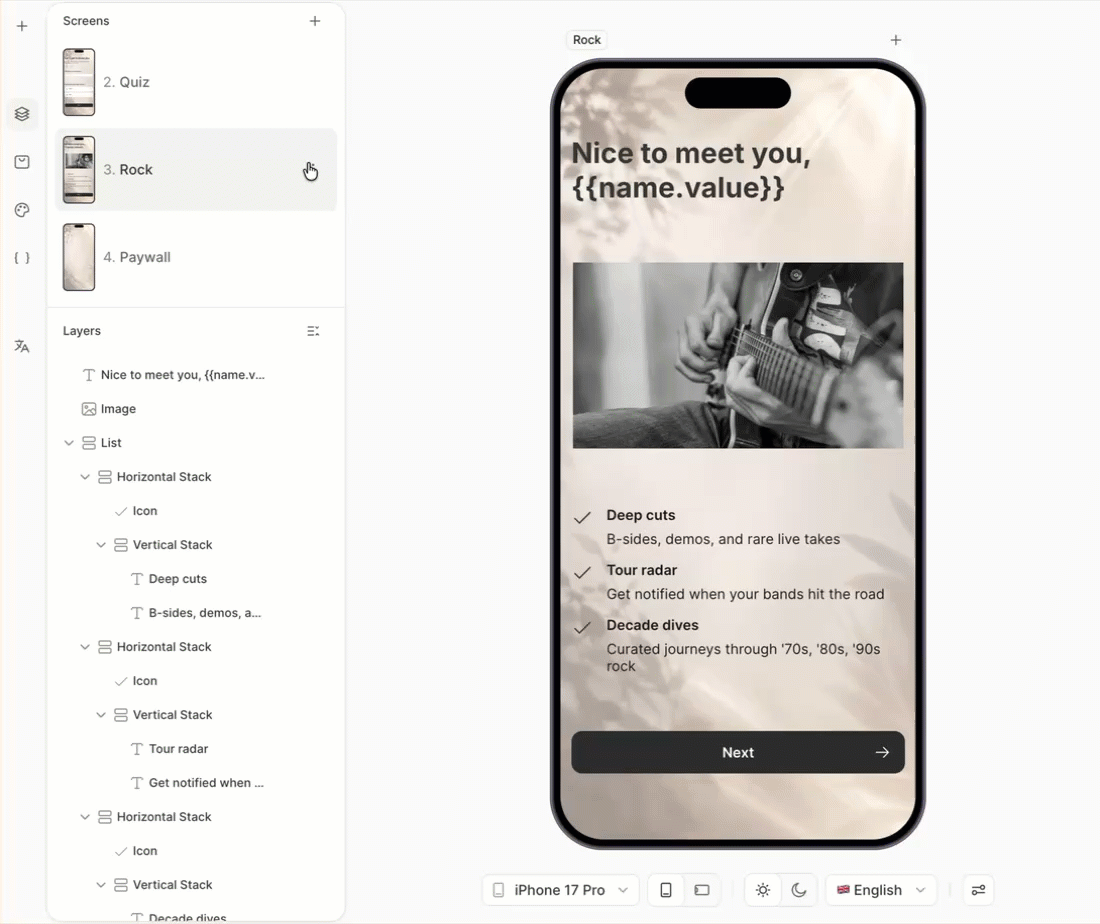
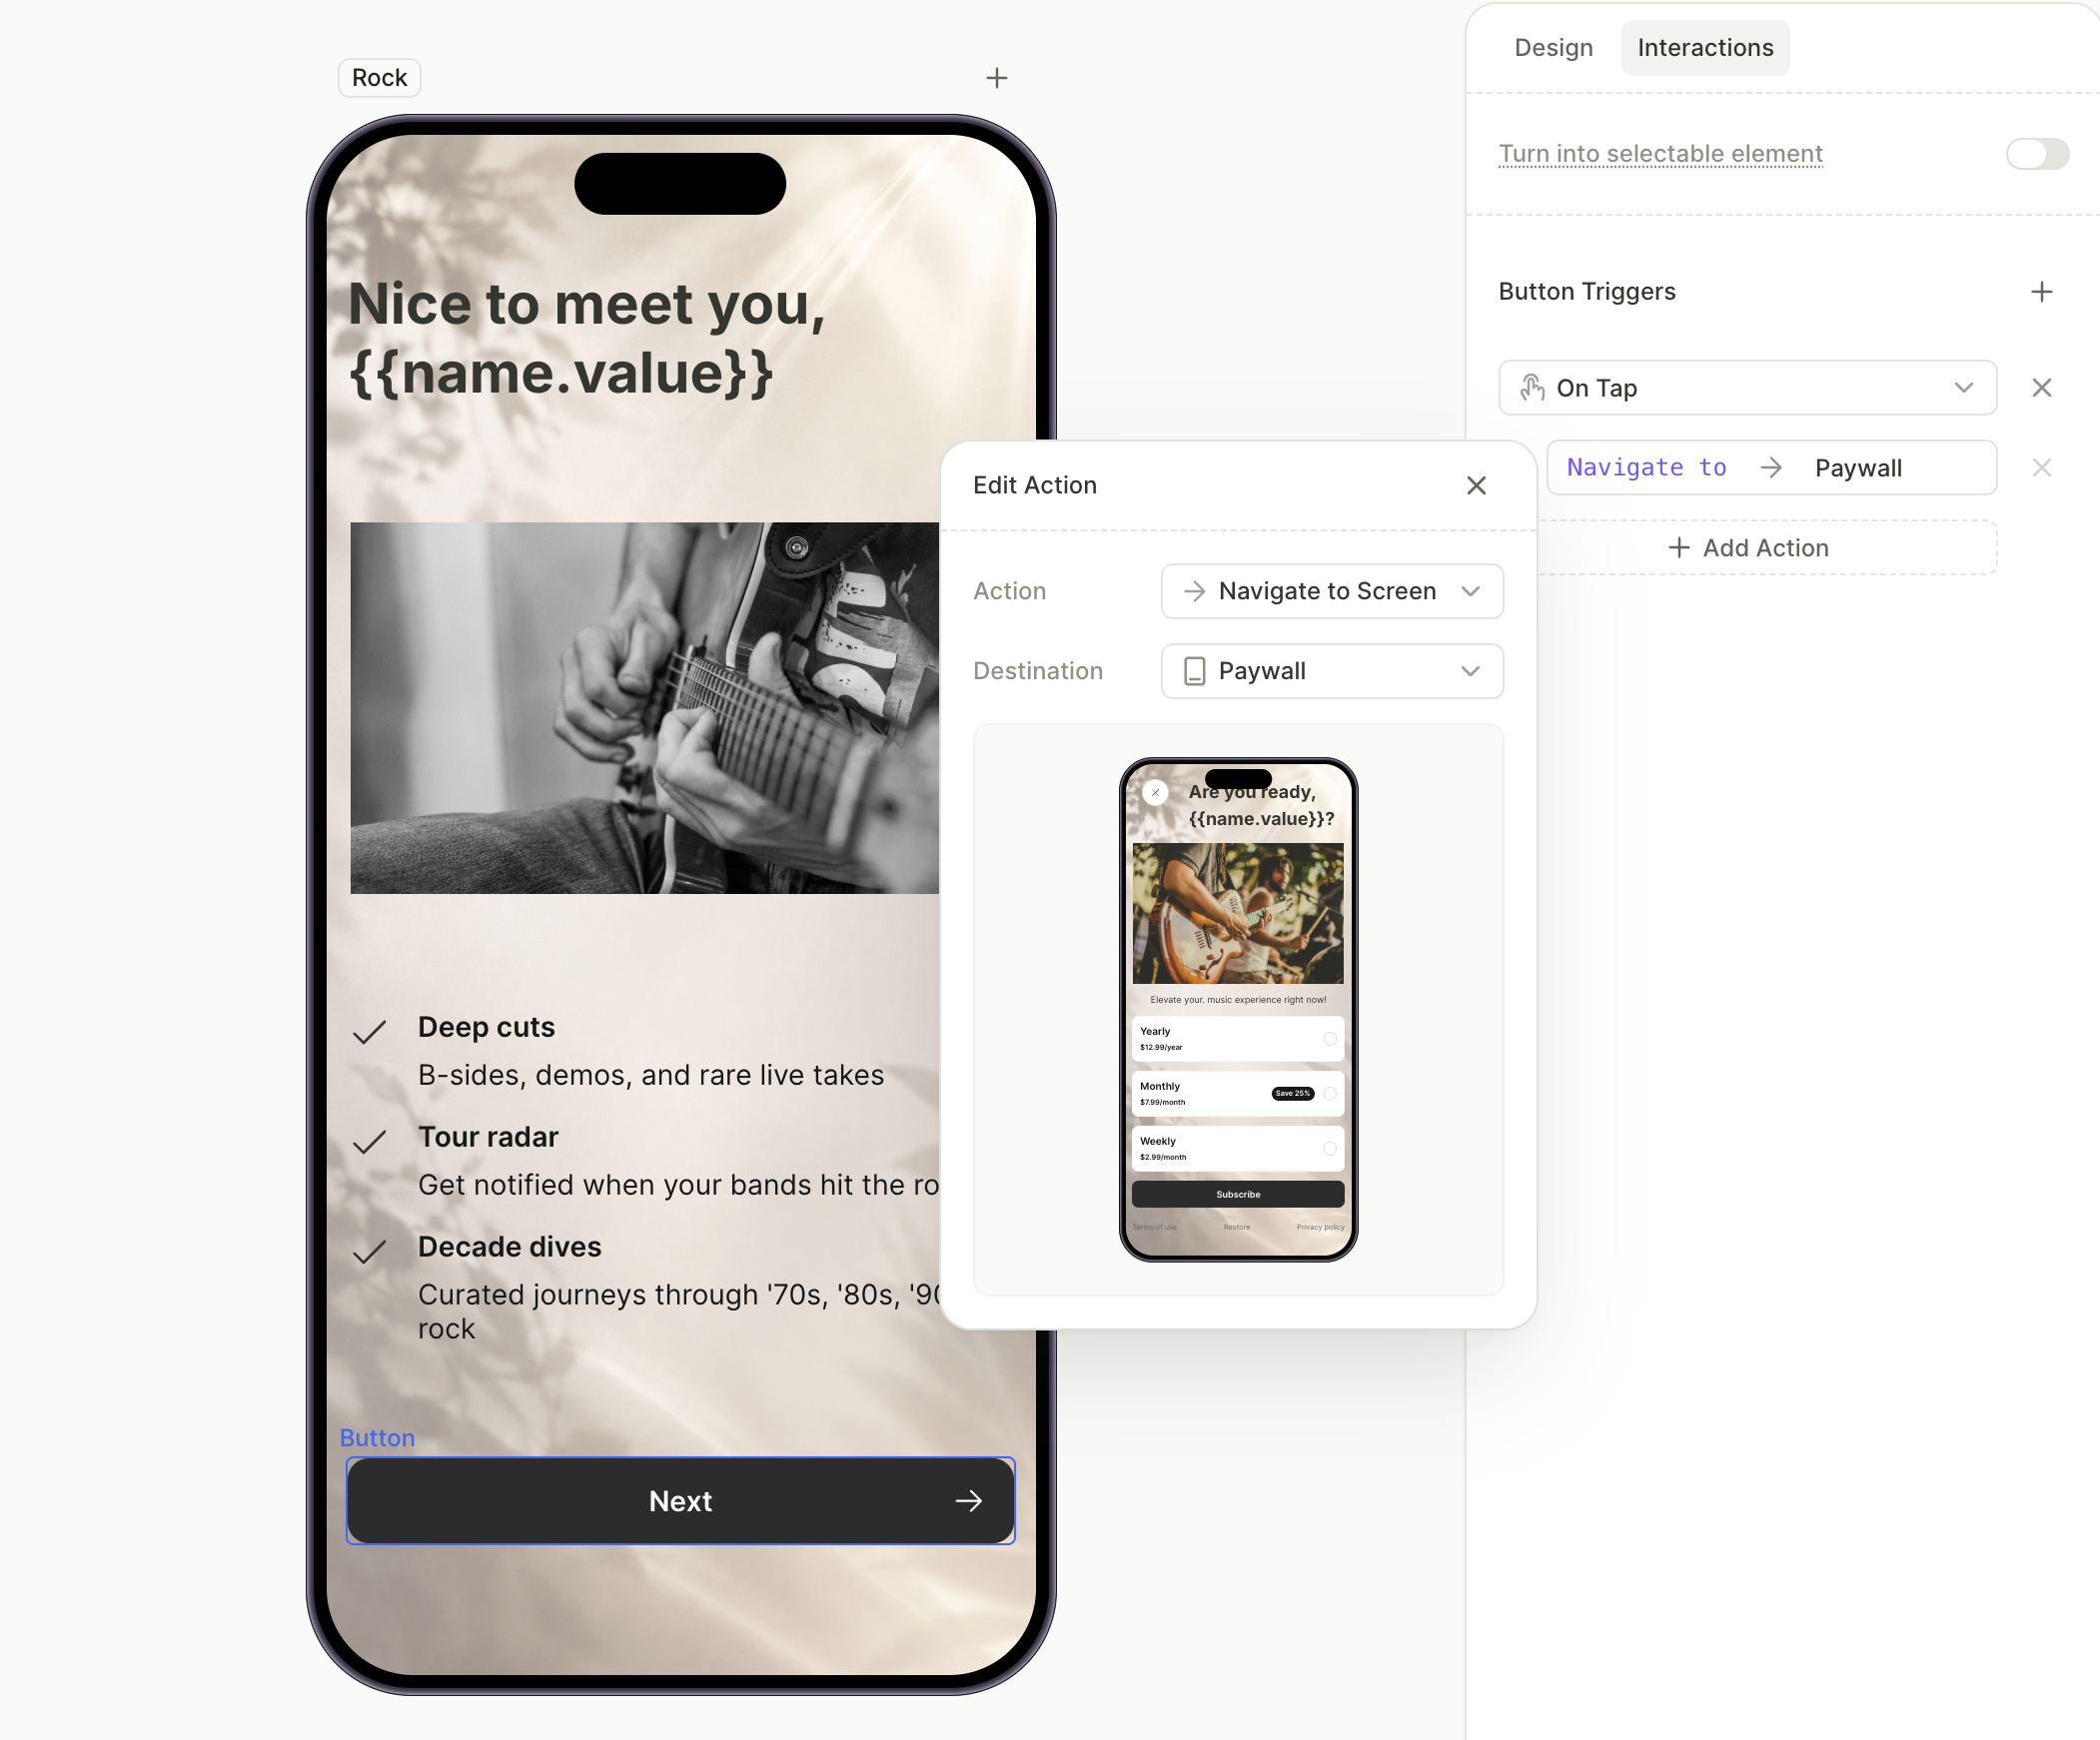
5. Build the first branching path
Each path screen tailors content for one audience segment. In our example, the Rock path features rock-focused content — playlists, artists, and recommendations.
For more on variables, see Variables.
To build the screen:
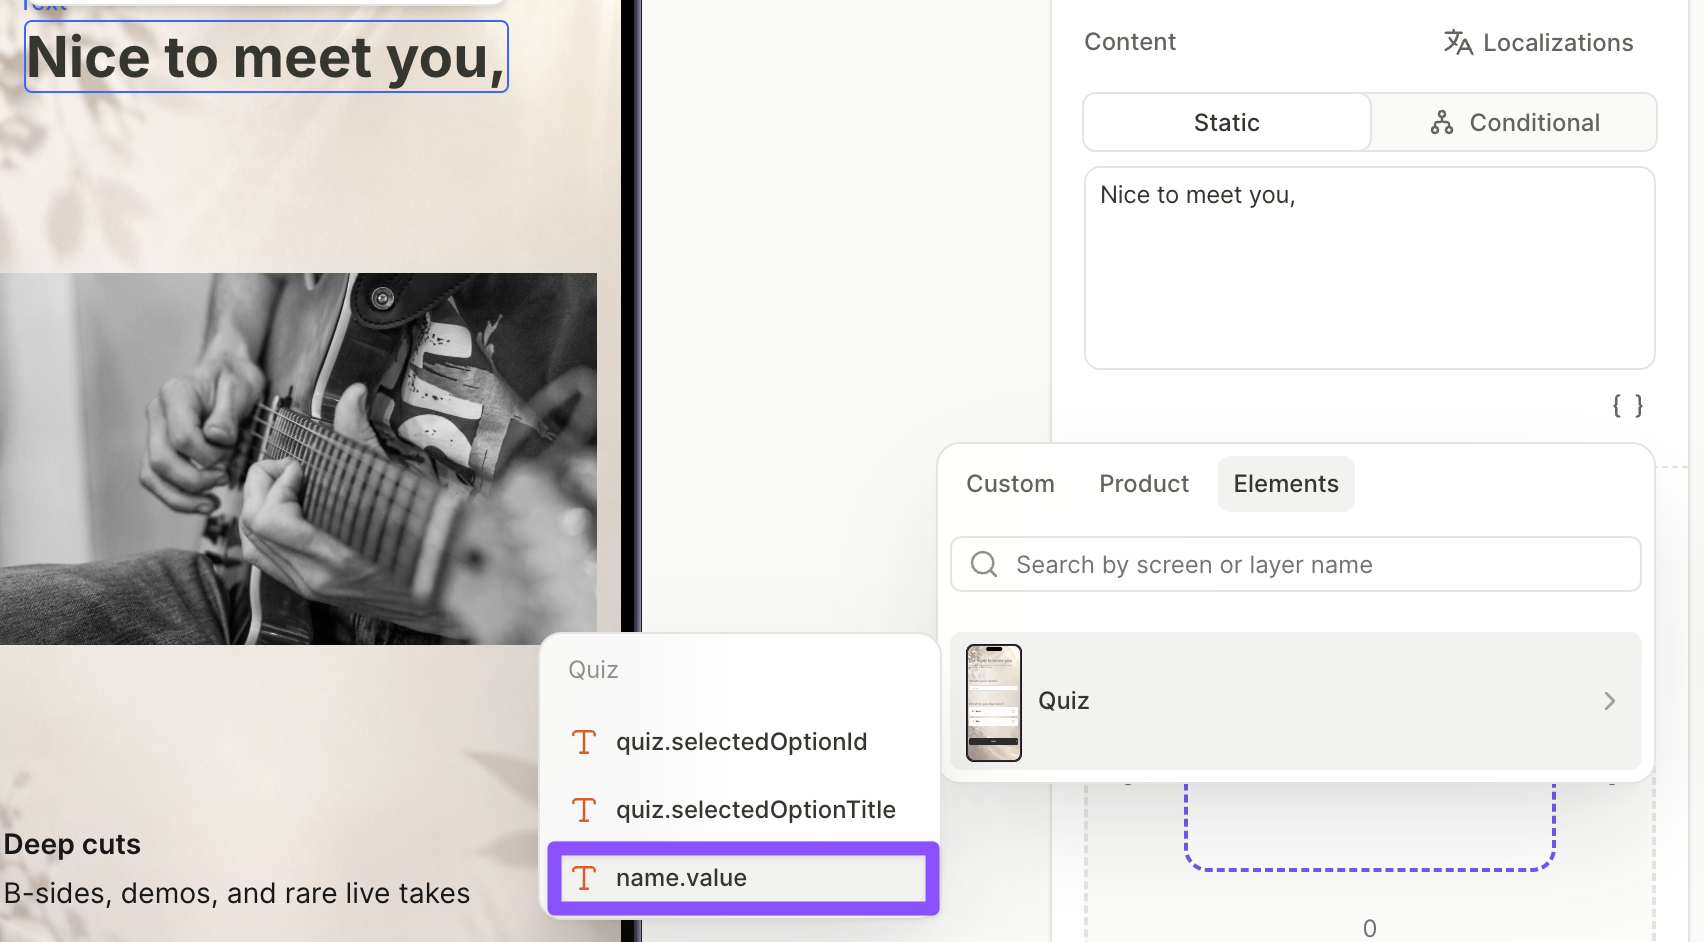
- In the Screens panel, click the Rock path screen.
- Add a headline. Place the cursor in the Content field where the personalization should appear, click the variable icon
 , and open the Elements tab. Pick the screen where the input lives — in our example, Quiz — then pick the input’s value variable. The picker resolves it as
 <elementId>.value— in our example,name.value. At runtime, the headline updates with whatever the user typed.
- Add the body copy as additional text elements, tuned to the audience segment for this path.
- Add a primary button at the bottom.
6. Build the second branching path
Path screens usually share a layout — only the copy changes. Duplicate the first path screen and update the content.
To duplicate and update:
- In the Screens panel, select the first path screen and press ⌘D / Ctrl+D to duplicate it. The copy appears at the end of the screen list.
- Rename the copy — in our example,
Hip hop path— and drag it to the correct place in the screen list, so it sits next to the screen it was duplicated from.
- Update the body copy for the other audience segment. The personalized headline keeps working — the variable carries over.
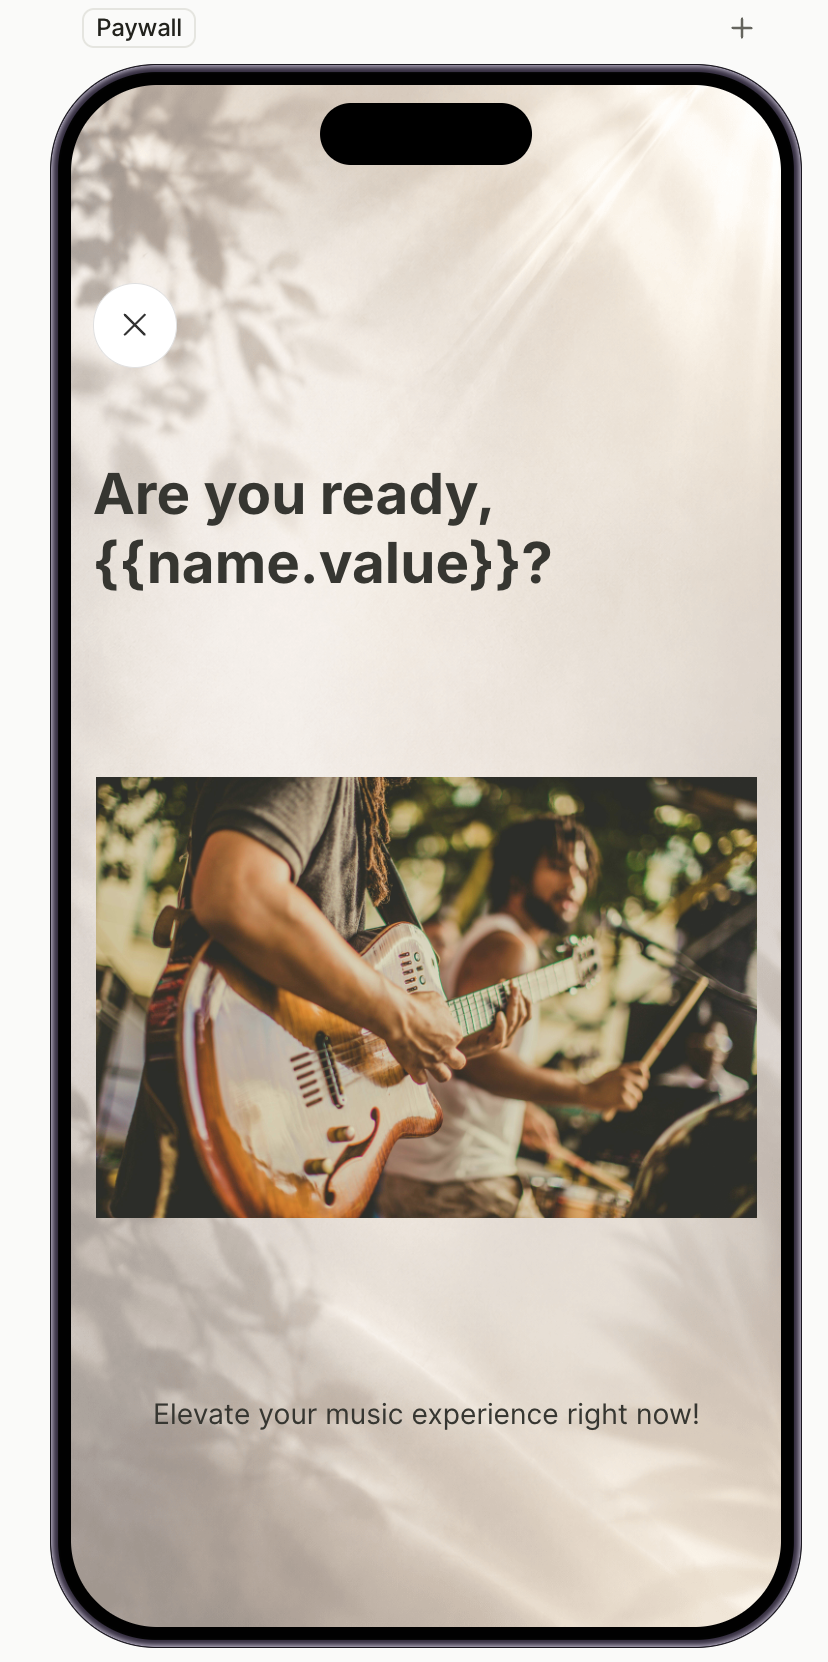
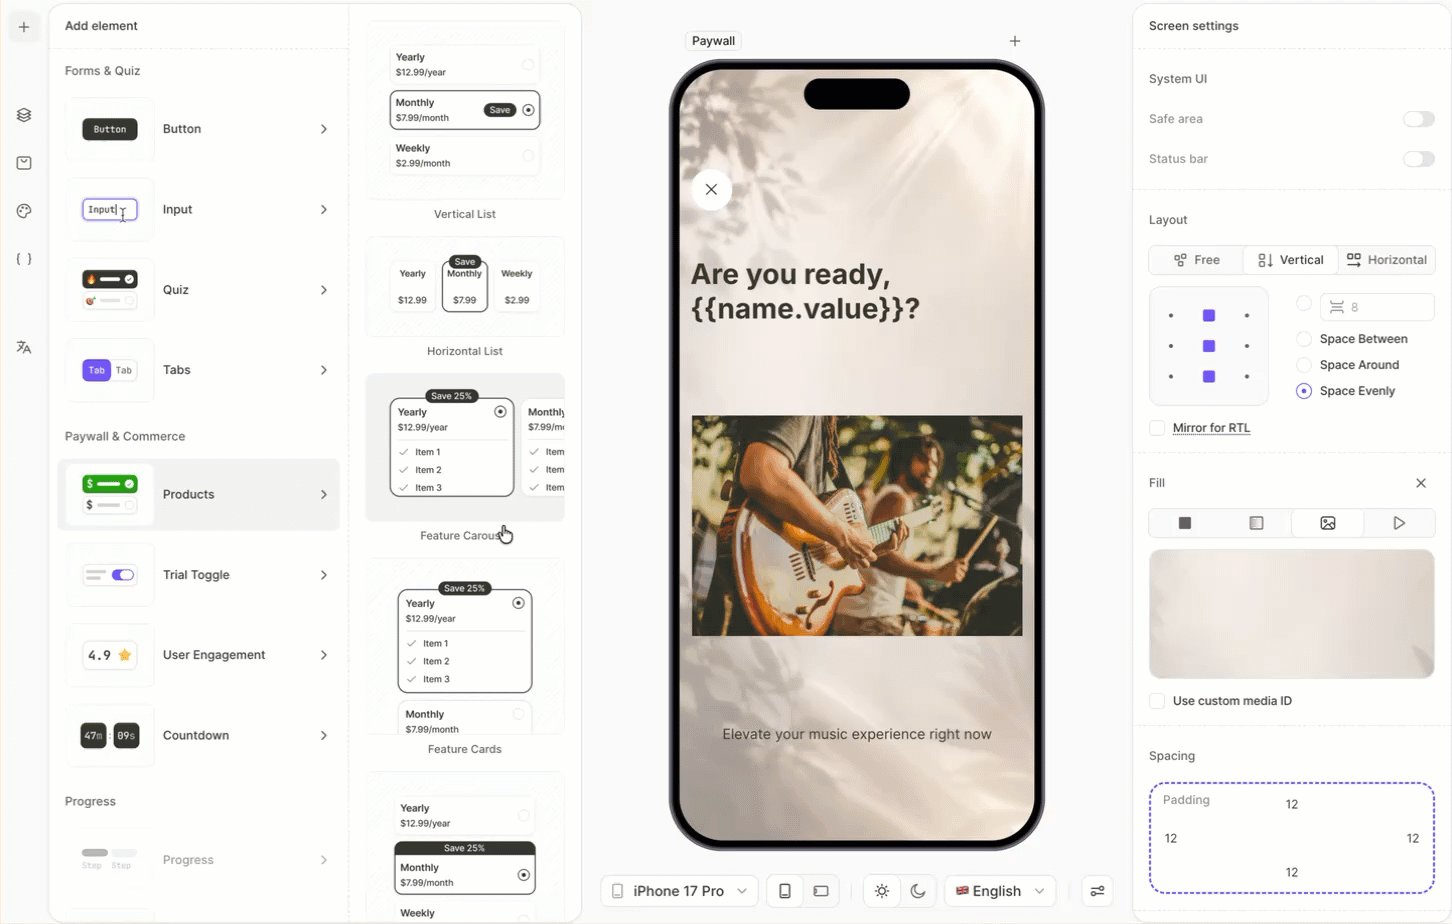
7. Build the paywall
The final screen is the paywall — where the user can subscribe. For a fuller walkthrough of paywall mechanics, see Create a basic paywall screen. The version below condenses that walkthrough.
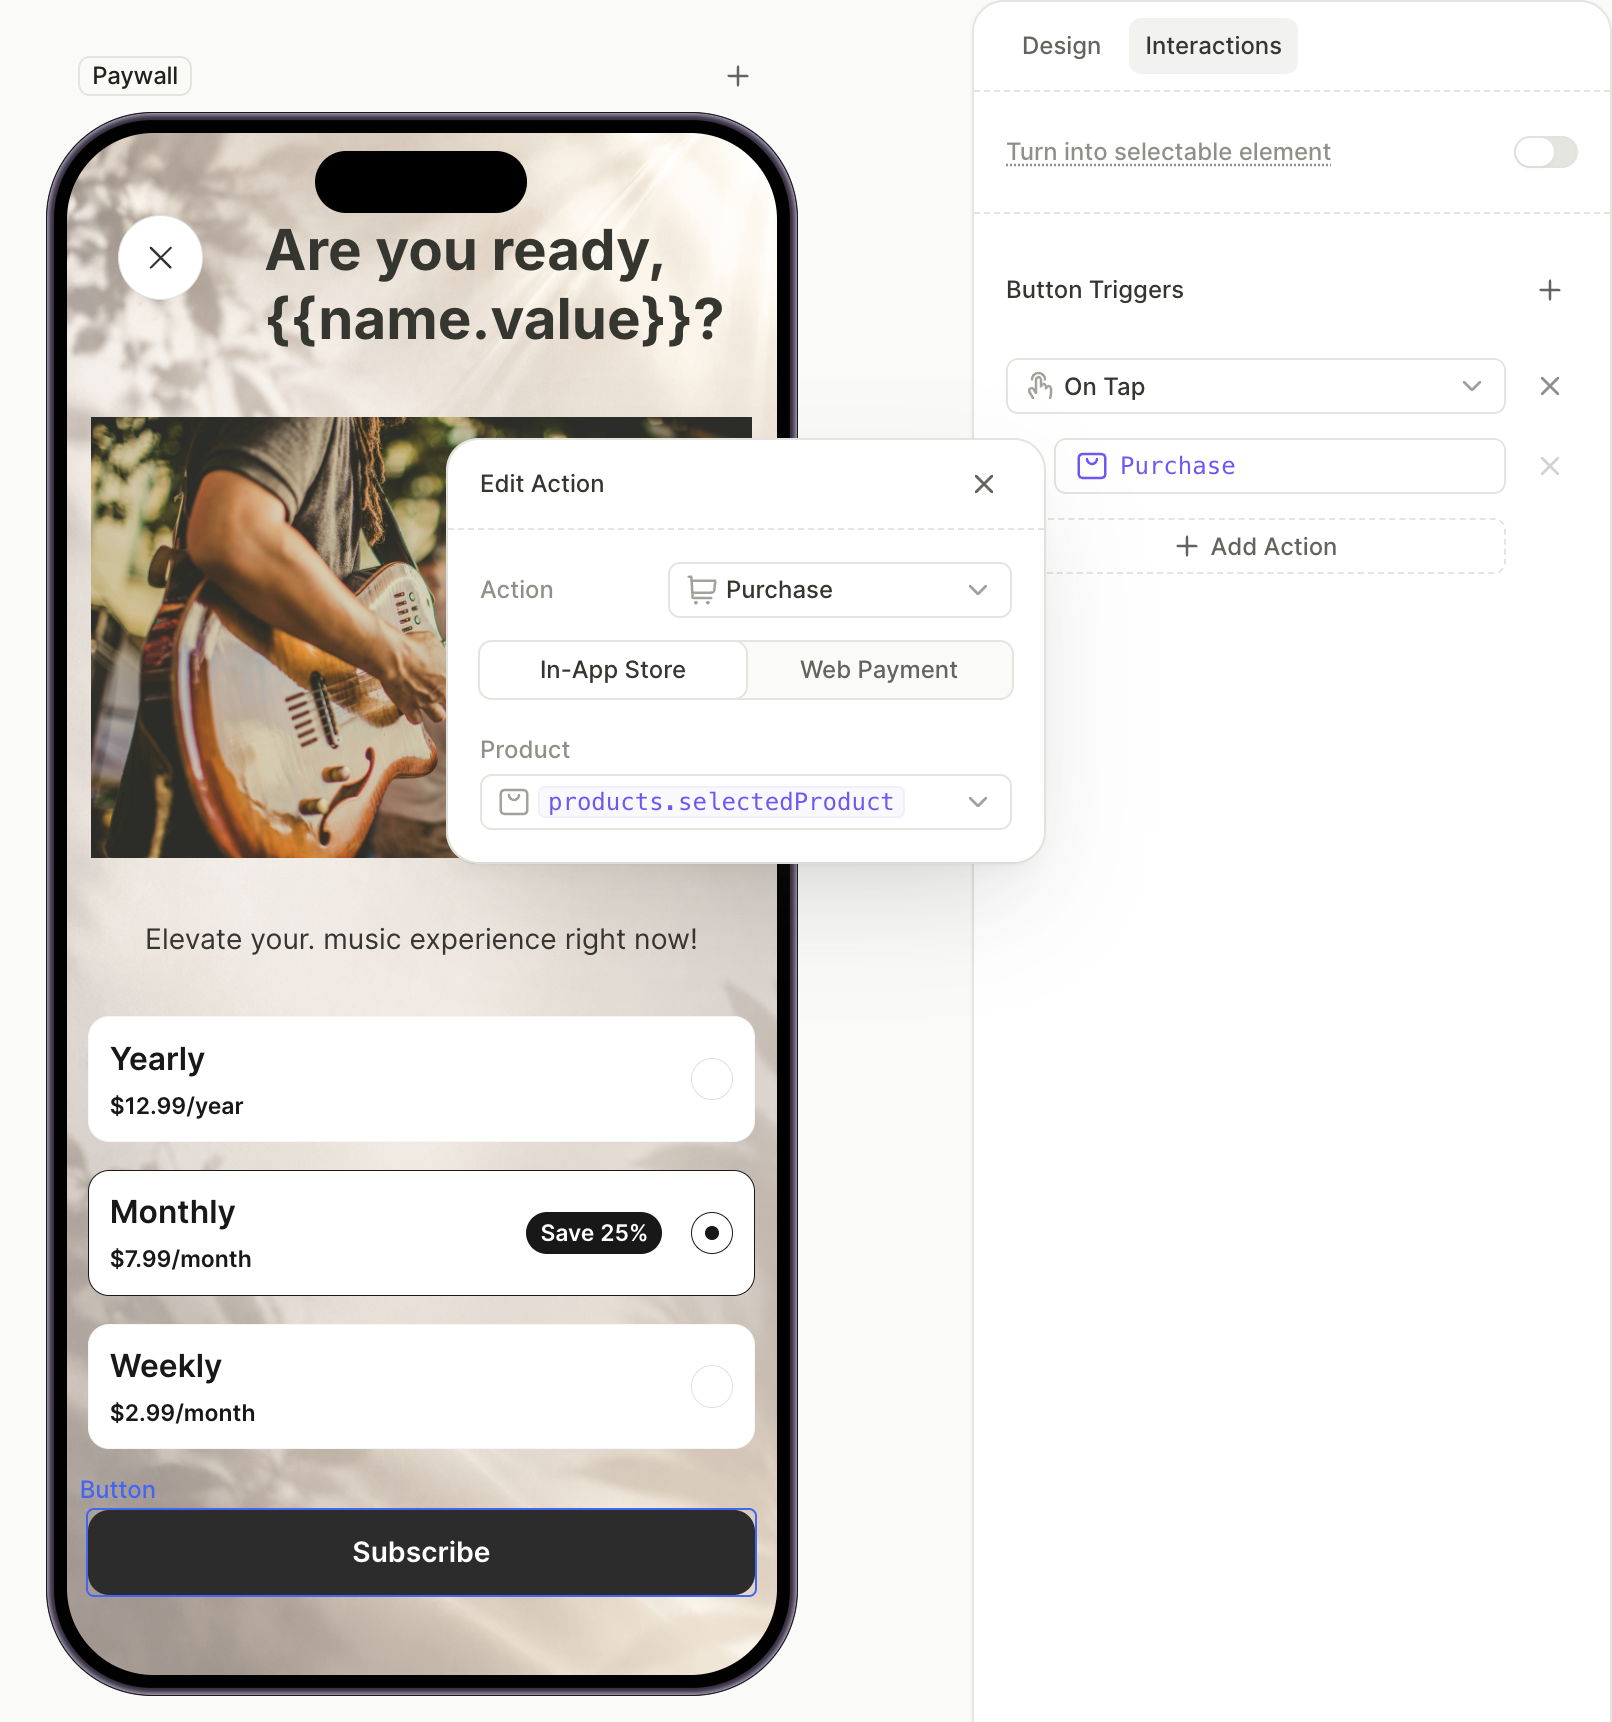
Click the Paywall screen in the Screens panel, then add the elements:
- Add a Horizontal Container at the top and add a Close button inside it. The Close preset comes preconfigured.
- Add the main image, the headline (with the same personalization variable as on the path screens), and a subheading as supporting copy.
- Add the products: click + > Products and pick Vertical List. Assign each card a product from the dropdown in the Design tab.
- Click the default product’s card and enable Set as default product so it’s pre-selected when the screen loads.
- Add the purchase button. Click + > Buttons and choose a preset. In the Interactions tab, click Add trigger > On tap > Add action and set Action to Purchase with Product as
products.selectedProduct.
-
Add the Button > Links template to the screen. It includes three footer links: Restore Purchases, Terms of Use, and Privacy Policy.
The Restore link is pre-configured. To configure the other links, select the button element, open the Interactions tab, and set the target for the Open URL action.

8. Wire navigation between the screens
Screens don’t connect to each other automatically. Use On tap triggers and Navigate to actions to connect each screen’s primary button to its next screen. A screen that branches based on user input uses a Conditional action instead.
For more on navigation and conditional actions, see Navigation and interaction and Actions — Conditional actions.
To wire the navigation for the example flow:
- Static navigation from the introduction screen. Open the Welcome screen, select the primary button, and switch to the Interactions tab. Click Add trigger > On tap > Add action, set Action to Navigate to, and pick the next screen — in our example, the Quiz screen.
- Conditional navigation from the quiz. Open the Quiz screen, select the Next button, and add an On tap trigger with a Conditional action. Set up the IF/ELSE rule:
- In the variable picker, open the Elements tab, pick the Quiz screen, and select
quiz.selectedOptionId. - Use the Equals operator and compare against the ID of one of the options — in our example, the Rock option.
- IF the comparison matches, fire Navigate to and pick the first path screen.
- ELSE, fire Navigate to and pick the second path screen.
- In the variable picker, open the Elements tab, pick the Quiz screen, and select
- Static navigation from each branching path to the paywall. Repeat the pattern from step 1 on each path screen, with the paywall as the destination.
Next steps
- Save and publish your flow.
- Add the flow to a placement to start showing it to users.
- For audience-specific flows (instead of in-flow branching), create audience segments and assign different flows on the Placement page.