
Show an offer when users tap close
When a user taps the close button, they’re about to leave without paying. This recipe intercepts the first close tap: instead of closing the paywall, it reveals a last-chance offer overlay. When the user dismisses the offer, the close button works normally and closes the flow.
The logic takes one custom Boolean variable and one conditional action:
close_tappedstarts asFalse.- The first close tap shows the offer overlay and sets
close_tappedtoTrue. - Any later close tap closes the flow.
Before you start
- Build a paywall screen with a close button — for example, follow Create a basic paywall screen.
- Create a product with an offer to promote in the overlay.
1. Create the variable
For more on custom variables, see Variables.
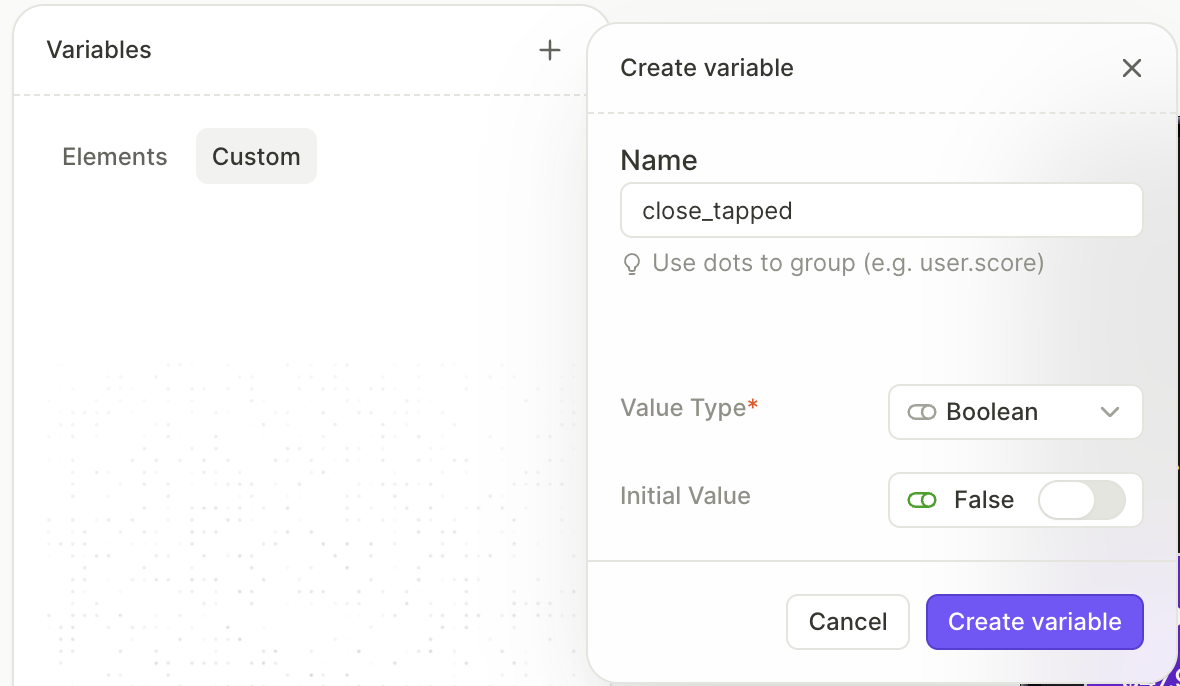
- In the left panel, click to open Variables.
- On the Custom tab, click +.
- Name the variable
close_tappedand set Value Type to Boolean. Leave Initial Value set to False. - Click Create variable.
2. Build the offer overlay
The overlay is a container that pins to the device screen and sits on top of the paywall. Build it visible — hidden elements can’t be edited, so you’ll hide it in step 4, once the content is in place.
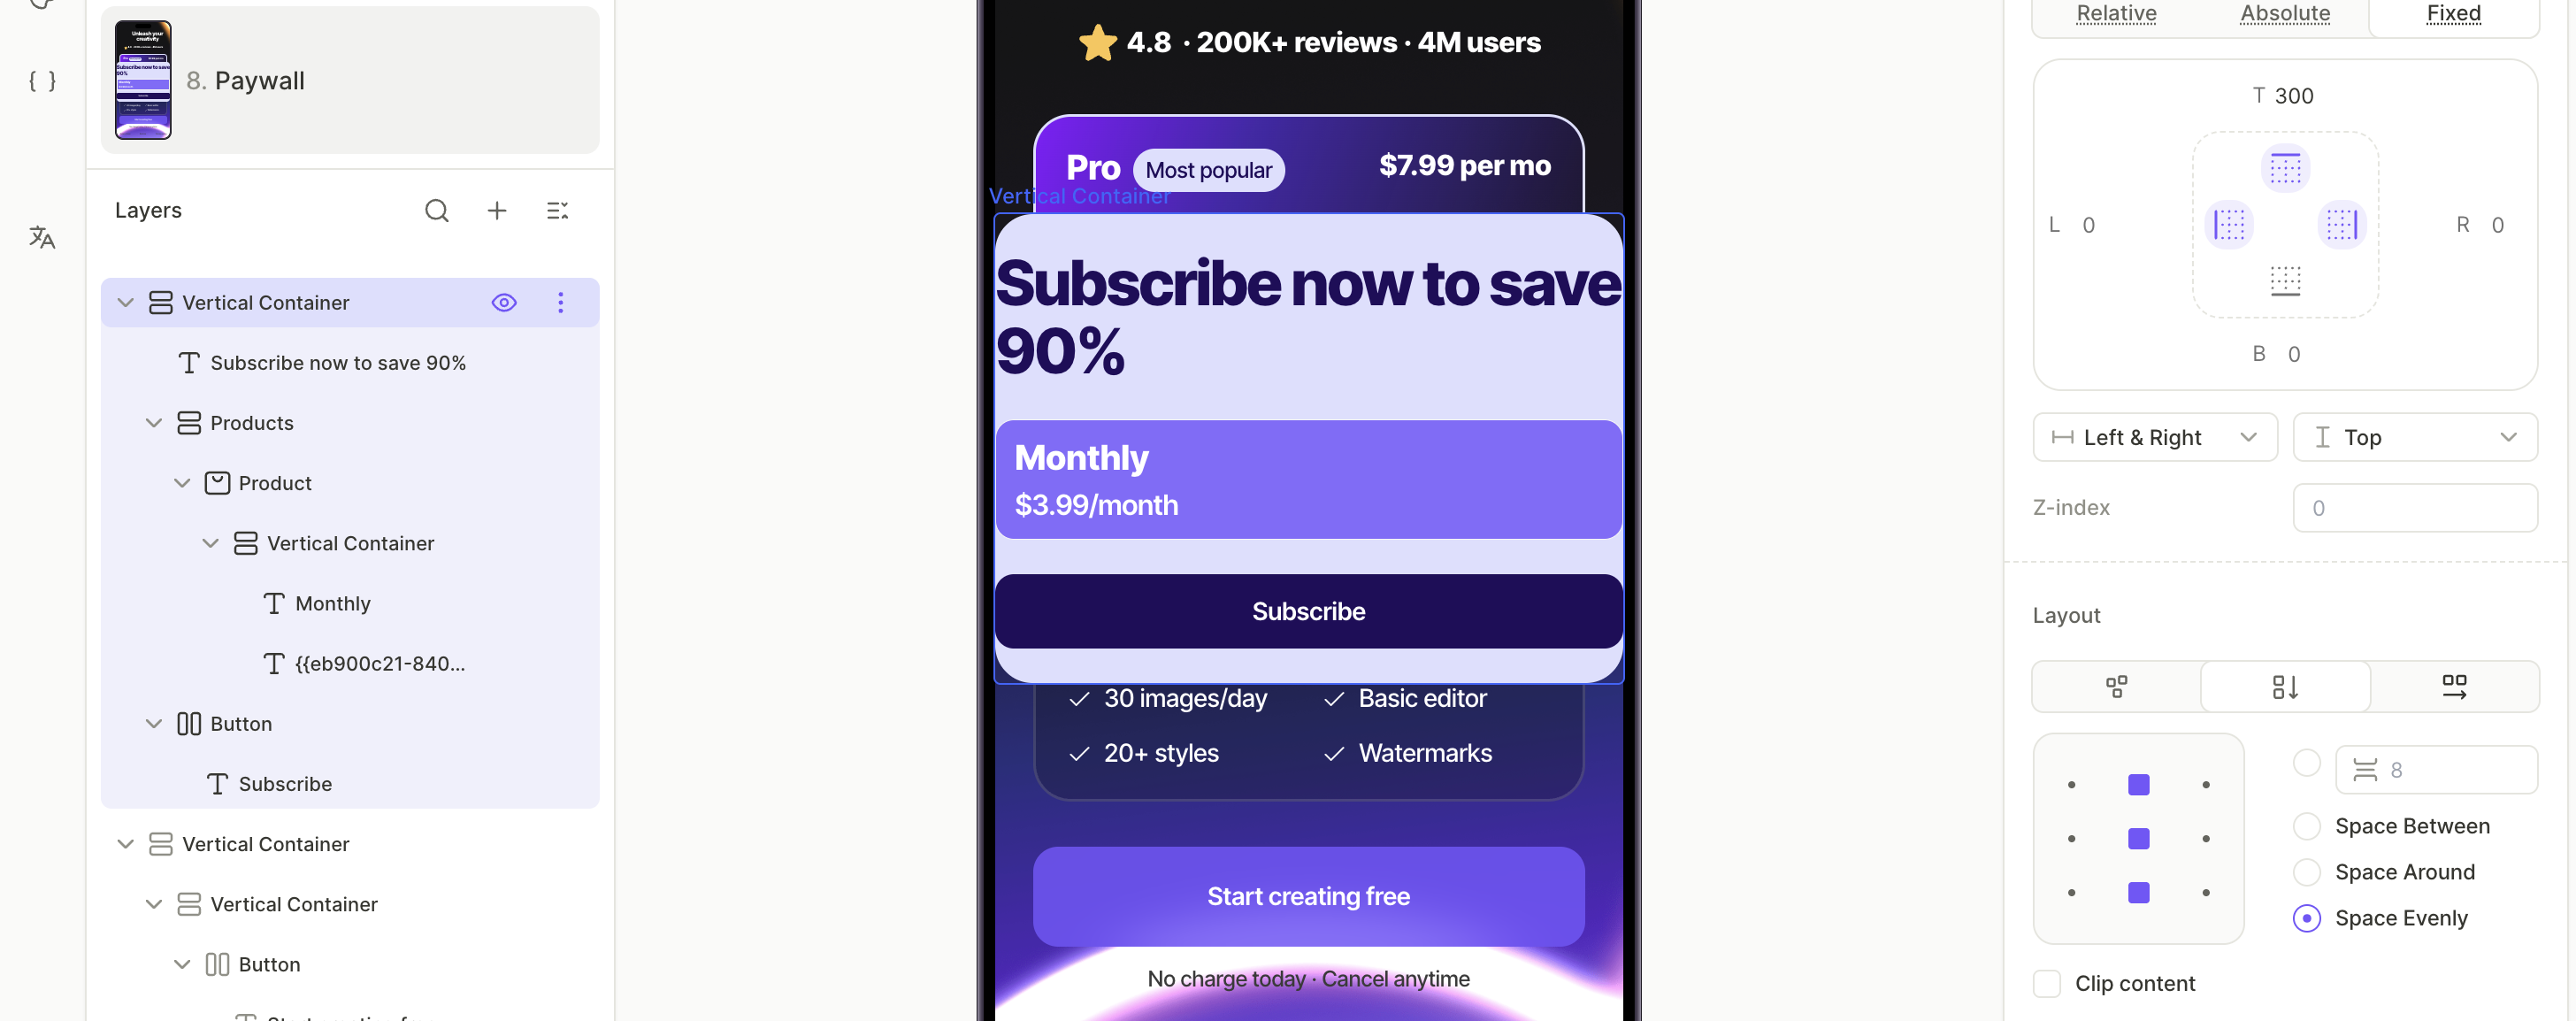
- Click + > Layout > Vertical Container.
- With the container selected, open the Design tab and set Position to Fixed. Set the horizontal alignment to Left & Right and the vertical alignment to Top. There is no vertical centering option, so enter a top offset (for example,
300) to move the overlay toward the middle of the screen. - Under Fill, set a background — a solid color or an image. The container is transparent by default, so without a fill the paywall stays visible underneath the overlay.
- Add the offer content. With the container selected in the Layers panel, click + > Text > H2. To show the discounted price, insert offer variables such as
offer_pricein the Content field. - Click + > Products, choose a layout preset, and drag it into the overlay. Select the product card on the canvas and pick the product and the offer in the Design tab.
- Click + > Buttons, choose a button preset, and drag it into the overlay. On the Interactions tab, click Add trigger > On tap > Add action, then set Action to Purchase and Product to your offer product.
3. Add the dismiss button to the overlay
The overlay needs its own close button. Its action must hide the overlay — not close the flow.
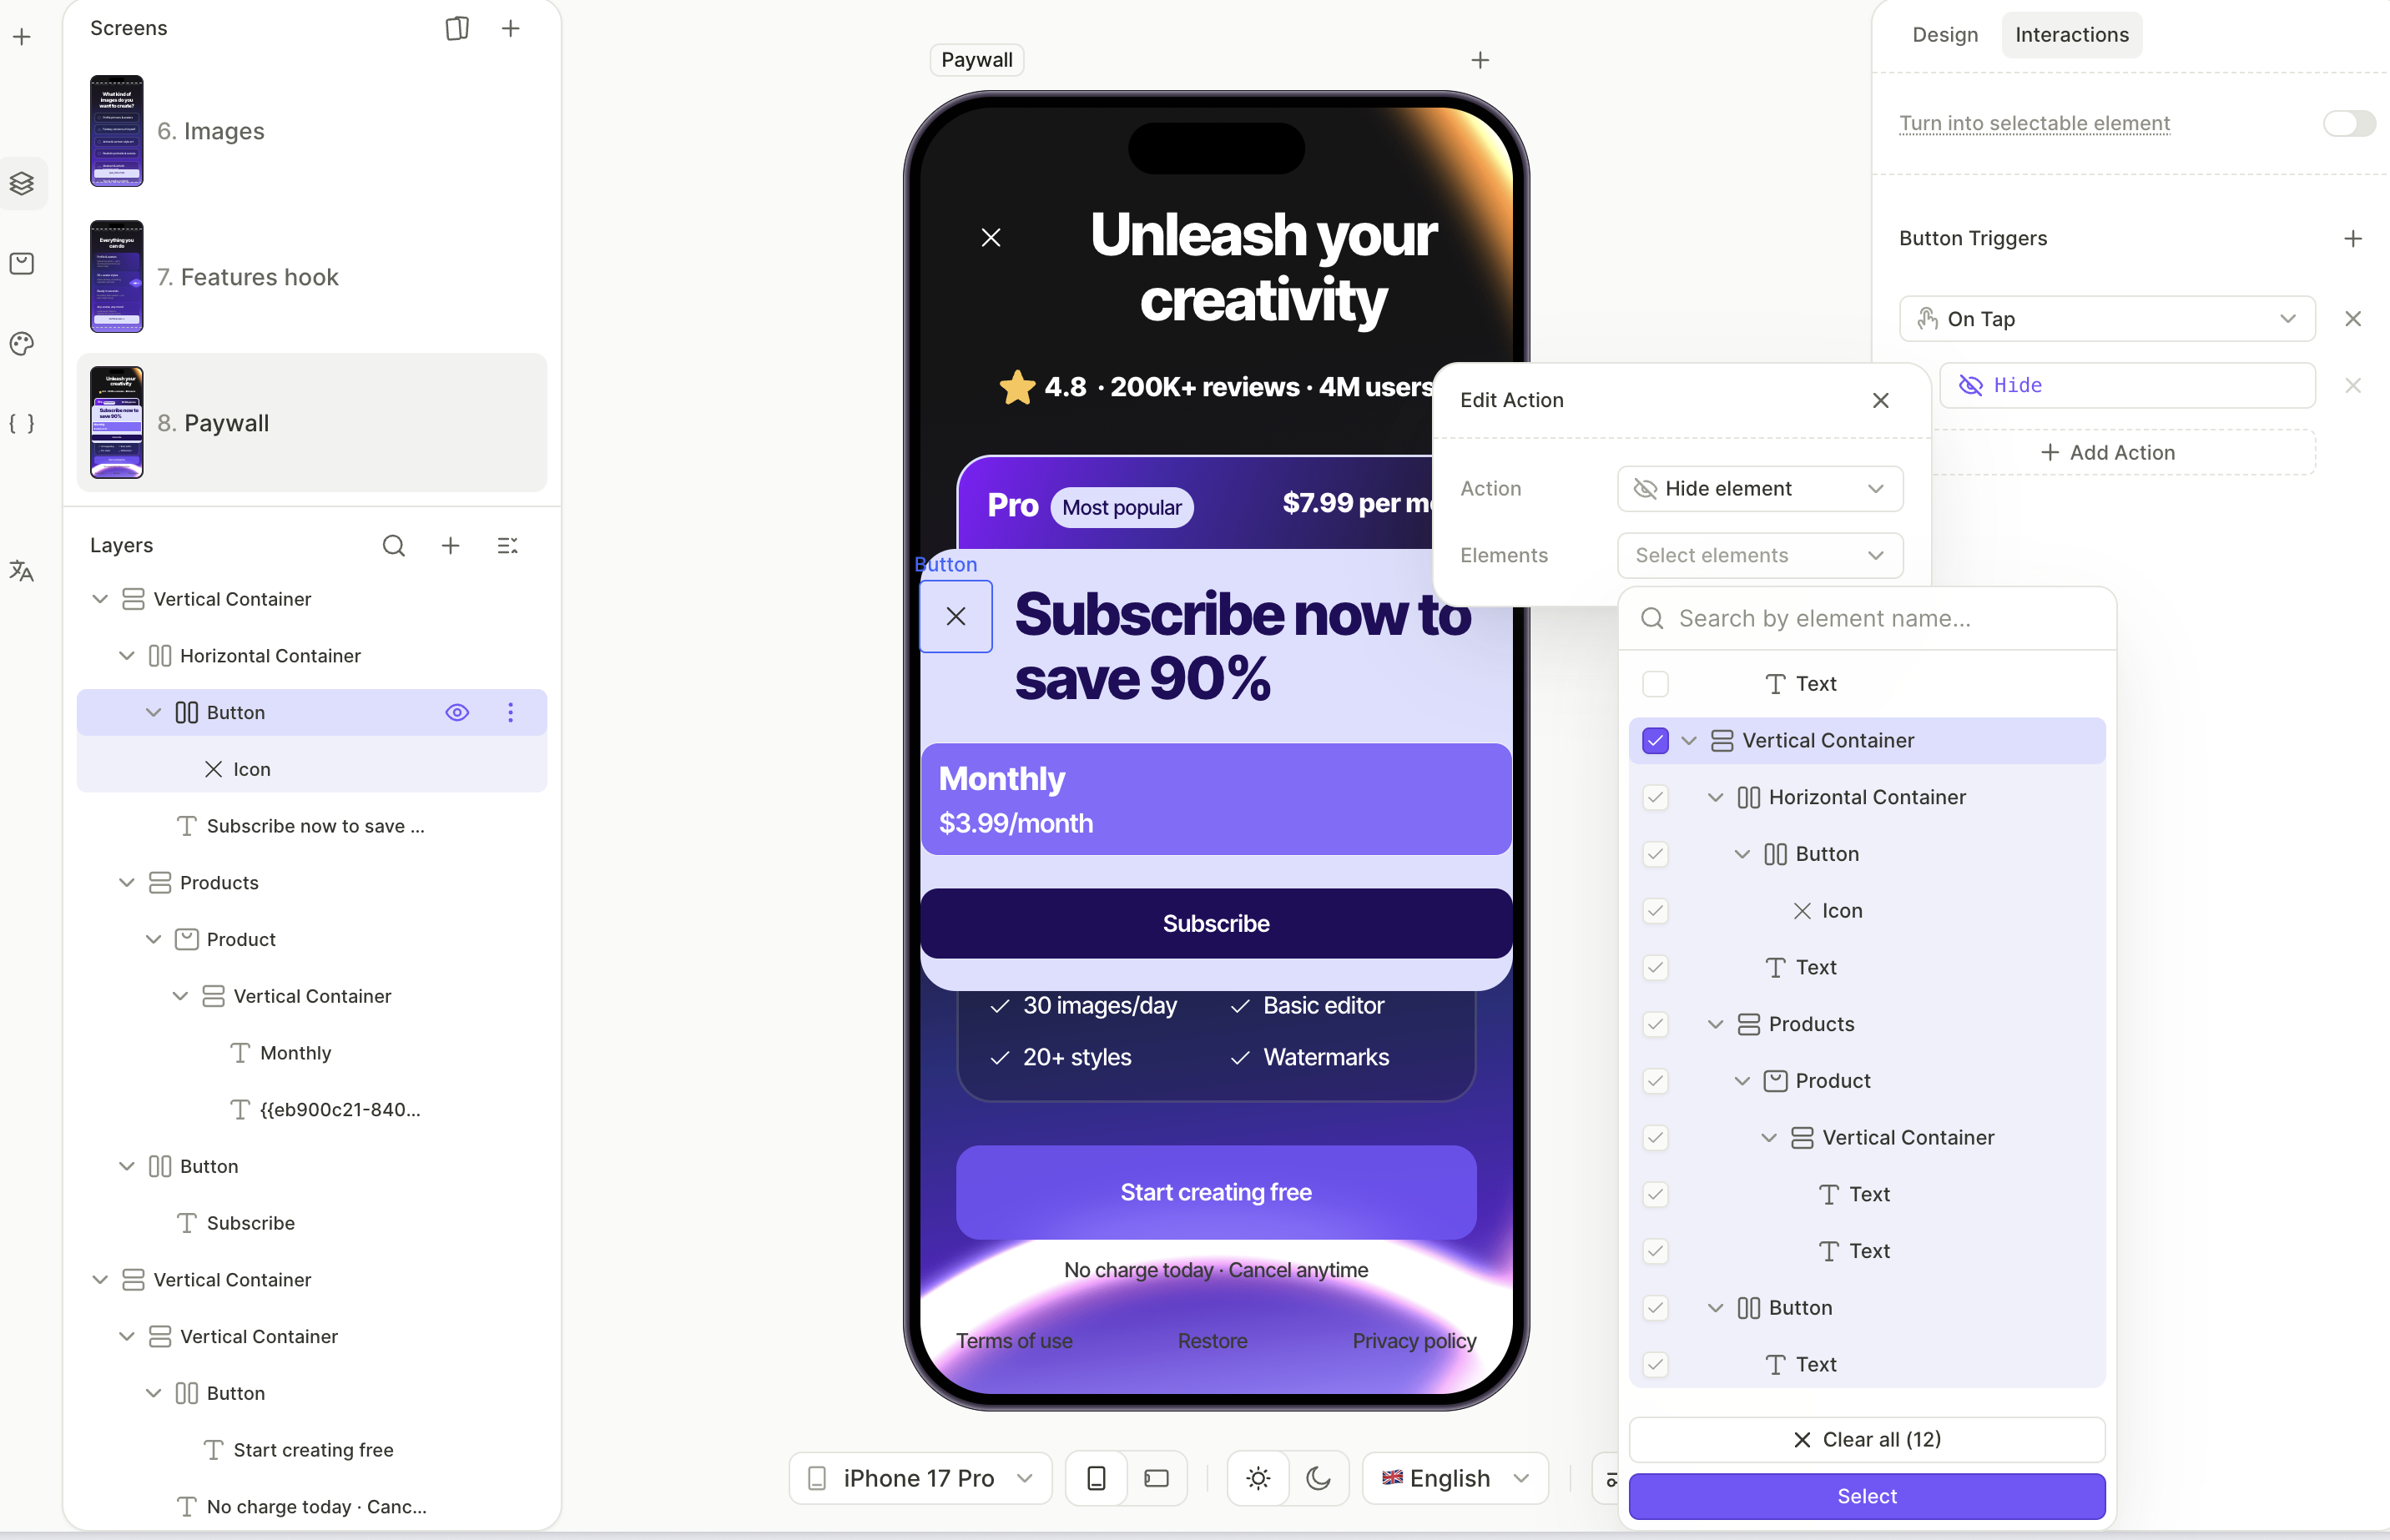
- With the overlay selected, click + > Buttons > Close flow.
- With the button selected, open the Interactions tab. The preset comes with a preconfigured Close Flow action. Click the action and change its type to Hide element. Set the target to the overlay container.
Don’t leave the preconfigured Close Flow action on the overlay’s dismiss button — it would close the entire flow instead of hiding the overlay.
4. Hide the overlay
The overlay must stay invisible until the first close tap.
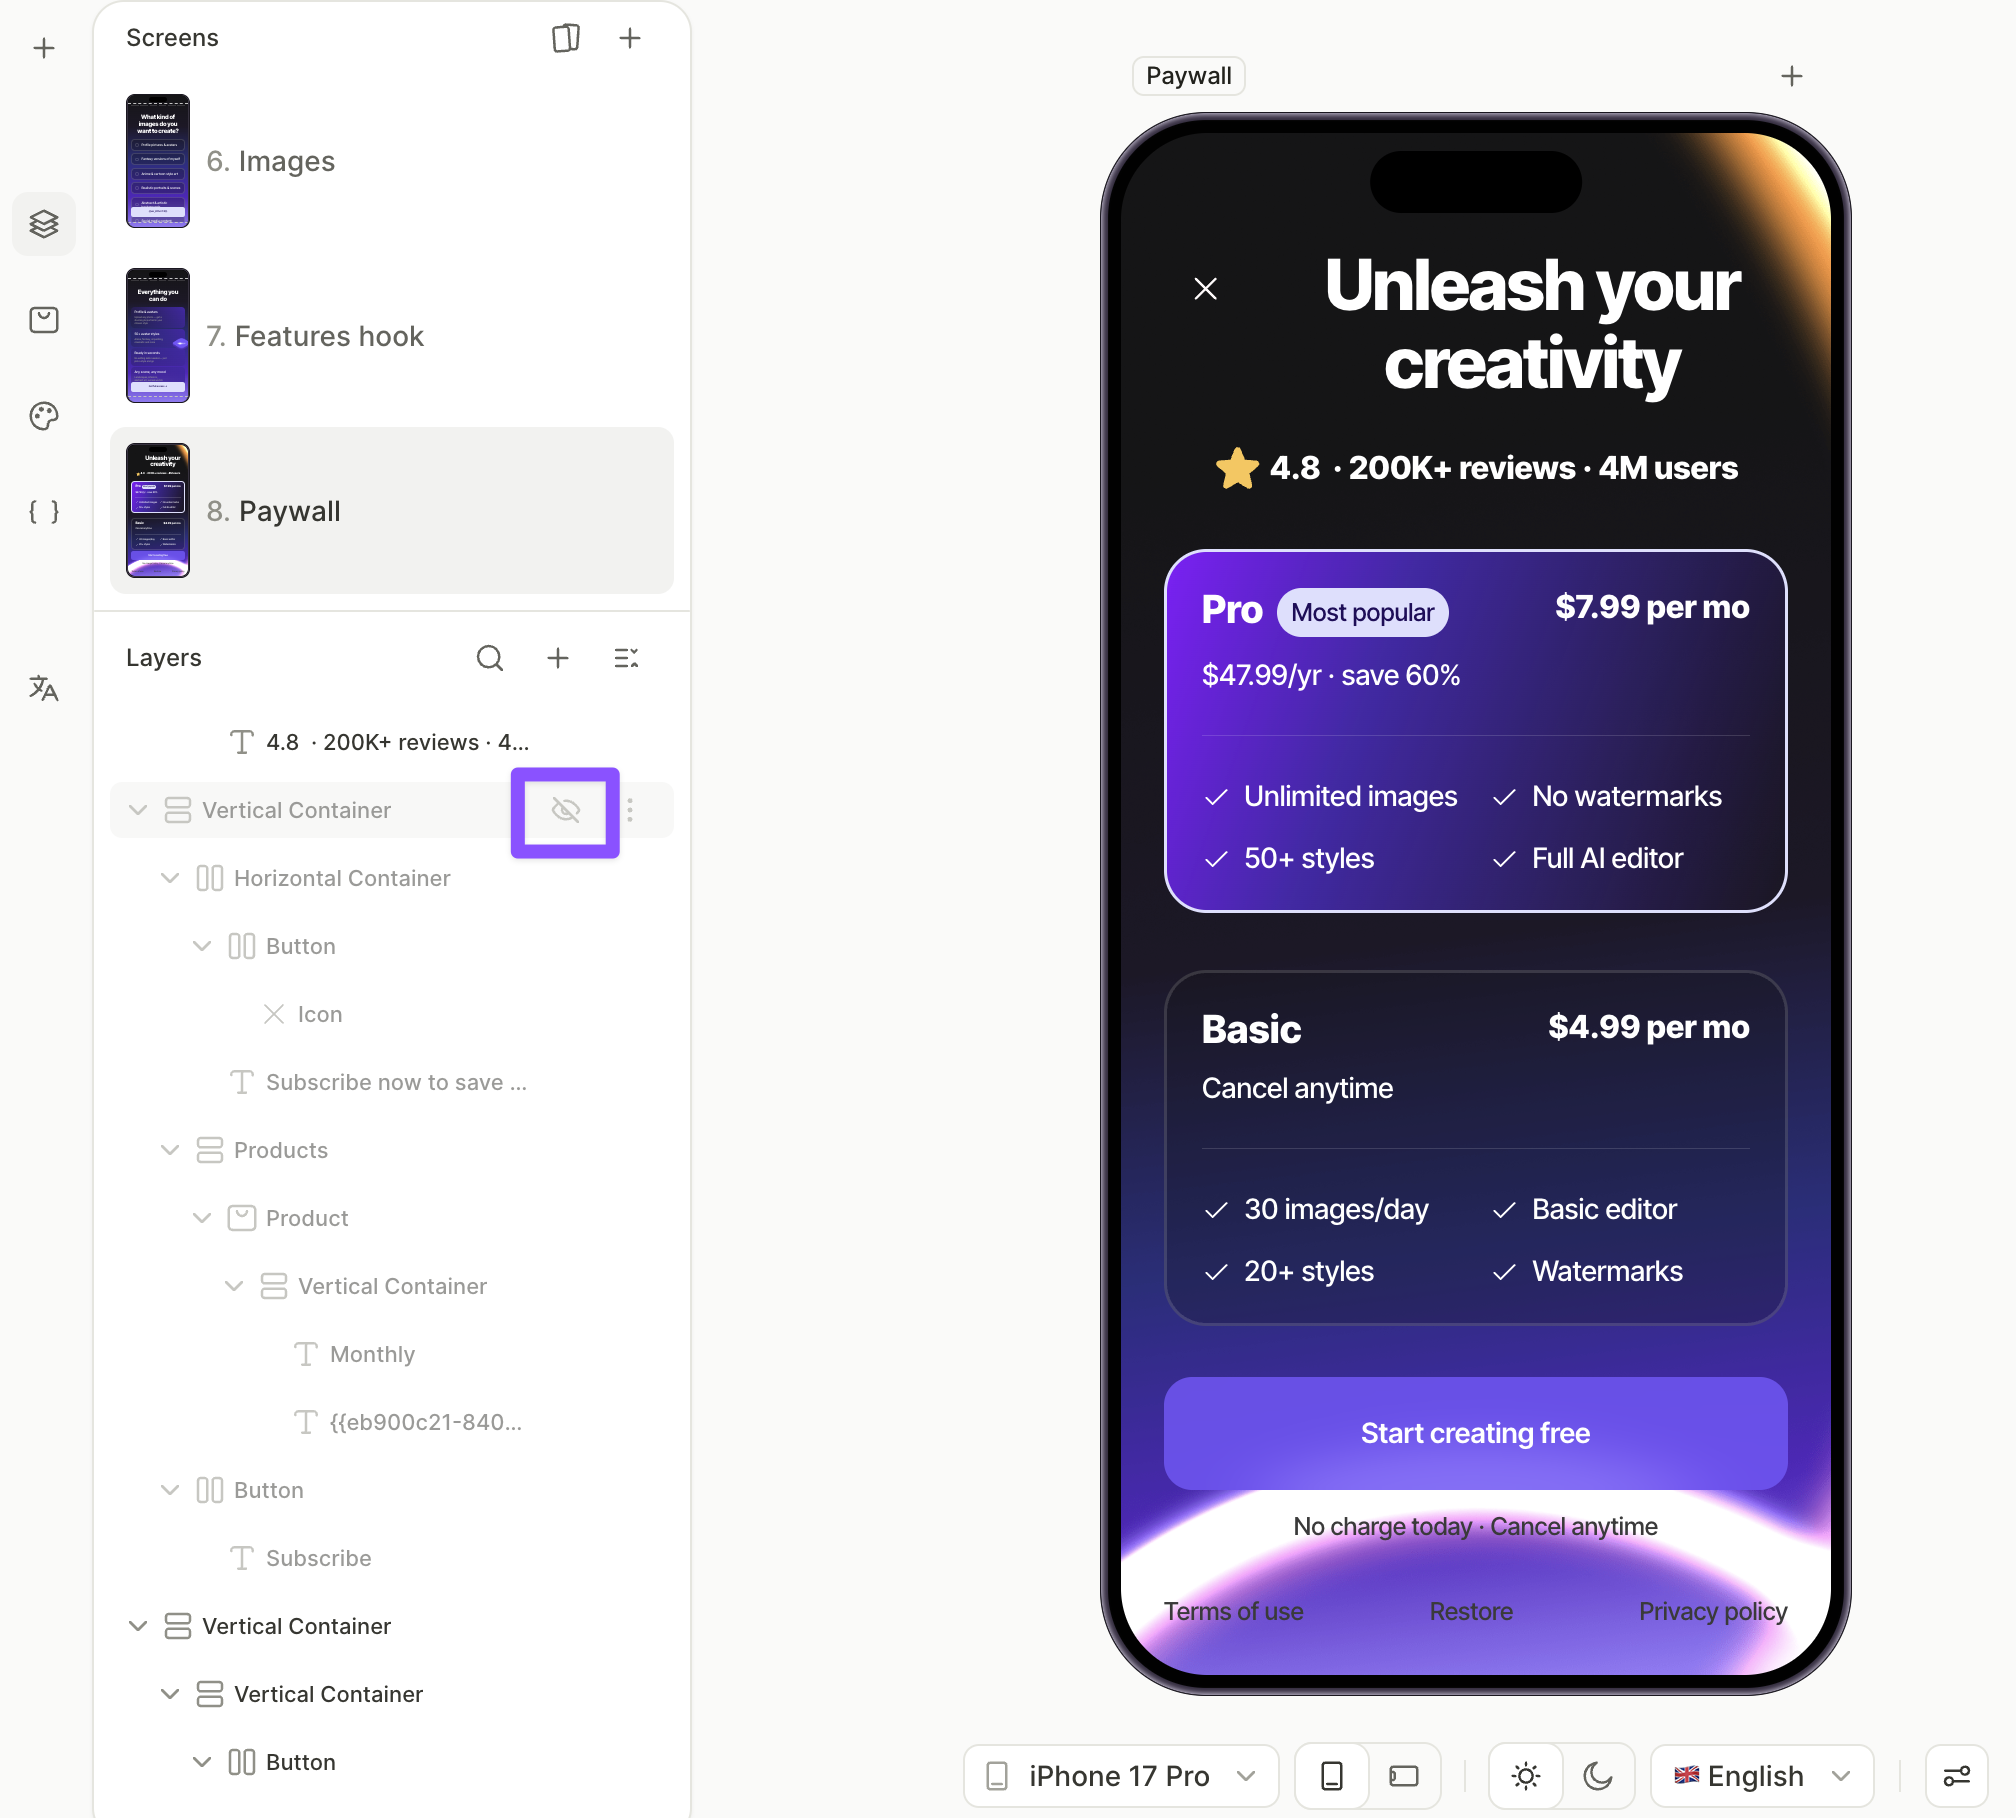
In the Layers panel, select the overlay container and set its state to Hide . The overlay stays in the layer tree but no longer renders on the canvas.
5. Set up the close button
Replace the close button’s default action with a conditional action that branches on close_tapped.
For more on conditional actions, see Actions — Conditional actions.
-
Select the paywall’s close button — the one on the screen, not the overlay’s dismiss button.
-
Open the Interactions tab, click the preconfigured Close Flow action, and change its type to Conditional Action.
-
In the if block, click Add condition and set:
close_tappedEquals False. -
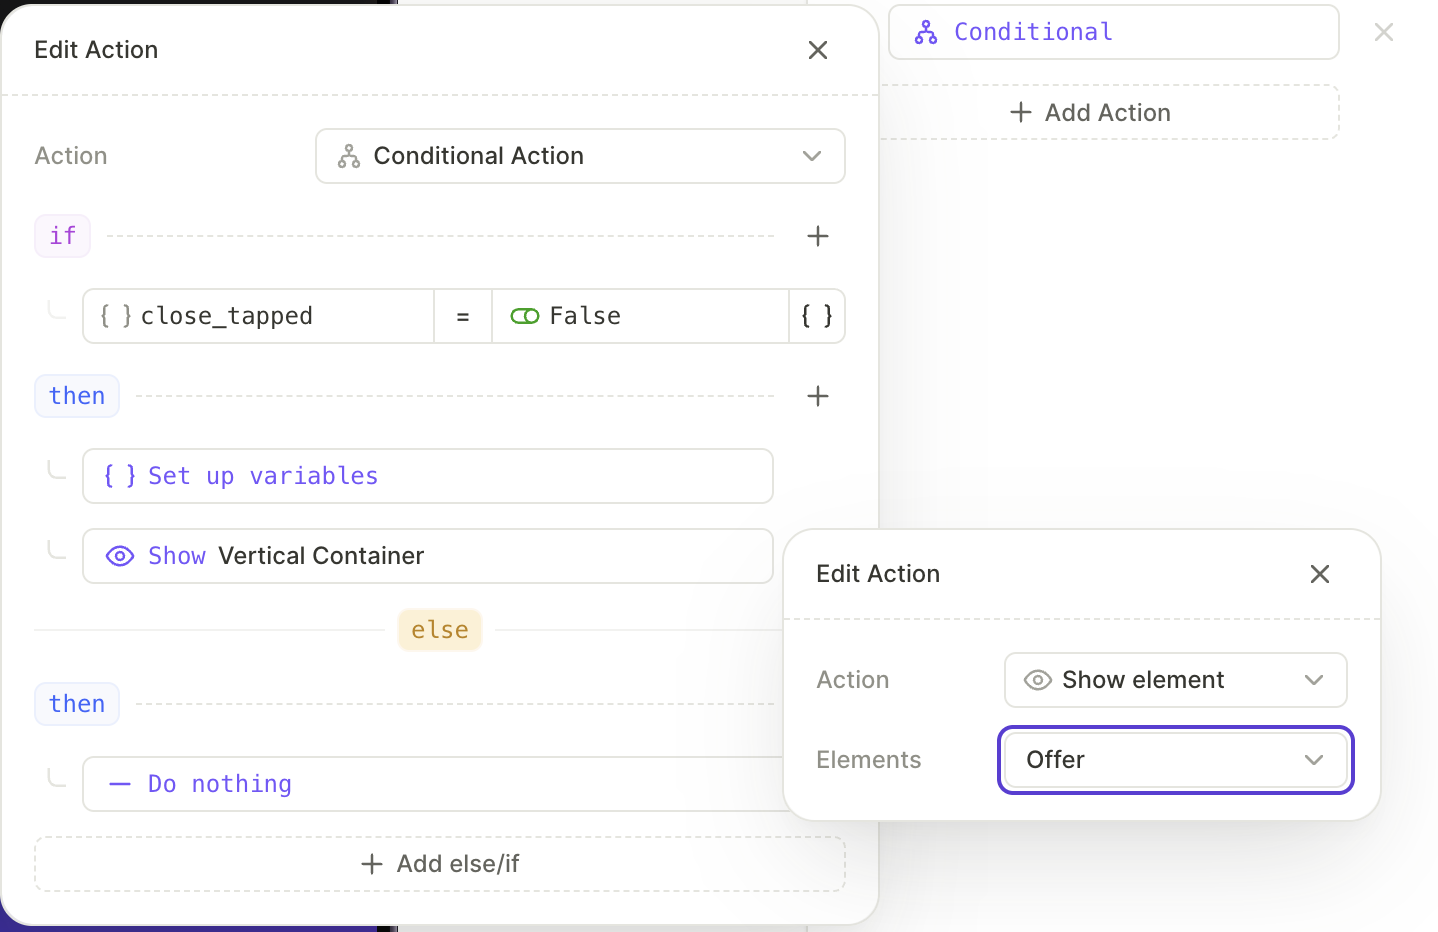
In the then block, add two actions:
-
Set variable: Set
close_tappedto True.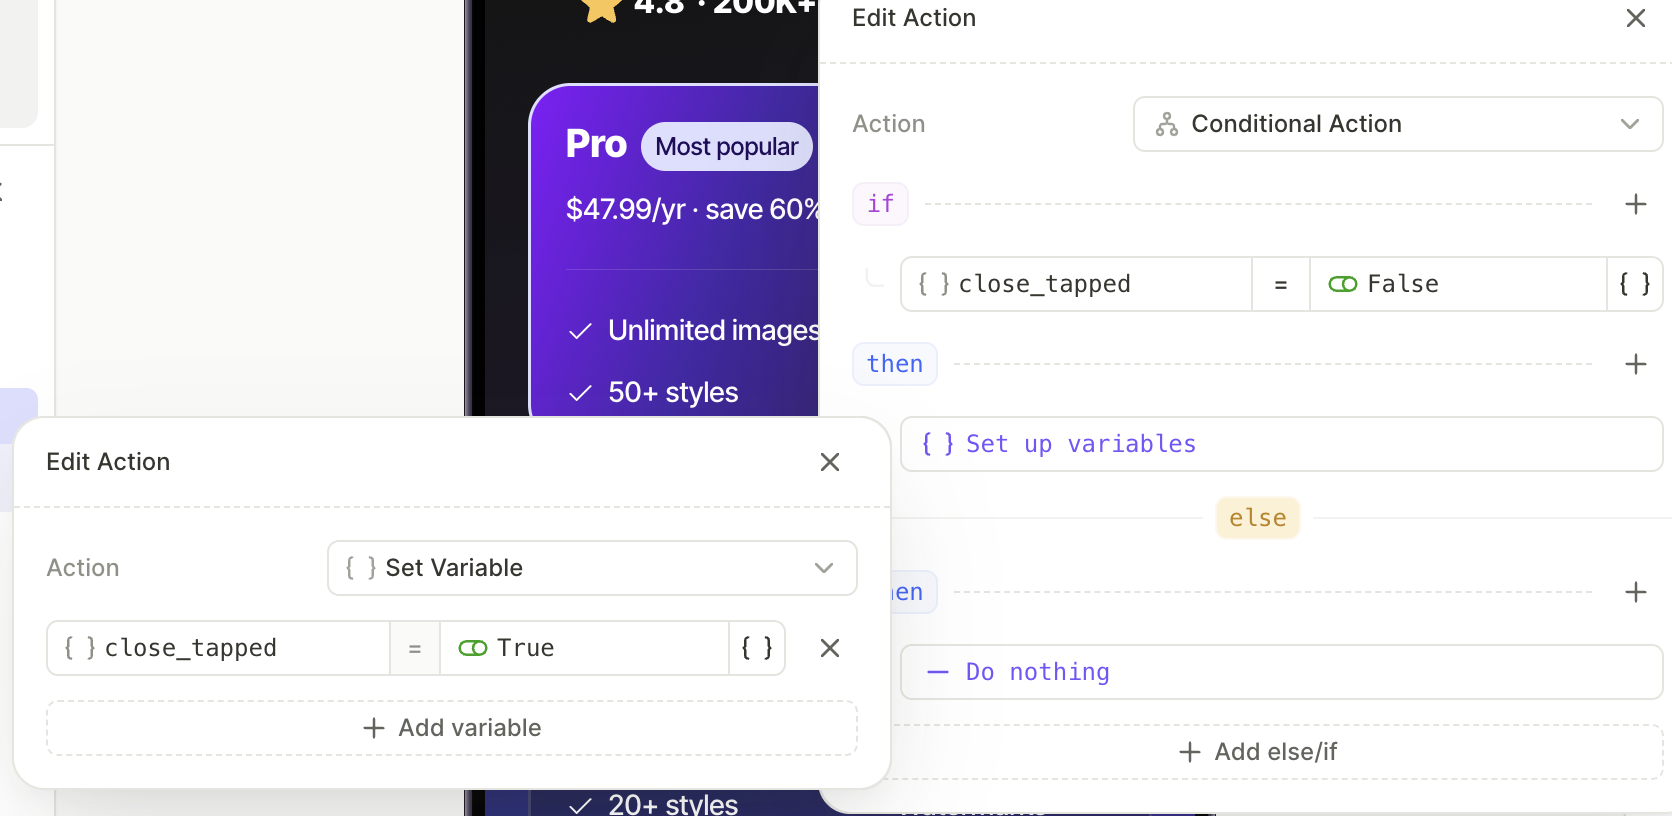
-
Show element: Set the target to the offer overlay.
-
-
In the else block, add a Close Flow action.
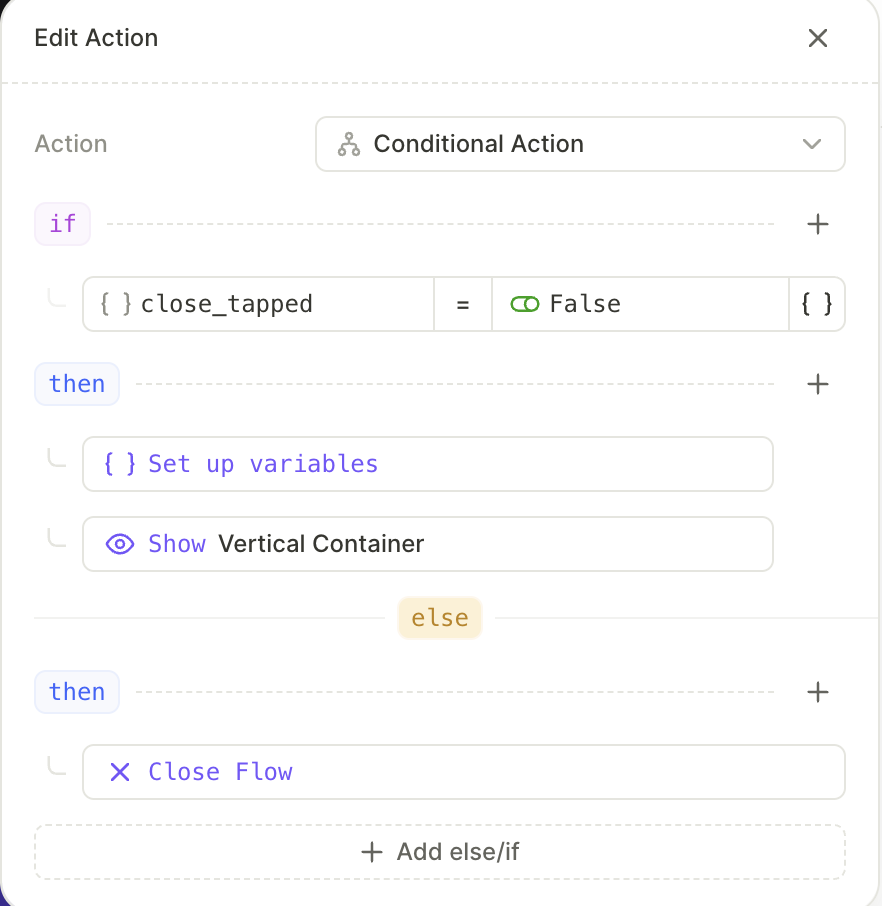
Now the first close tap reveals the offer. After the user dismisses it, tapping close again matches the else branch and closes the flow.
Next steps
- Save and publish your flow.
- Add the flow to a placement to start showing it to users.