Web paywall configuration
Once you click Create web paywall on the Web paywall page, you’ll be redirected to a separate page to set up the web paywall design and payment method.
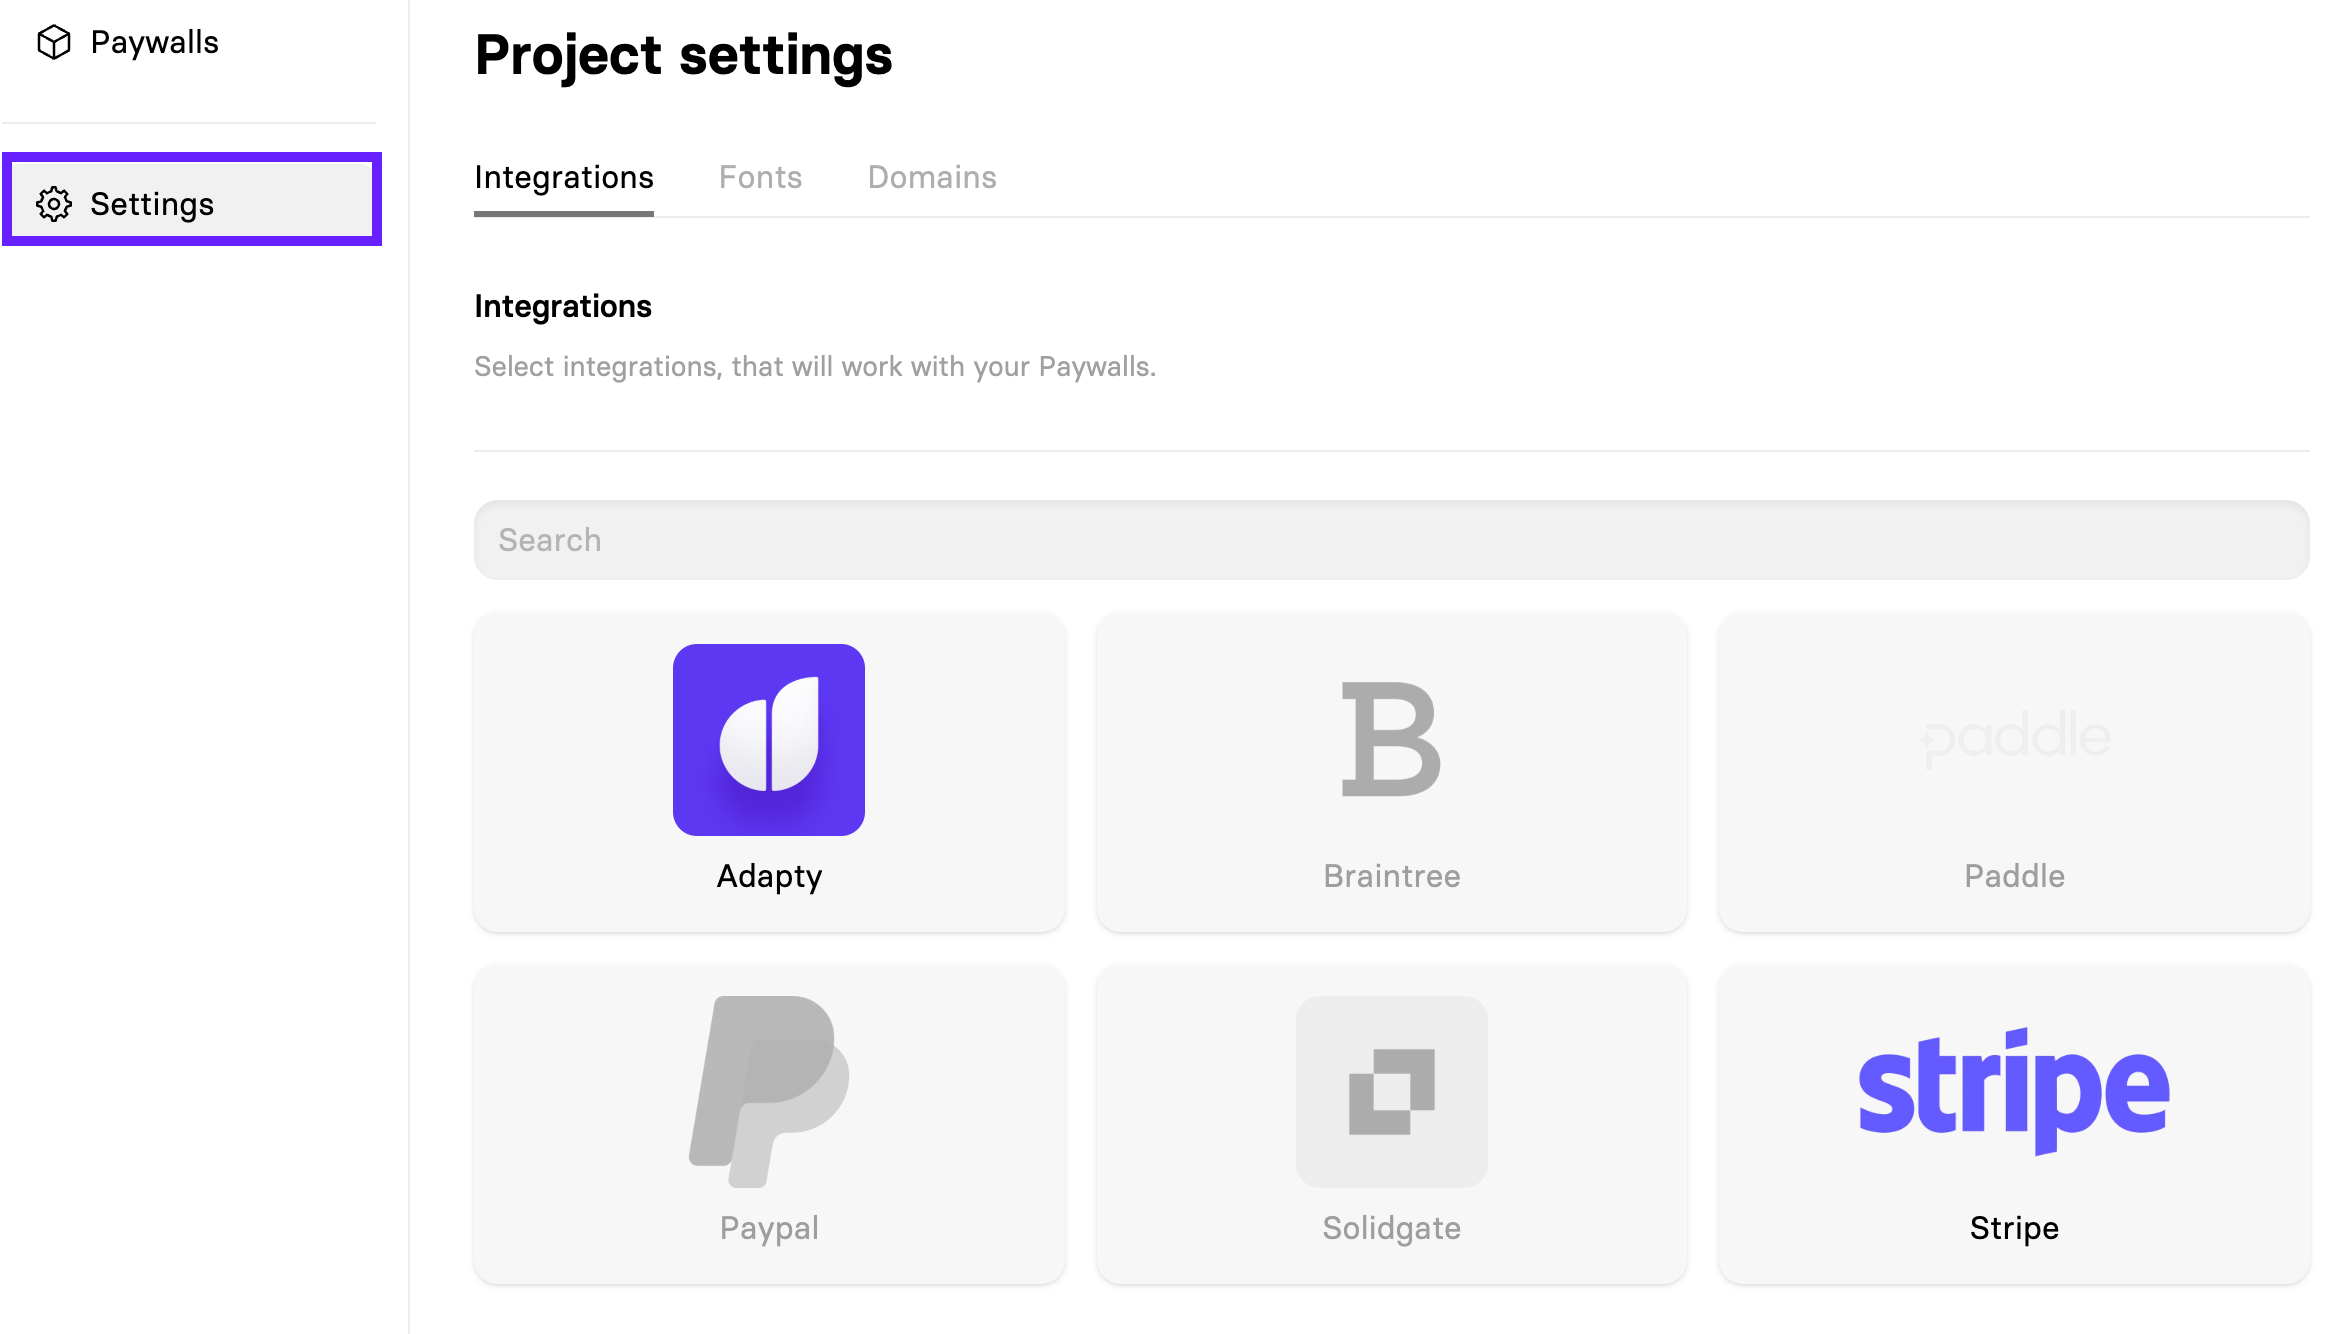
Set up a payment method
First, you need to connect a payment provider that will handle purchases. The available options are:
- Stripe
- Paddle
- Paypal
- Solidgate
To ensure accurate web paywall analytics tracking in Adapty, you need to add your products along with their corresponding Stripe/Paddle/other payment provider product IDs in Adapty.
To set up a payment provider:
-
On the web paywall list page, click Settings and switch to the Integrations tab.
-
Select a payment provider and follow the integration instructions on the screen.
-
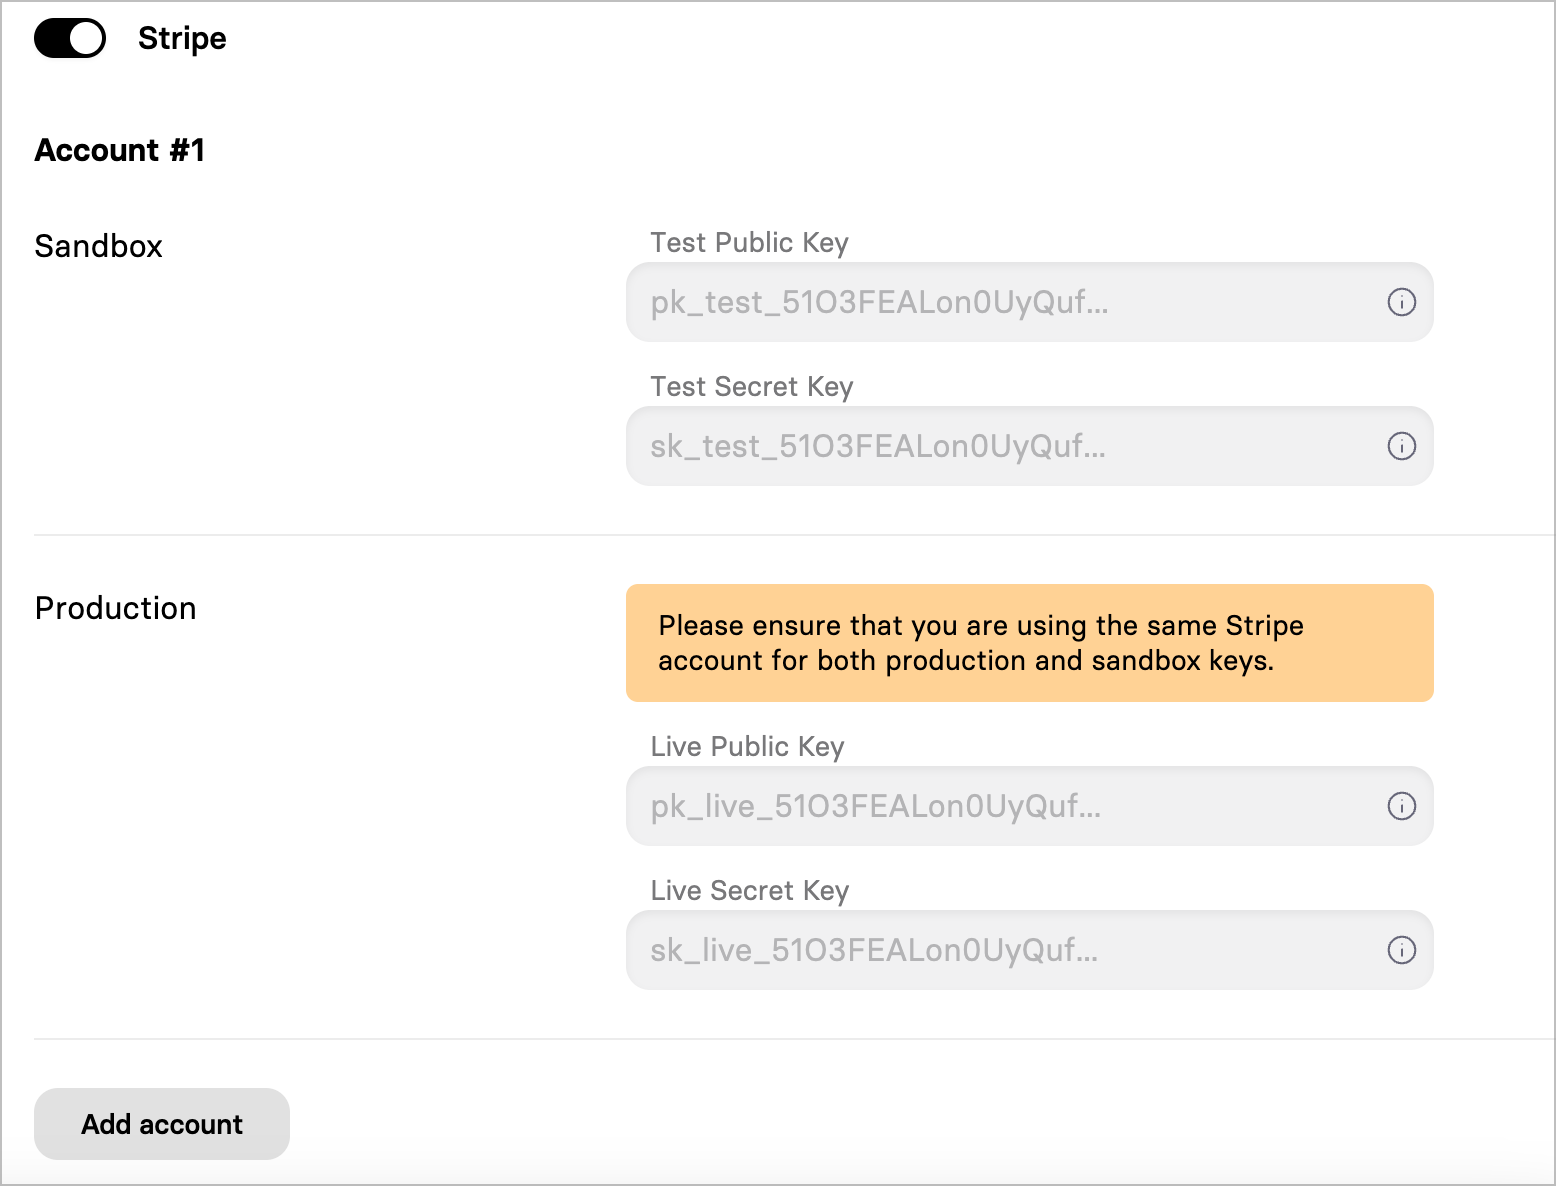
⚠️ If you choose Stripe, make sure you’re using keys from the Test Mode environment despite the interface saying Sandbox. Otherwise your web paywall will not work. Sandboxes in Stripe are not yet supported.
Set up Apple Pay domain verification
In Settings > Domains, select your primary payment provider to use for domain verification. Then, verify your paywall domains with the respective provider:
Stripe:
- Go to Payment method domain settings and click Add a new domain.
- Add
app.funnelfox.comand your personal paywall subdomain (it will look likepaywalls-....fnlfx.com). To find your subdomain, go to Settings > Domains and copy the Hosted subdomain value.
Paddle:
- In the Paddle console, go to Checkout > Website approval and click Add a new domain.
- Add
app.funnelfox.comand your personal paywall subdomain (it will look likepaywalls-....fnlfx.com). To find your subdomain, go to Settings > Domains and copy the Hosted subdomain value.
The approval process in Paddle is manual, so you will need to wait until the domains move from Pending to Approved.
FunnelFox Billing:
Follow the FunnelFox Billing integration instructions.
SolidGate:
- In your Solidgate Dashboard, go to Developers > Apple Pay Domains.
- Click + Add new domain and paste your project domain (from Settings > Domains in FunnelFox). Add your custom domain too, if applicable.
- To use Apple Pay in preview mode, also add
http://app.funnelfox.com/.
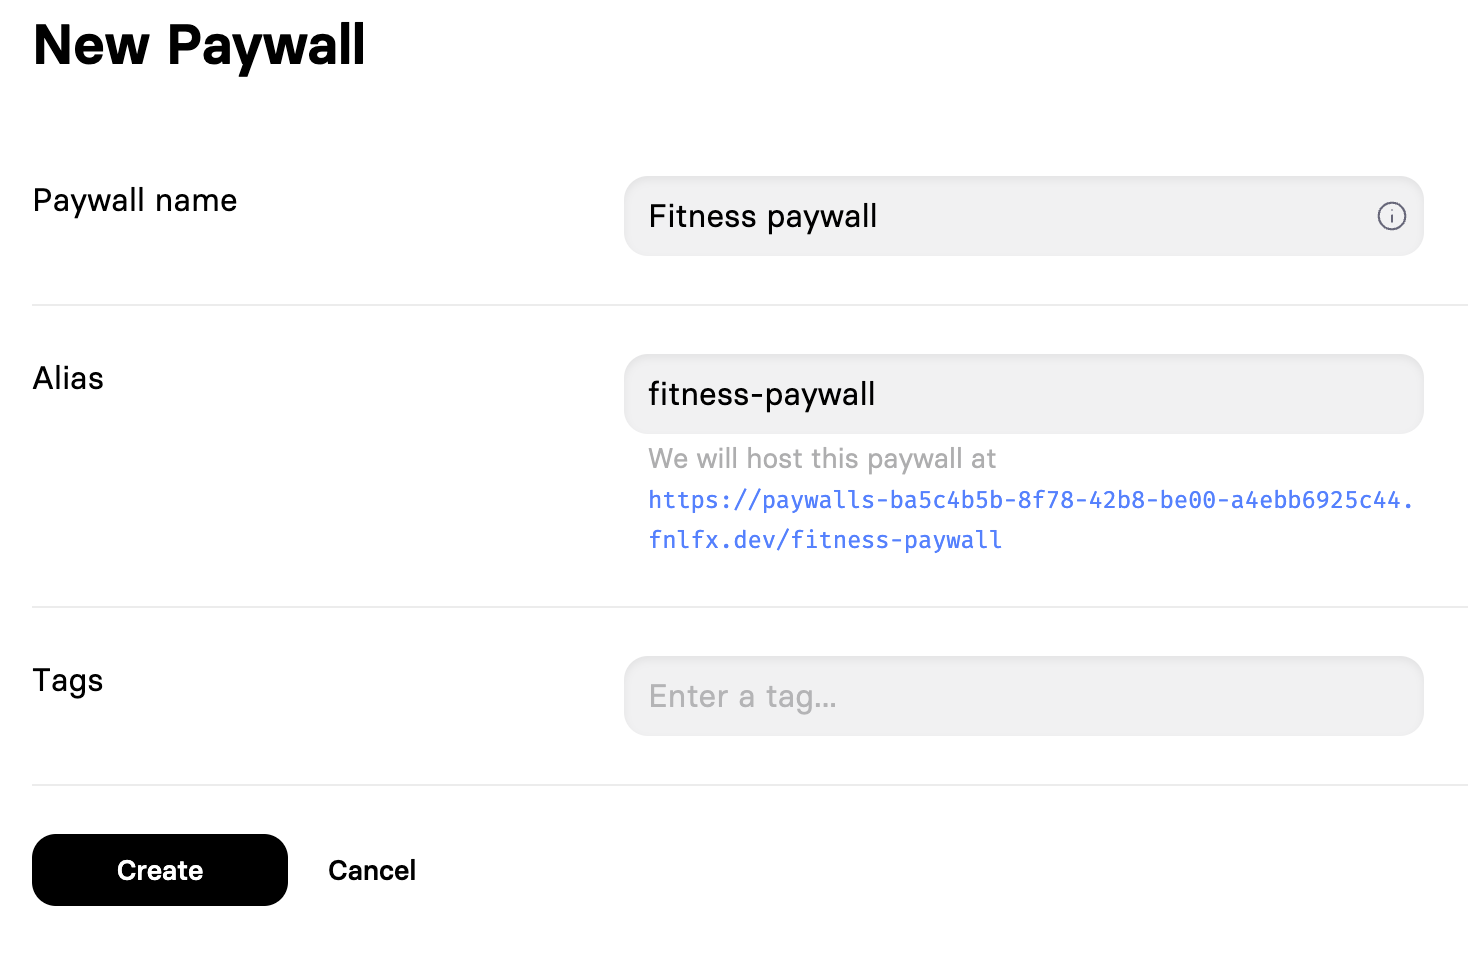
Create and configure a web paywall
-
On the web paywall list page, click Create a paywall.
-
Enter a paywall name and click Create.
-
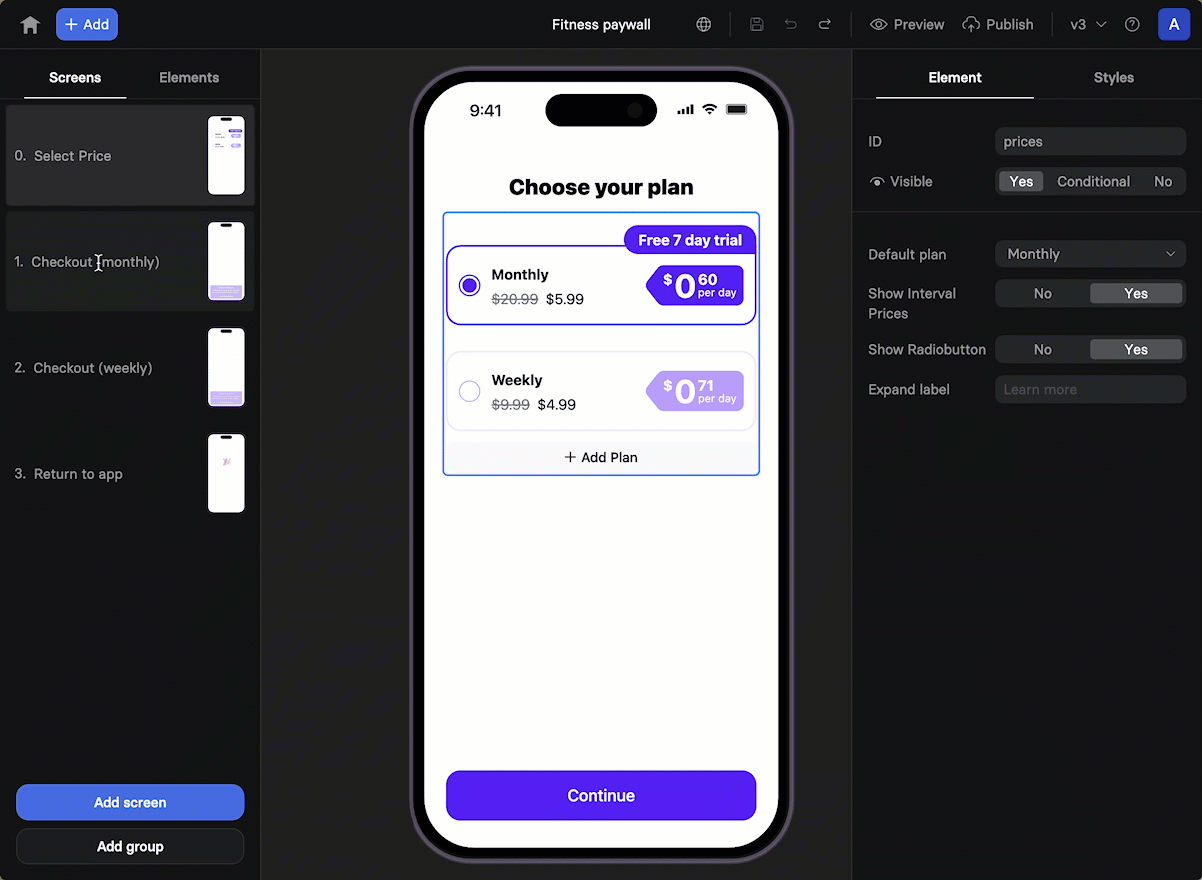
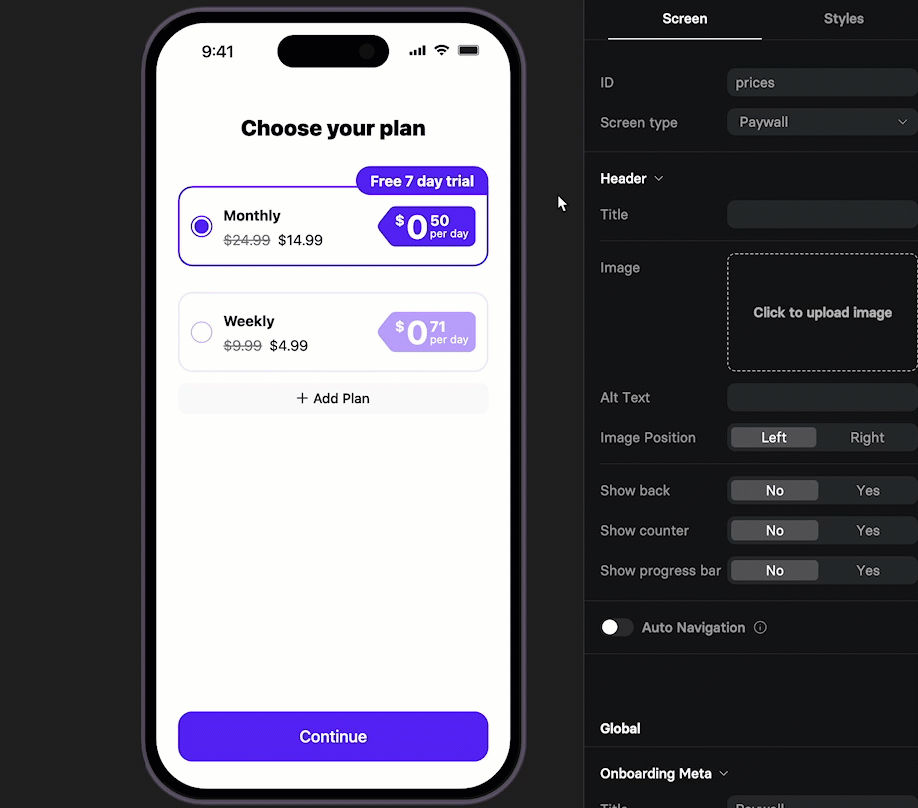
You will be redirected to a basic template with two subscription options and the Apple Pay purchase button.
The first screen lists the subscription plans. The second and third screens are checkout screens. Each screen corresponds to one plan you offer. If you have only one plan, delete the extra screen. If you have more, you need to duplicate the checkout screens.
The last screen users see after a successful purchase is where you need to clearly indicate that they can return to your app.
-
Set up the plan list: add or remove plans and prices. All the prices and plans you see on the screen are not added dynamically, so you need to configure them manually.
-
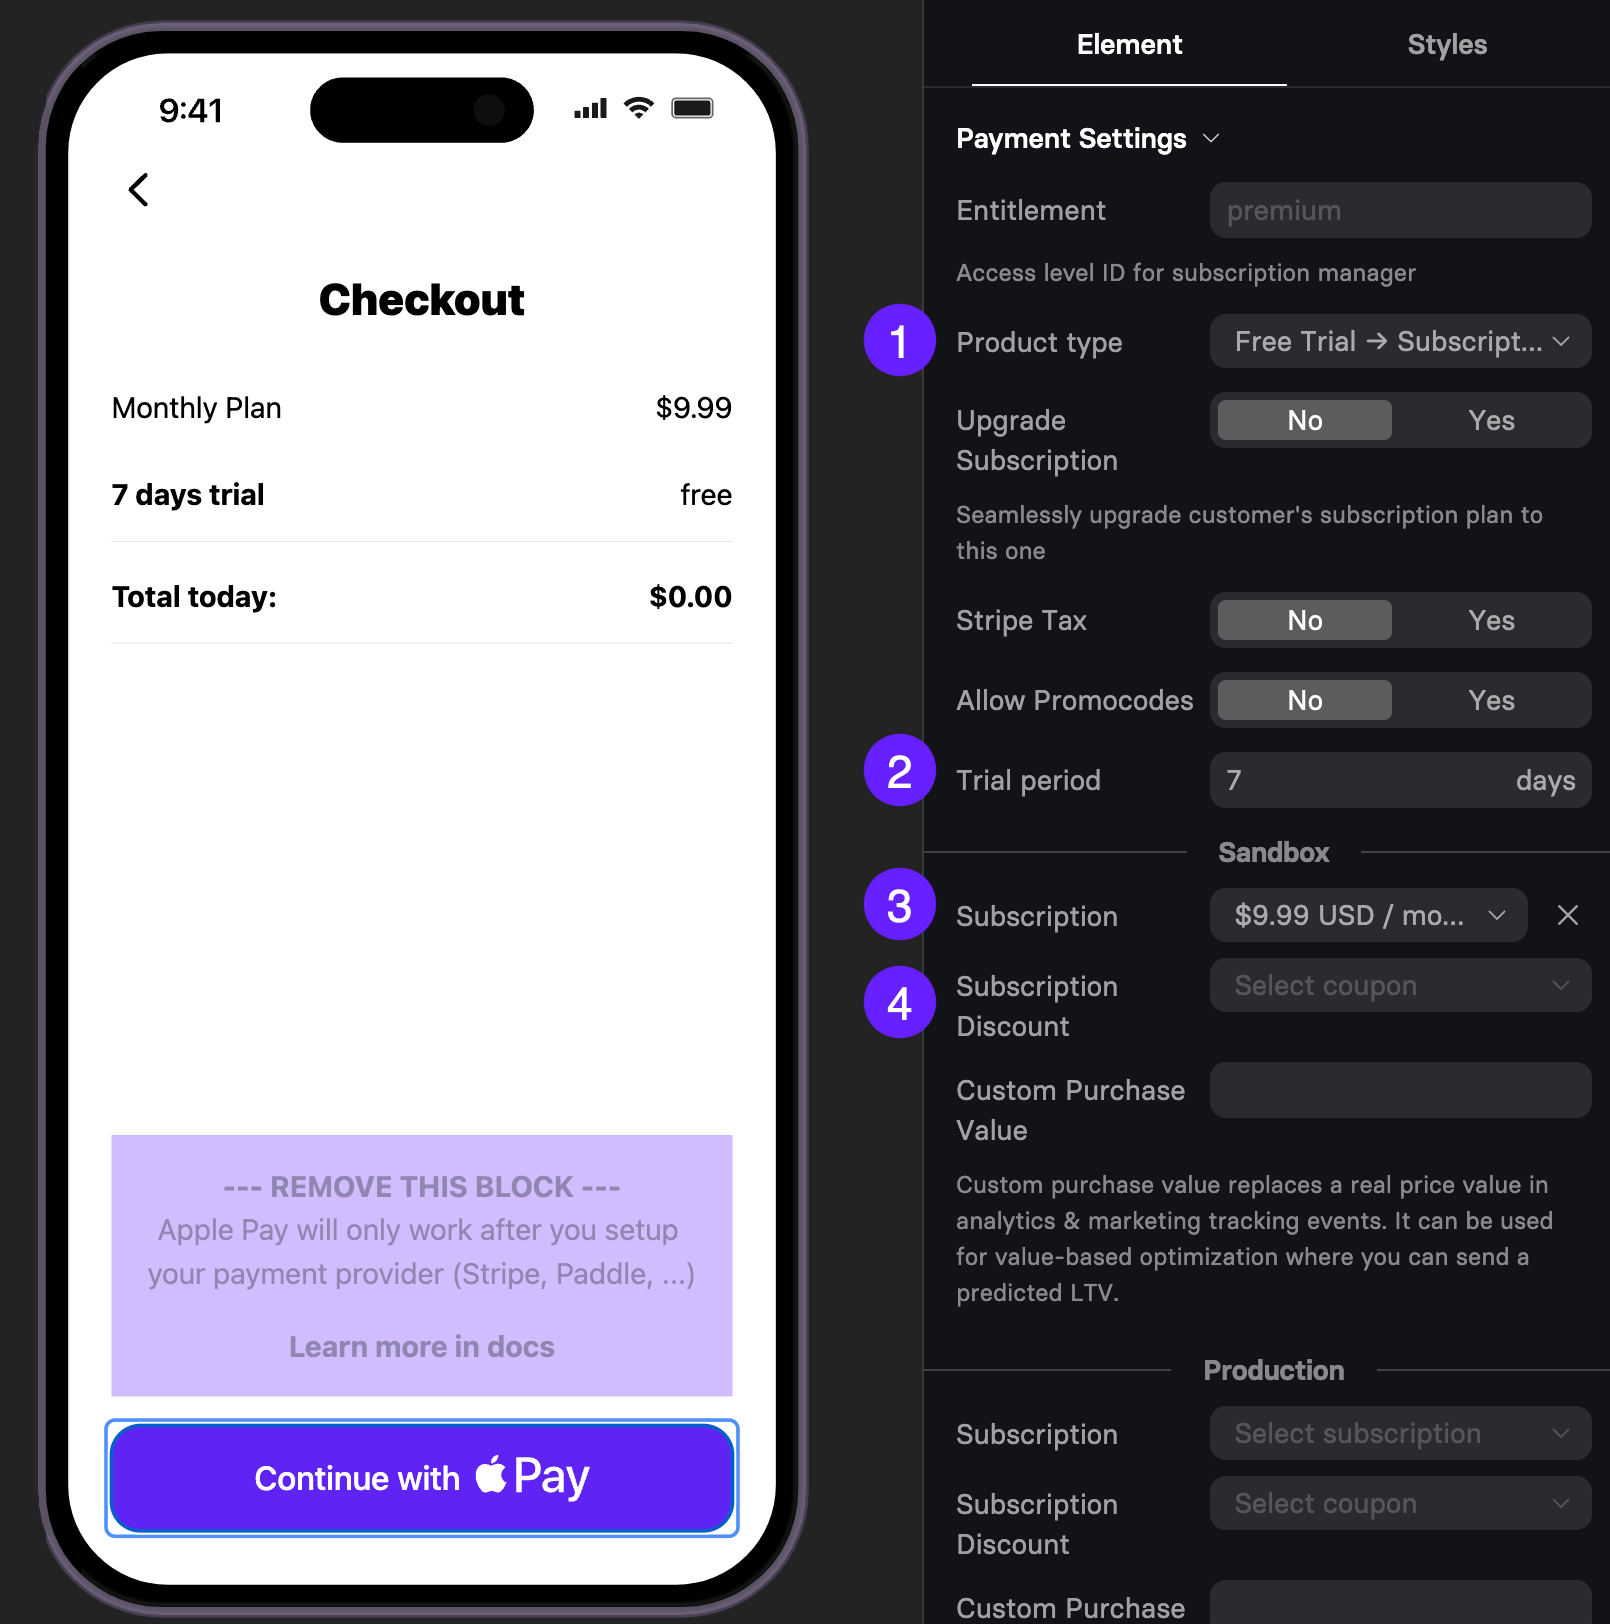
Add or configure a checkout screen for each plan you have. We recommend adding a total amount to each checkout screen so users know how much they need to pay before they click the purchase button.
-
On checkout screens, you already have the Apple Pay button. For it to work, on each screen, configure:
- Product type: Select whether you want to add a trial period or a discount.
- Trial period: Enter the trial period duration.
- Product: Select your product from your payment provider.
Ensure that the product is added to Adapty. Otherwise, the purchase result will be set to default.
- Subscription discount: Optionally, select a coupon from your payment provider.
-
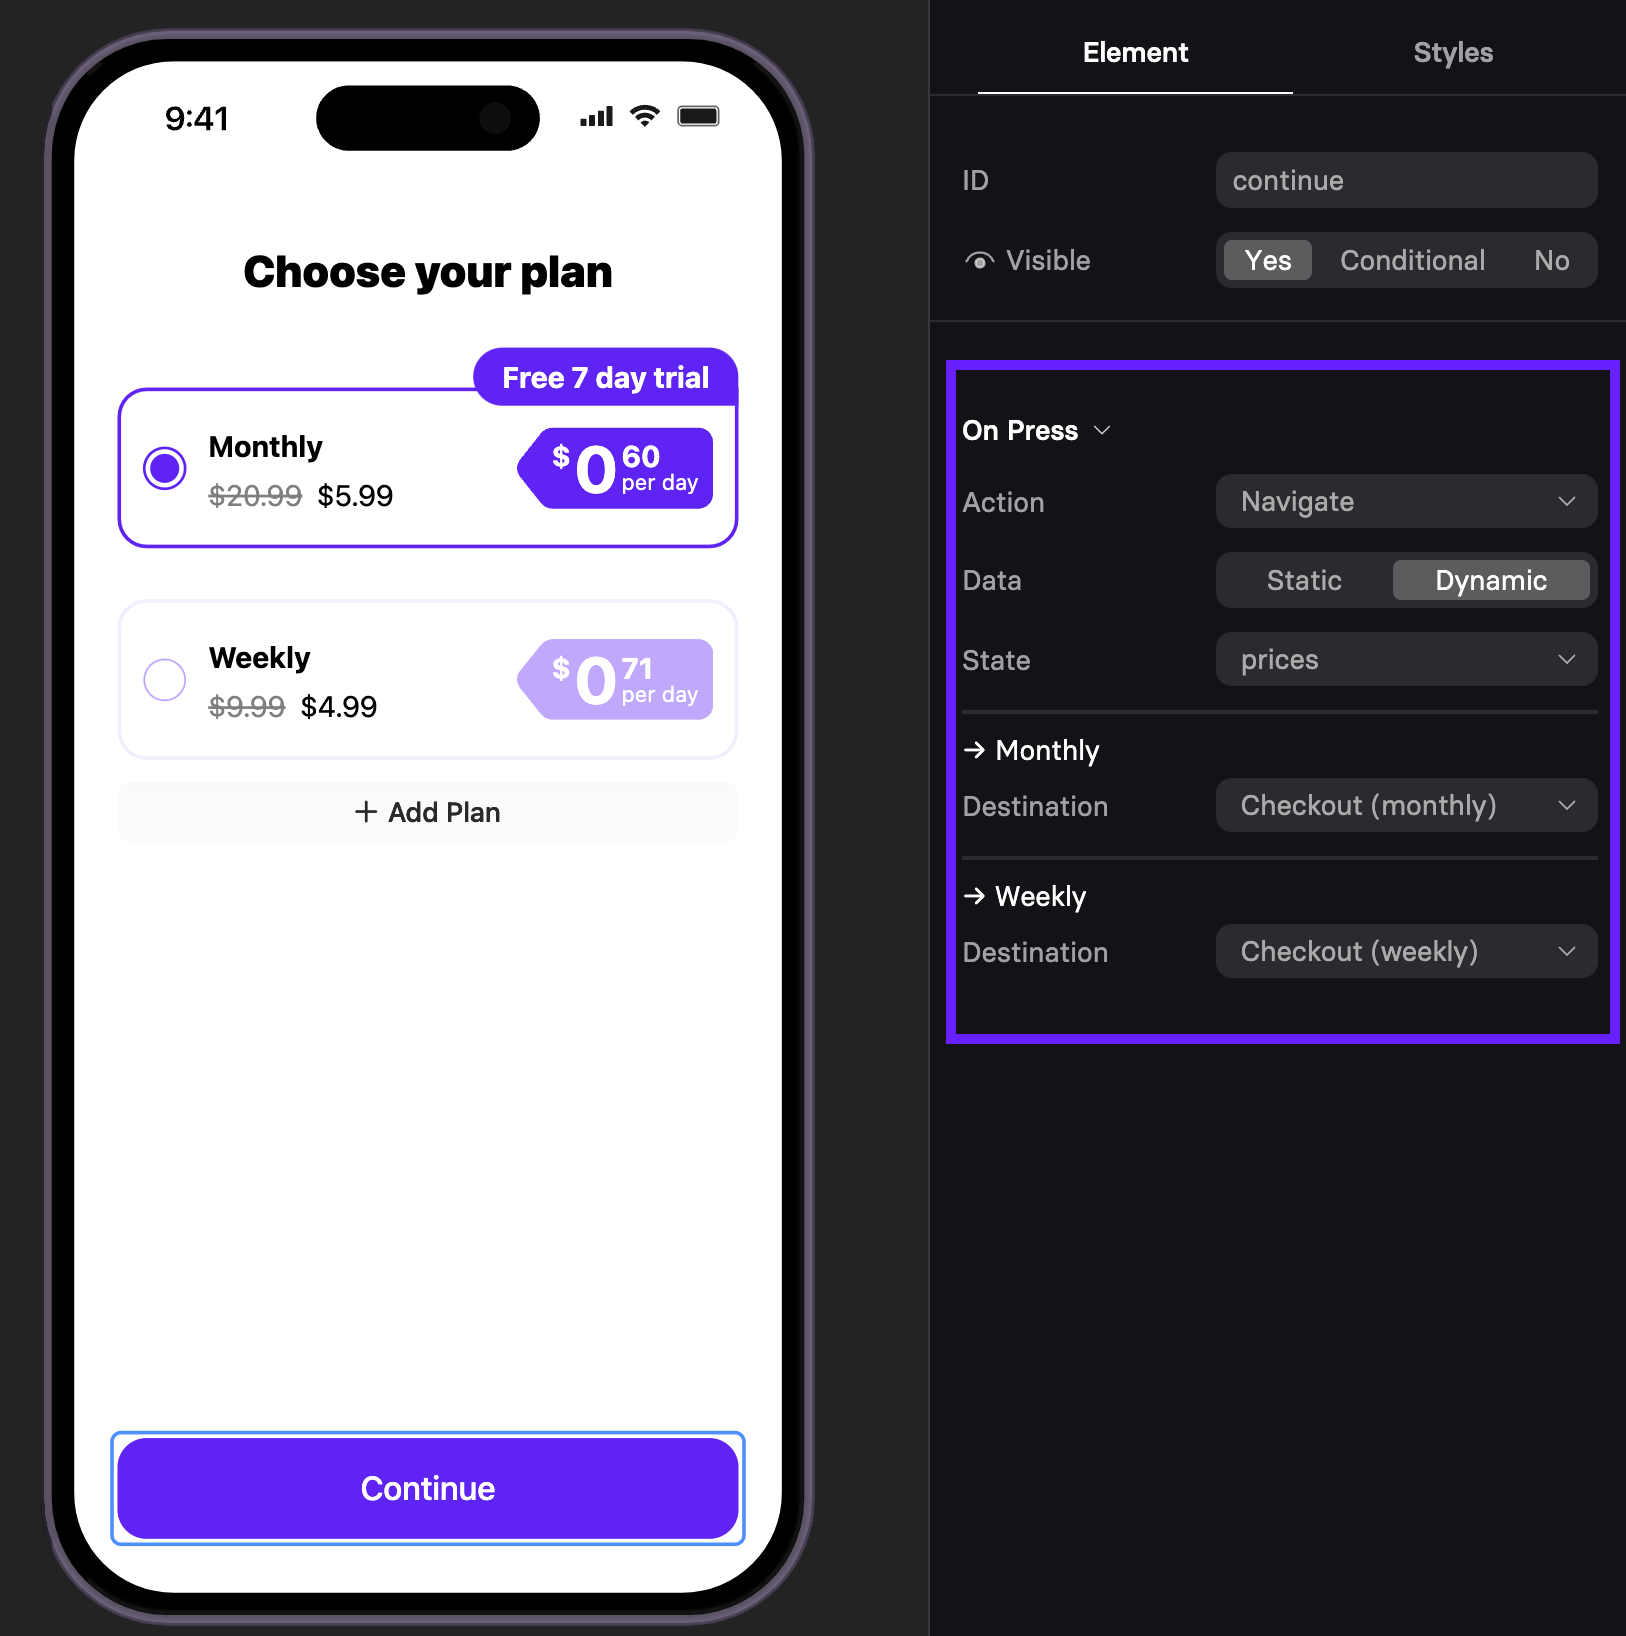
Now, you need to associate plans with checkout screens. On the plan selection screen, click the Continue button and select a destination screen for each plan.
When you are ready with the paywall, you need to get its link to activate this paywall in Adapty. The way you get it depends on whether you are testing it or launching it in the production environment:
-
For sandbox testing: Click Preview on the top right and copy the link.
-
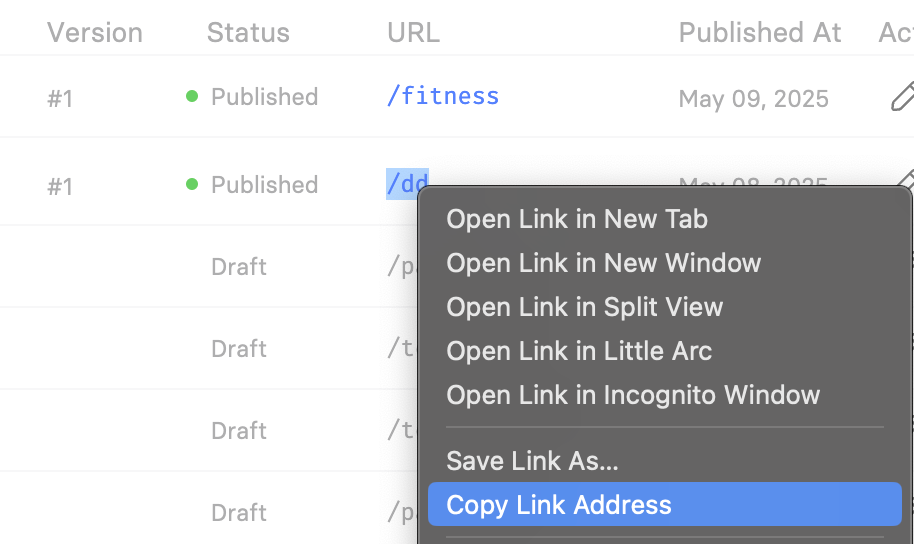
For production: Click Publish on the top right. Click Home and copy the link from the URL column.
That’s it! Use this link to proceed with the setup.