Show all plans in a bottom sheet
This template surfaces a single highlighted offer first, with a discreet link to the full plan list. Tapping Show all plans slides up a bottom sheet that contains the other products, a purchase button, and the footer links.
Use it when one plan converts disproportionately well — the bottom sheet keeps the alternatives one tap away without crowding the main screen.
Before you start
- Create products in the Adapty Dashboard.
- Connect Adapty to the App Store and Google Play.
1. Set up the screen layout
Use the hero image as the screen background and group the rest of the content at the bottom, so the image fills the upper part of the screen.
For the full list of screen properties, see Screens and layers — Screen settings.
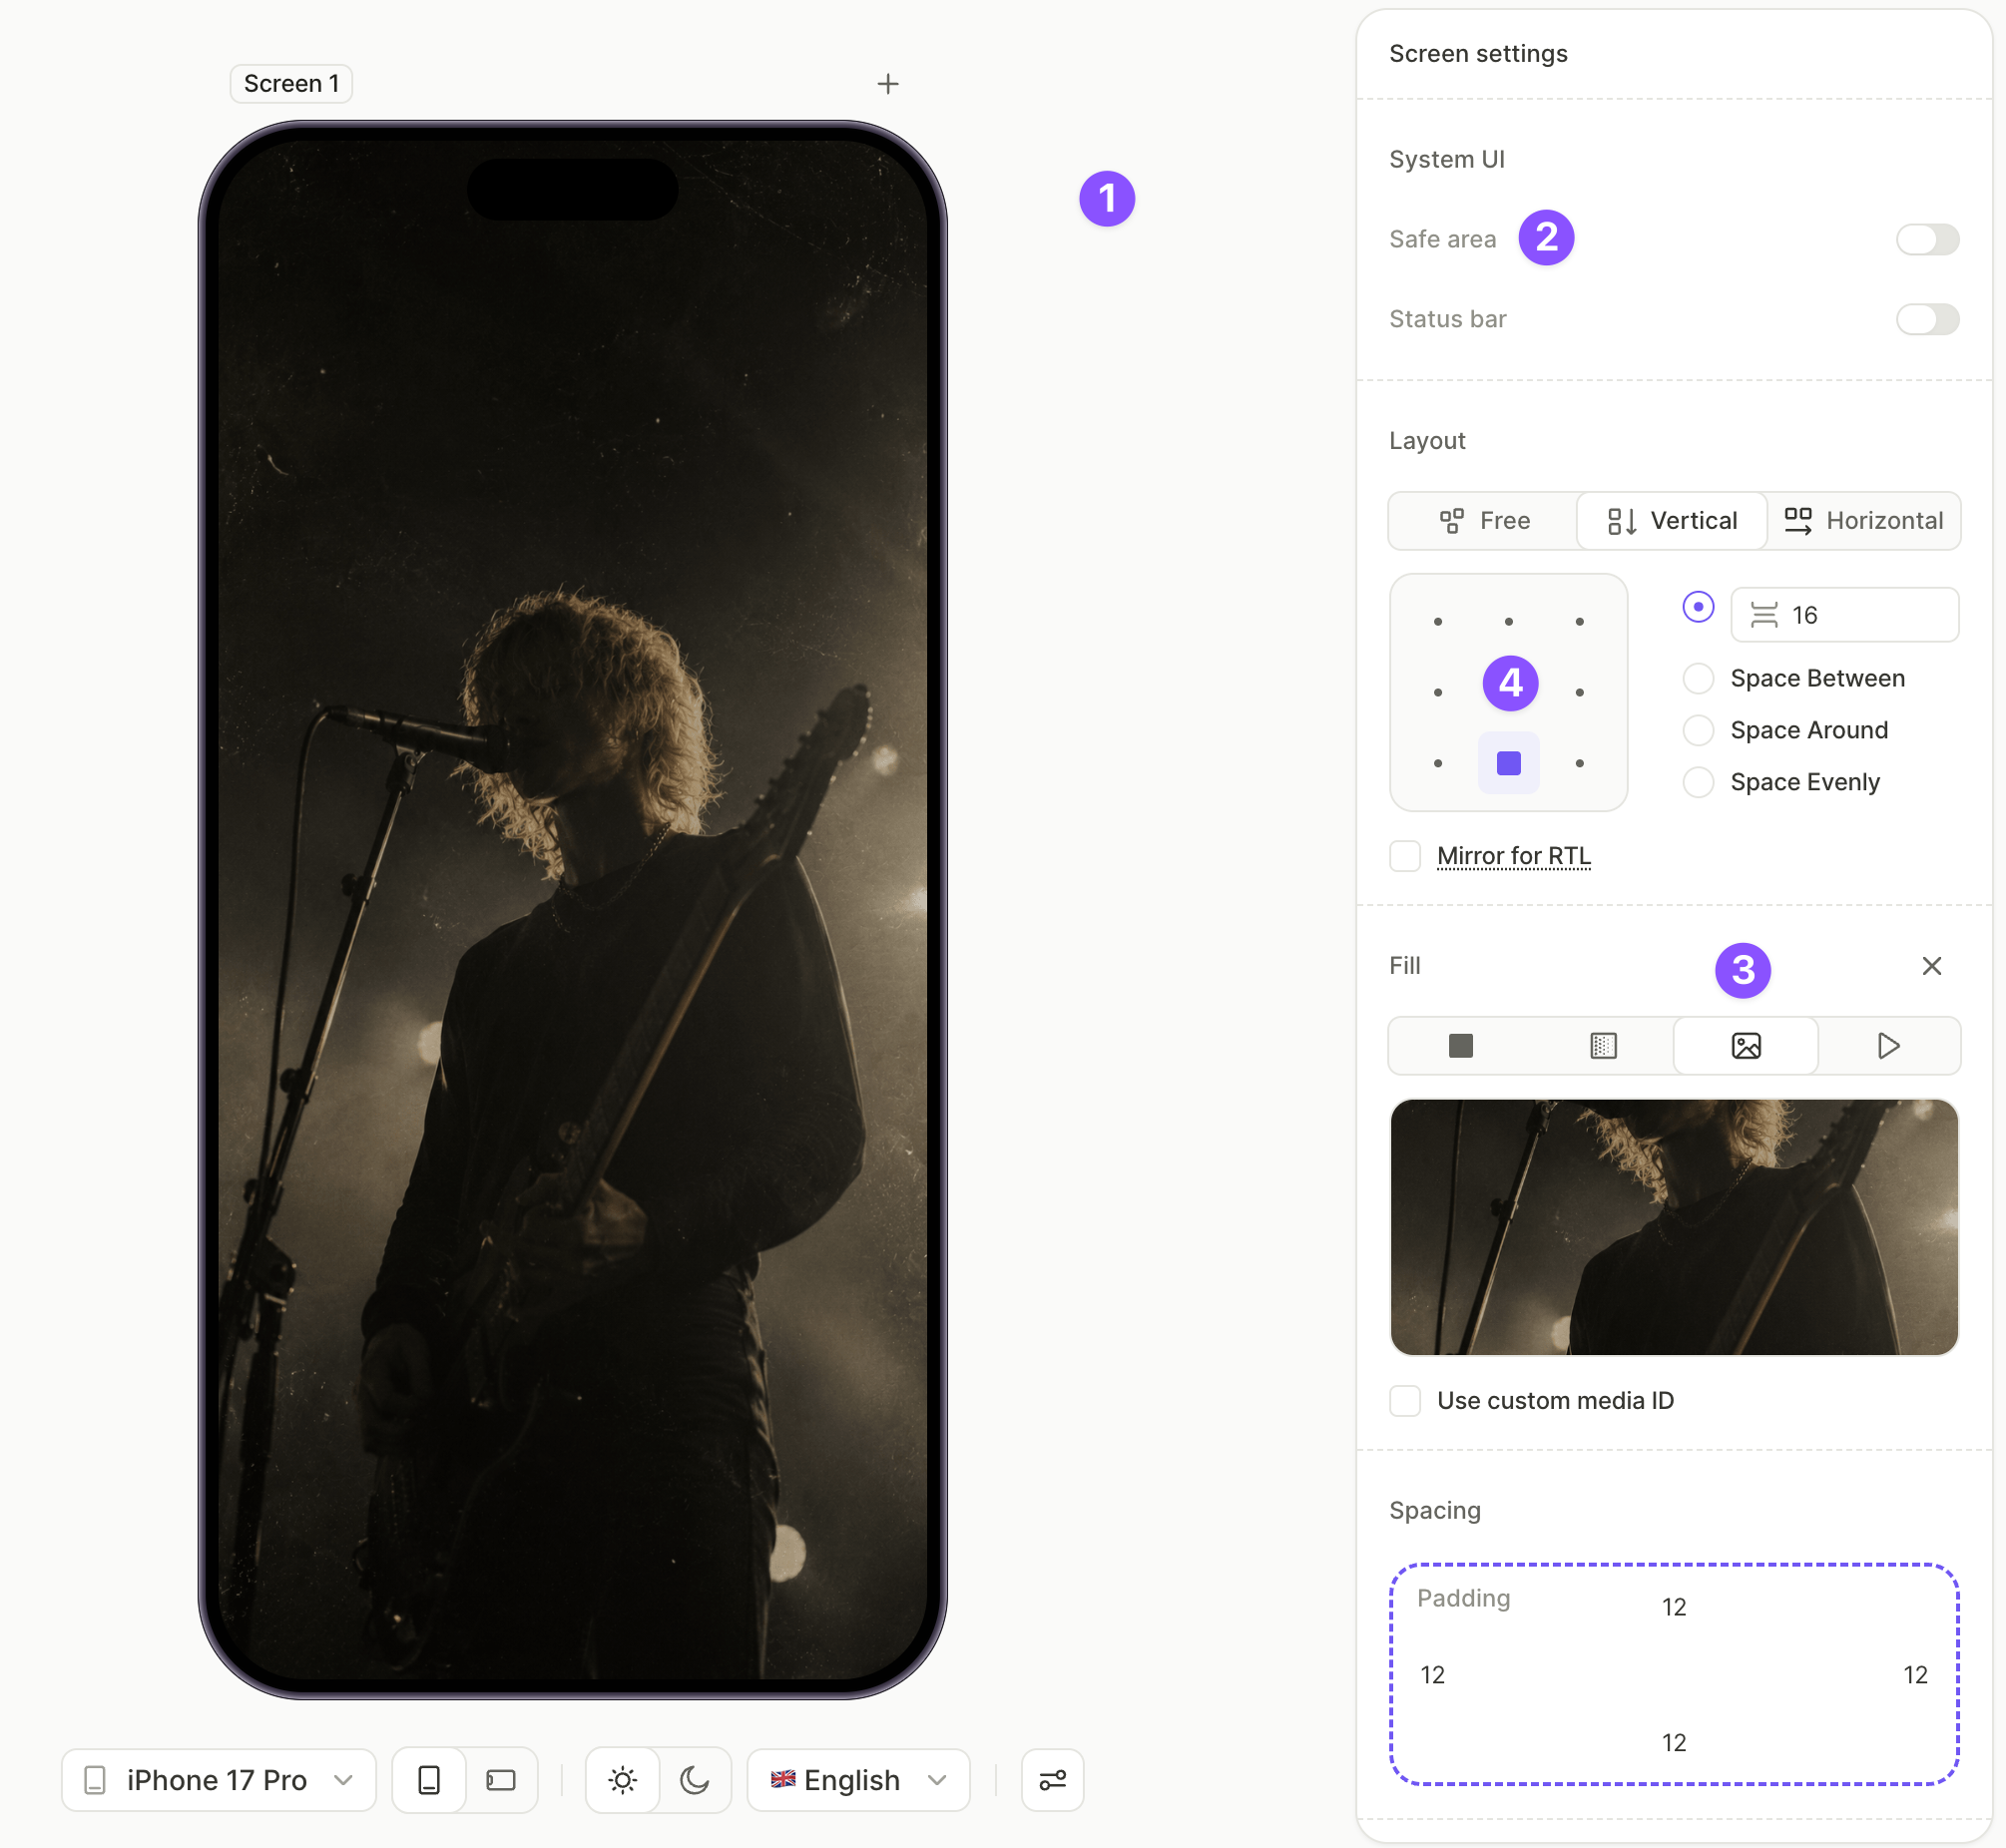
To configure the screen:
- Click an empty area of the canvas to select the screen.
- Under System UI, disable Safe area so the hero image extends to the screen edges.
- Under Fill, choose Image and upload your hero image.
- Under Layout, configure the direction, gap, and alignment to anchor the content where you want it. For this template, a Vertical direction with a small gap and bottom-middle alignment groups the heading and buttons in the lower part of the screen.
2. Add the CTA heading
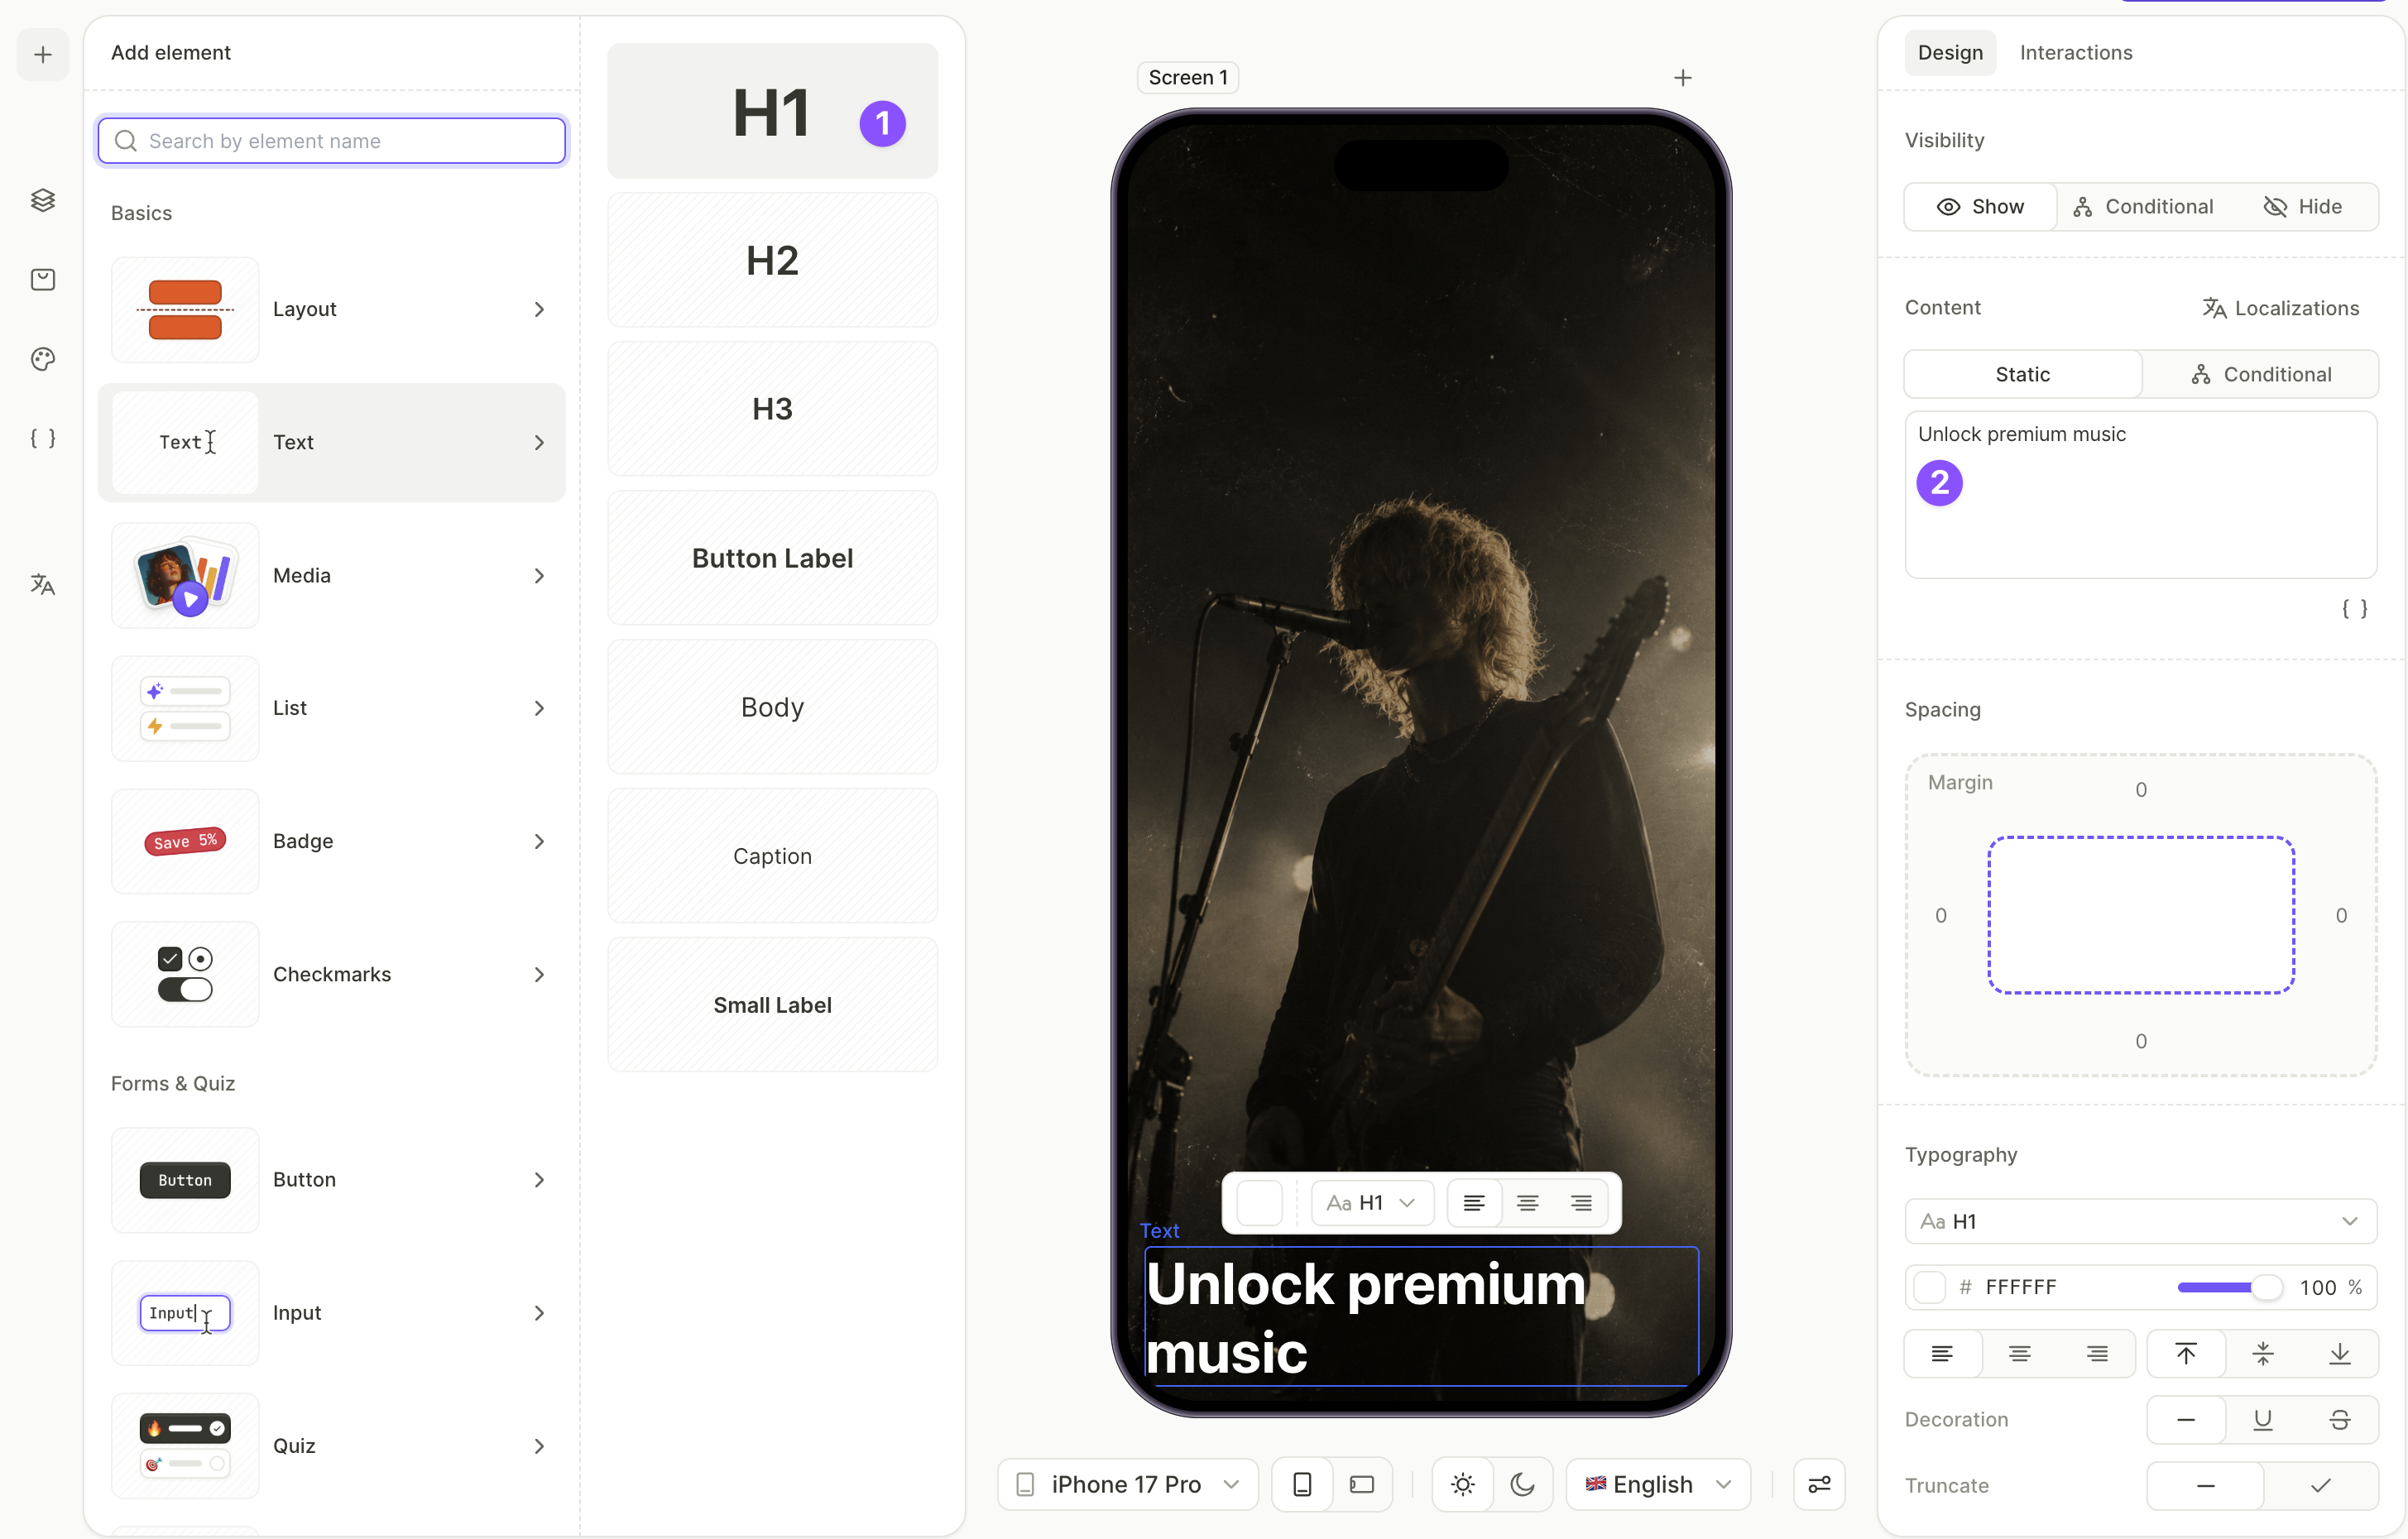
The heading sits in the lower portion of the screen, right above the subscribe button. The hero image fills the area above it.
- Click + > Text > H1.
- With the H1 selected, open the Design tab and edit the text in the Content field.
3. Add the bottom sheet and its title
The bottom sheet is a layout container that slides up from the bottom of the screen. Add it visible for now — you’ll populate it in the next few steps and hide it once the content is in place. Hidden elements can’t be edited, so the sheet has to stay visible until you’re done filling it.
For more on bottom sheets and other layout containers, see Elements — Layout.
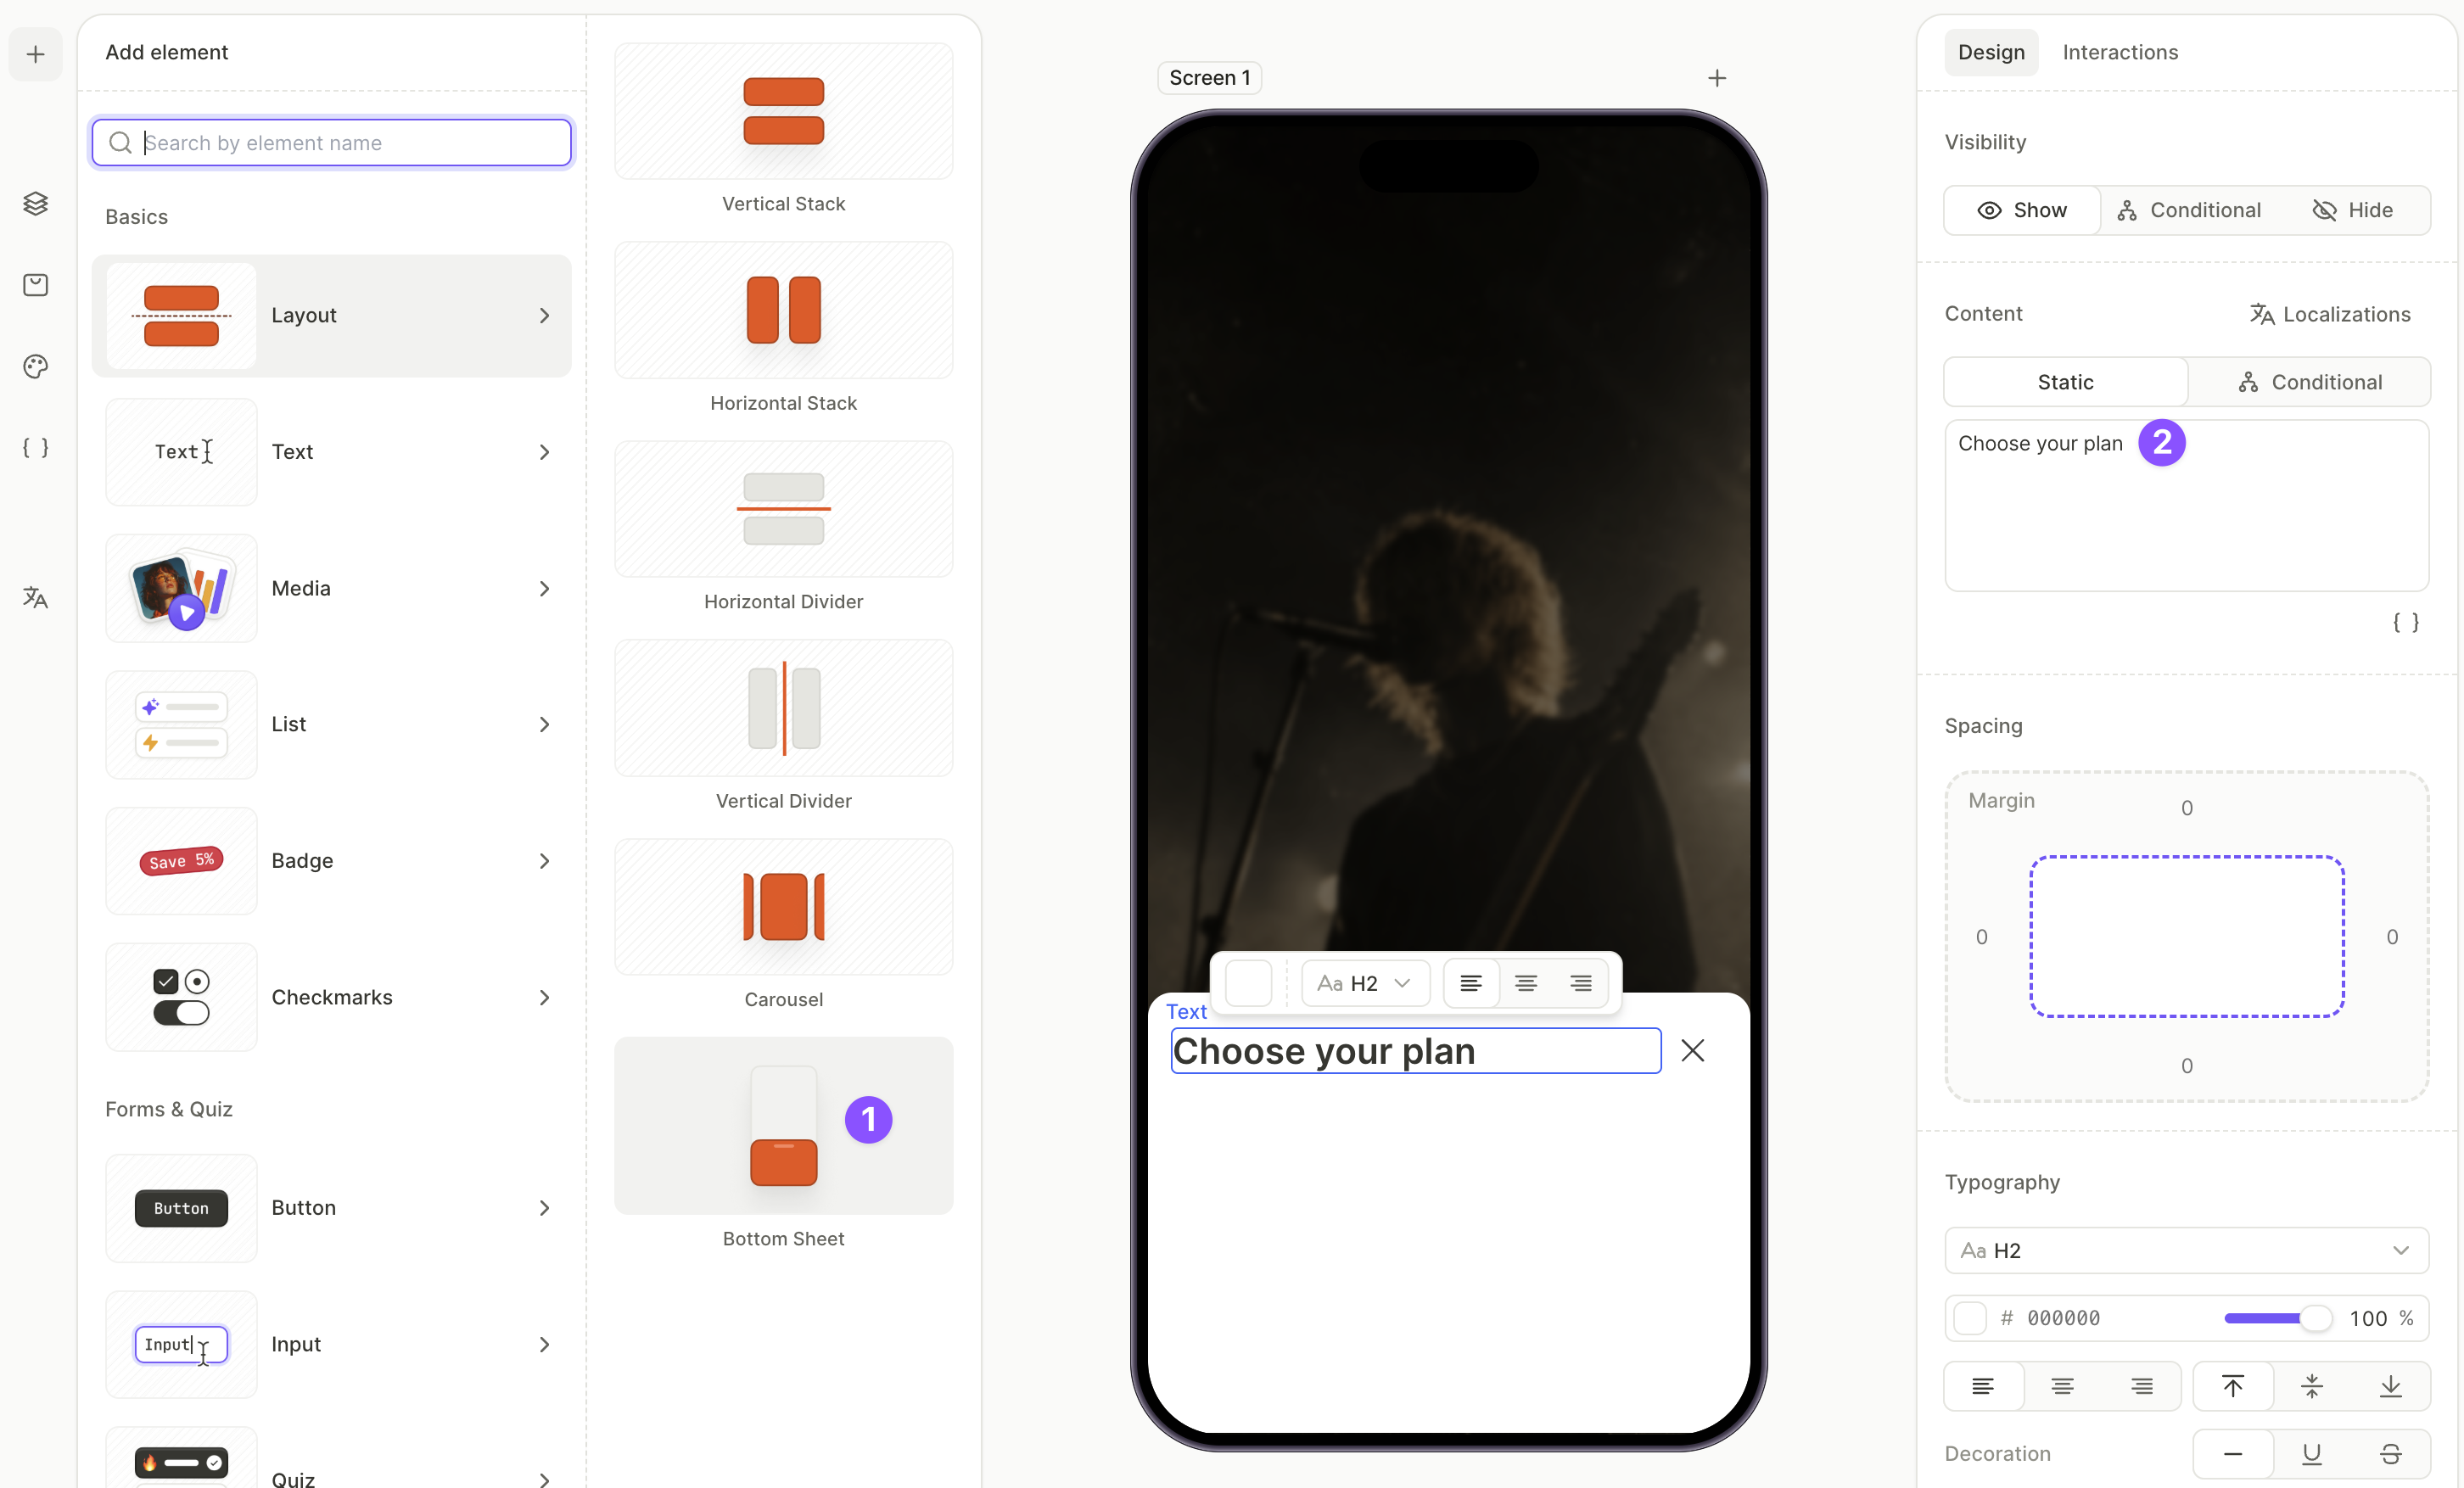
To add the bottom sheet and its title:
- Click + > Layout > Bottom Sheet.
- In the Layers panel, expand the bottom sheet, select the Title layer, and edit the Content field on the Design tab — for example,
Choose your plan.
4. Add the product list inside the bottom sheet
Place all the products inside the bottom sheet. One of them will also drive the price shown on the main CTA button.
For more on managing products, see Set up purchases.
To add and configure products:
- Click + > Products and choose a layout preset. Vertical List works well for most cases. The element appears on the screen, outside the bottom sheet.
- In the Layers panel, drag the Products layer into the Content container inside the bottom sheet.
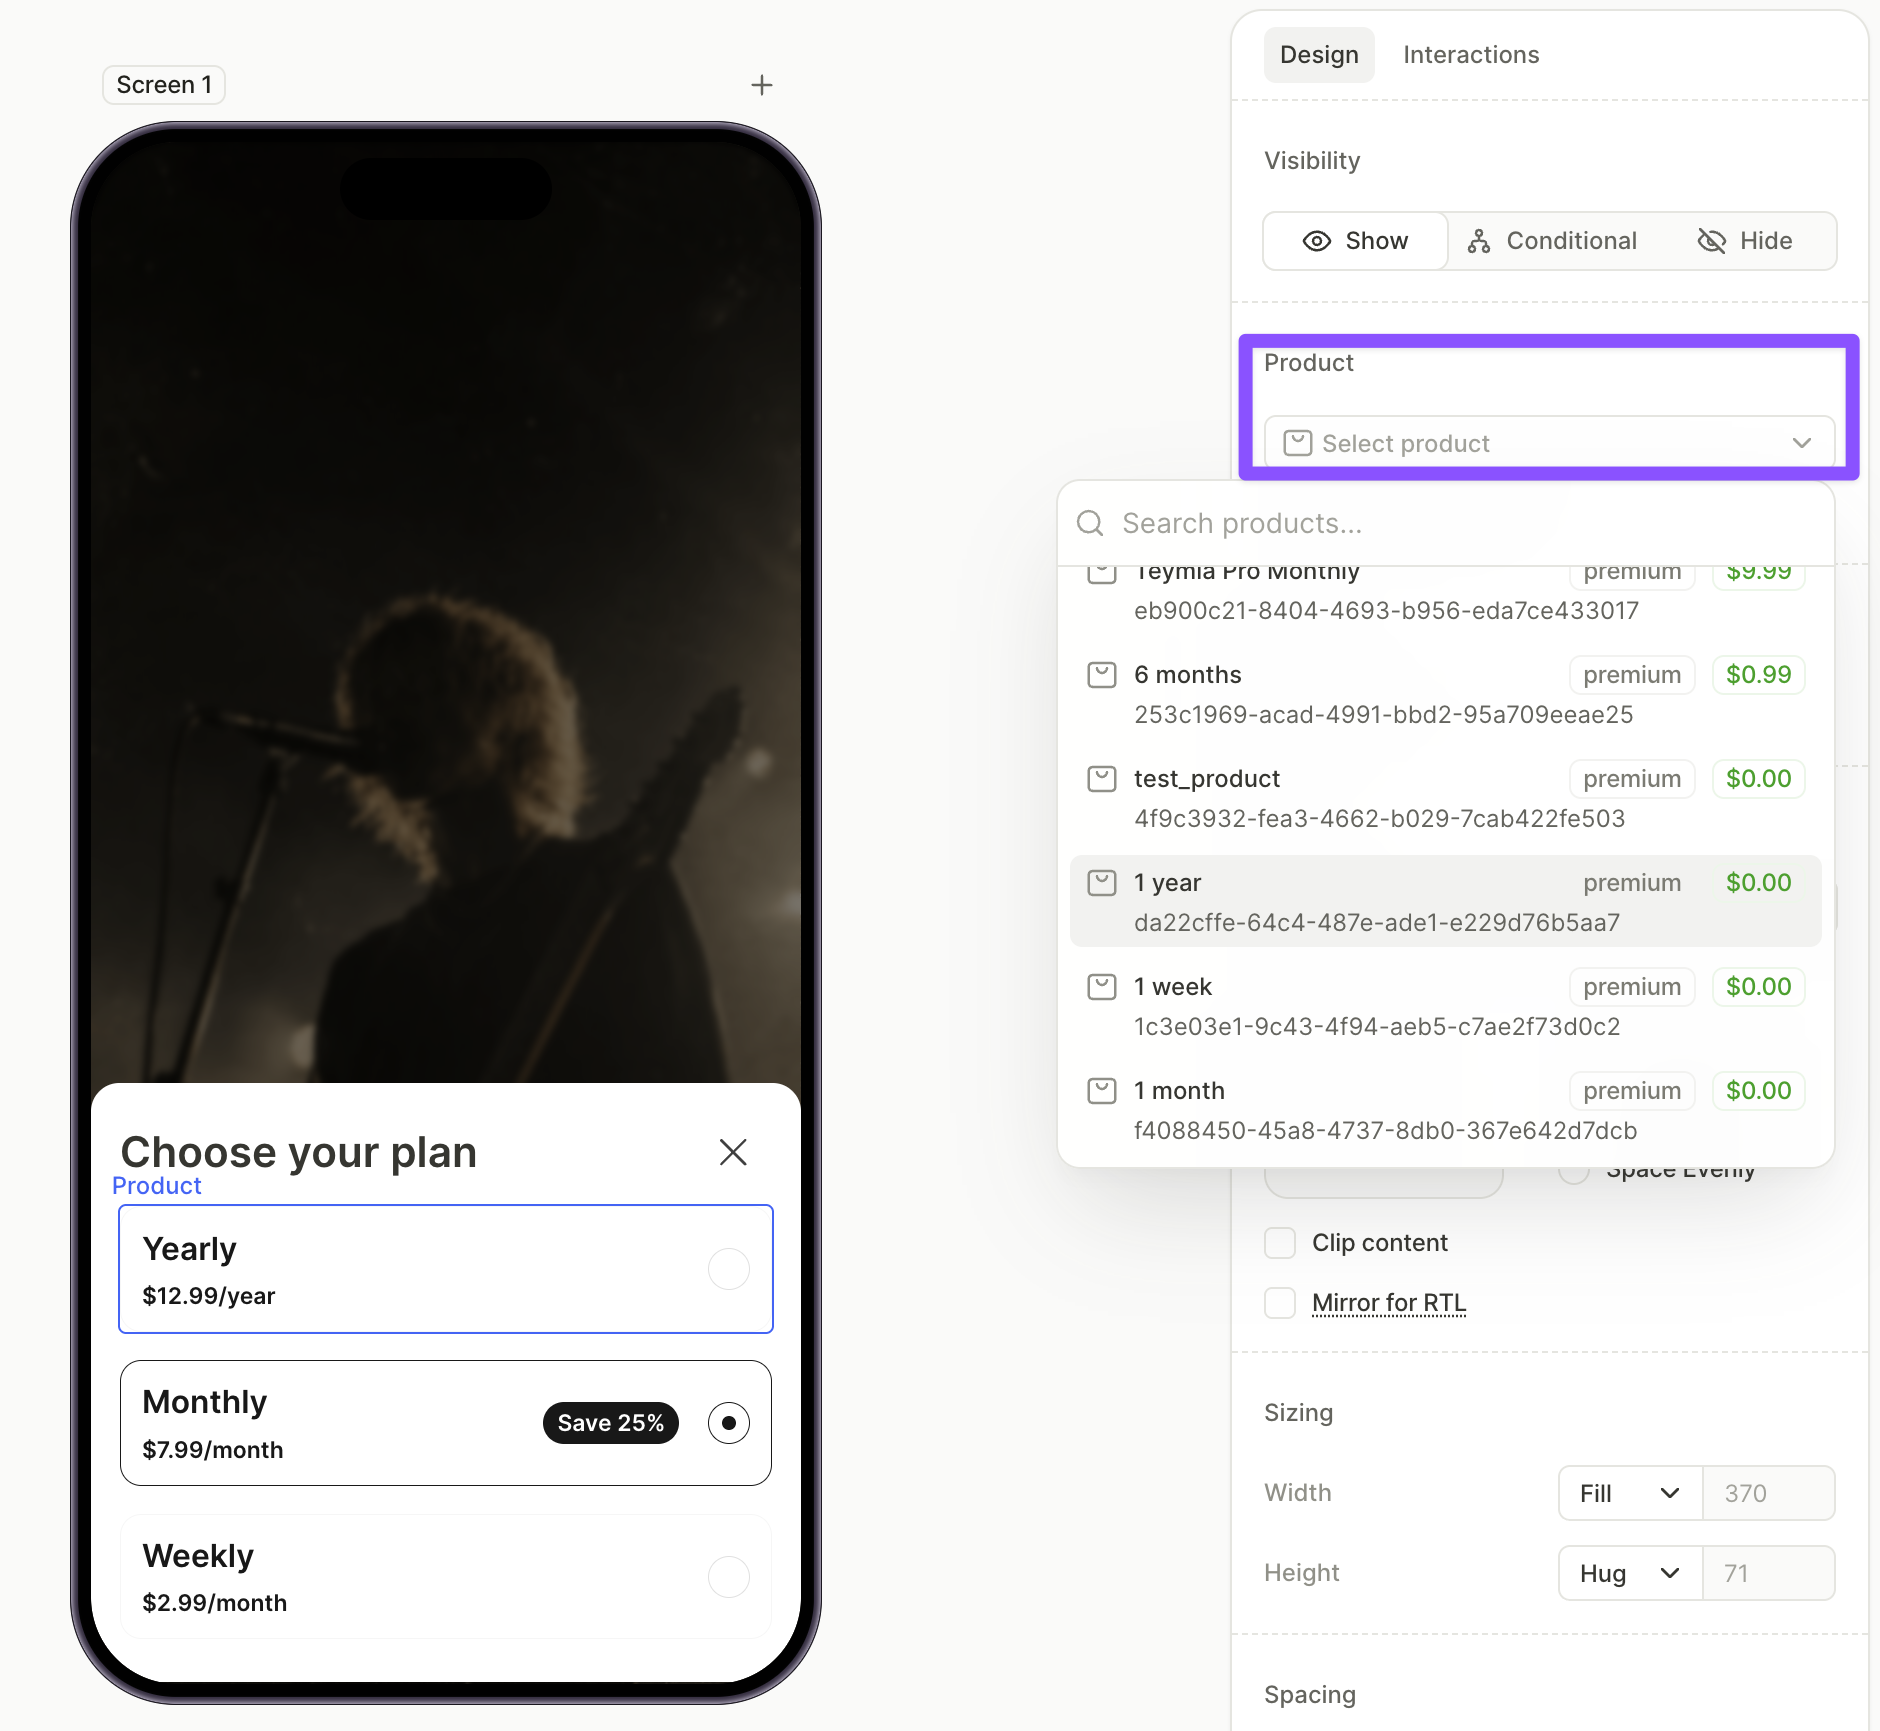
- Select each product card on the canvas and pick a product from the dropdown in the Design tab.
5. Add the purchase button inside the bottom sheet
The bottom sheet needs its own purchase button to buy whichever plan the user selects from the list.
- Click + > Buttons and choose a button preset.
- In the Layers panel, drag the new button into the Content container inside the bottom sheet.
- With the button selected, open the Interactions tab in the right panel.
- Click Add trigger > On tap, then click Add action.
- Set Action to Purchase and Product to
products.selectedProduct.
6. Add the footer links inside the bottom sheet
Don’t use inline links for text nested inside buttons. Instead, set up the Open URL action on the button itself.
Terms of use, privacy policy, and restore purchases sit at the bottom of the sheet — the main screen stays uncluttered.
- Click + > Buttons > Links. This adds a row with Restore Purchases, Terms of Use, and Privacy Policy.
- In the Layers panel, drag the Links row into the Content container inside the bottom sheet.
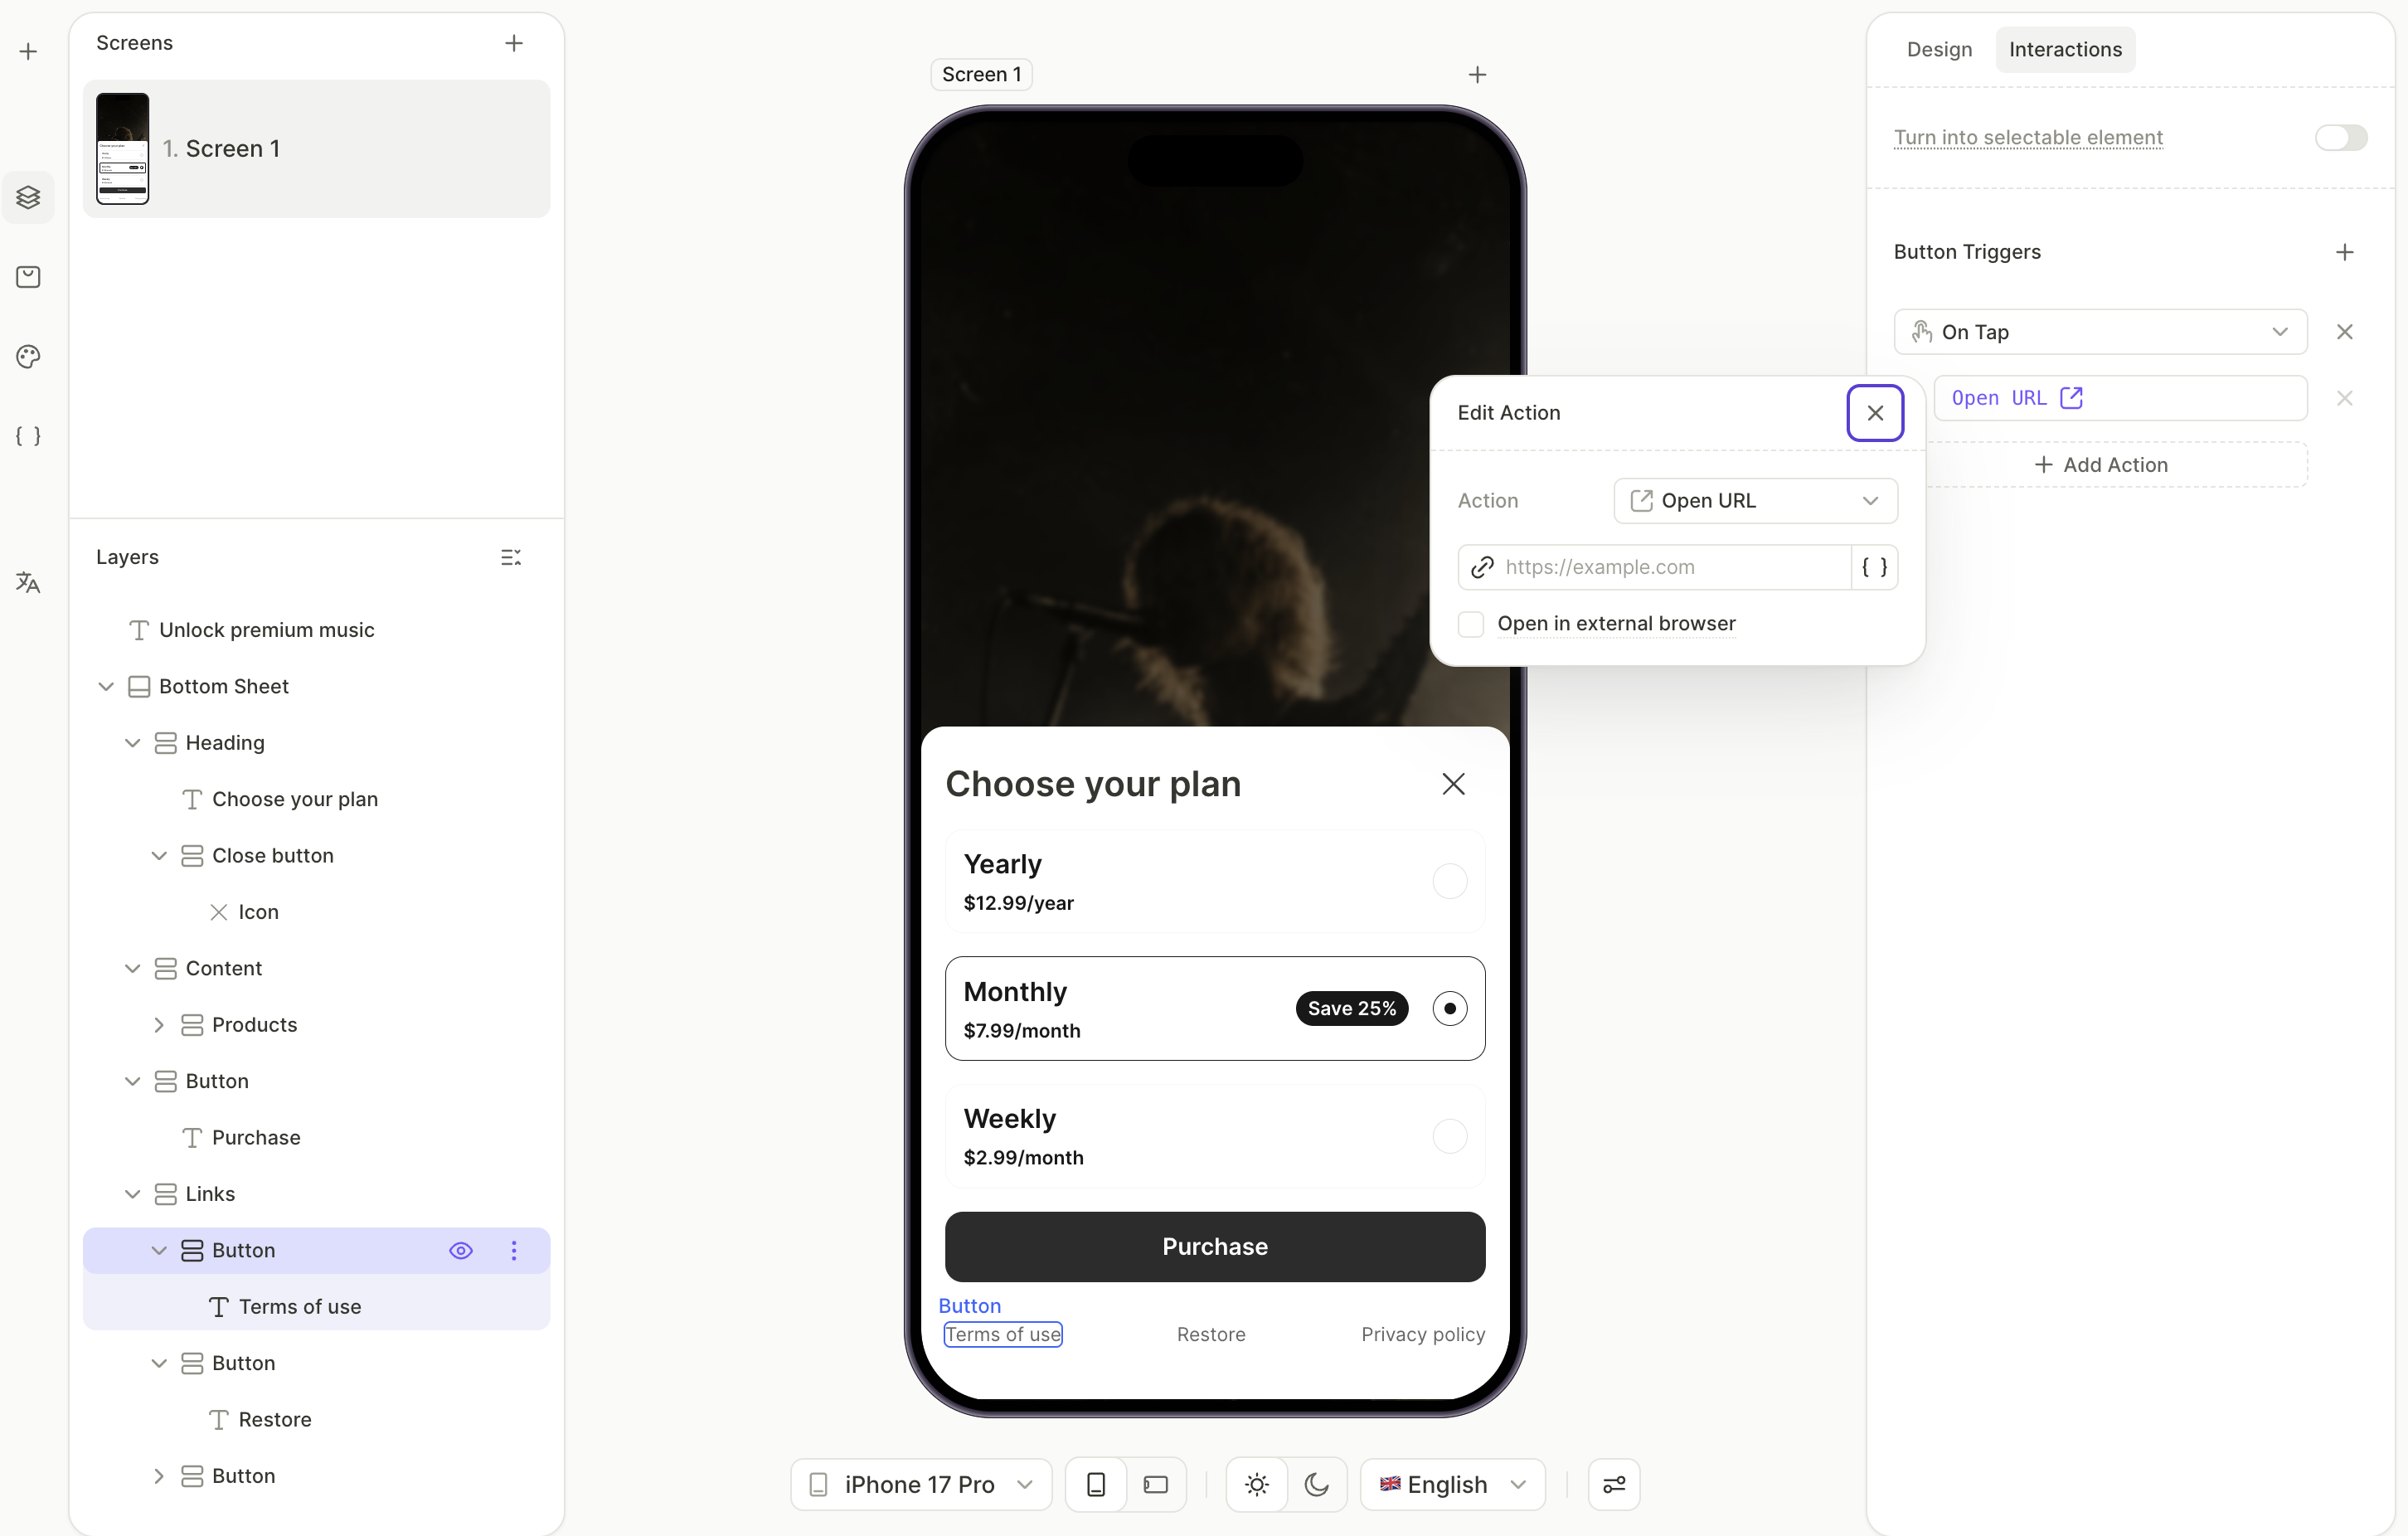
- In the Layers panel, select the Terms of Use button. Open the Interactions tab and paste your terms URL into the Open URL field.
- Repeat for the Privacy Policy button with your privacy URL.
- Leave the Restore Purchases link as is. Its action is preconfigured.
7. Hide the bottom sheet
With the sheet’s content in place, hide it so it doesn’t appear on the screen by default. Users will reveal it by tapping Show all plans in the last step.
In the Layers panel, select the bottom sheet and set its state to Hide . The sheet stays in the layer tree but no longer renders on the canvas.
8. Add the main subscribe button
The main button on the screen subscribes the user to the monthly plan in one tap. Its label uses the monthly product’s price variable so the button stays in sync with the product.
- In the Layers panel, click the screen so new elements add to the root, not inside the bottom sheet.
- Click + > Buttons and choose a button preset.
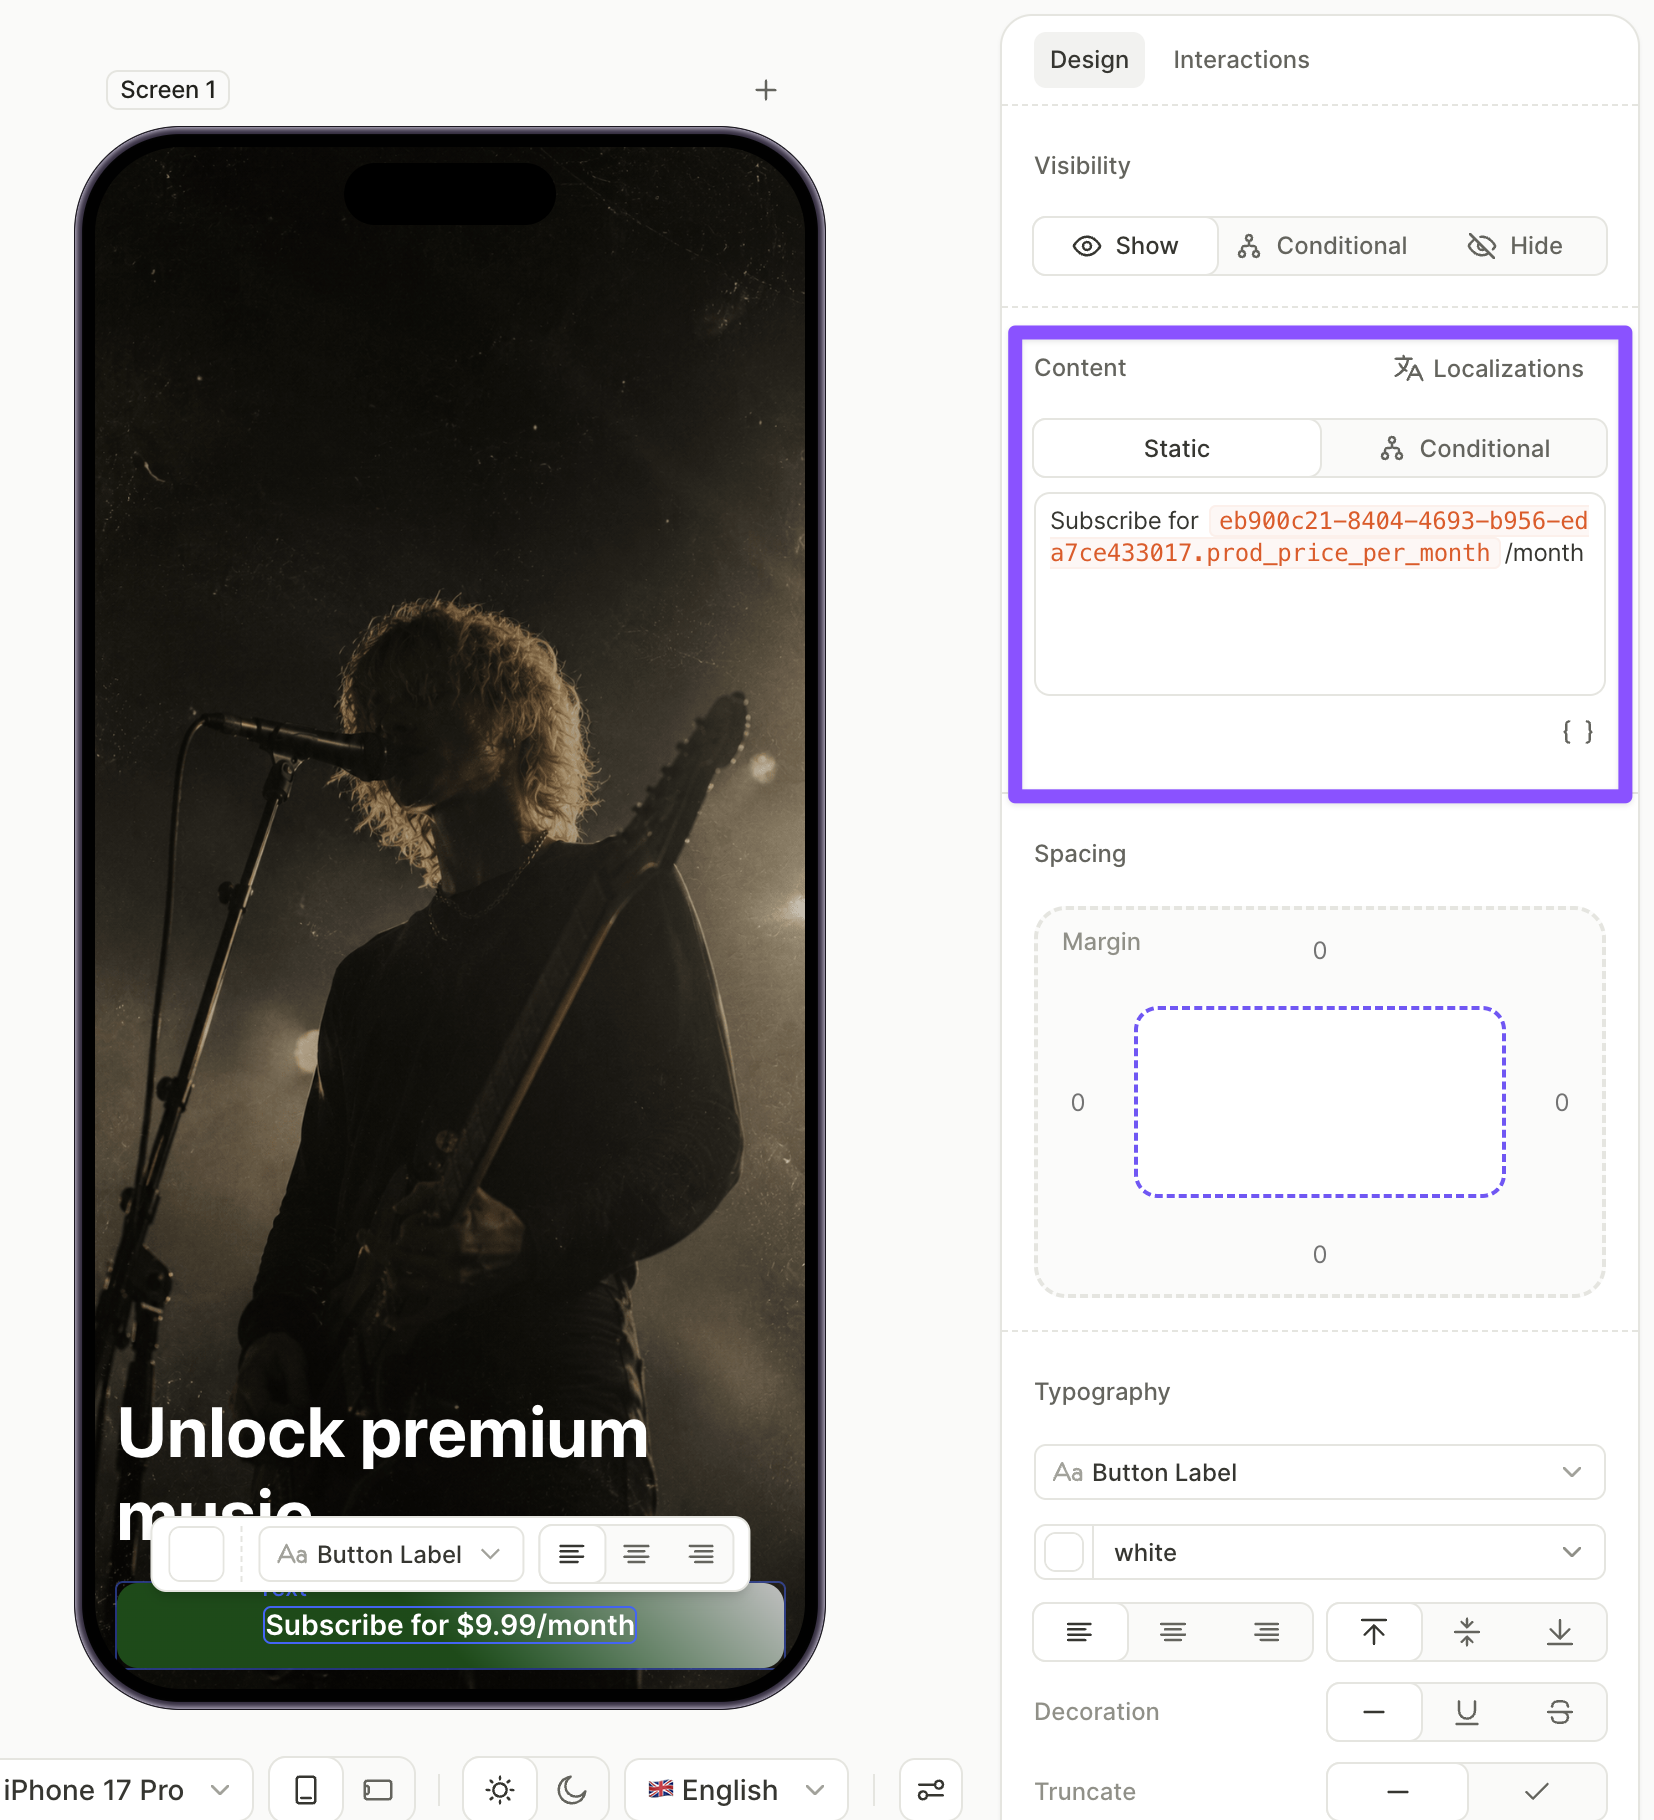
- With the button selected, open the Design tab and place the cursor in the Content field. Click
 and pick the price variable for the main product. Surround it with the rest of the label — for example,
 Subscribe for {price}/month.
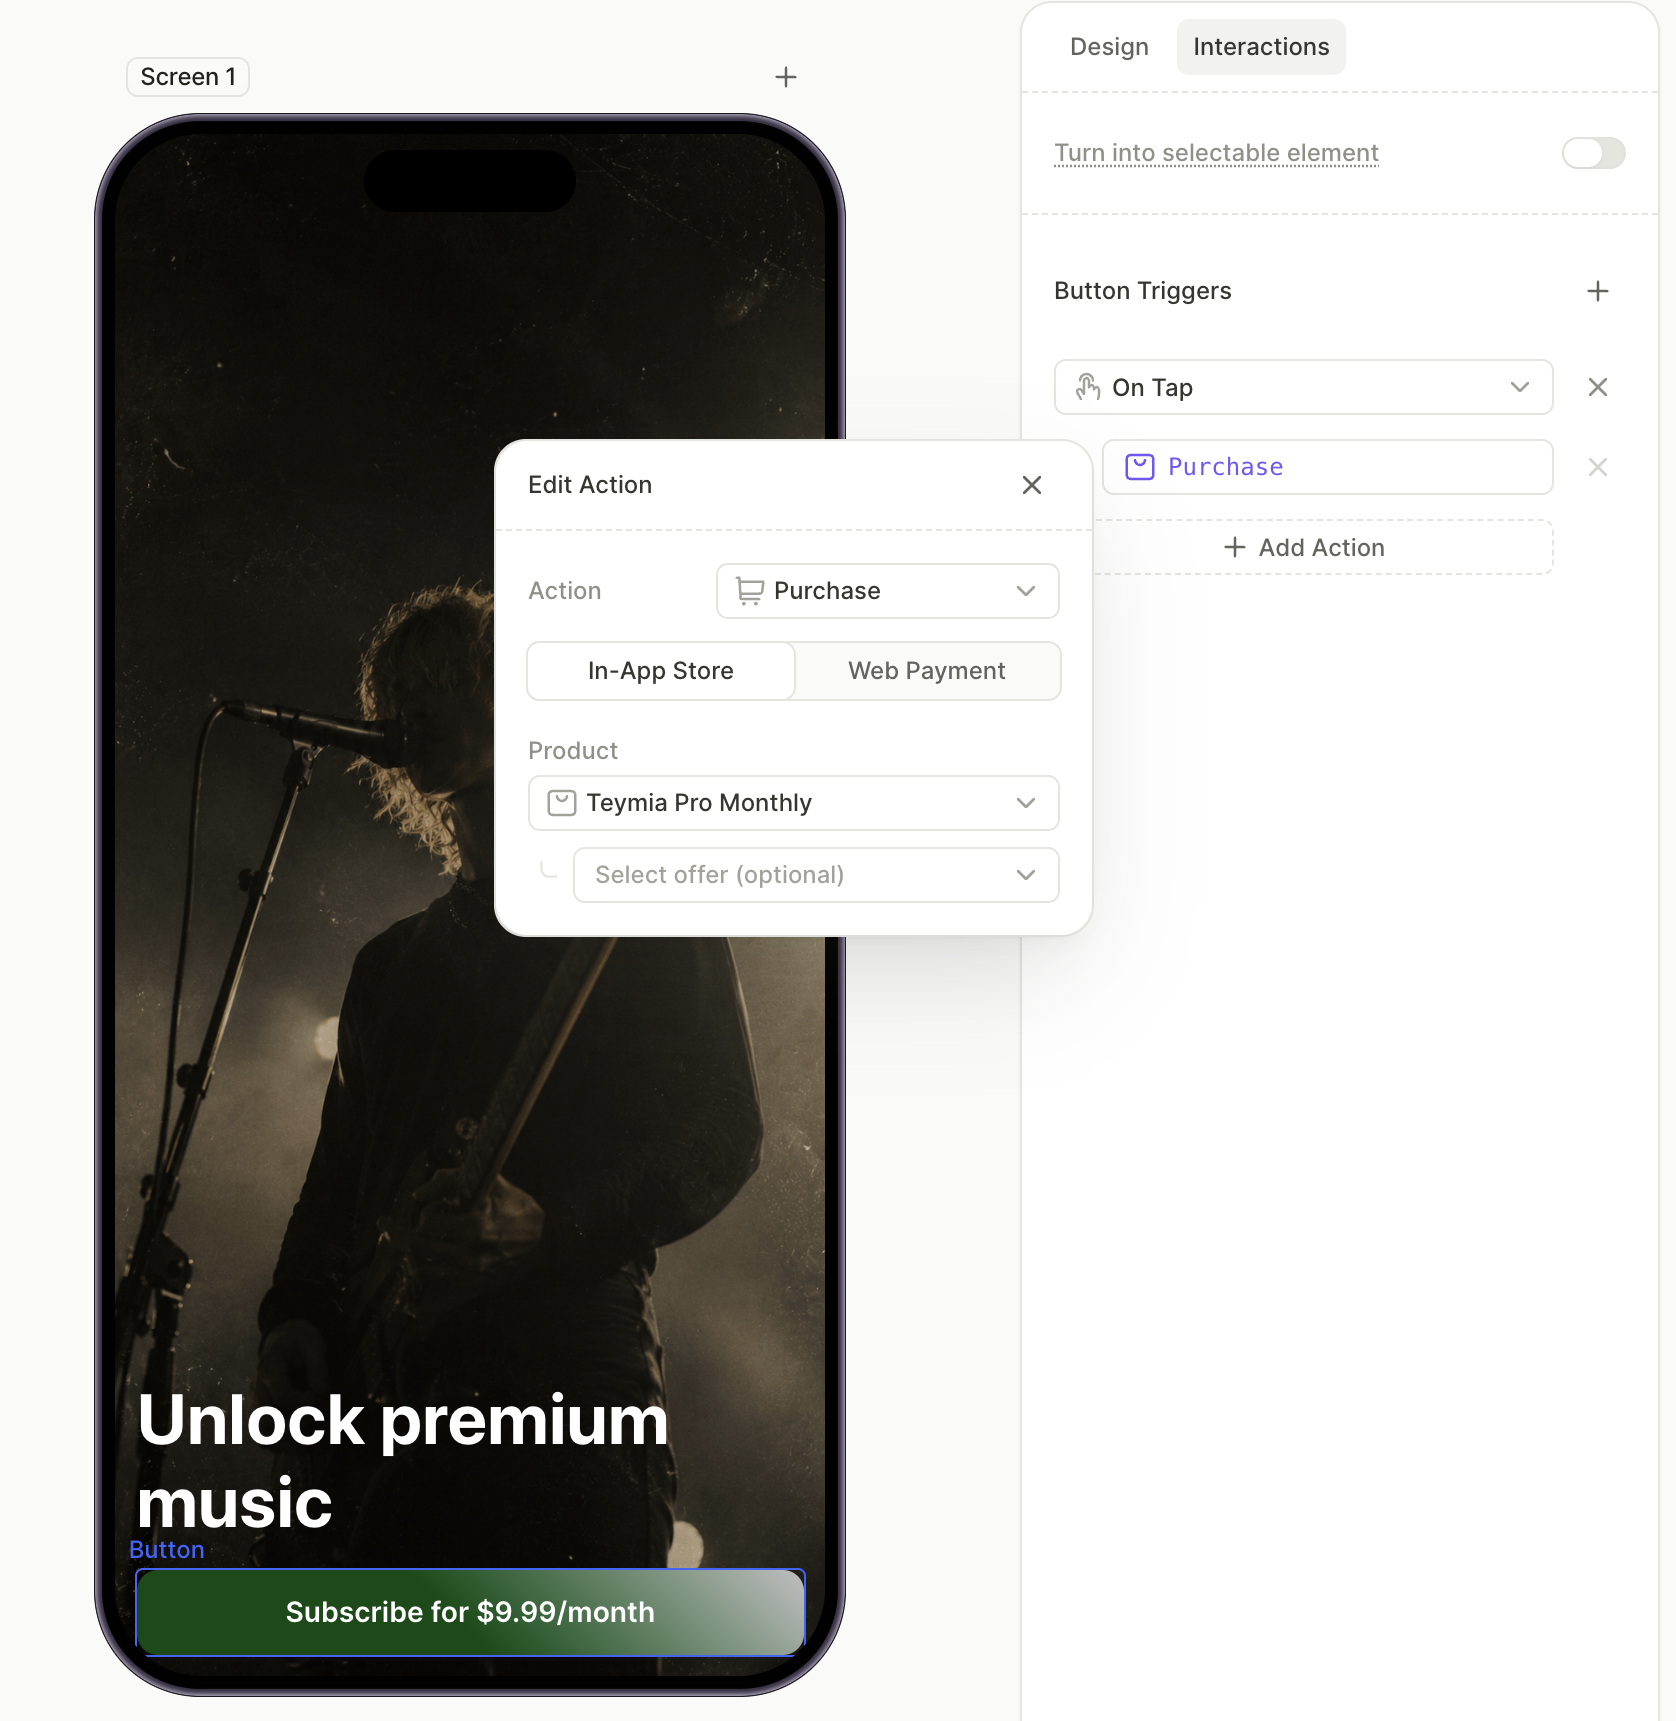
- Switch to the Interactions tab and click Add trigger > On tap > Add action.
- Set Action to Purchase and Product to the product you need. Unlike the bottom sheet button, this one targets a specific product instead of
products.selectedProduct.
9. Add the ‘Show all plans’ link
A text link below the subscribe button reveals the bottom sheet on tap. Adding it as a text element with the Button Label style keeps the look minimal while still letting you attach an action.
For more on the Show/Hide action, see Actions — Show/hide elements.
To add the link:
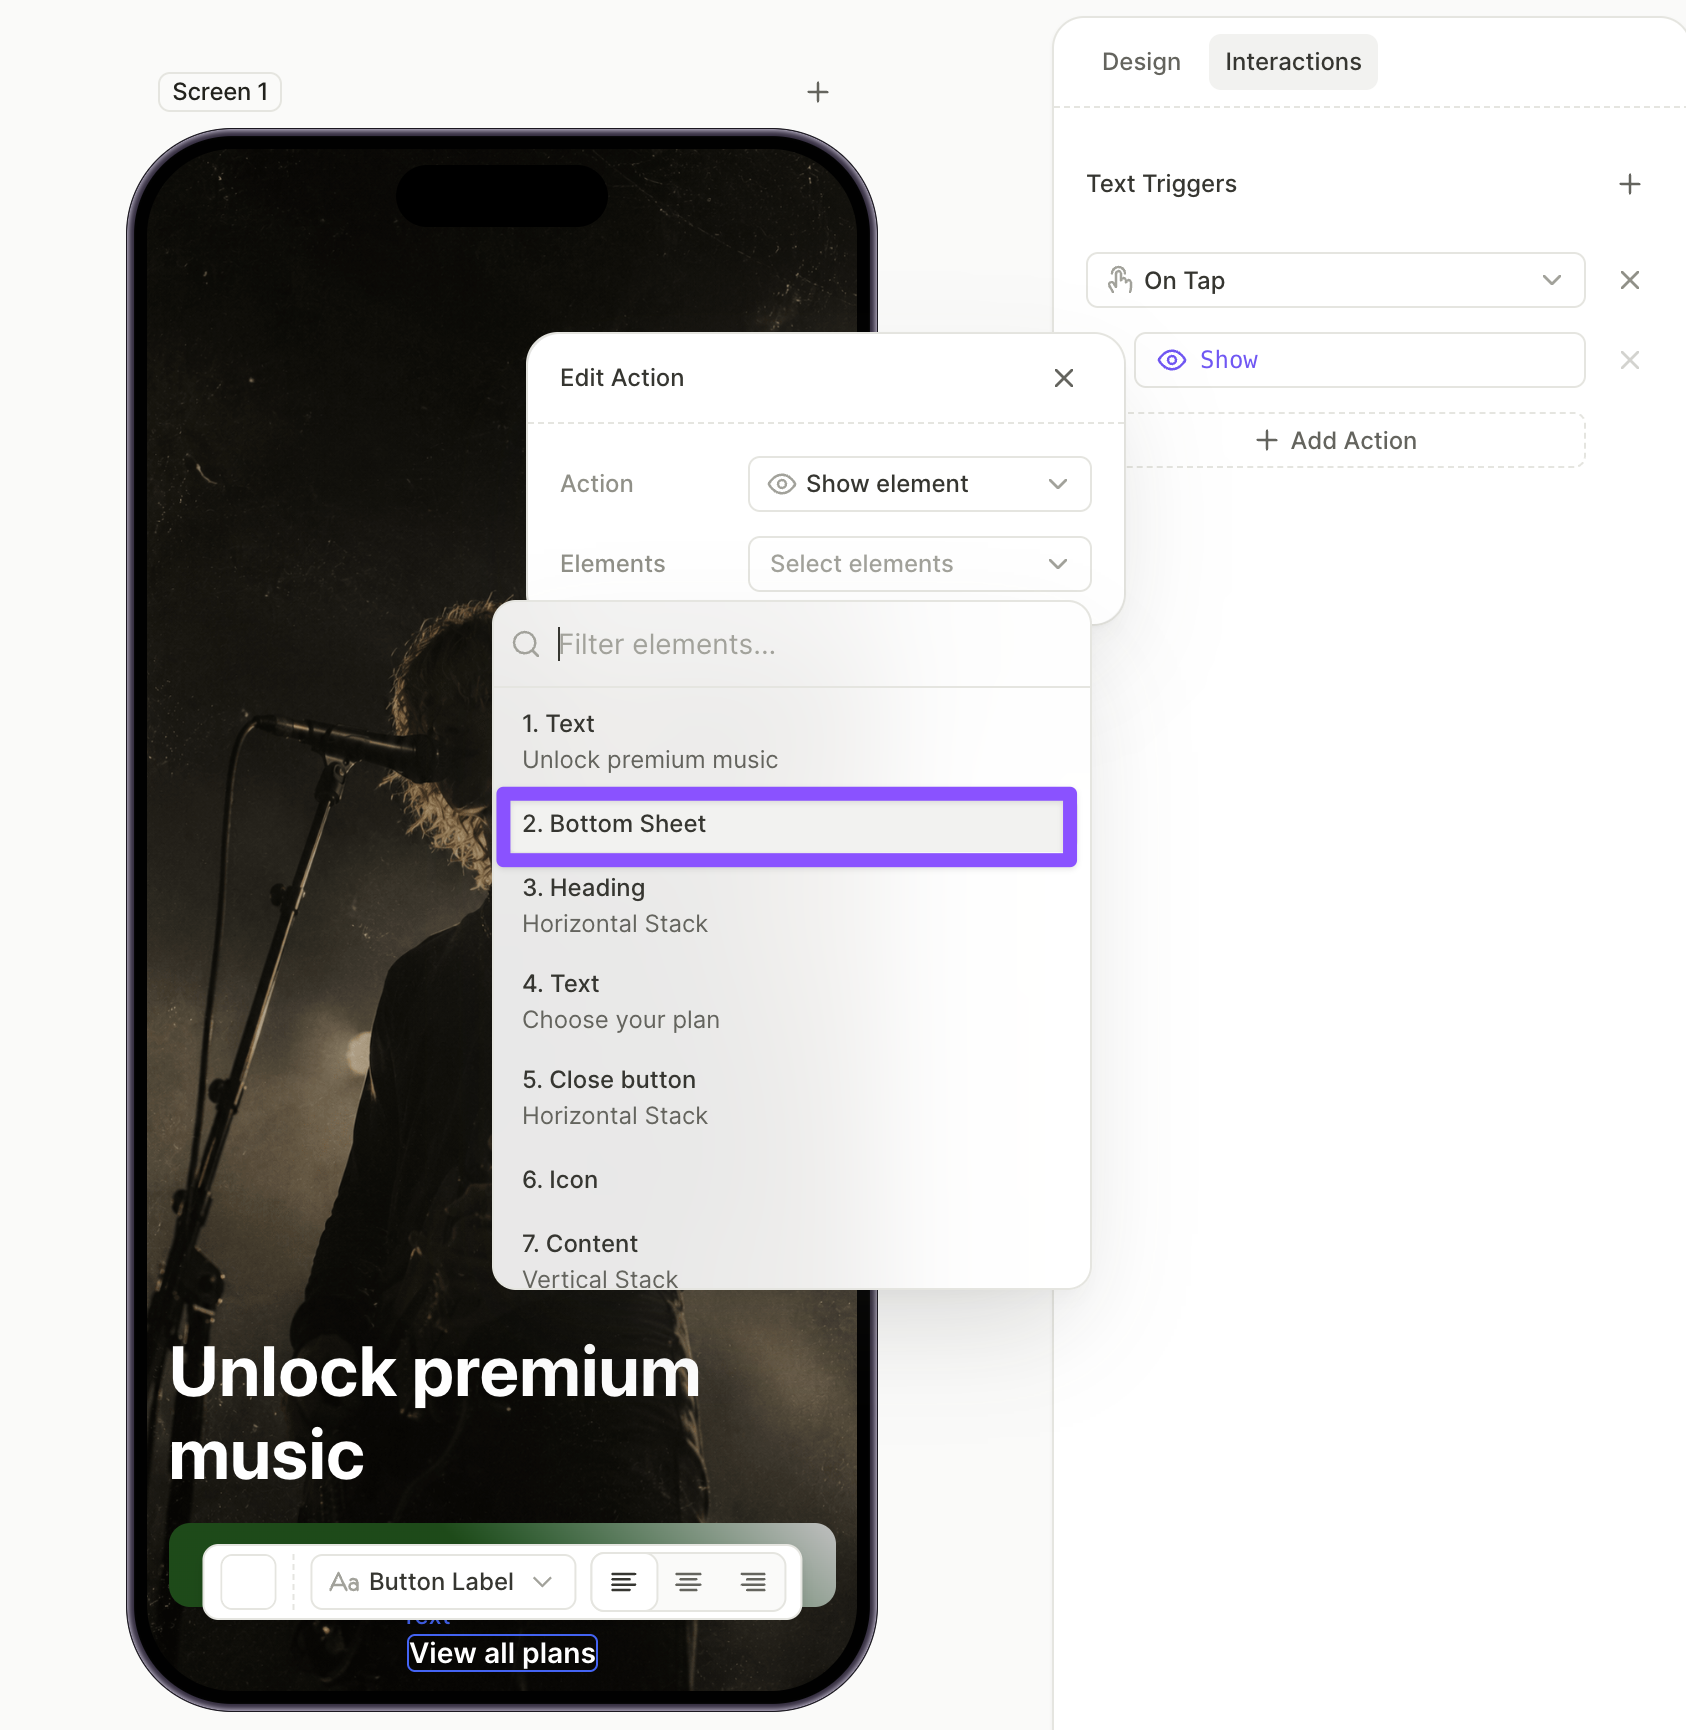
- With the screen selected in the Layers panel, click + > Text > Button Label.
- With the text element selected, edit the Content field to read
Show all plans. - Open the Interactions tab and click Add trigger > On tap > Add action.
- Set Action to Show and pick the bottom sheet element from the dropdown.
Next steps
- Save and publish your flow.
- Add the flow to a placement to start showing it to users.