Show all plans in a bottom sheet
This template surfaces a single highlighted offer first, with a discreet link to the full plan list. Tapping Show all plans slides up a bottom sheet that contains the other products, a purchase button, and the footer links.
当某个方案的转化率明显高于其他方案时,可以使用这种布局——底部弹窗让用户随时能以一次点击切换其他选项,同时不让主屏幕显得拥挤。
开始之前
- 在 Adapty 看板中创建产品。
- 将 Adapty 连接到 App Store 和 Google Play。
1. 设置屏幕布局
将主图作为屏幕背景,并将其余内容集中在底部,使图片填满屏幕上方区域。
完整的屏幕属性列表,请参阅屏幕与图层 — 屏幕设置。
配置屏幕的步骤如下:
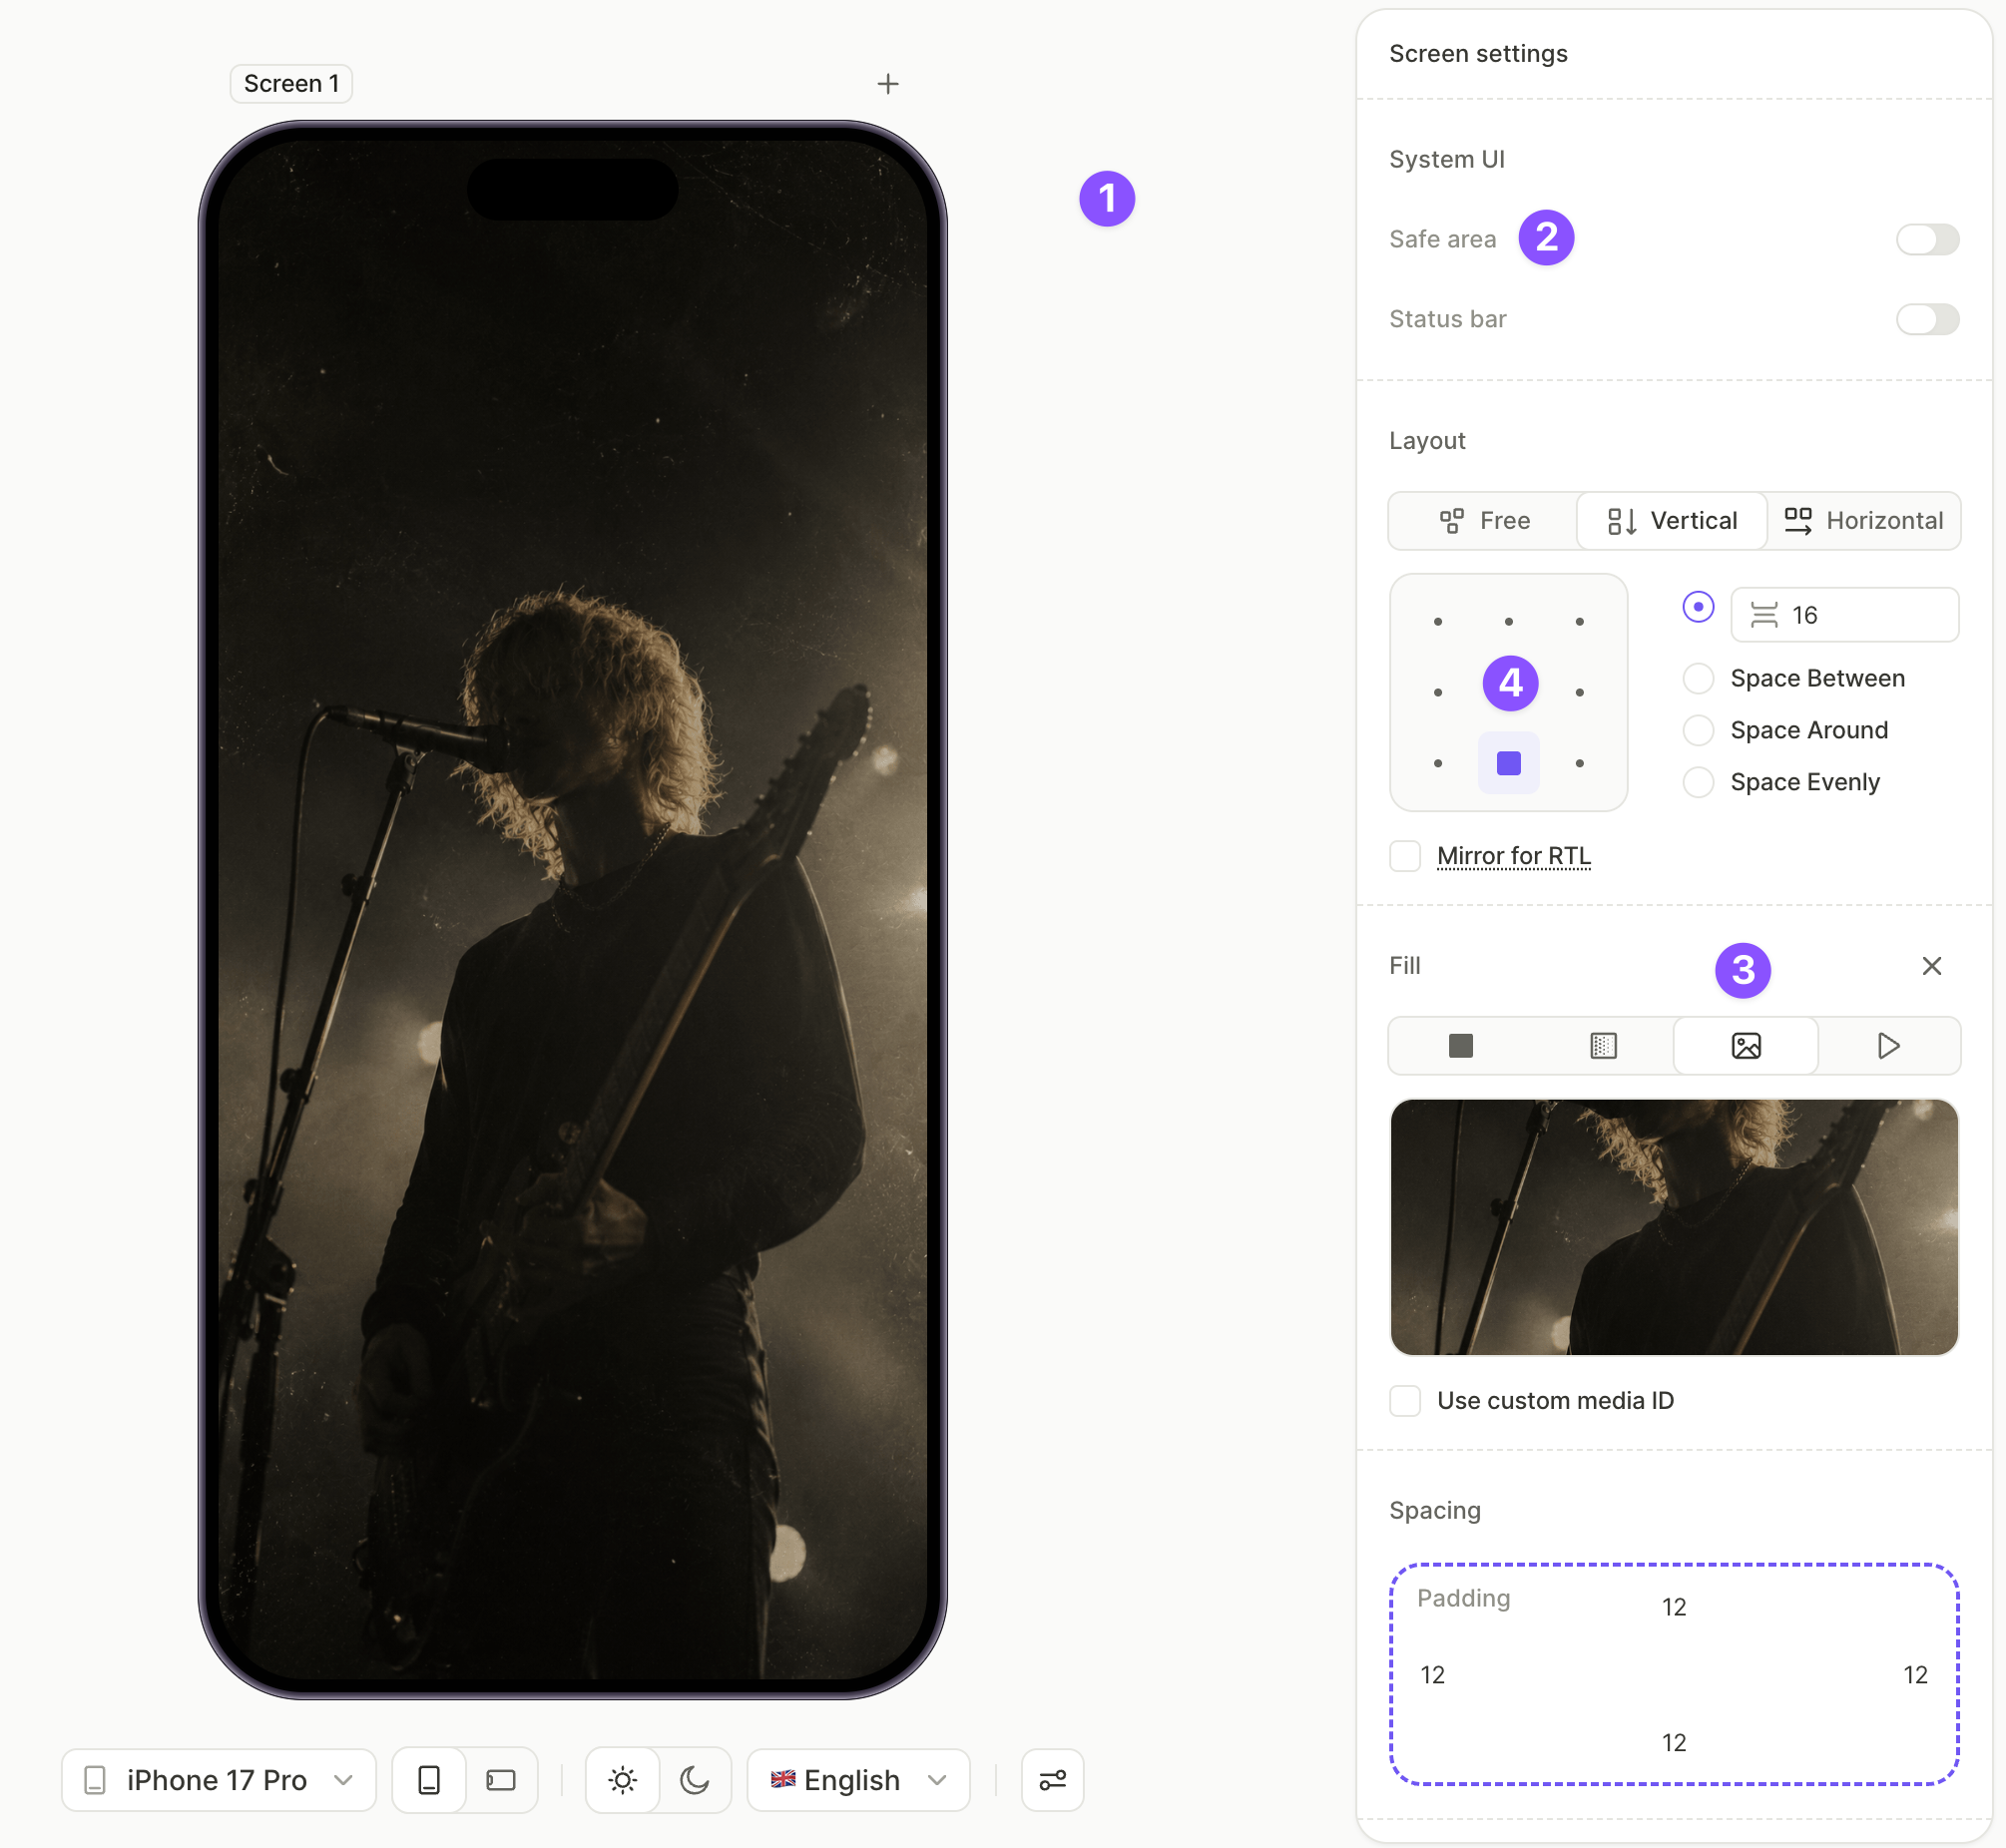
- 点击画布空白区域,选中屏幕。
- 在 System UI 下,关闭 Safe area,让主图延伸到屏幕边缘。
- 在 Fill 下,选择 Image 并上传主图。
- 在 Layout 下,配置方向、间距和对齐方式,将内容固定到目标位置。对于此模板,选择 Vertical 方向,设置较小的间距并选择 bottom-middle 对齐,可将标题和按钮组合在屏幕下方。
2. 添加 CTA 标题
标题位于屏幕下方,紧贴在订阅按钮上方,主视觉图片填充其上方区域。
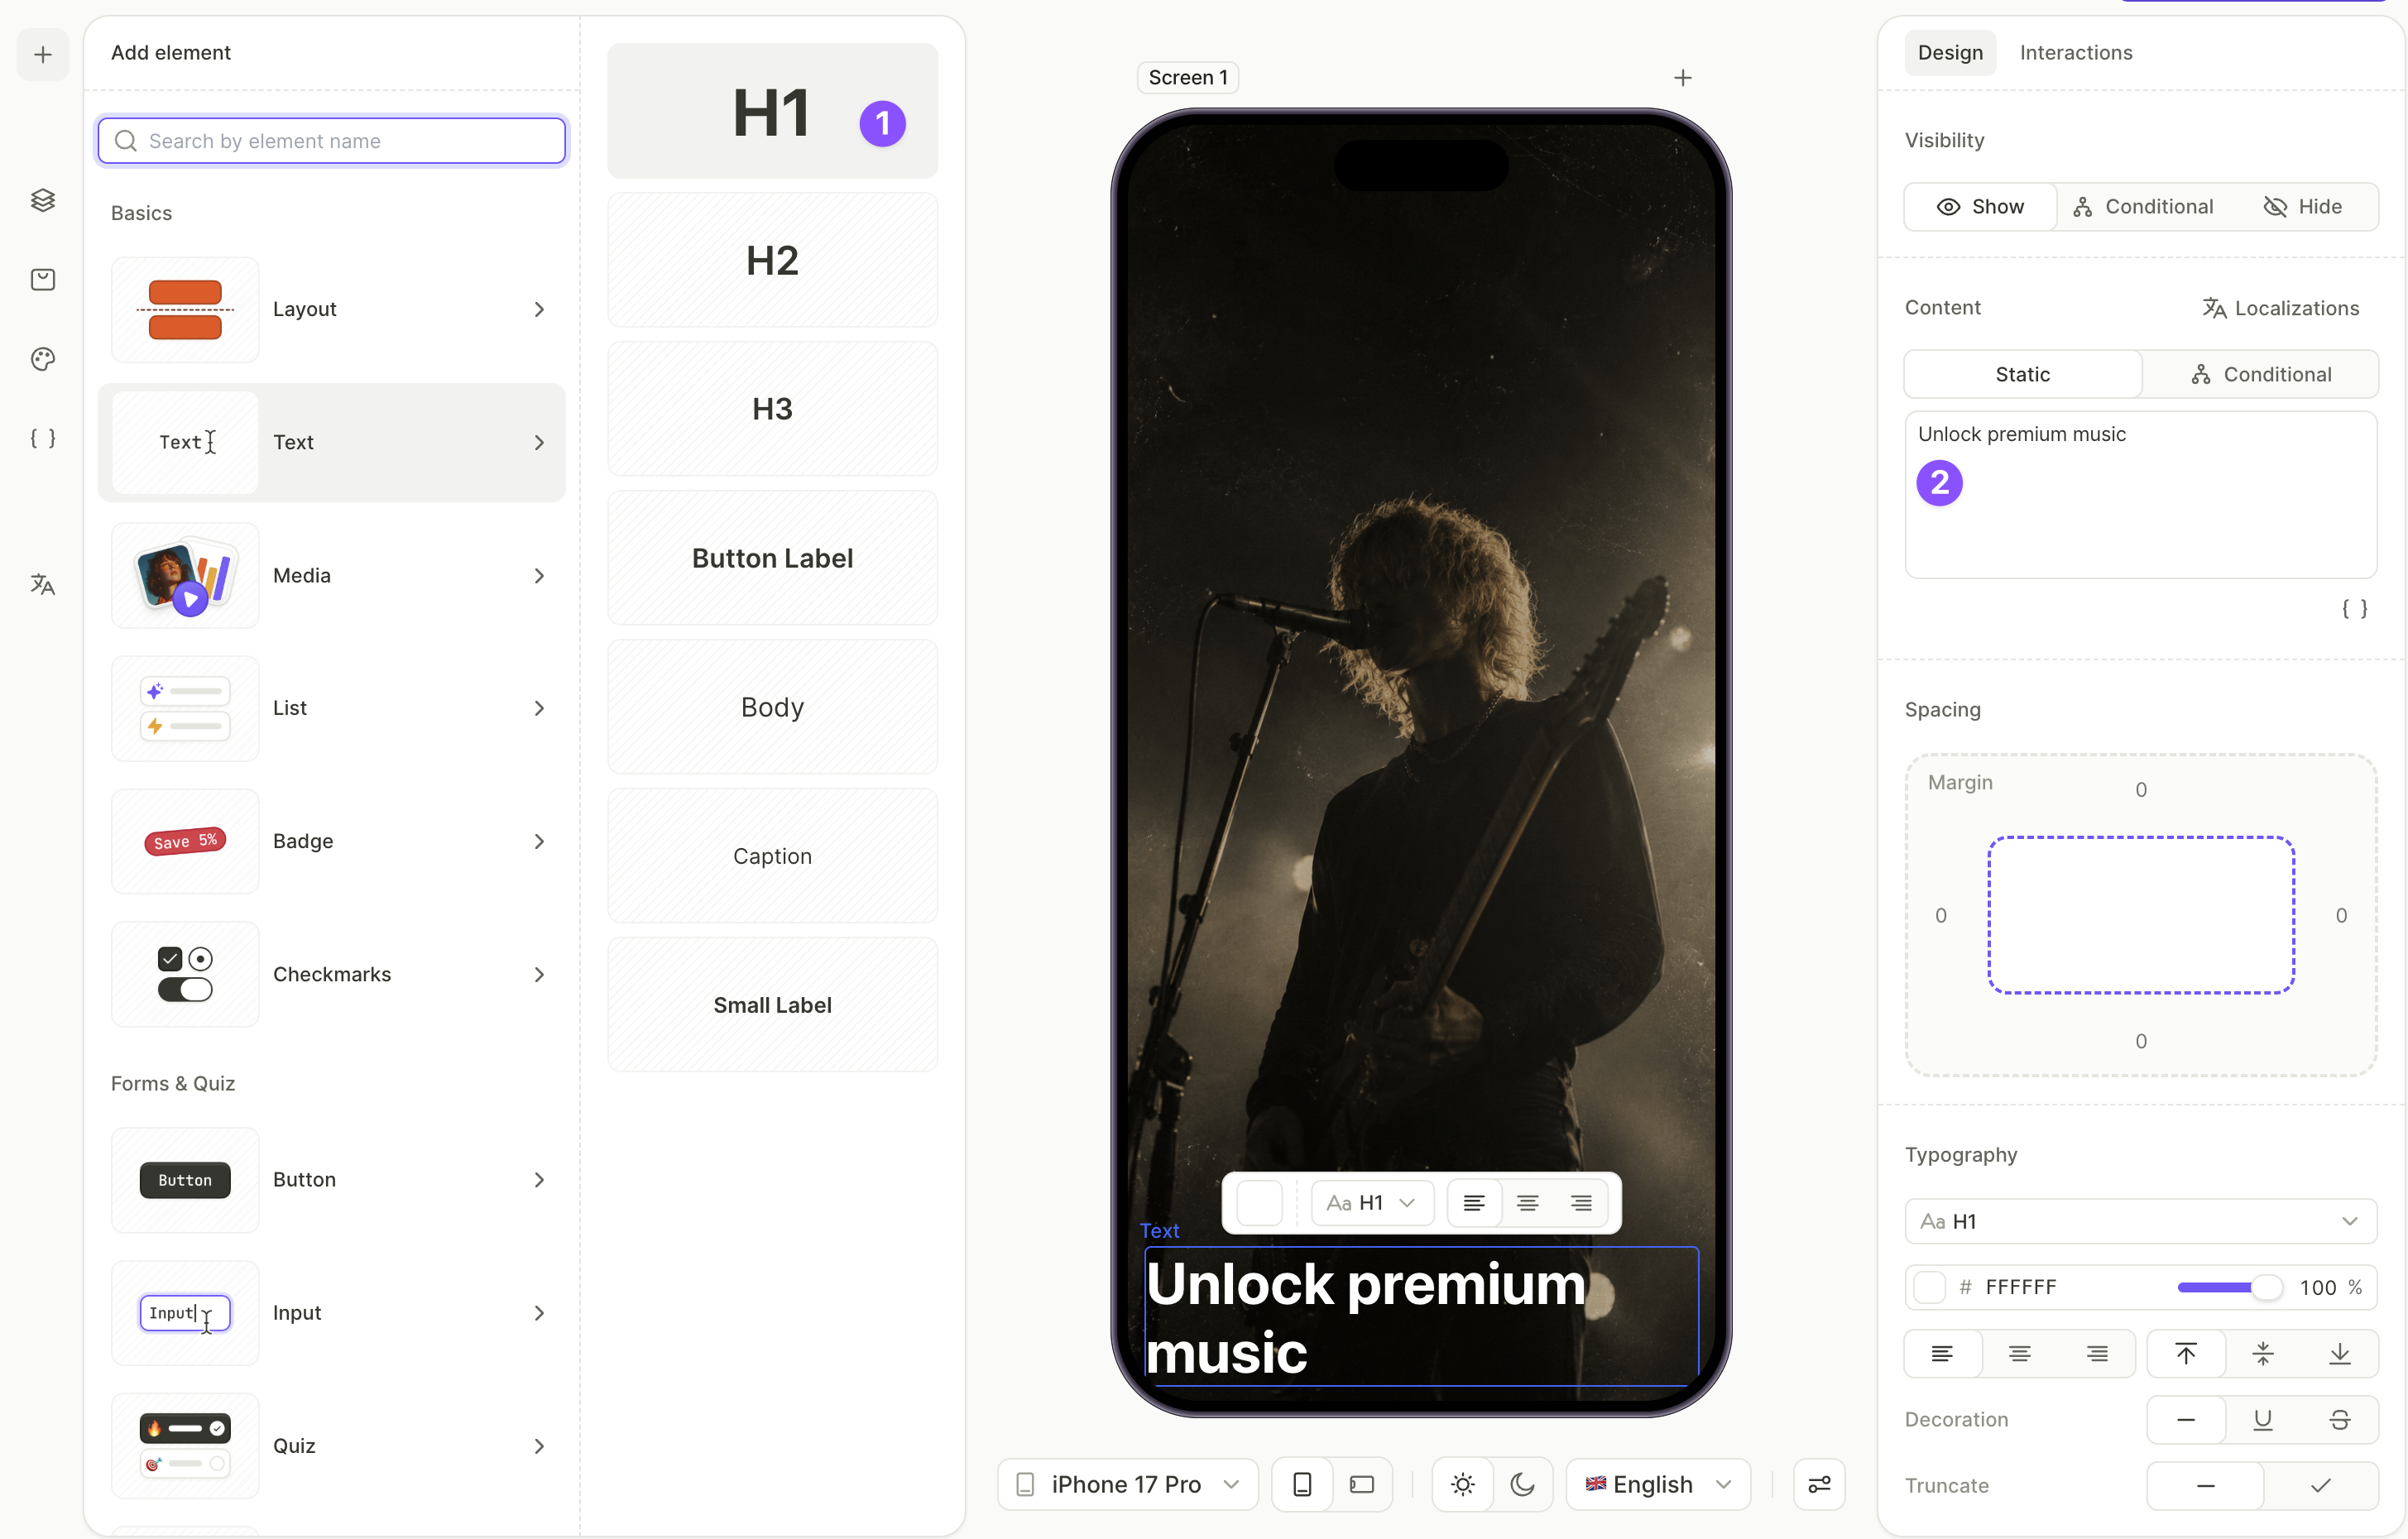
- 点击 + > Text > H1。
- 选中 H1 后,打开 Design 标签页,在 Content 字段中编辑文本内容。
3. 添加底部弹出层及其标题
底部弹出层是一种从屏幕底部滑出的布局容器。现在先将它设置为可见状态——接下来几步你会往里填充内容,填好后再隐藏它。隐藏状态下的元素无法编辑,所以在填充完成之前,弹出层需要保持可见。
关于底部弹出层及其他布局容器的详细说明,请参阅元素——布局。
按以下步骤添加底部弹出层及其标题:
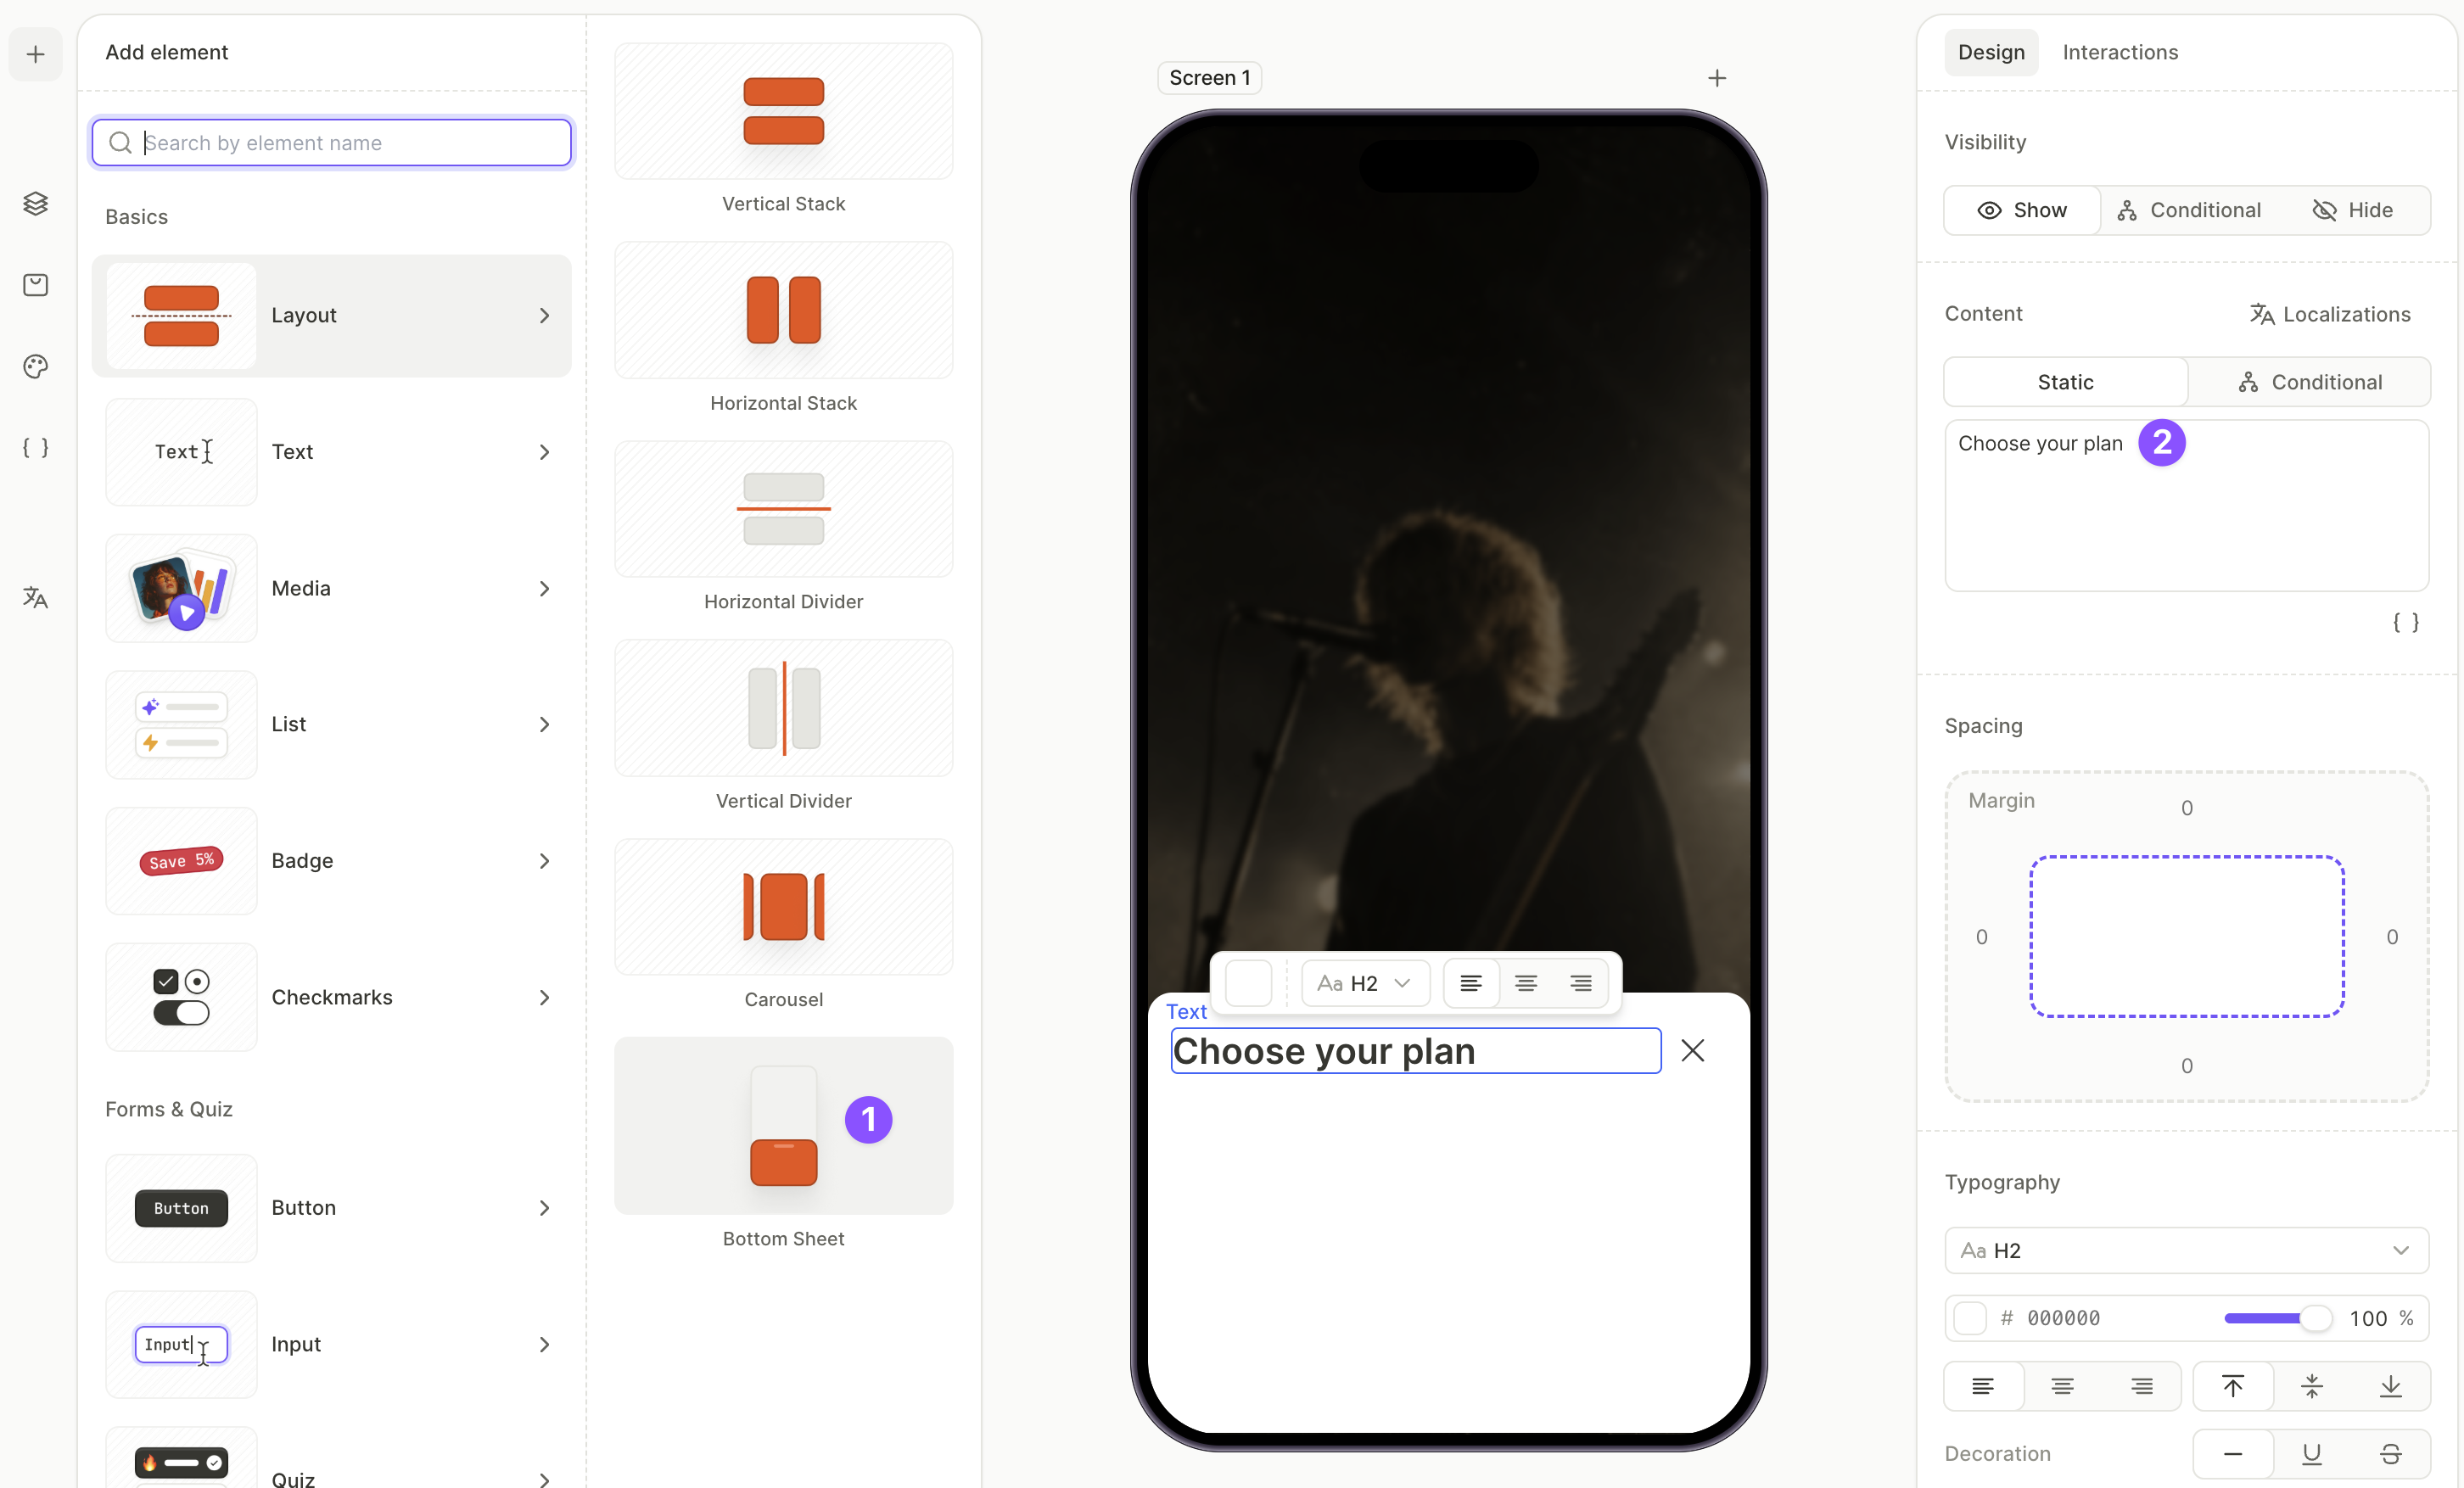
- 点击 + > Layout > Bottom Sheet。
- 在 Layers 面板中,展开底部弹出层,选择 Title 图层,然后在 Design 标签页的 Content 字段中填写内容——例如
Choose your plan。
4. 在底部弹窗中添加产品列表
将所有产品放入底部弹窗中。其中一个产品还将驱动主 CTA 按钮上显示的价格。
更多产品管理信息,请参阅设置购买。
按以下步骤添加和配置产品:
-
点击 + > Products,选择一种布局预设。垂直列表适合大多数场景。该元素将出现在屏幕上,位于底部弹窗之外。
-
在 Layers 面板中,将 Products 图层拖入底部弹窗内的 Content 容器中。
-
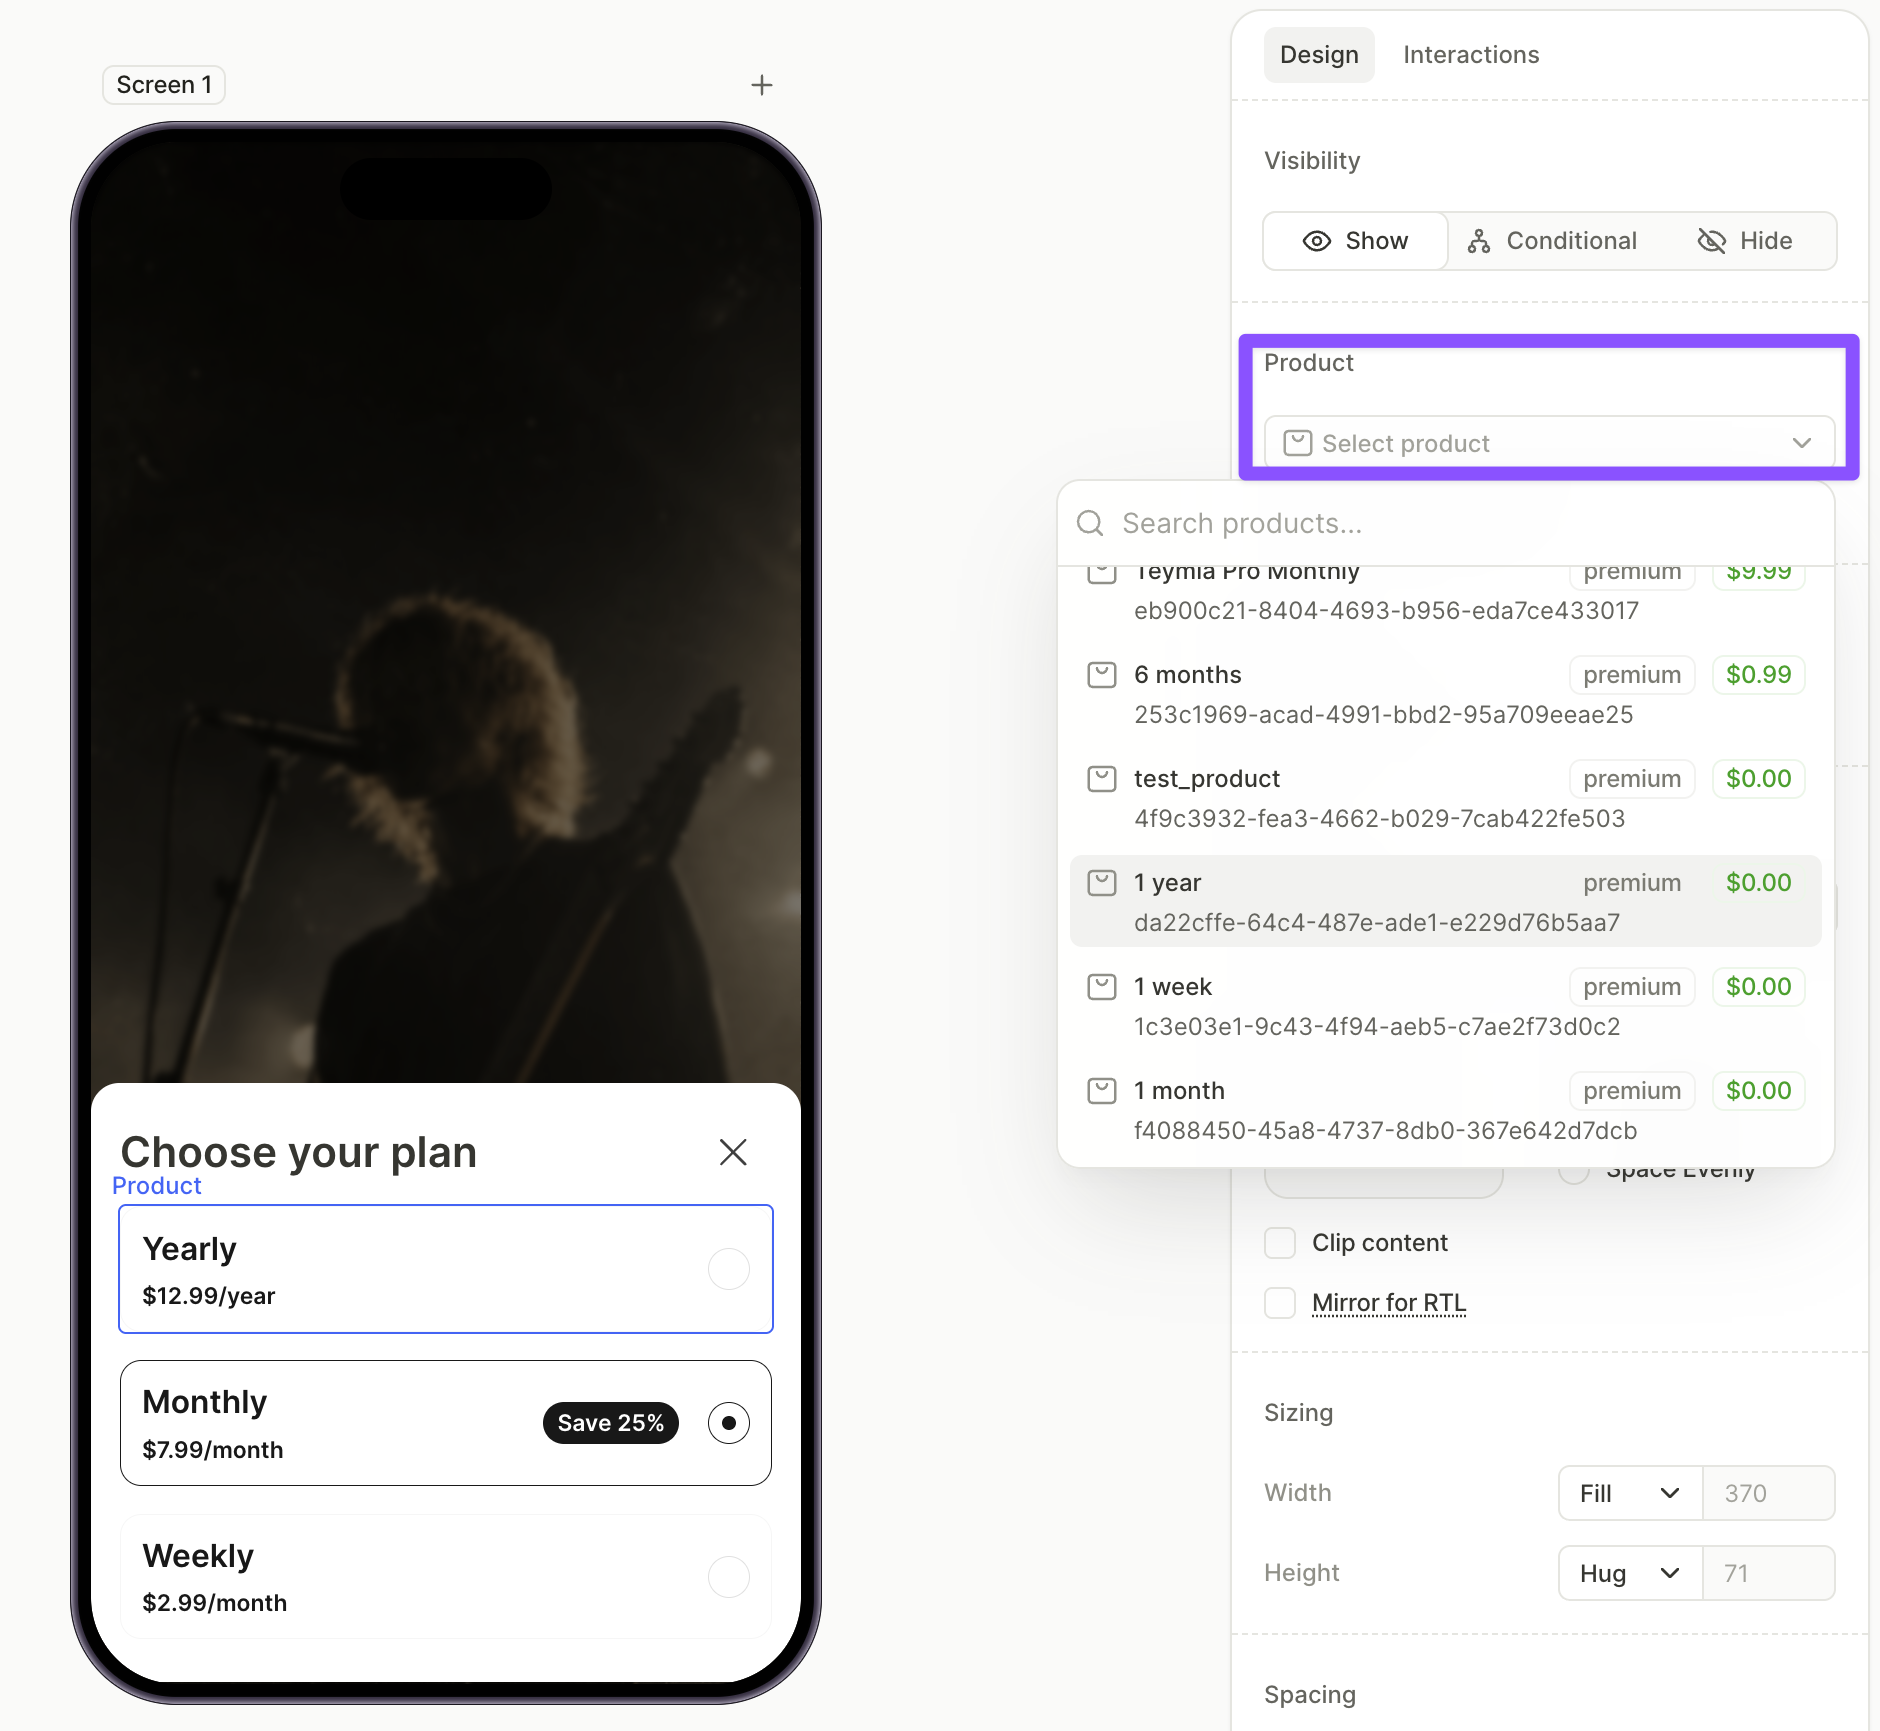
在画布上选择每张产品卡片,然后在 Design 标签的下拉菜单中选择对应产品。
5. 在底部弹窗中添加购买按钮
底部弹窗需要有自己的购买按钮,用于购买用户从列表中选择的方案。
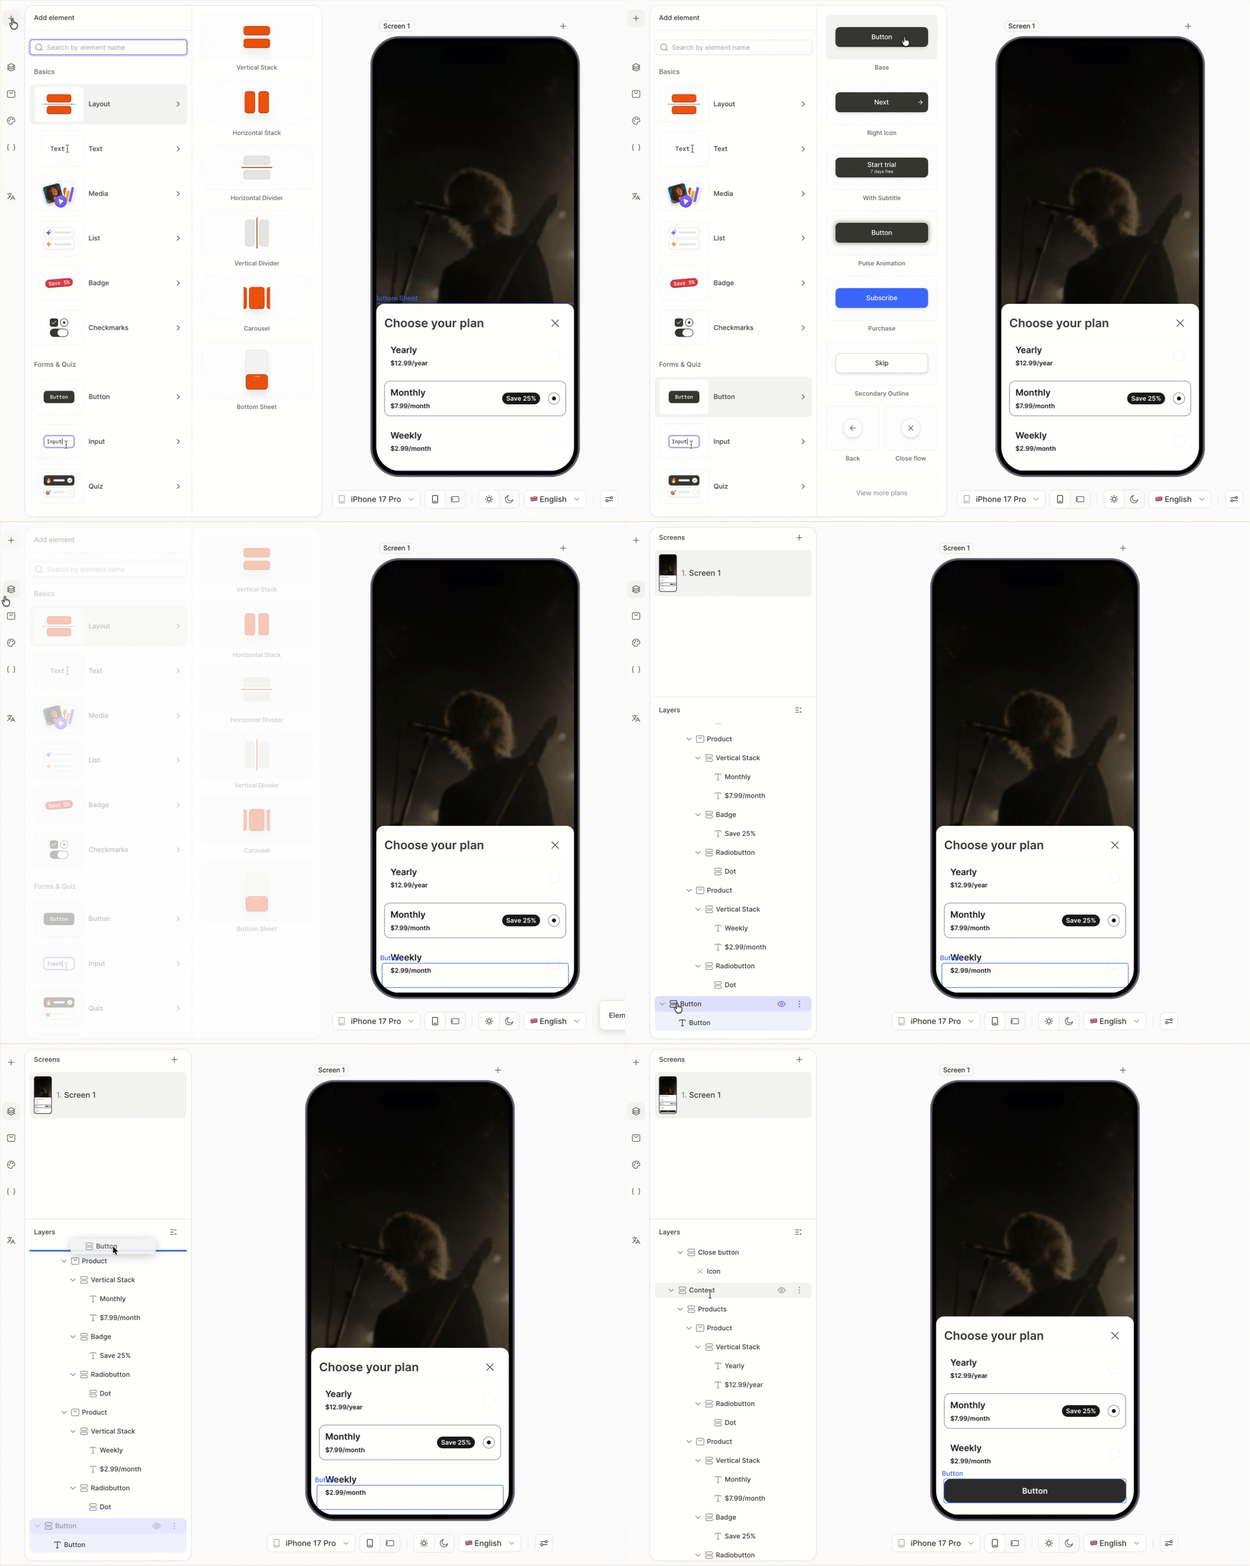
- 点击 + > Buttons,选择一个按钮预设。
- 在 Layers 面板中,将新按钮拖入底部弹窗内的 Content 容器。
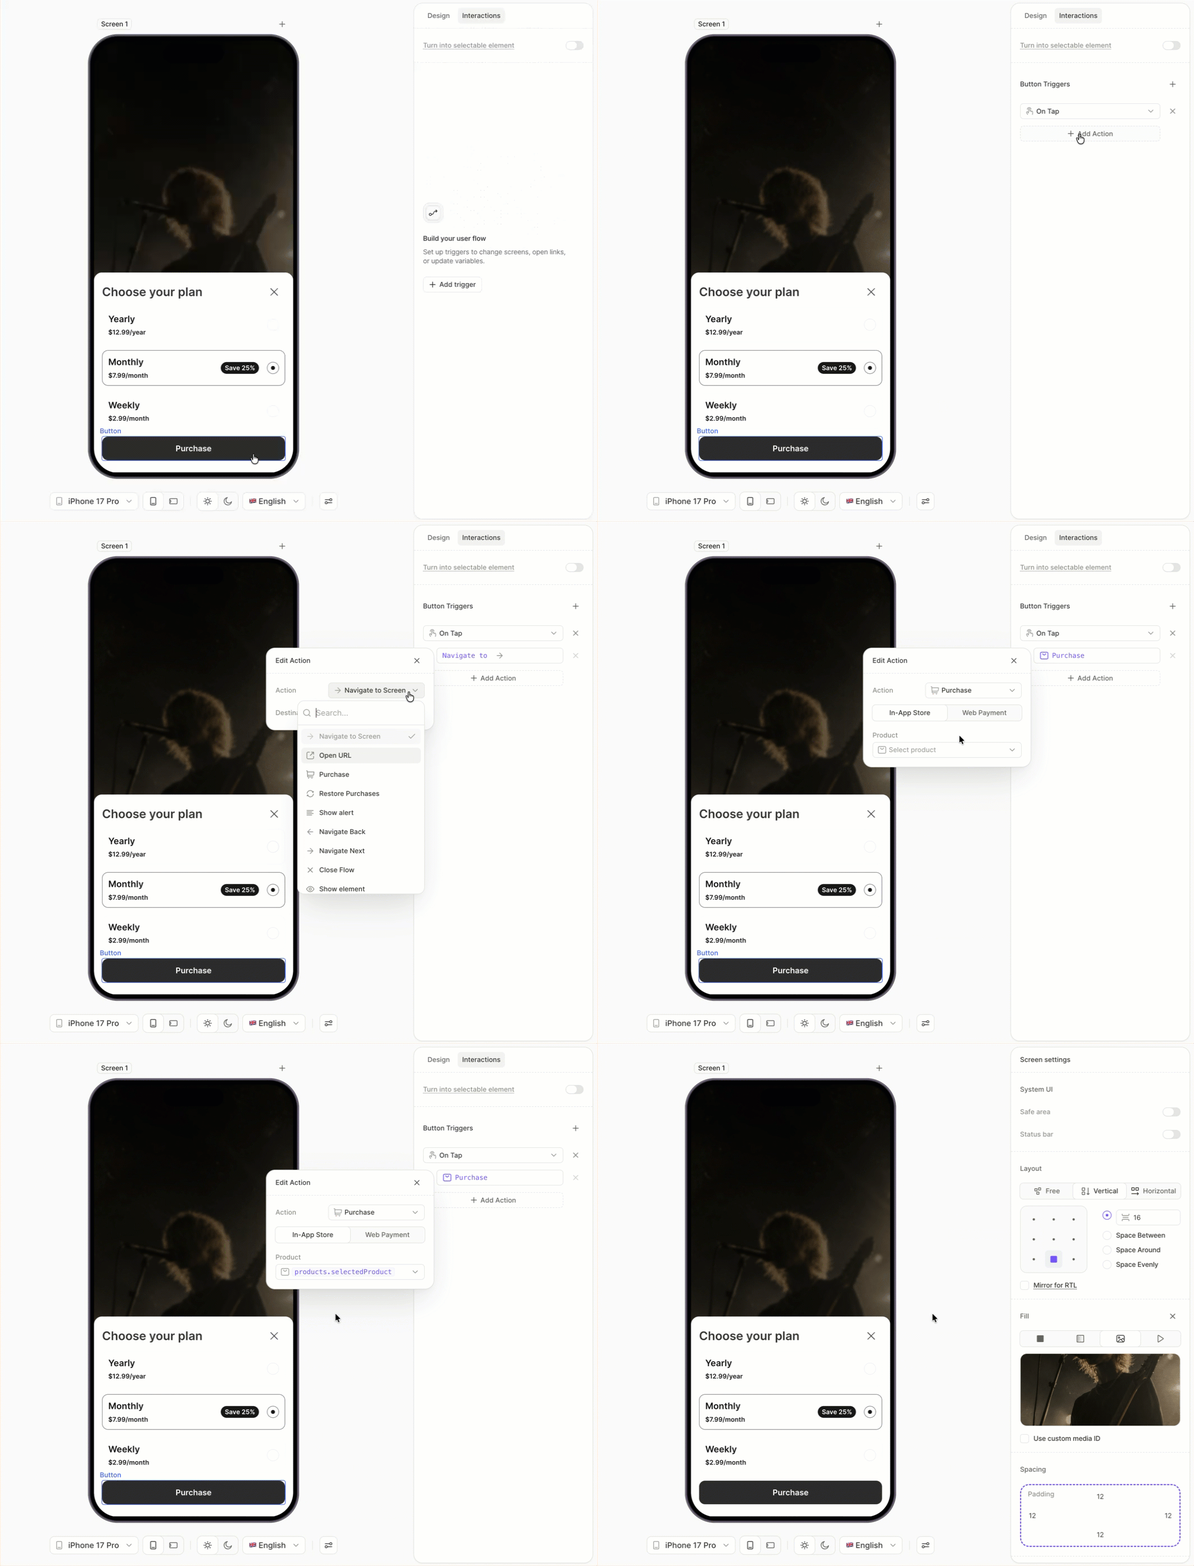
- 选中按钮后,在右侧面板打开 Interactions 标签页。
- 点击 Add trigger > On tap,然后点击 Add action。
- 将 Action 设置为 Purchase,将 Product 设置为
products.selectedProduct。
6. 在底部弹窗中添加底部链接
不要在按钮内嵌套的文本中使用内联链接。请改为在按钮本身上设置 Open URL 操作。
使用条款、隐私政策和恢复购买链接位于弹窗底部,主屏幕保持简洁。
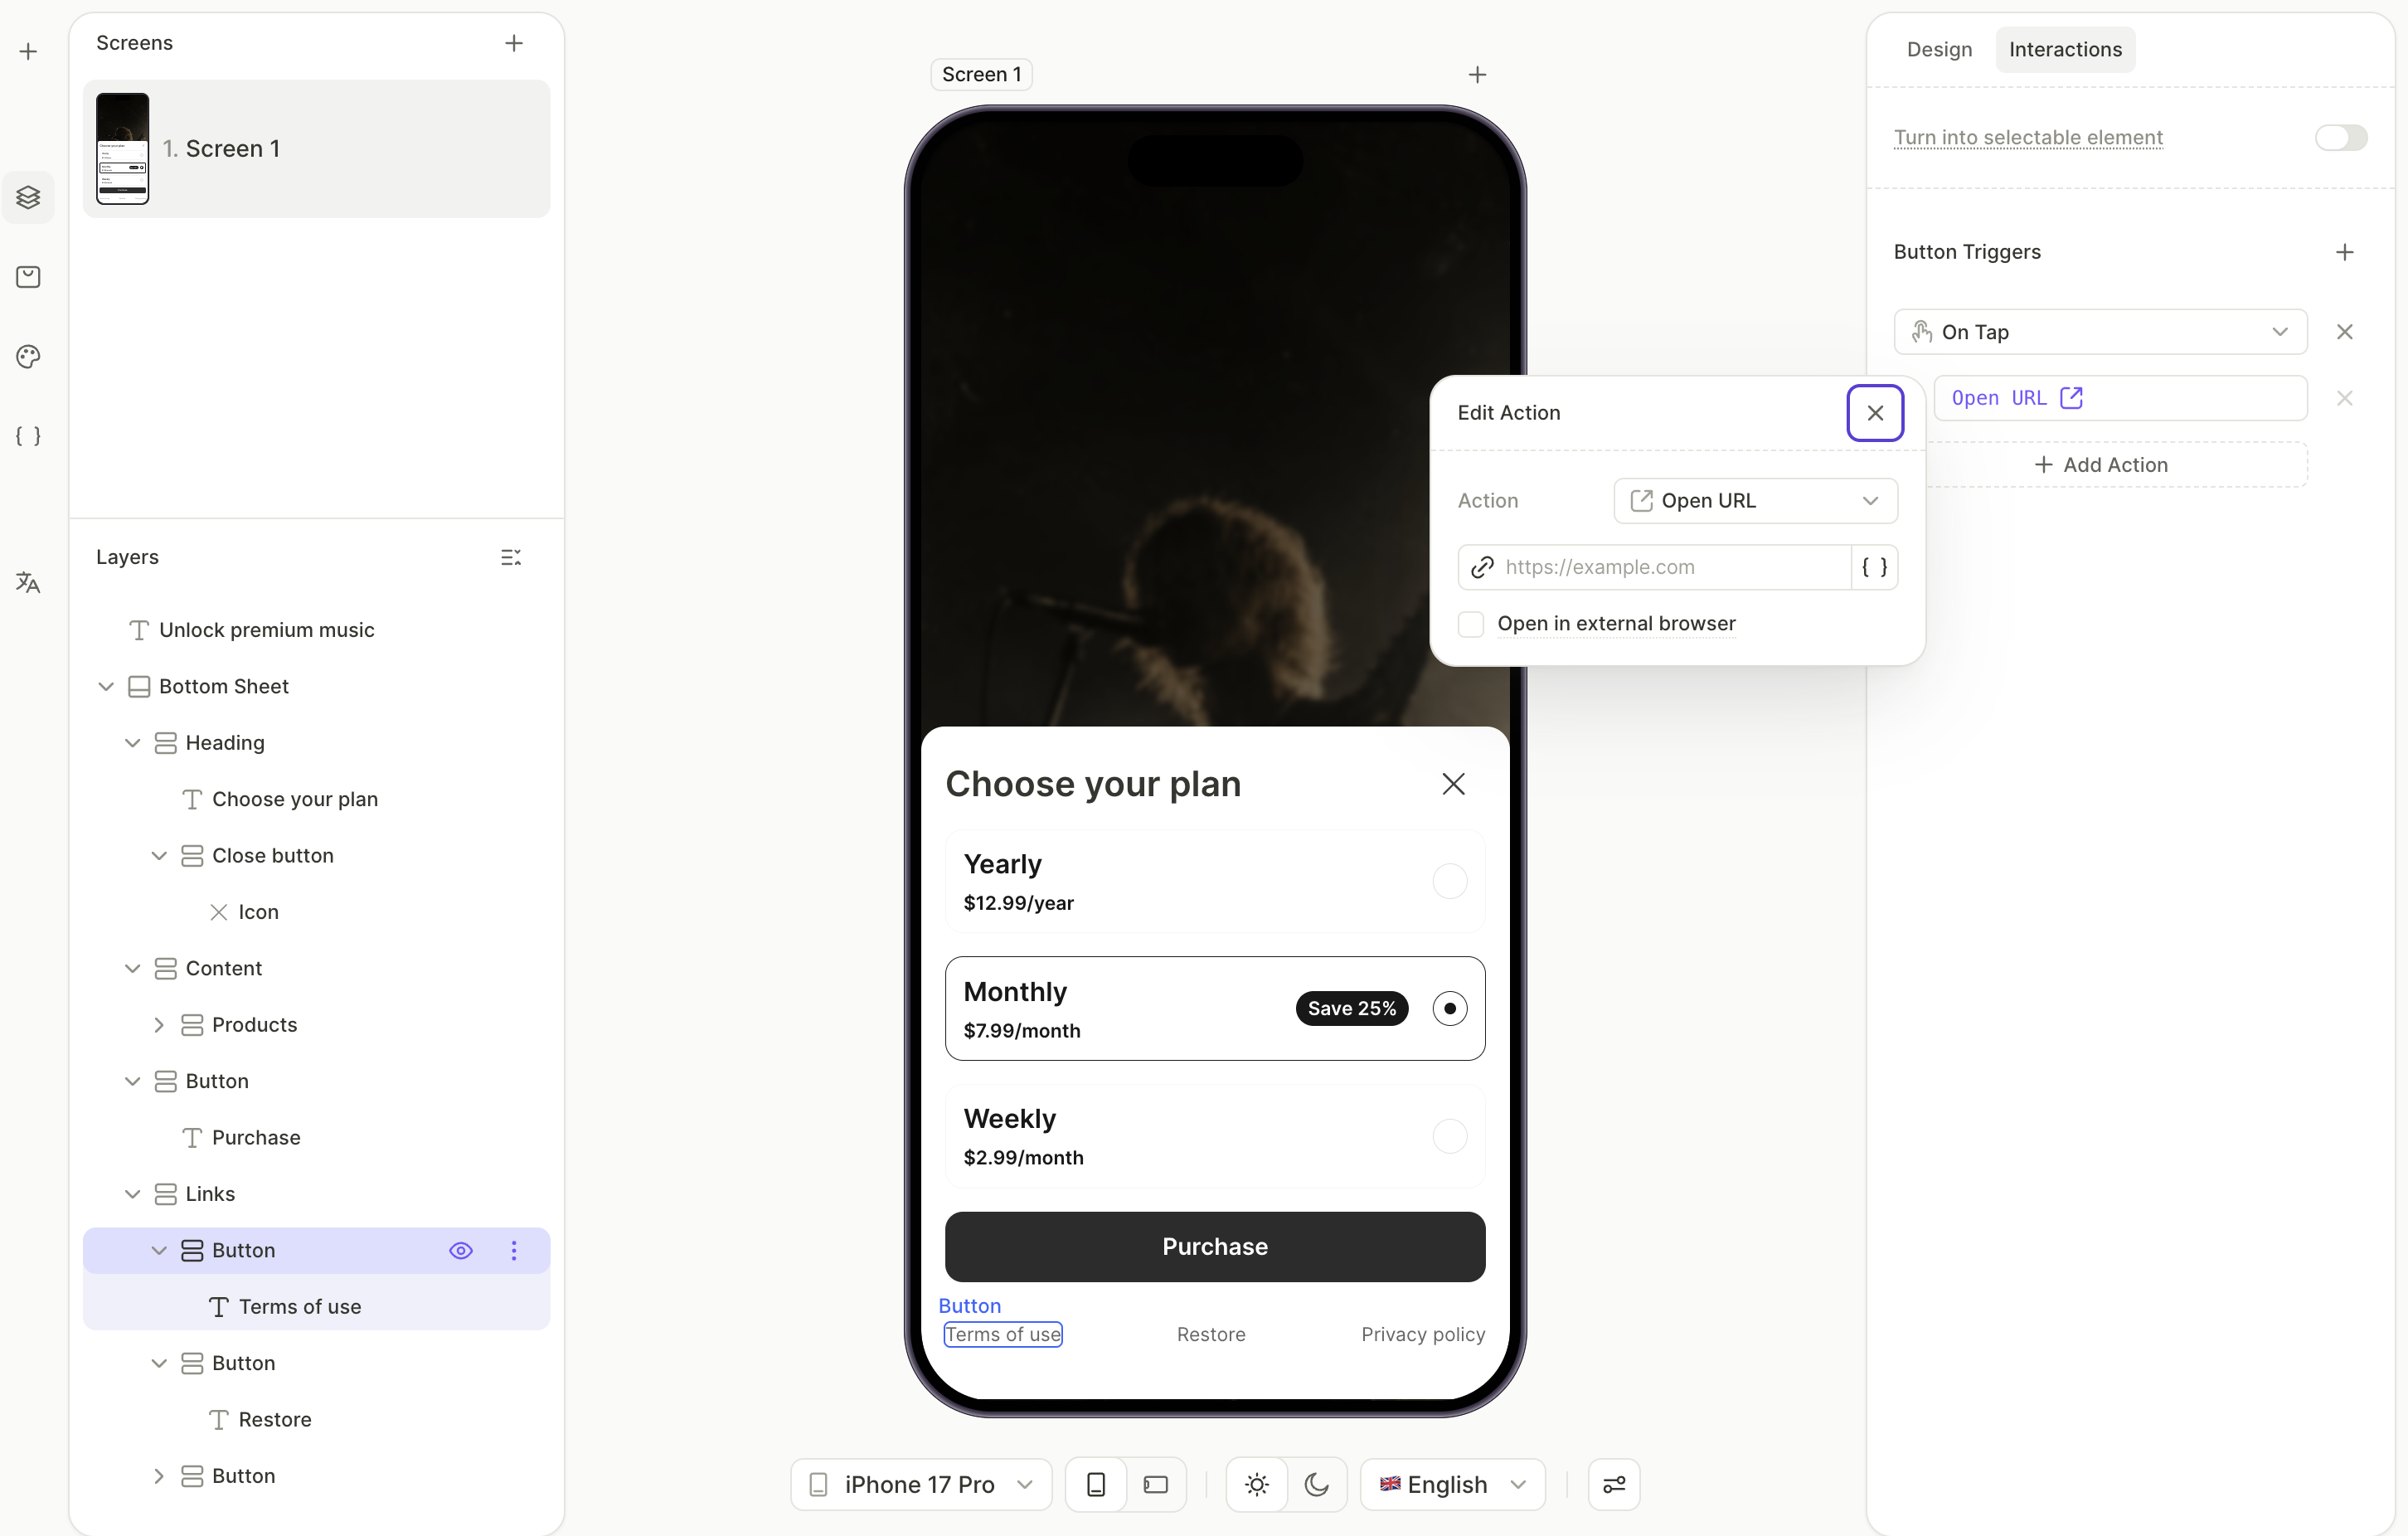
- 点击 + > Buttons > Links,此操作会添加一行,包含 Restore Purchases、Terms of Use 和 Privacy Policy。
- 在 Layers 面板中,将 Links 行拖入底部弹窗的 Content 容器内。
- 在 Layers 面板中,选择 Terms of Use 按钮。打开 Interactions 标签页,将您的条款 URL 粘贴到 Open URL 字段中。
- 对 Privacy Policy 按钮重复上述操作,填入您的隐私政策 URL。
- 保持 Restore Purchases 链接不变,其操作已预先配置好。
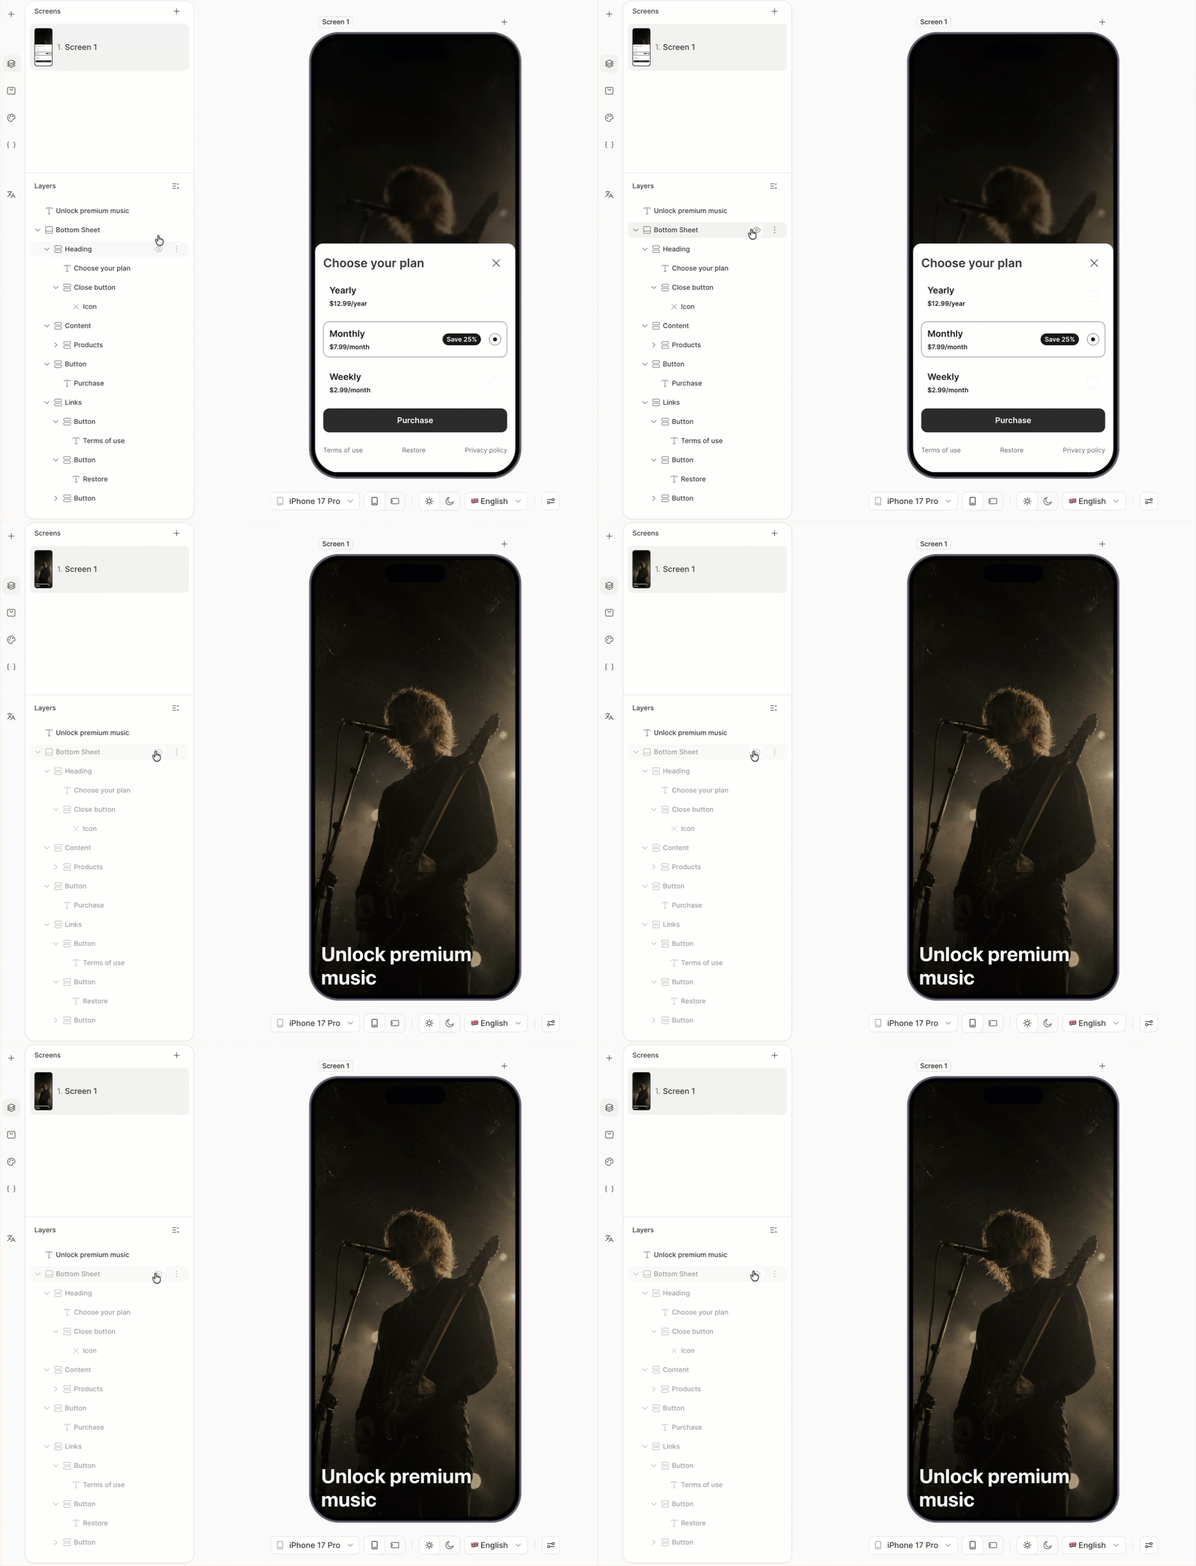
7. 隐藏底部弹窗
底部弹窗的内容设置完成后,将其隐藏,使其默认不显示在屏幕上。用户在最后一步点击 Show all plans 后即可看到它。
在 Layers 面板中,选中底部弹窗,将其状态设置为 Hide 。弹窗仍保留在图层树中,但不会在画布上渲染。
8. 添加主订阅按钮
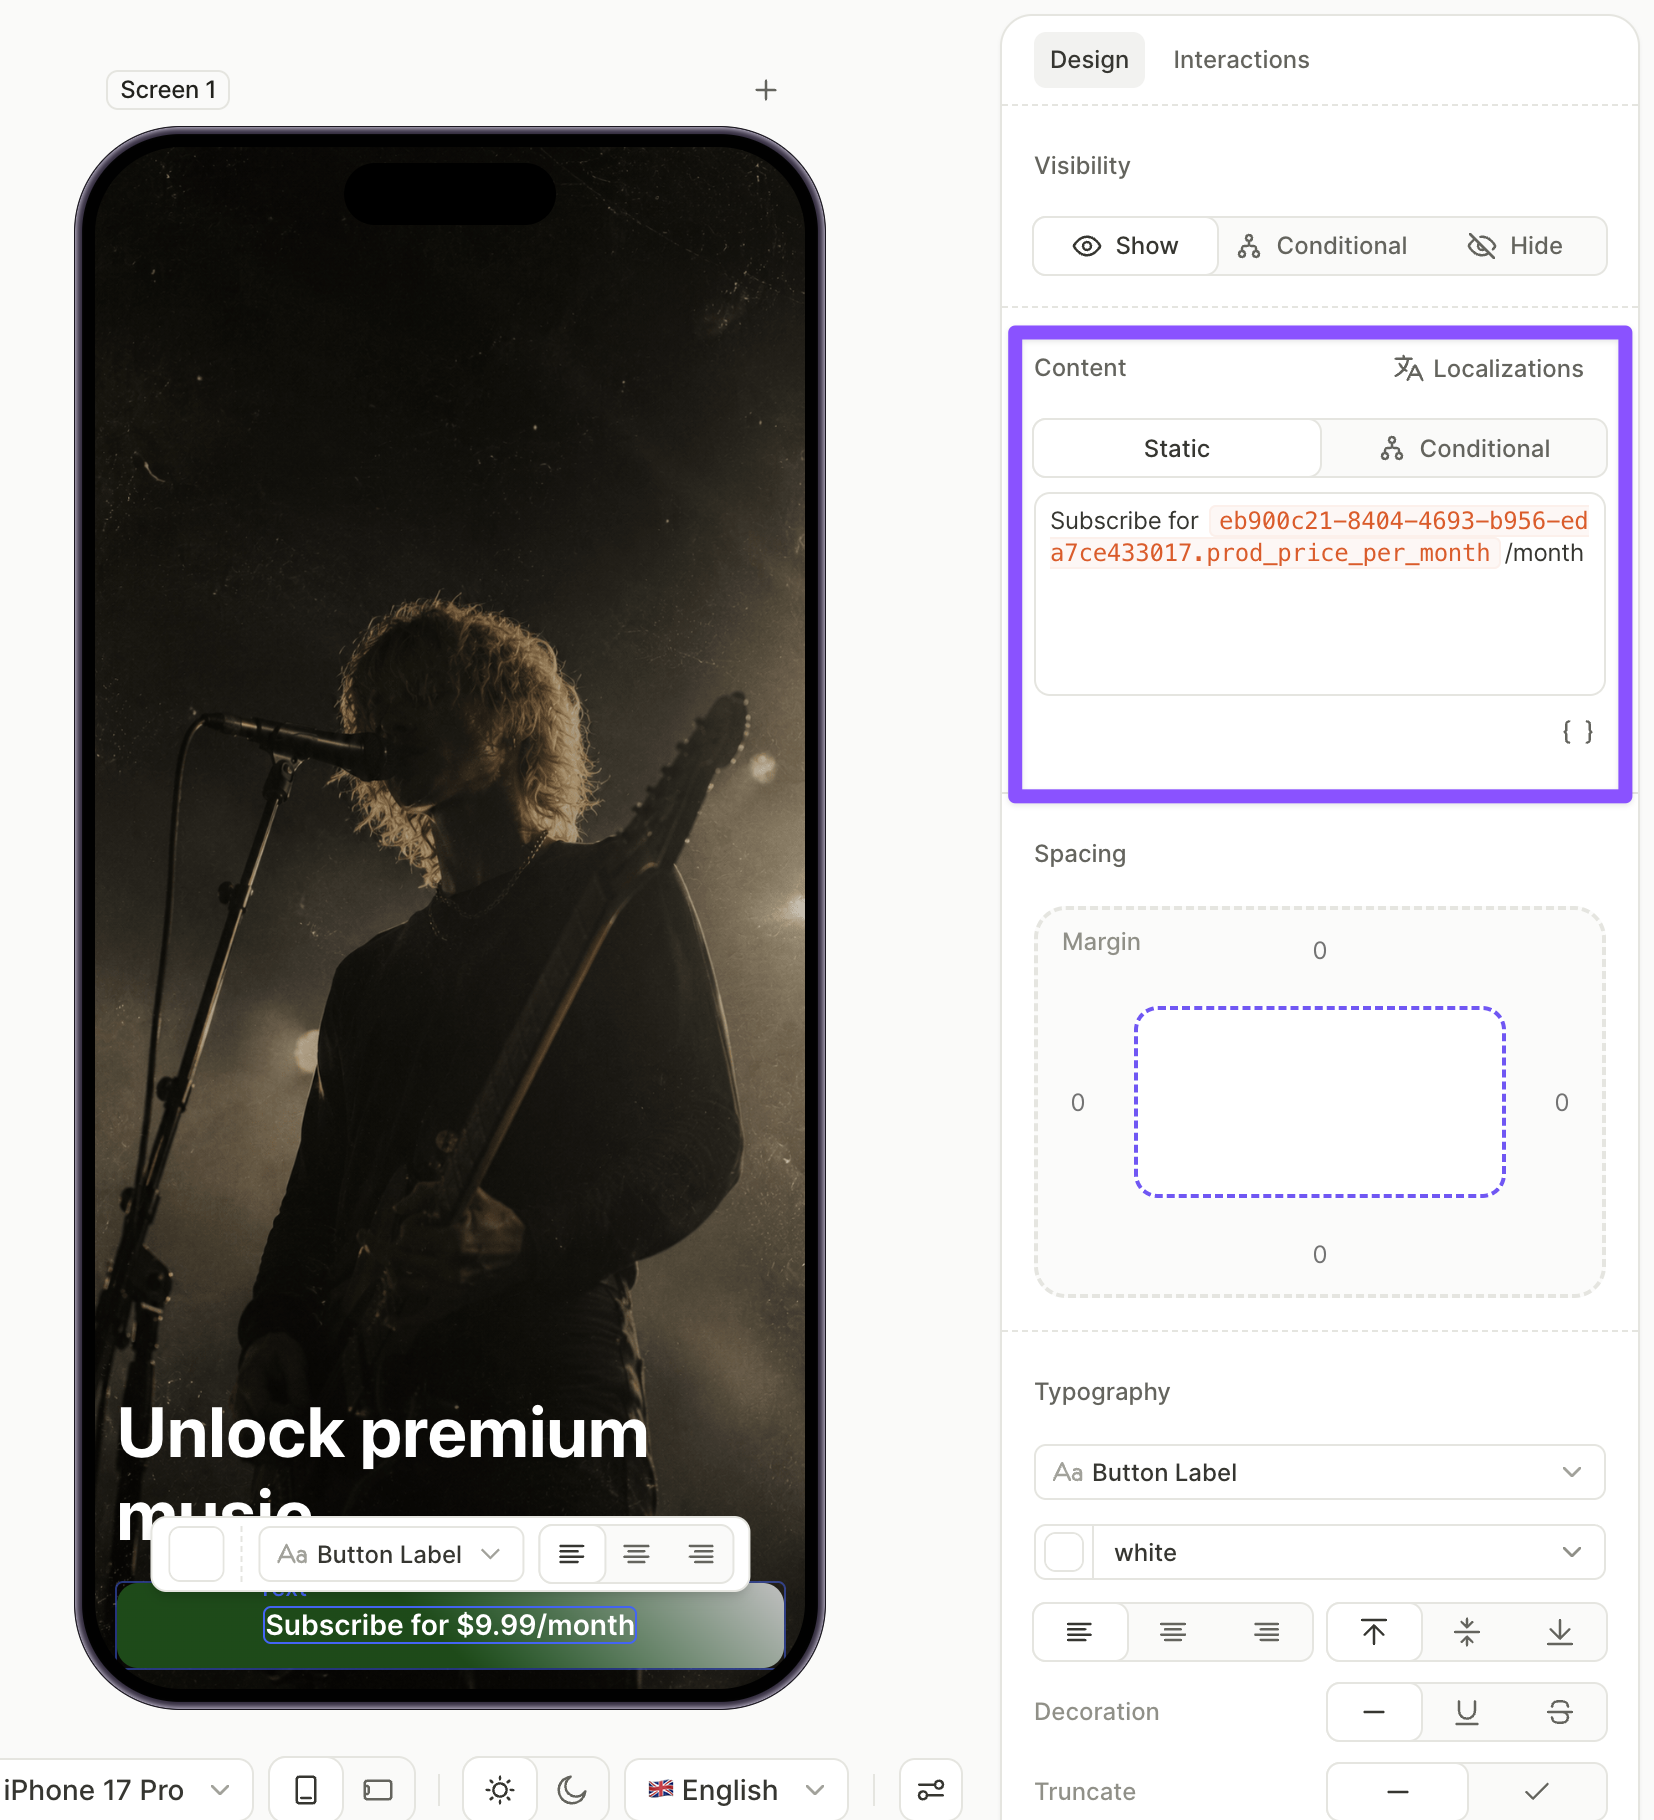
屏幕上的主按钮只需轻点一下即可让用户订阅月度计划。按钮标签使用月度产品的价格变量,确保按钮内容与产品信息保持同步。
- 在 Layers 面板中,点击屏幕,确保新元素添加到根层,而不是底部弹窗内。
- 点击 + > Buttons,选择一个按钮预设。
- 选中按钮后,打开 Design 标签页,将光标定位到 Content 字段。点击
 并选择主产品的价格变量。在变量两侧补充完整的标签文字——例如
 Subscribe for {price}/month。
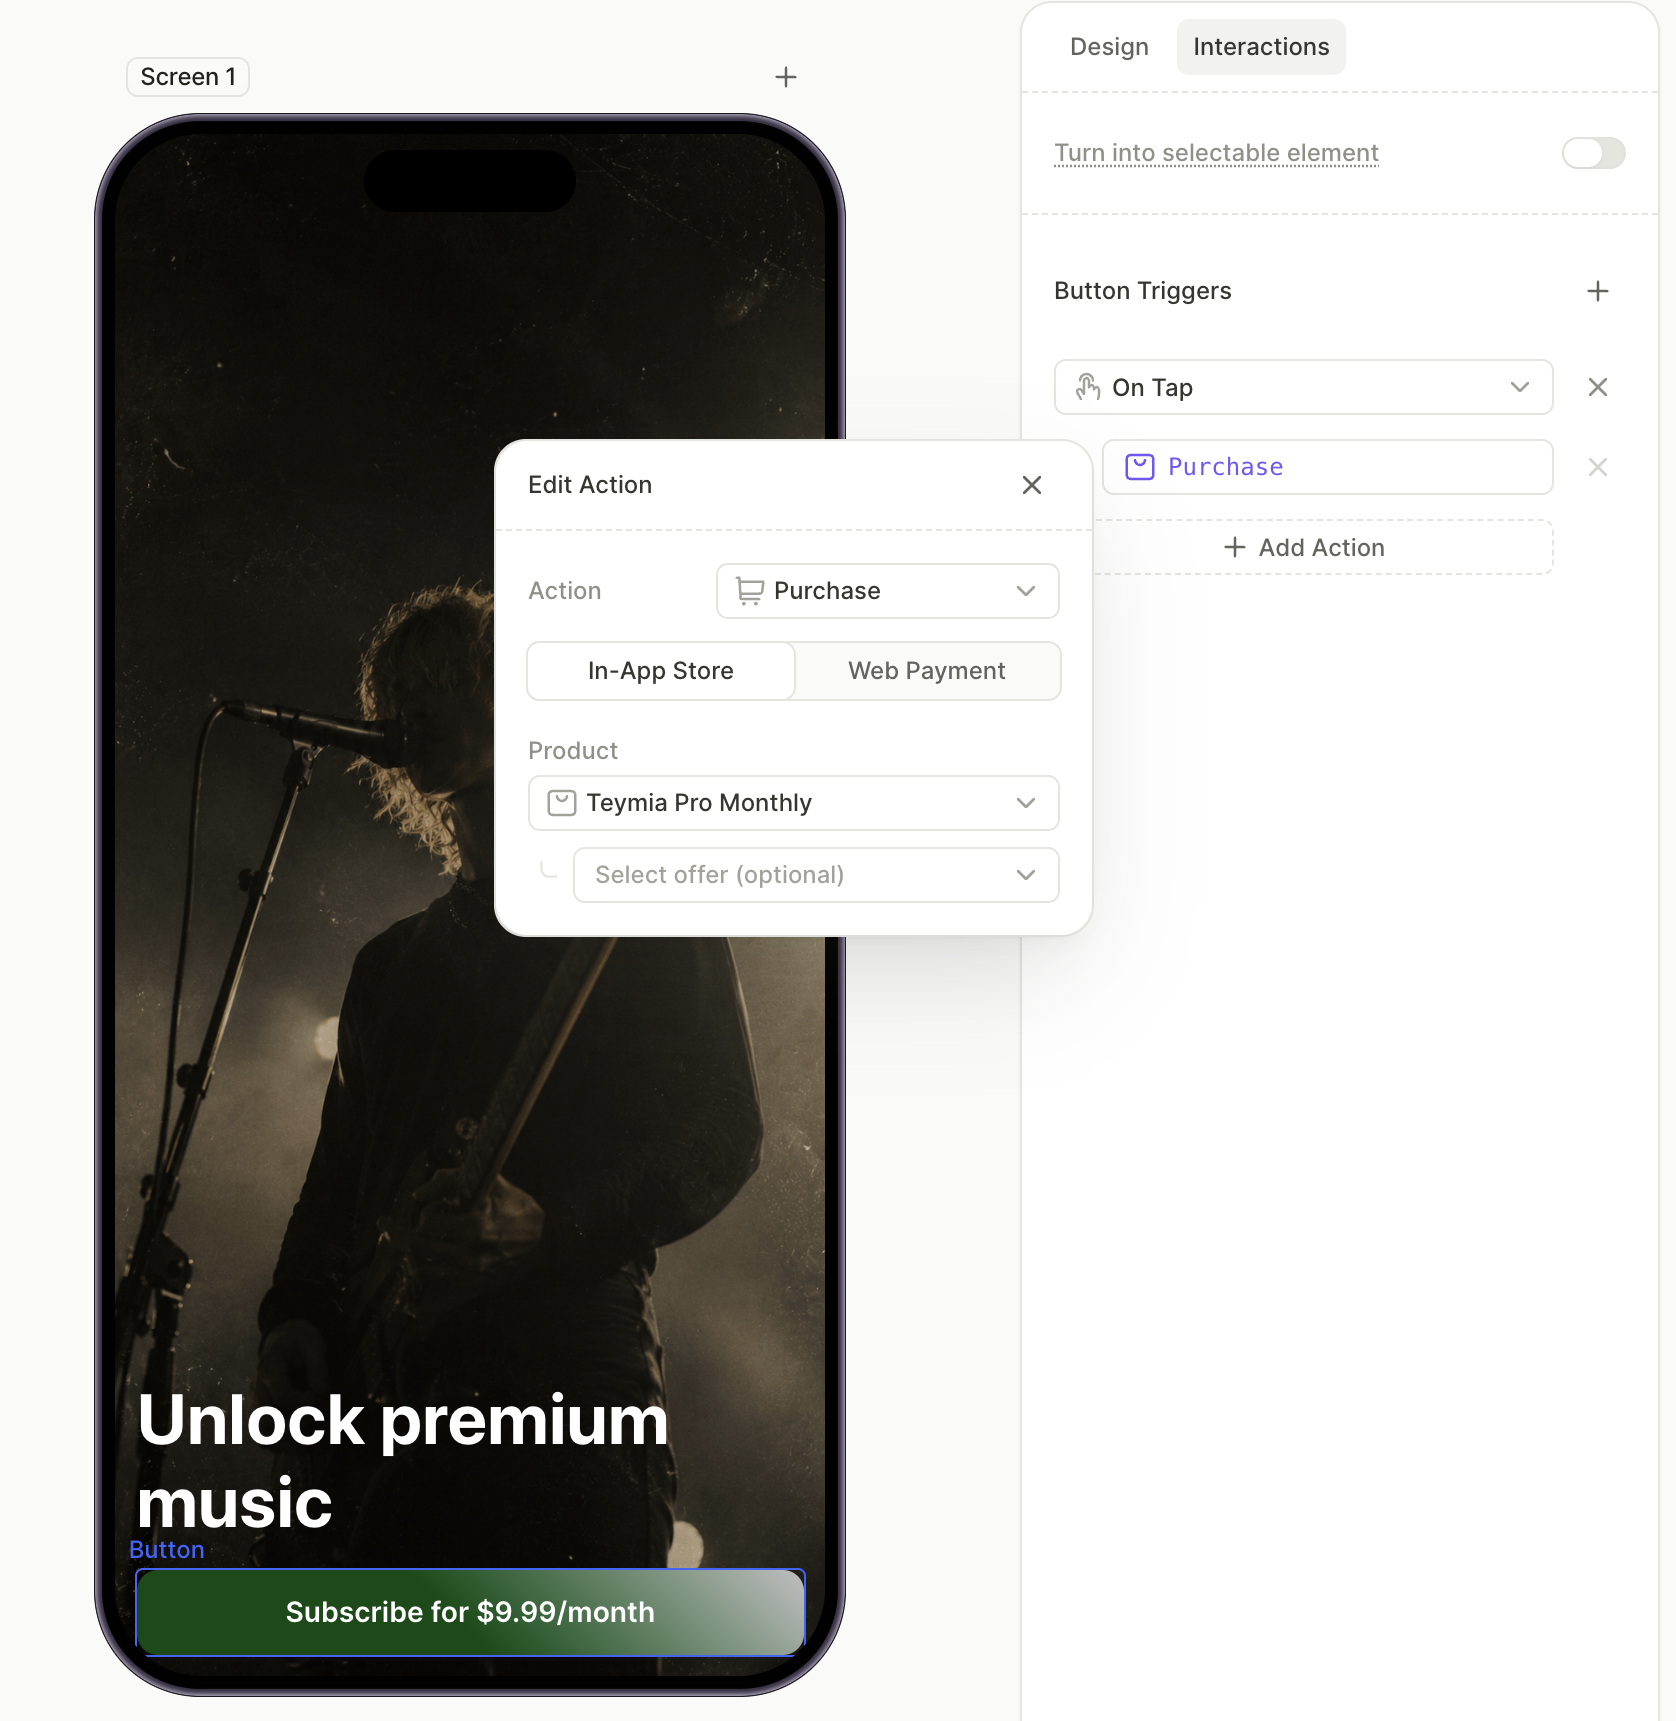
- 切换到 Interactions 标签,点击 Add trigger > On tap > Add action。
- 将 Action 设置为 Purchase,将 Product 设置为所需的产品。与底部弹窗按钮不同,此按钮指向的是特定产品,而非
products.selectedProduct。
9. 添加”显示所有方案”链接
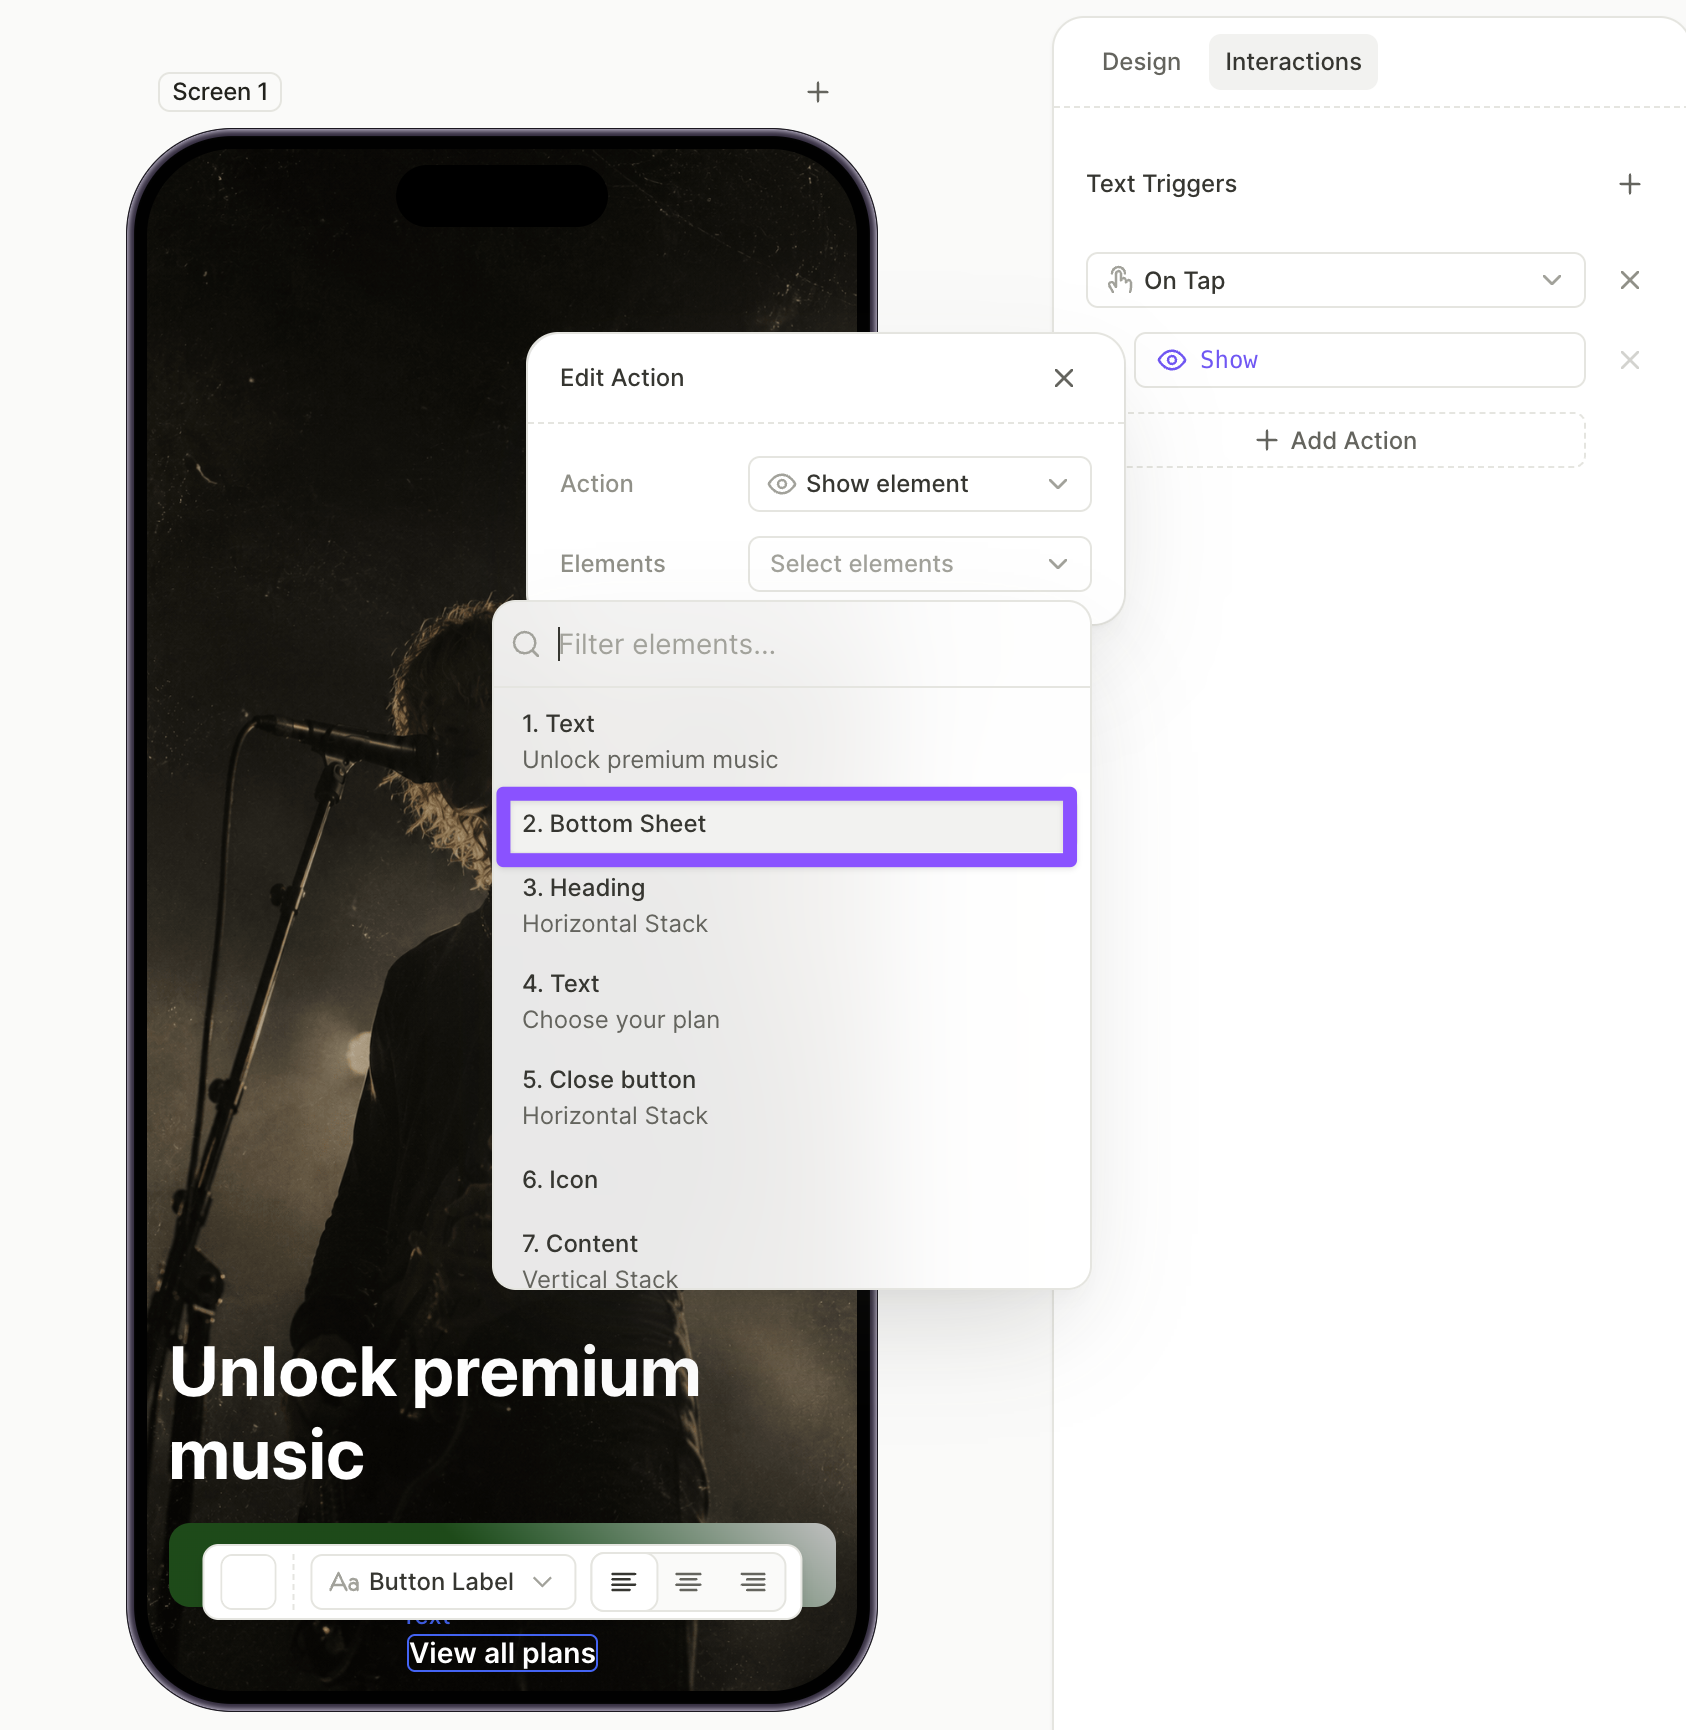
订阅按钮下方的文字链接,点击后会展开底部弹窗。将其设置为带有 Button Label 样式的文本元素,既保持界面简洁,又可以绑定操作。
有关显示/隐藏操作的更多信息,请参阅操作——显示/隐藏元素。
添加链接的步骤:
- 在 Layers 面板中选中该屏幕,点击 + > Text > Button Label。
- 选中文本元素后,将 Content 字段的内容修改为
Show all plans。 - 打开 Interactions 标签页,点击 Add trigger > On tap > Add action。
- 将 Action 设置为 Show,然后从下拉菜单中选择底部弹出层元素。