Capacitor SDKでオンボーディングのデータを処理する
オンボーディングはSDK v4で非推奨となり、将来のリリースで削除される予定です。 バグ修正や改善は行われません。代わりにフローをご利用ください。オンボーディングはWebView内で動作しますが、フローはデバイス上でネイティブにレンダリングされるため、よりスムーズなアニメーション、一貫したネイティブな外観、高速な読み込み、WebViewランタイムへの依存がなくなります。まずはフローとペイウォールの取得とフローとペイウォールの表示をご覧ください。
ユーザーがクイズの質問に回答したり、入力フィールドにデータを入力したりすると、onStateUpdated メソッドが呼び出されます。このフィールドタイプをコード内で保存または処理できます。
例:
view.setEventHandlers({
  onStateUpdated(action, meta) {
    // Process data
  },
});アクションのフォーマットはこちらを参照してください。
保存されたデータの例(実装によってフォーマットが異なる場合があります)
// Example of a saved select action
{
    "elementId": "preference_selector",
    "meta": {
        "onboardingId": "onboarding_123",
        "screenClientId": "preferences_screen",
        "screenIndex": 1,
        "screensTotal": 3
    },
    "params": {
        "type": "select",
        "value": {
            "id": "option_1",
            "value": "premium",
            "label": "Premium Plan"
        }
    }
}

// Example of a saved multi-select action
{
    "elementId": "interests_selector",
    "meta": {
        "onboardingId": "onboarding_123",
        "screenClientId": "interests_screen",
        "screenIndex": 2,
        "screensTotal": 3
    },
    "params": {
        "type": "multiSelect",
        "value": [
            {
                "id": "interest_1",
                "value": "sports",
                "label": "Sports"
            },
            {
                "id": "interest_2",
                "value": "music",
                "label": "Music"
            }
        ]
    }
}

// Example of a saved input action
{
    "elementId": "name_input",
    "meta": {
        "onboardingId": "onboarding_123",
        "screenClientId": "profile_screen",
        "screenIndex": 0,
        "screensTotal": 3
    },
    "params": {
        "type": "input",
        "value": {
            "type": "text",
            "value": "John Doe"
        }
    }
}

// Example of a saved date picker action
{
    "elementId": "birthday_picker",
    "meta": {
        "onboardingId": "onboarding_123",
        "screenClientId": "profile_screen",
        "screenIndex": 0,
        "screensTotal": 3
    },
"params": {
    "type": "datePicker",
    "value": {
        "day": 15,
        "month": 6,
        "year": 1990
        }
    }
}
ユースケース
ユーザープロファイルにデータを紐付ける
入力データをユーザープロファイルにすぐに紐付け、同じ情報を二度尋ねないようにするには、アクションの処理時に入力データでユーザープロファイルを更新する必要があります。
たとえば、name という ID のテキストフィールドでユーザーに名前を入力してもらい、その値をユーザーの名(ファーストネーム)として設定したい場合や、email フィールドでメールアドレスを入力してもらいたい場合、アプリのコードは次のようになります。
view.setEventHandlers({
  onStateUpdated(action, meta) {
    // Store user preferences or responses
    if (action.elementType === 'input') {
      const profileParams: any = {};

      // Map elementId to appropriate profile field
      switch (action.elementId) {
        case 'name':
          if (action.value.type === 'text') {
            profileParams.firstName = action.value.value;
          }
          break;
        case 'email':
          if (action.value.type === 'email') {
            profileParams.email = action.value.value;
          }
          break;
      }

      // Update profile if we have data to update
      if (Object.keys(profileParams).length > 0) {
        adapty.updateProfile({ params: profileParams }).catch((error) => {
          // handle the error
        });
      }
    }
  },
});
オンボーディングの回答に基づいてペイウォールをカスタマイズする
オンボーディングにクイズを使うことで、オンボーディング完了後にユーザーへ表示するペイウォールもカスタマイズできます。
例えば、スポーツの経験について質問し、ユーザーグループごとに異なる CTA やプロダクトを表示することが可能です。
- オンボーディングビルダーでクイズを追加し、各選択肢に意味のある ID を割り当てます。
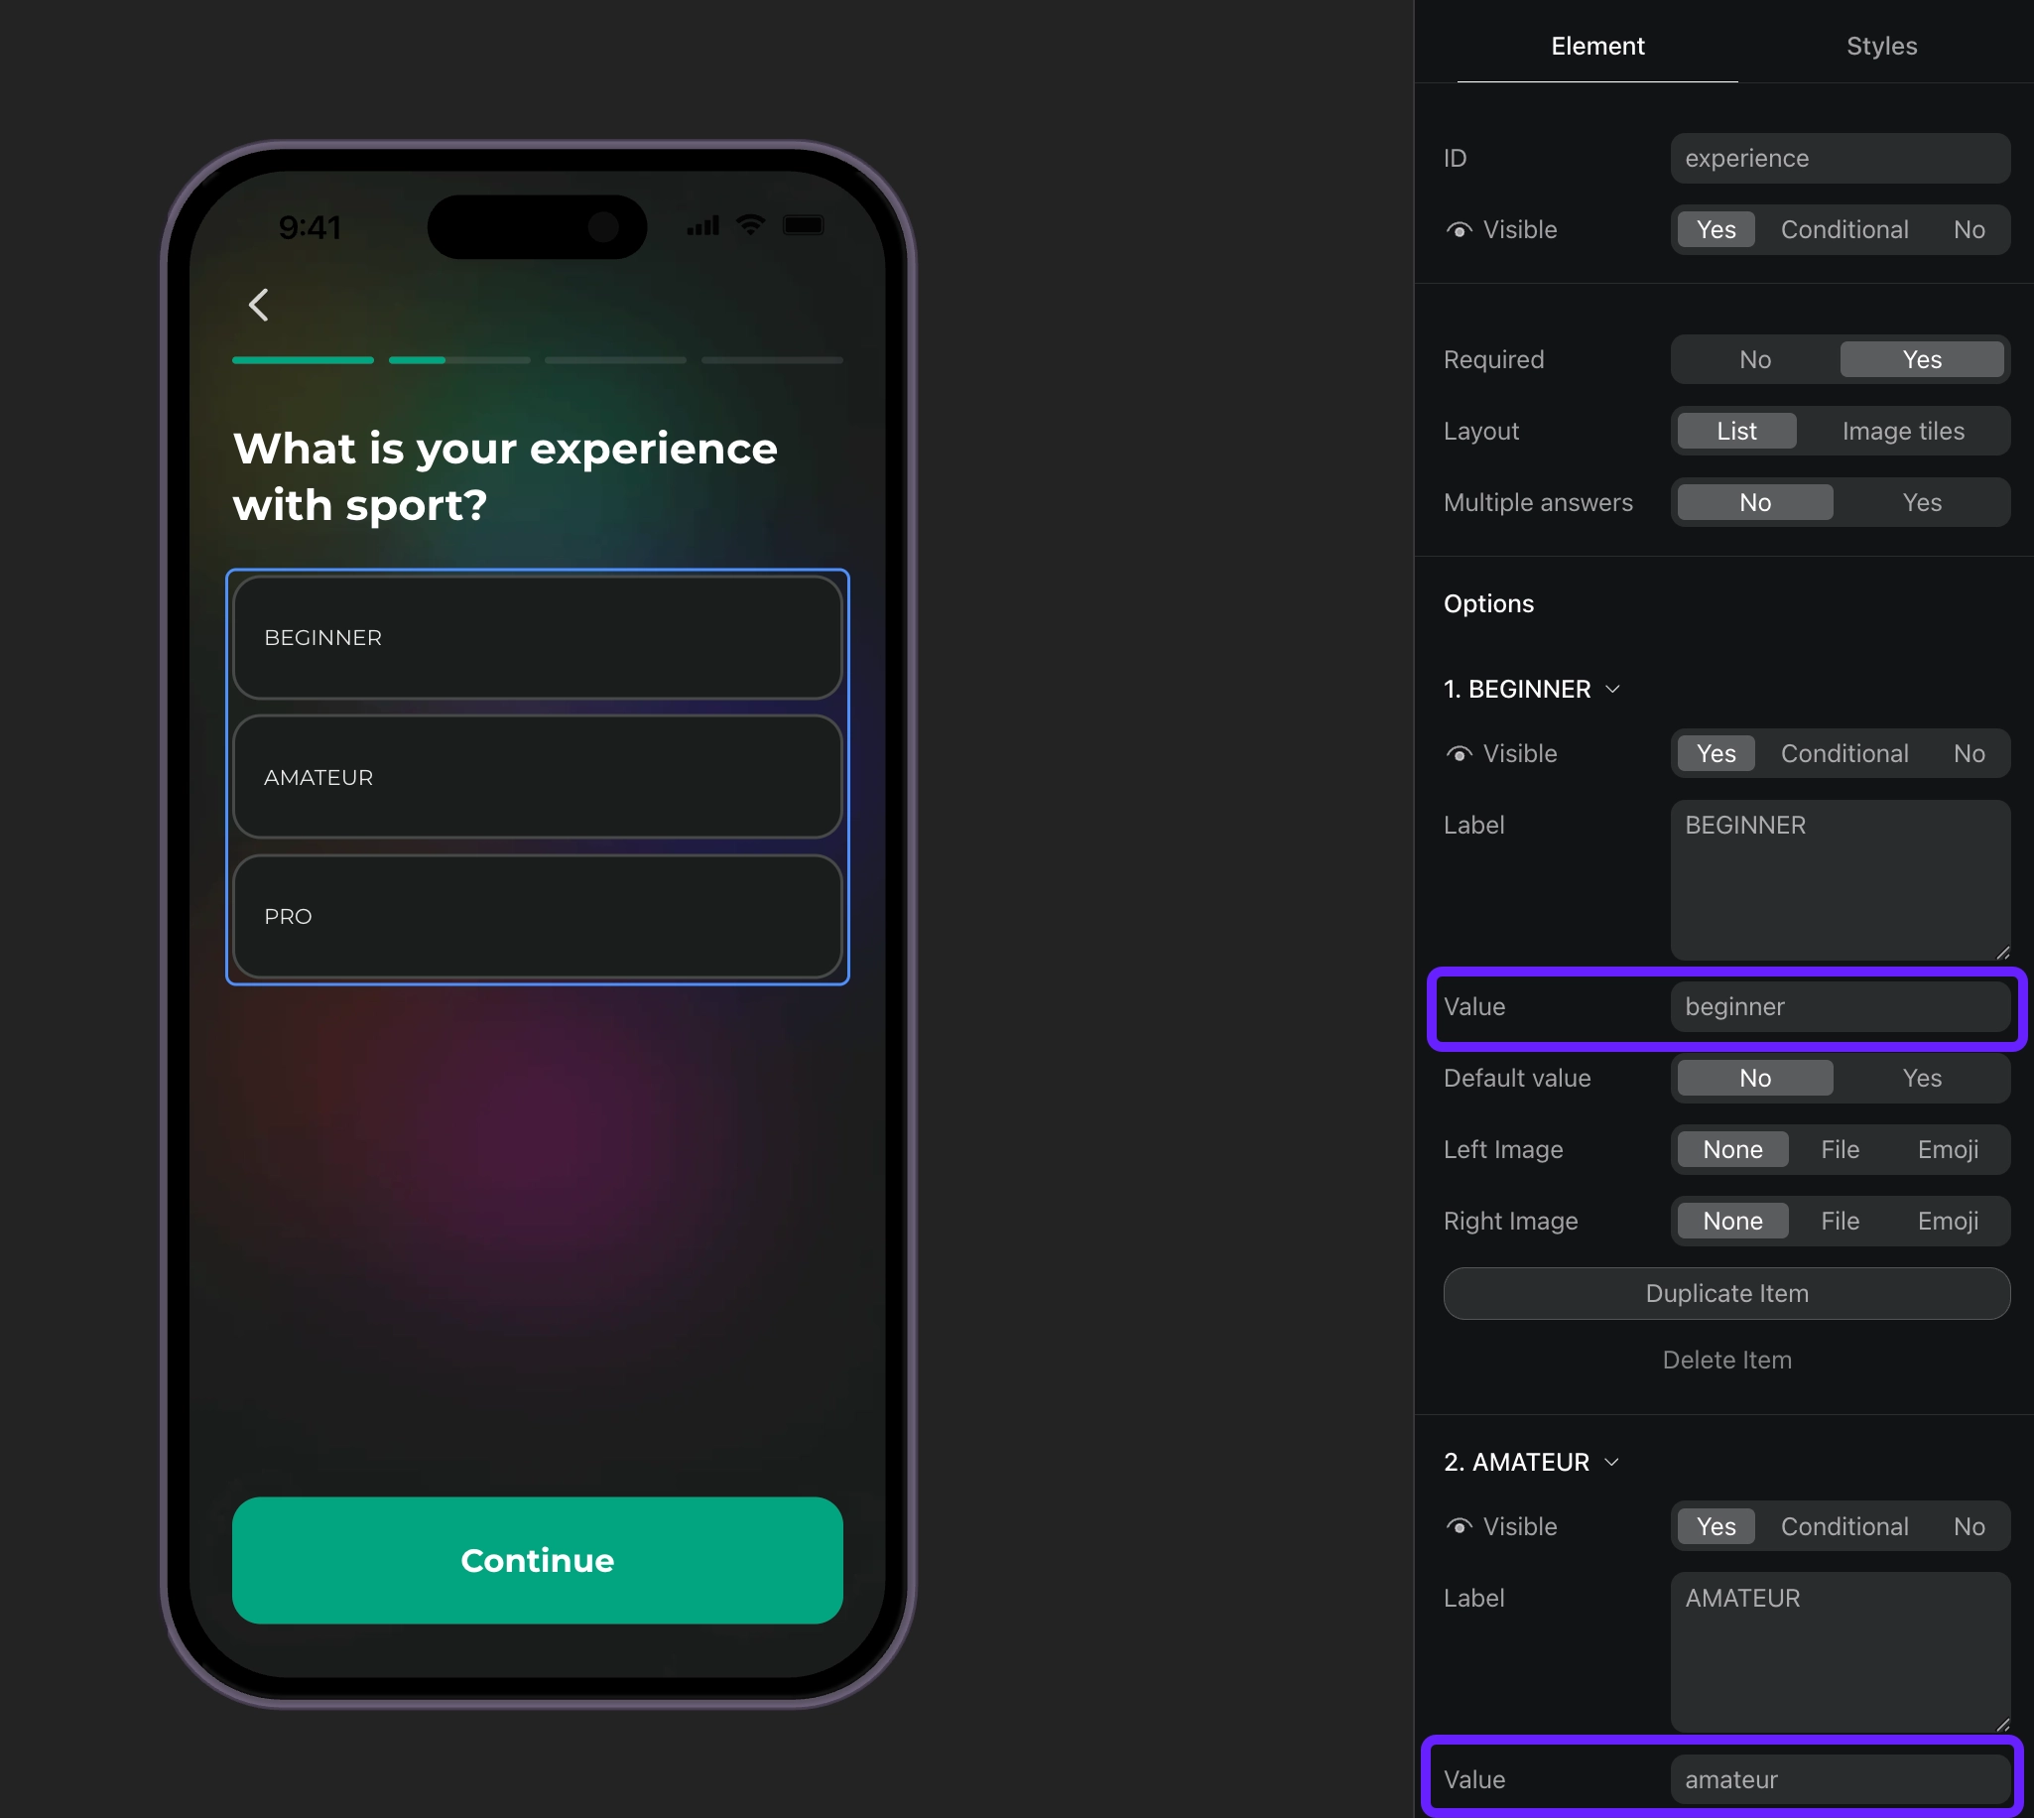
- ID をもとにクイズの回答を処理し、ユーザーにカスタム属性を設定します。
view.setEventHandlers({
  onStateUpdated(action, meta) {
    // Handle quiz responses and set custom attributes
    if (action.elementType === 'select') {
      const profileParams: any = {};

      // Map quiz responses to custom attributes
      switch (action.elementId) {
        case 'experience':
          // Set custom attribute 'experience' with the selected value (beginner, amateur, pro)
          profileParams.codableCustomAttributes = {
            experience: action.value.value
          };
          break;
      }

      // Update profile if we have data to update
      if (Object.keys(profileParams).length > 0) {
        adapty.updateProfile({ params: profileParams }).catch((error) => {
          // handle the error
        });
      }
    }
  },
});- カスタム属性の各値に対してセグメントを作成します。
- プレースメントを作成し、作成した各セグメントに対してオーディエンスを追加します。
- アプリのコードでプレースメントのペイウォールを表示します。オンボーディングにペイウォールを開くボタンがある場合は、このボタンのアクションへの応答としてペイウォールのコードを実装してください。