Testing iOS in-app purchases: Xcode or Sandbox?

After adding purchases to the app, you need to make sure that they work correctly and run smoothly for your users. To do this, it is important to test them.
In this third article in the series on implementing in-app purchases in iOS, we'll try to cover most of the questions around the implementation and customization of purchases. Check the links below for all articles in this series in case you need to get caught up:
- iOS in-app purchases, part 3: testing purchases in Xcode
In-app purchases testing in Xcode vs Sandbox
There are two testing options on iOS: the classic Sandbox purchases, and StoreKit local testing through Xcode.
Sandbox testing is a bit tedious and it runs only on a real device. To test in Sandbox, firstly you need to create a Sandbox account on the portal, link it in your device’s settings, and after that run through the testing flow. Some scenarios require a very large amount of manipulation (refund, ask to buy, lifetime non-consumable purchases).
StoreKit local testing has greatly simplified the testing process for in-app purchases and subscriptions. First of all, you can test purchases in Xcode at an early stage when your app is not connected to App Store Connect. Secondly, there is no need to create additional accounts in the App Store for Xcode, which significantly speeds up the process of configuring tests, especially for lifetime non-consumable purchases. Third, local testing can be automated, which potentially reduces the chance of errors occurring in the code. Moreover, you can even write UI tests for paywalls and other interfaces where purchases appear.
However, some things are available only in Sandbox. For instance, a pricing table with automatic conversion to different currencies can be used only in the App Store. Also, receipt validation in the usual form no longer works – local purchases are validated through Xcode, and this mechanism falls on the shoulders of the developer.
Otherwise, Xcode covers most of the testing scenarios and tasks. In this article, we will consider the configuration and basic scenarios for working with this tool.
How to create configuration files and fill them with products
To test local purchases in Xcode, you need to add a file with the product configuration that you want to test.
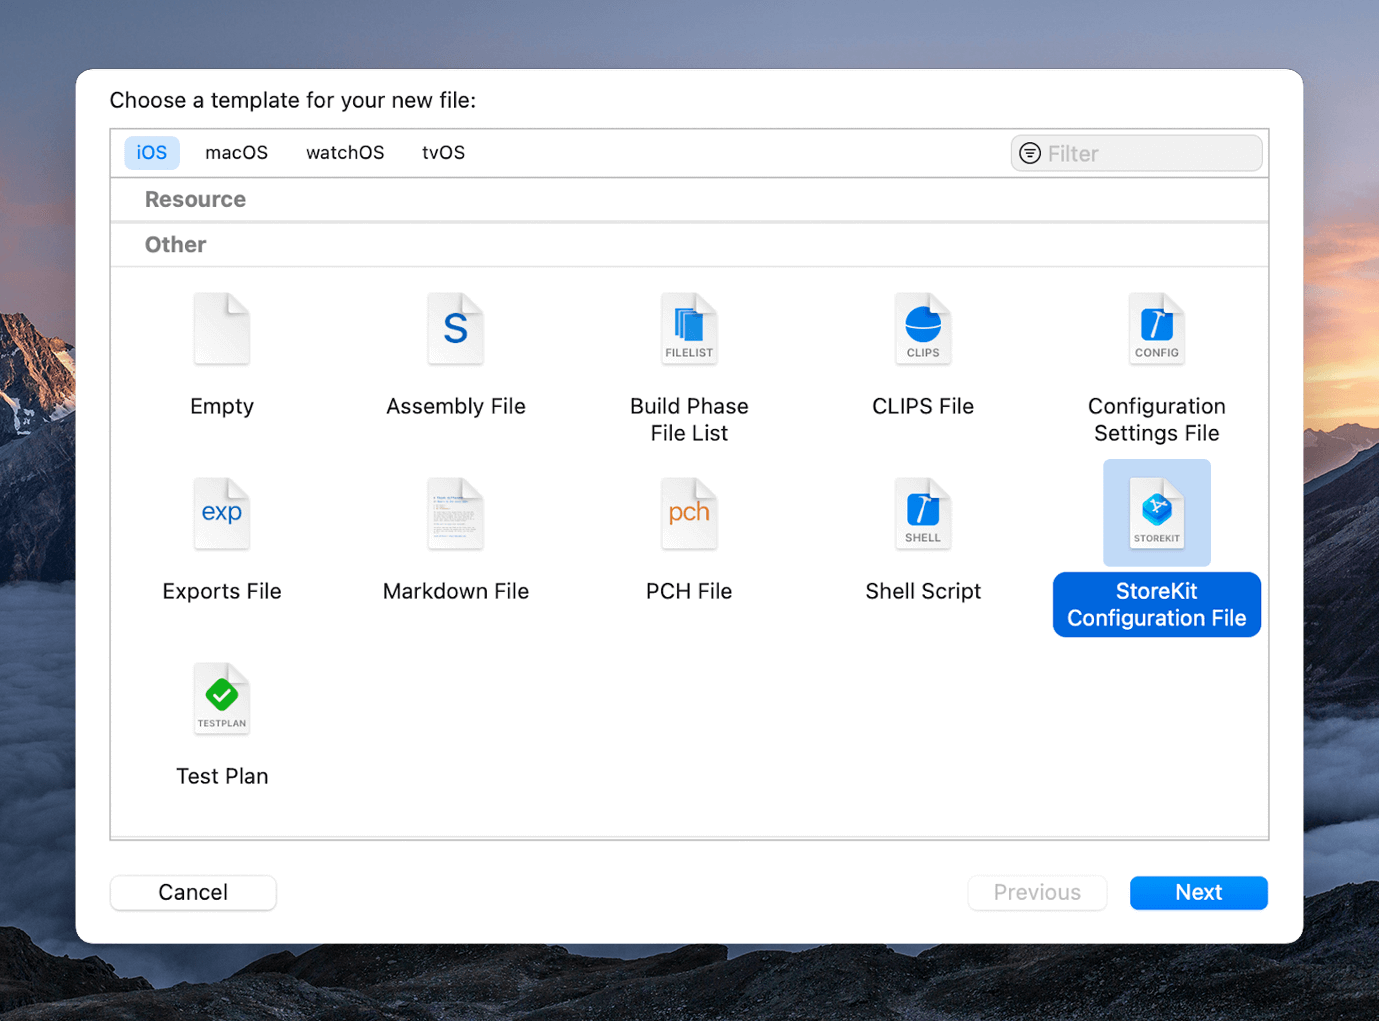
To do this, in Xcode, select File → New → File, select the StoreKit Configuration file template, specify the name, and save.
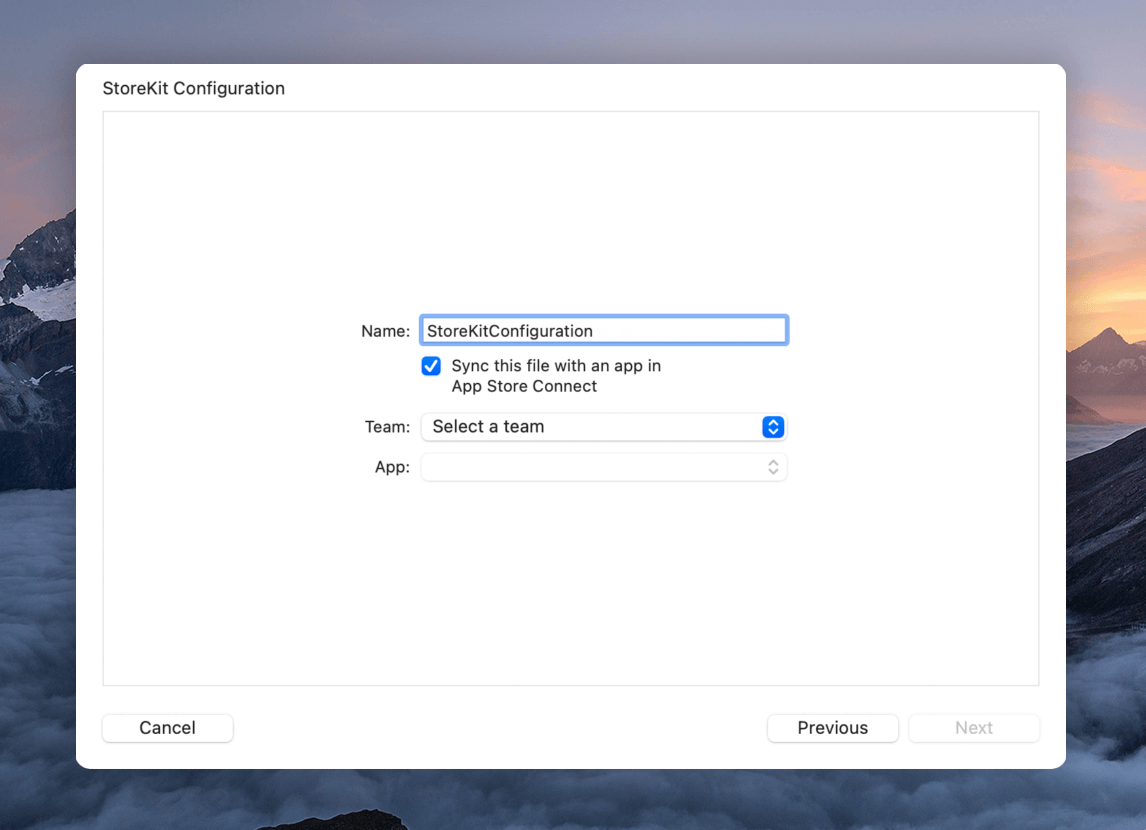
You can also sync the configuration file with an app definition in App Store Connect and skip the process of adding purchases and subscriptions to it.
Next, at the bottom of the created file, click “+” and select the desired product depending on purchases that you plan to test: subscriptions, non-renewable subscriptions, consumable or non-consumable purchases:
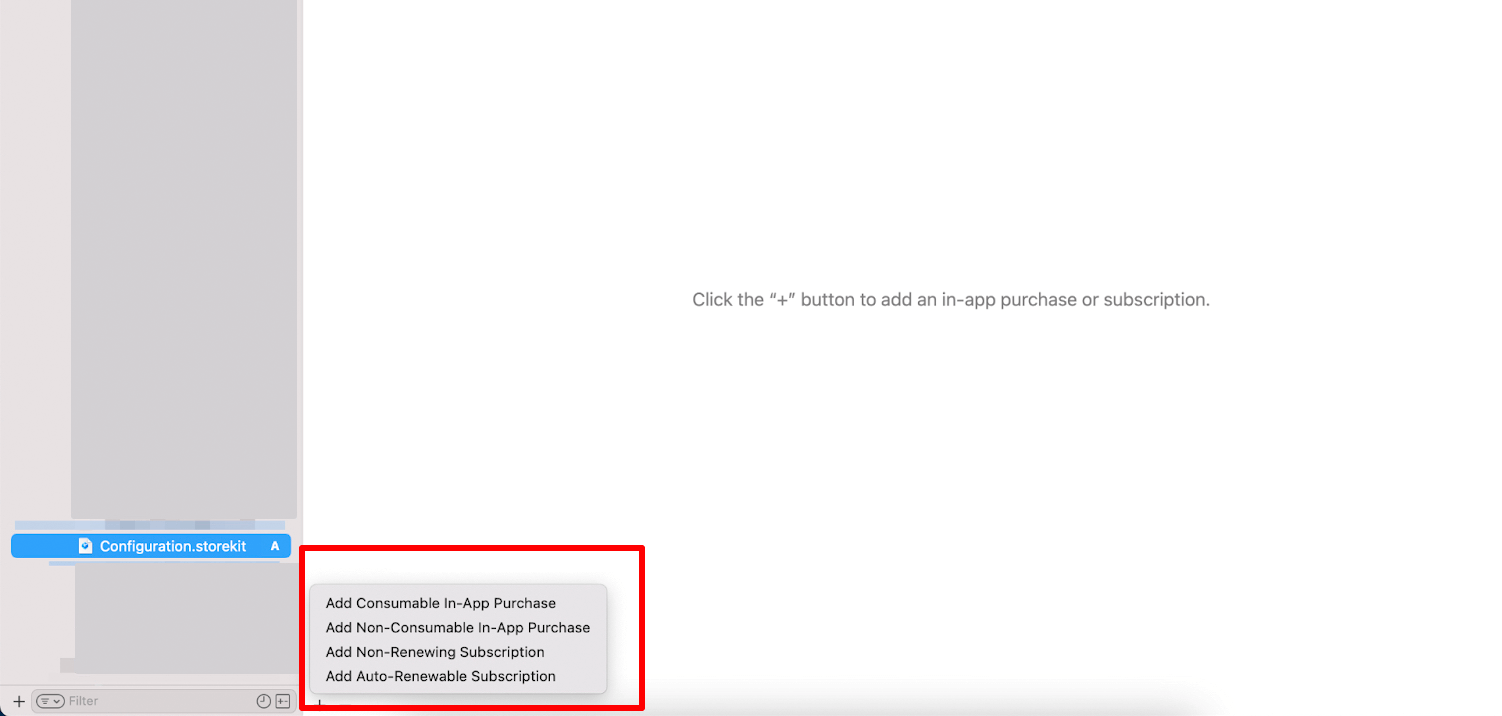
For example, let's select “Auto-renewable subscriptions” and create a subscription group.
A subscription group provides a way to group multiple auto-renewing subscriptions together that all provide the same level of access to premium features, but differ in price or period. Within a group, a user may only be subscribed to one subscription at a time. Should they wish to switch, that would be considered a cross-grade as they are only changing the price or period.
Enter a name for the group and set up a subscription:
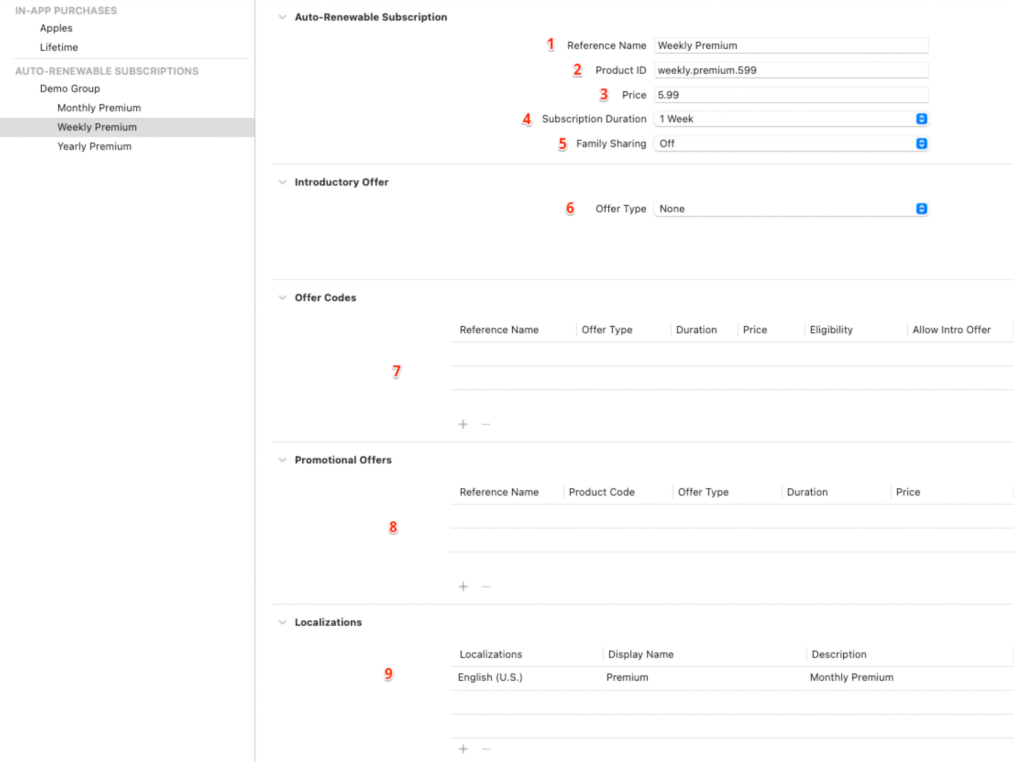
- Subscription name – This is how the subscription will be displayed in the list on the left. This is not used anywhere else, so the most important thing in the name is to make it understandable for yourself.
- The product ID – a required field. The product ID will be used when making a purchase. Yet again, it's important to make it clear: for example, monthly, annual, premium.
- The price – Required
- The subscription duration – Required
- Enable or disable family sharing – Optional
- Introductory offer – Optional
- Offer codes – Optional
- Рromotional offers – Optional
- Localization: title and description – This is how the in-app purchase will be named and described in the App Store of different regions.
How to enable and disable local in-app purchase testing on iOS
Now that you've added the products, you can start testing.
In Xcode select Edit scheme → Options
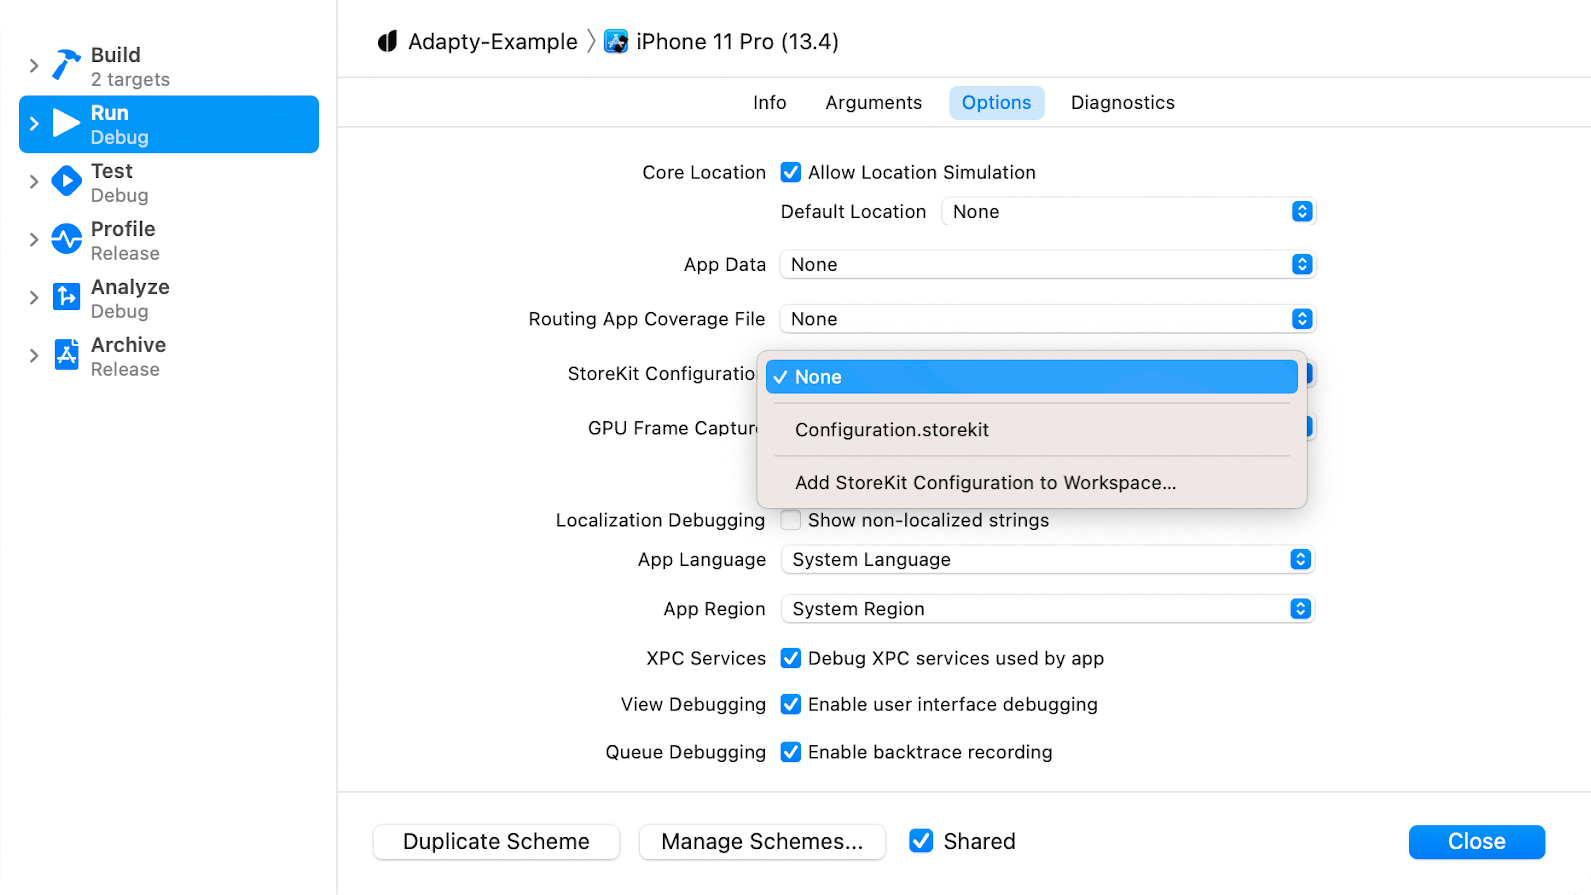
In the StoreKit Configuration menu, you will see a list of configuration files available for testing. In our case, this is the Configuration.storekit that we created in the first step. To disable testing, “none” should be selected.
Before moving further to the next step of the testing process, let me remind you that the Adapty SDK makes implementing in-app purchases on iOS much easier and provides many benefits like advanced subscription analytics, paywalls, A/B tests, cohort analysis, and server-side receipt validation. Check it out!
Example of a purchase with a test transaction
Let's test a purchase. To do this, run your app and follow the purchase process for a subscription on your paywall. The paywall will be fed data from StoreKit using the products we entered in the configuration file rather than from the App Store. If you haven't checked it out yet, the previous article in this series reviews the steps to set up purchases and paywalls on iOS.
Starting with Xcode 12, it became possible to manage test purchases. You can track all test purchases and transactions, reject and confirm purchases, make refunds, and more right in the Xcode interface.
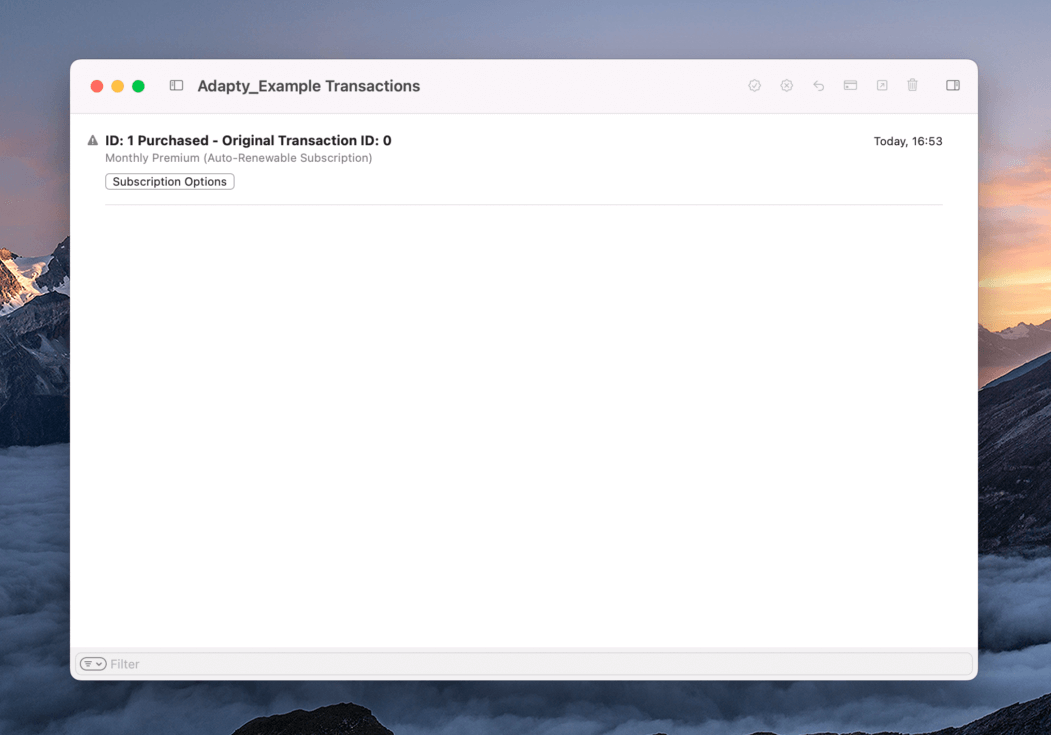
To see your test purchases, run the application, and then select Debug → StoreKit → Manage Transactions from the menu. In the window that appears, you will see a list of test transactions performed locally:
Settings for iOS test purchases
There is an Editor menu that lets you manage the settings for test purchases:
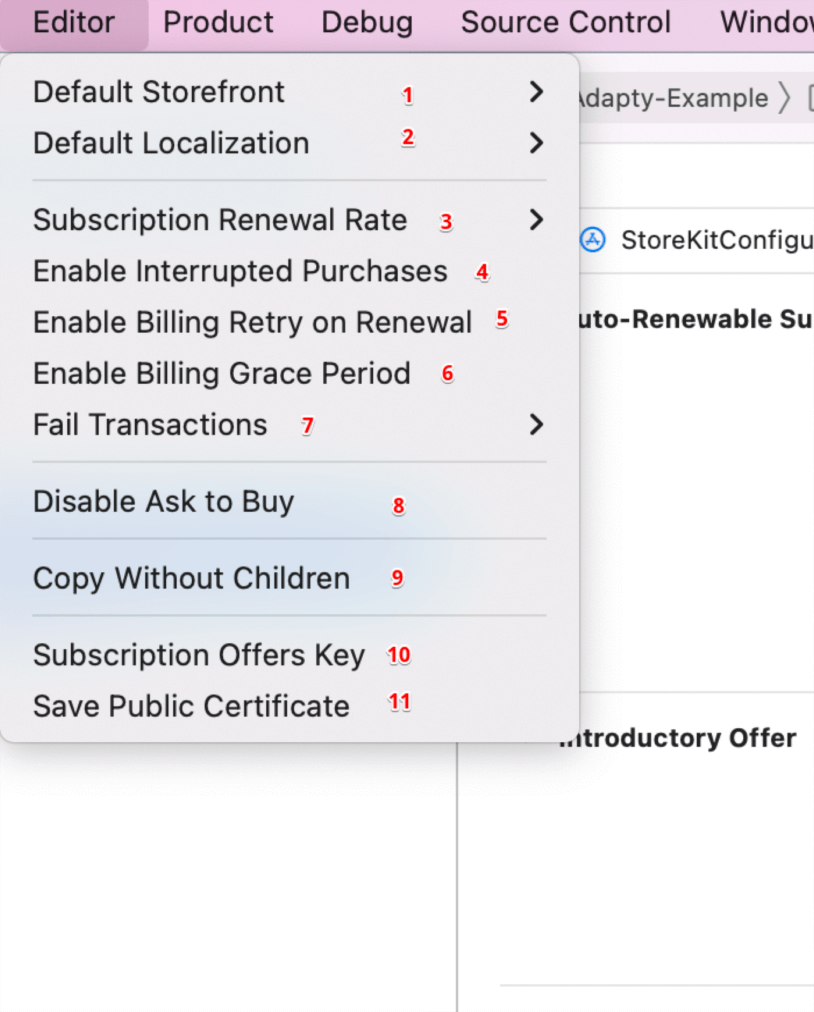
To see it, you need to select your StoreKit configuration file and click the Editor menu. It has the following options:
- Default Storefront. Allows you to select and switch countries and currencies, respectively.
- Default Localization. Switching localization for products that allows you to test different languages for names and prices.
- Subscription Renewal Rate. Allows you to adjust the subscription period. In Xcode you manually set the interval, for which the purchase will be tested: an annual subscription can be tested in an hour or a minute. This allows you to control many complex purchase scenarios.
- Enable interrupted purchases. Allows you to test interrupted purchases that require some additional action from the user during the purchase. For example, for users from Europe, additional confirmation is requested for transactions over €30.
- Enable Billing Retry on Renewal. Allows you to test billing retry for auto-renewal subscriptions due to a payment issue.
- Enable Billing Grace Period. Allows you to test accessing your app’s paid content for a period of time while Apple continues to attempt to collect payment after failed auto-renewal.
- Fail transactions. Allows you to explicitly call for certain errors.
- Enable ask to buy. Enables additional request for purchase authorization.
- Copy Without Children. Copy item in StoreKit configuration.
- Subscription Offers Key. Key for signing promo offers.
- Save Public Certificate. Used for local validation of the user's receipt (confirmation of information about their purchases)
“Ask to buy” for purchases with Family Sharing / Deferred purchases
StoreKit local testing allows you to test interrupted purchases that require confirmation by an adult family member.
To do this, select Editor → Enable Ask to Buy, restart the application and try to buy something. You will see the alert with the option to request permission to purchase.

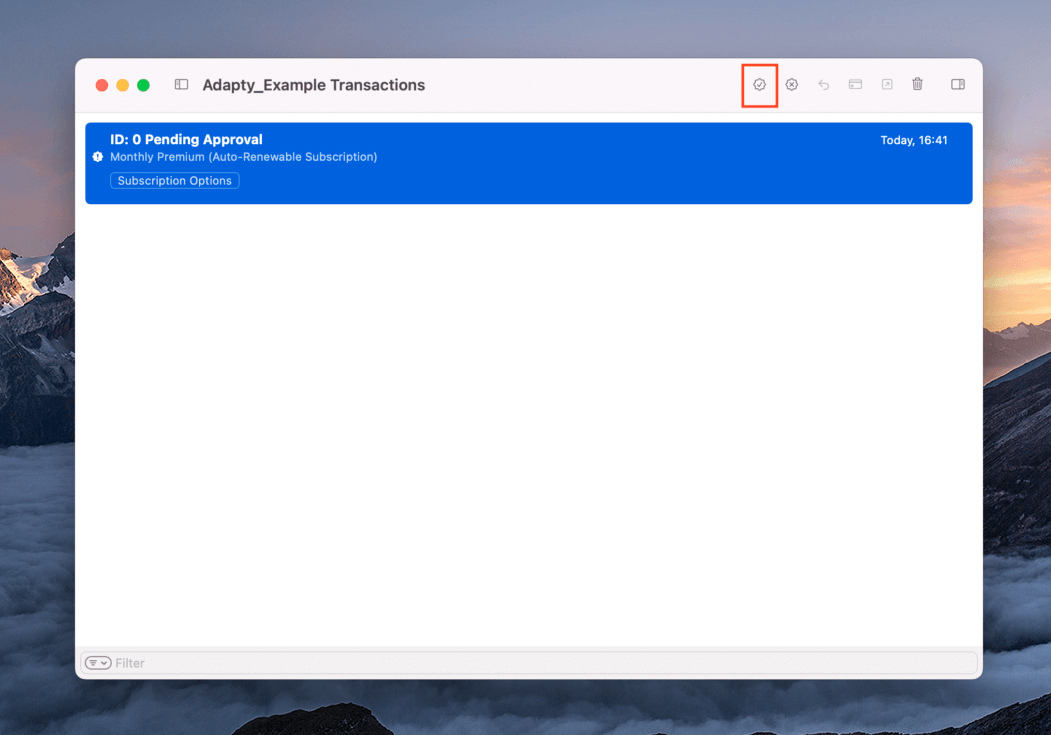
Once you click the Ask button, look for it in your transaction history window. It should say "pending approval". Click the highlighted button in the screenshot below to approve the transaction. The app should see this and finish the transaction.
Managing local subscriptions: delete & refund
With the transaction history window, you can delete purchases in order to re-test them (just click on the transaction and hit the delete key), as well as simulate refunds. You can also right-click on any transaction in the list to show other options.
In the previous article of this series, we reviewed the modern approach of using a transaction listener in our IAP manager type to capture StoreKit transactions and process them. To know when a transaction has been revoked due to a refund or billing issue failure, add the following to the code provided from the previous article.
...
for status in statuses {
  switch status.state {
    case .revoked:
      if let transaction,
        let revocationDate = transaction.revocationDate {
        handleRevokedEntitlement(for: transaction.productID)
      }
    case .expired:
      continue
    default:
      ...
  }
}In the handleRevokedEntitlement(for:) method, you would want to remove access to the paid features covered by this purchase.
You can learn more about StoreKit 2 in our article here.
Conclusion
These were the main scenarios for managing purchases and testing them in Xcode. As you can see, Xcode has a lot of features, and local StoreKit testing is easier than using the Sandbox. In the following articles, we will talk about the rest of the aspects of connecting purchases on iOS: server-side receipt validation, promo offers, error handling, and how to add purchases to the app using the Adapty SDK (spoiler alert: much easier than without it).