Test in-app purchases in App Store Sandbox
Once you've configured in-app purchases in your mobile app, it's crucial to test them thoroughly to ensure functionality and proper transmission of transactions to Adapty before releasing the app to production. Transactions and purchases that occur in the sandbox don’t incur charges. To conduct sandbox testing, you'll need to use a special test account - Sandbox Apple ID, and ensure the testing device is added to the Developer Account in the App Store Connect.
Sandbox testing is ideal for developers who wish to personally test purchases on a device connected to their Mac via XCode.
For more details, you can refer to the Apple's documentation on Testing in-app purchases with sandbox.
Test on a real device
To validate the end-to-end purchase process, it's essential to conduct testing on a real device. While testing on a simulator allows you to examine paywalls, it does not enable interaction with the Apple server, making it impossible to test purchases.
Before you start testing
Before you start testing in-app purchases, make sure that:
- Your Apple Developer Program account is active. For more information, see Apple's What you need to enroll.
- Your membership Account Holder has signed the Paid Applications Agreement, as described in Apple's Sign and update agreements.
- You set up the product information in App Store Connect for the app you’re testing. At a minimum, set up a product reference name, product ID, a localized name, and a price.
- The Keychain Sharing capability is disabled. For more information, see Apple's article Configuring keychain sharing.
- You’re running a development-signed rather than a production-signed build of your app.
- You have completed all the steps outlined in the release checklist.
Prepare for Sandbox testing
Testing in-app purchases in the sandbox environment doesn’t involve uploading your app binary to App Store Connect. Instead, you build and run your app directly from Xcode. However, it does require a special test account - Sandbox Apple ID.
Step 1. Create a Sandbox test account (Sandbox Apple ID) in the App Store Connect
Create a new sandbox test account
When testing your purchases, it's crucial to create a new sandbox test account each time. This ensures a clean purchase history, optimal performance, and smooth functionality.
To create a Sandbox Apple ID:
-
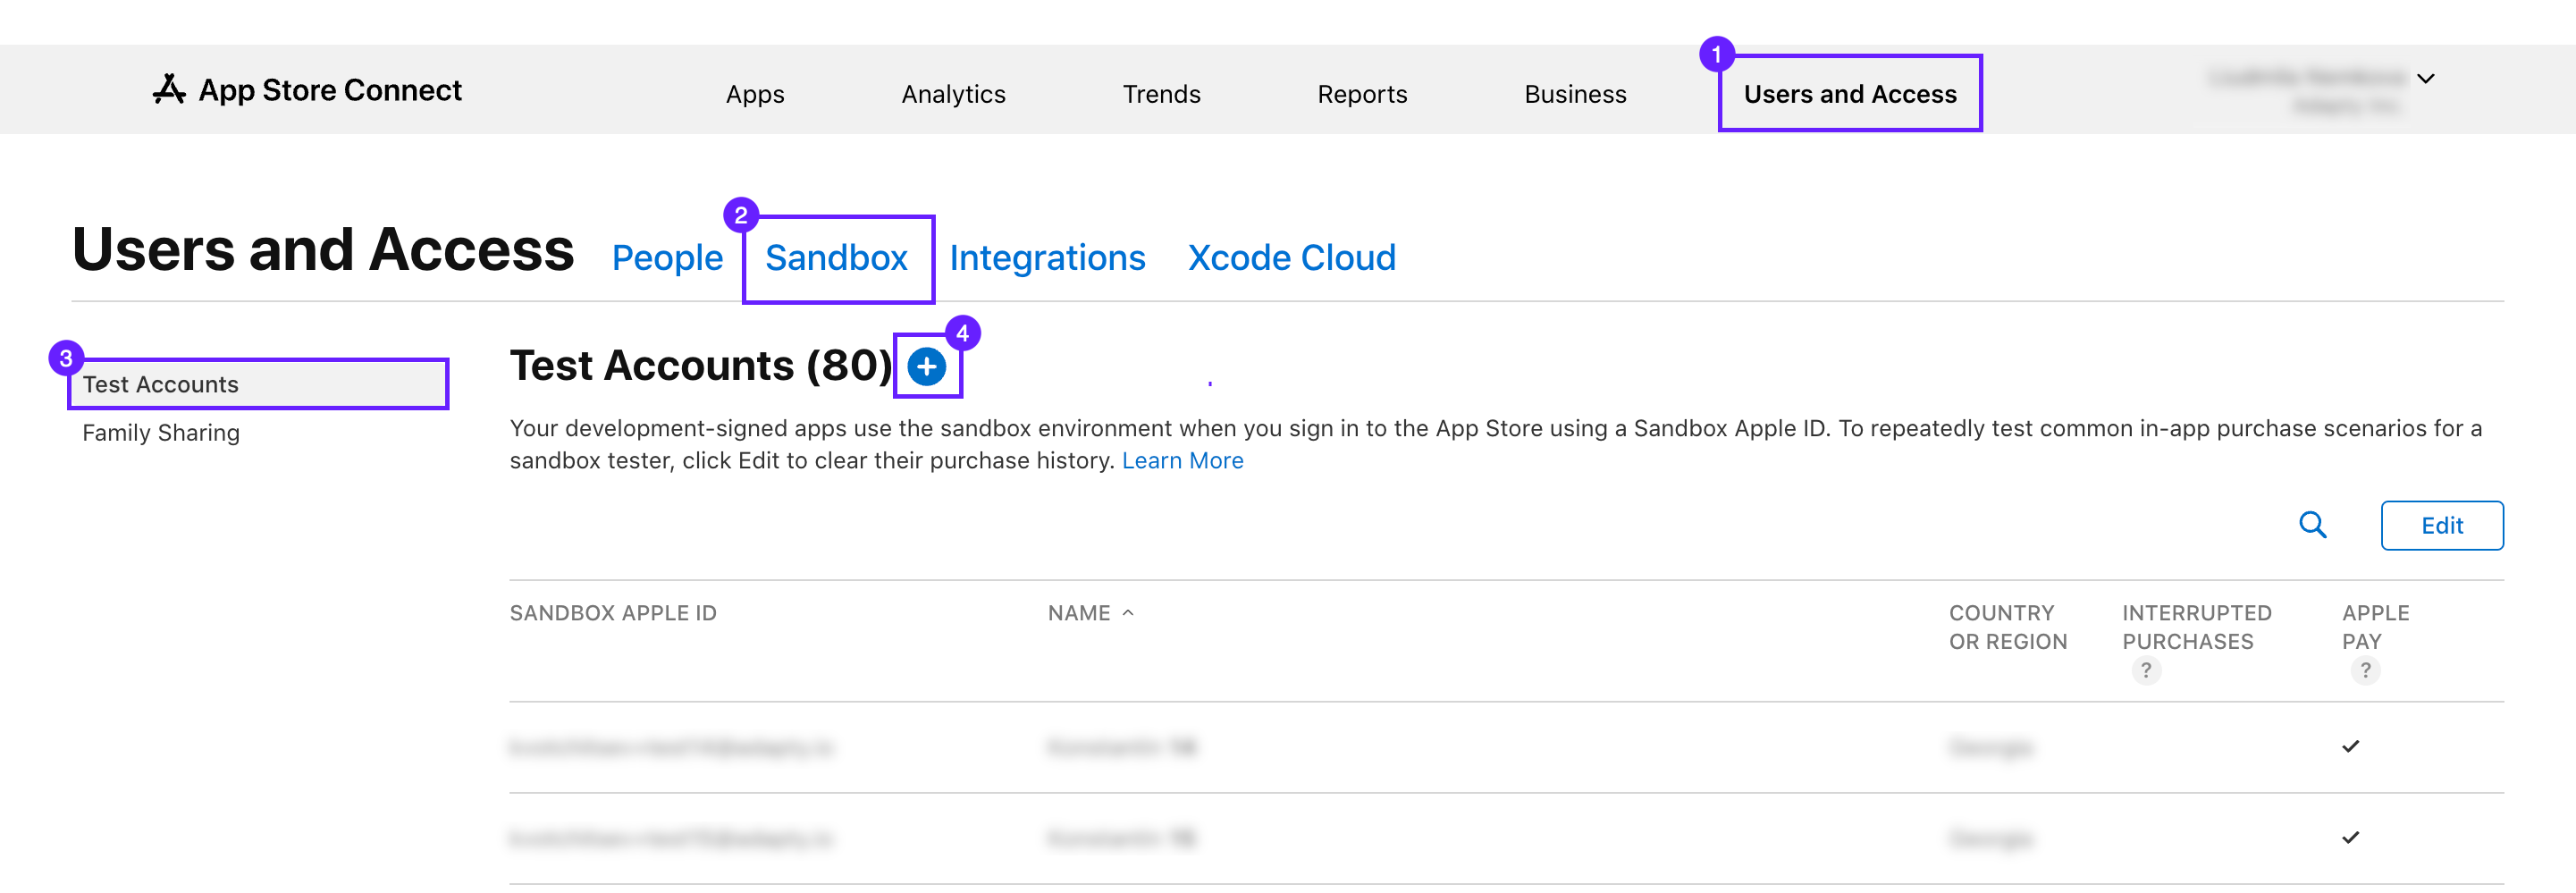
Open App Store Connect. Proceed to Users and Access → Sandbox → Test Accounts section.
-
Click the add button (+) button next to the Test Accounts title.
-
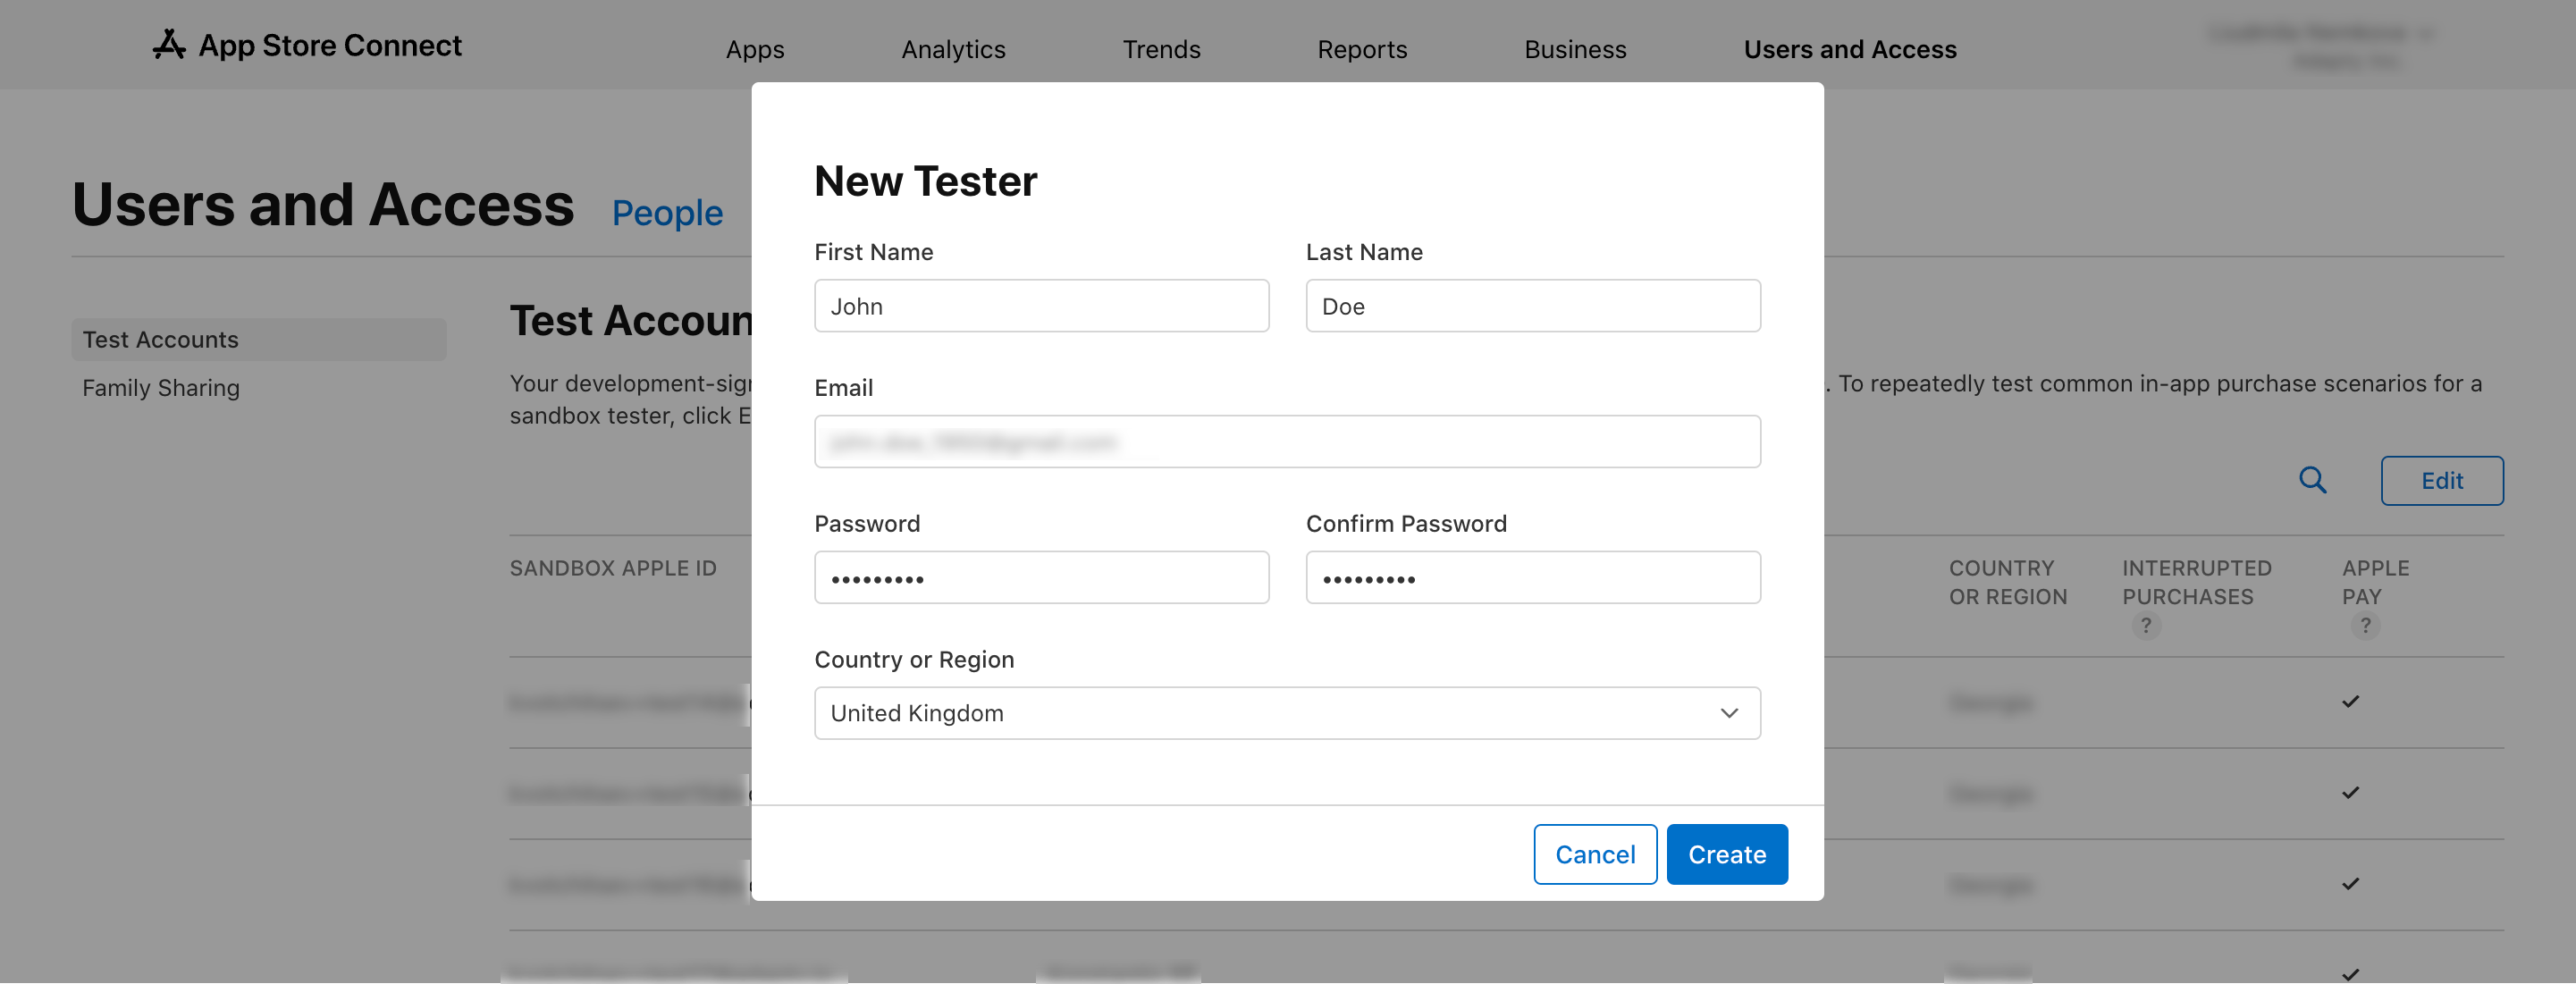
In the New Tester window, enter the data of the test user.
warning- Make sure to provide a valid email you can verify.
- Make sure to define the Country or Region which you plan to test.
-
Click the Create button to confirm the creation
Step 3. Add the Sandbox test account to your device
The first time you run an app from XCode on your device, there's no need to manually add a Sandbox account. Upon building the app in XCode and running it on your device, when you initiate a purchase, the device prompts you to enter the Apple ID for the purchase. Simply enter your Sandbox Apple ID and password at this juncture, and the Sandbox test account will be automatically added to your device.
If you need to change the Sandbox Apple ID associated with your device, you can do so directly on the device by following these steps:
- On iOS 12, navigate to Settings > [Your Account] > App Store > Sandbox Account.
On iOS 13 or greater, navigate to Settings > App Store > Sandbox Account. - Tap the current Sandbox Apple ID in the Sandbox Account section.
- Tap the Sign Out button.
- Tap the Sign In button.
- In the Use the Apple IS for Apple Media Services window, tap the Use Other Apple ID button.
- In the Apple ID Sign-In Requested window, enter the new sandbox account credentials that you previously created.
- Tap the Done button.
- In the Apple ID Security window, tap the Other options button.
- In the Protect your account window, tap the Do not upgrade button.
The added sandbox account is shown in the Sandbox Account section of your iOS device Settings.
Step 4. Connect the device to your Mac with XCode
To execute the built app version on your real device, include the device as a run destination in the Xcode project
- Connect your real device to the Mac with XCode using a cable or using the same Wi-Fi.
- Choose the Windows -> Devices and Simulators from the XCode main menu.
- In the Devices tab, choose your device.
- Tap the Trust button on your mobile phone.
Your device is connected to the XCode and can be used for sandbox testing.
Step 5. Build the app and run it
Click the Run button in the toolbar or choose Product -> Run to build and run the app on the connected real device. If the build is successful, Xcode runs the app on your iOS device and opens a debugging session in the debug area of the XCode.
The app is ready for testing on the device.
When you’re done testing the app, click the Stop button in the XCode toolbar.
Step 6. Make purchase
Make a purchase in your mobile app via paywall.
Now you can validate that the test purchase is successful.