---
title: "Unity SDKのCode-1000 noProductIDsFoundエラーの修正"
description: "Adaptyでサブスクリプションを管理する際に発生する無効なプロダクト識別子エラーを解決します。"
---
1000コードエラー `noProductIDsFound` は、ペイウォールでリクエストしたプロダクトがApp Storeに登録されているにもかかわらず、購入可能な状態にないことを示します。このエラーには `InvalidProductIdentifiers` という警告が伴う場合があります。警告のみでエラーが表示されない場合は、無視して問題ありません。
`noProductIDsFound` エラーが発生している場合は、以下の手順で解決してください。
## ステップ1. バンドルIDを確認する \{#step-2-check-bundle-id\}
---
no_index: true
---
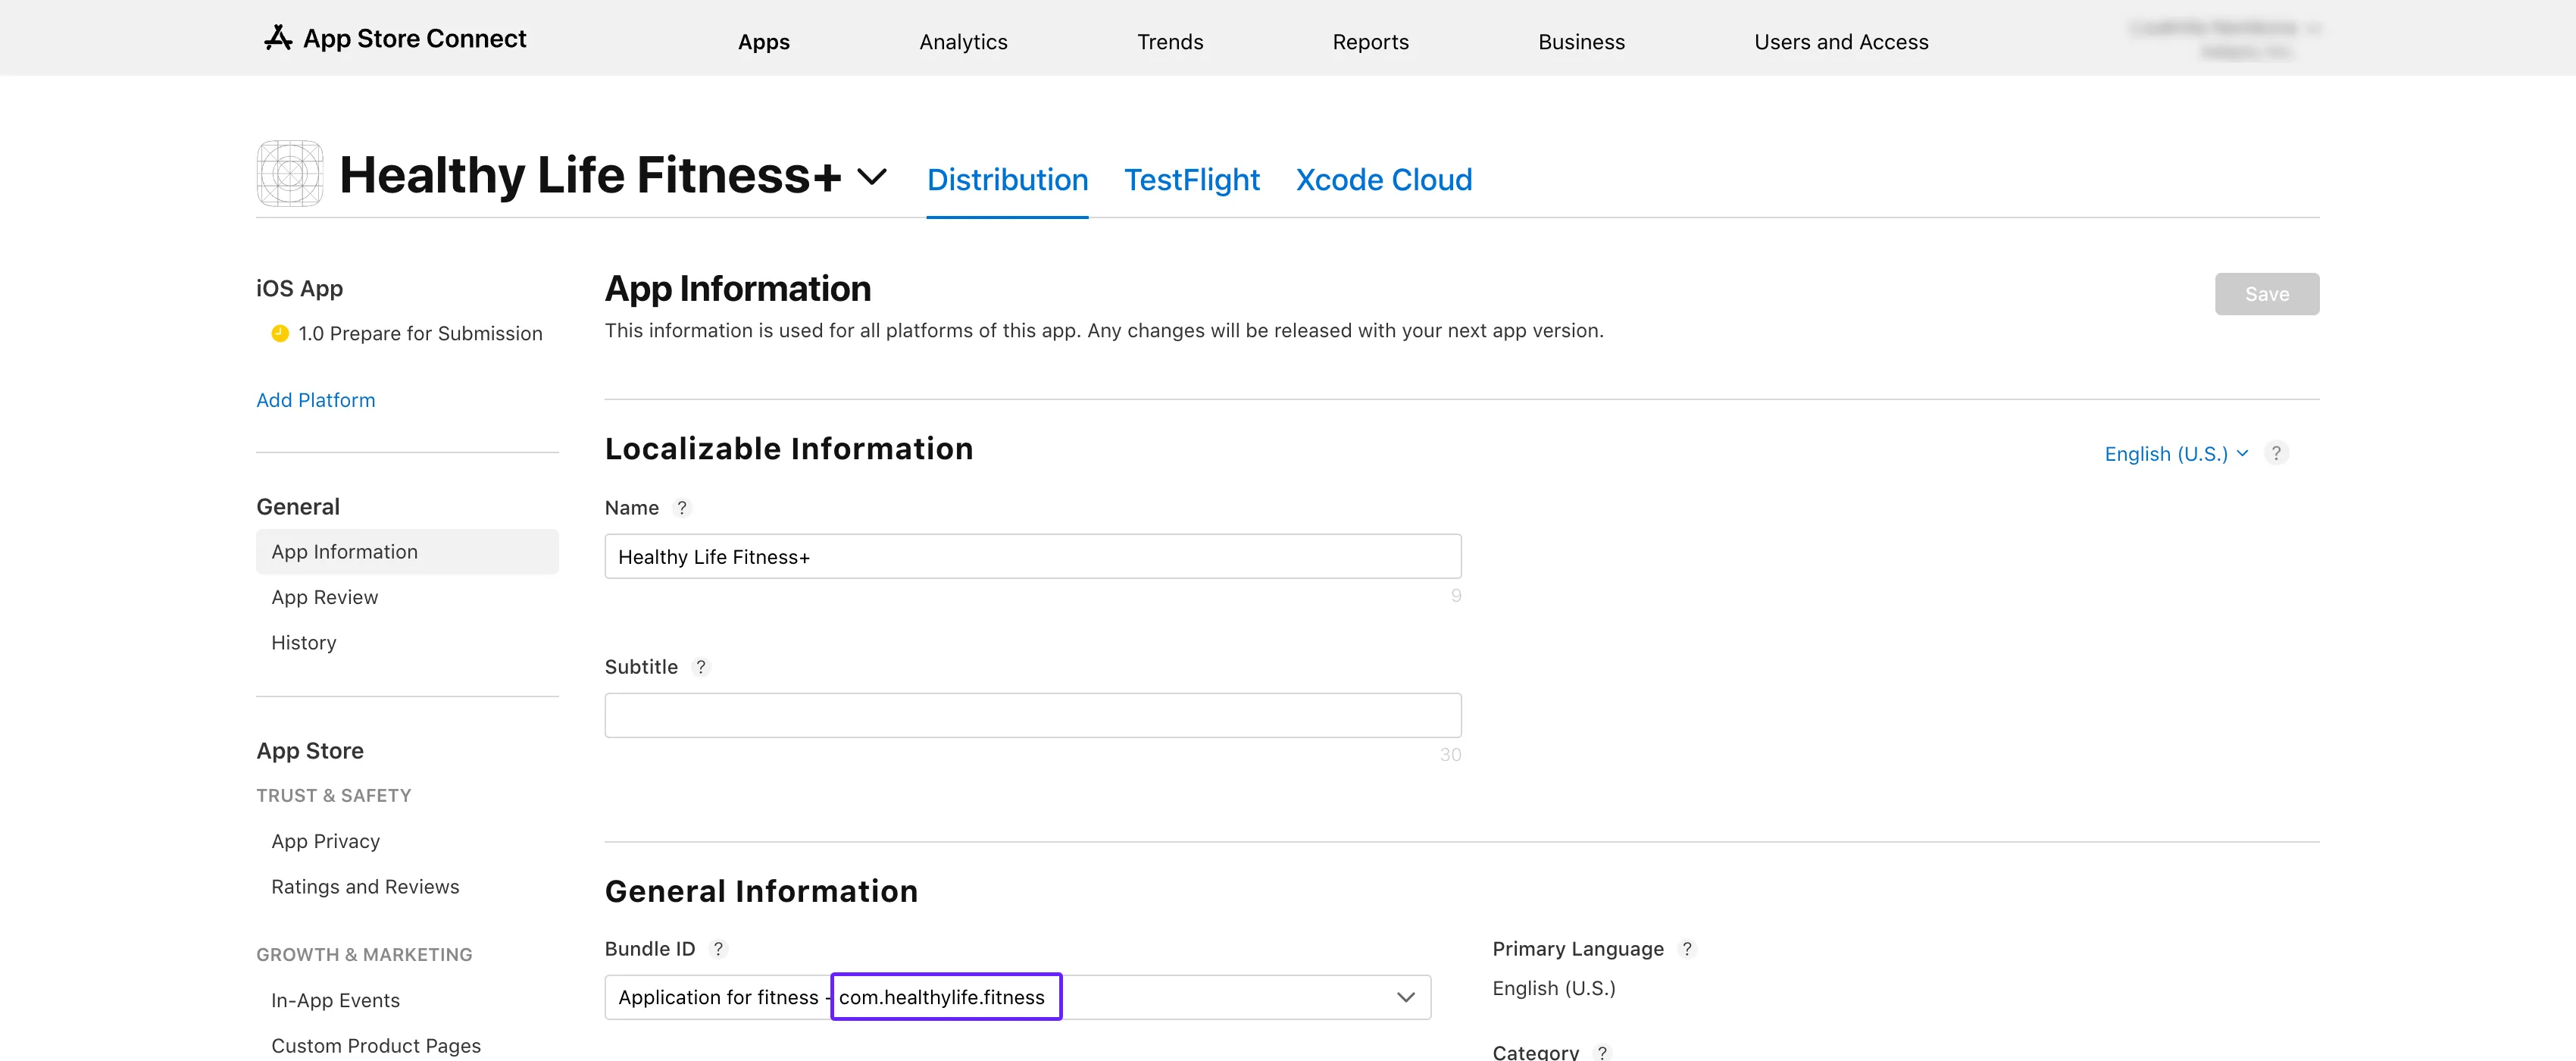
1. [App Store Connect](https://appstoreconnect.apple.com/apps) を開きます。アプリを選択し、**General** → **App Information** セクションに進みます。
2. **General Information** サブセクションで **Bundle ID** をコピーします。
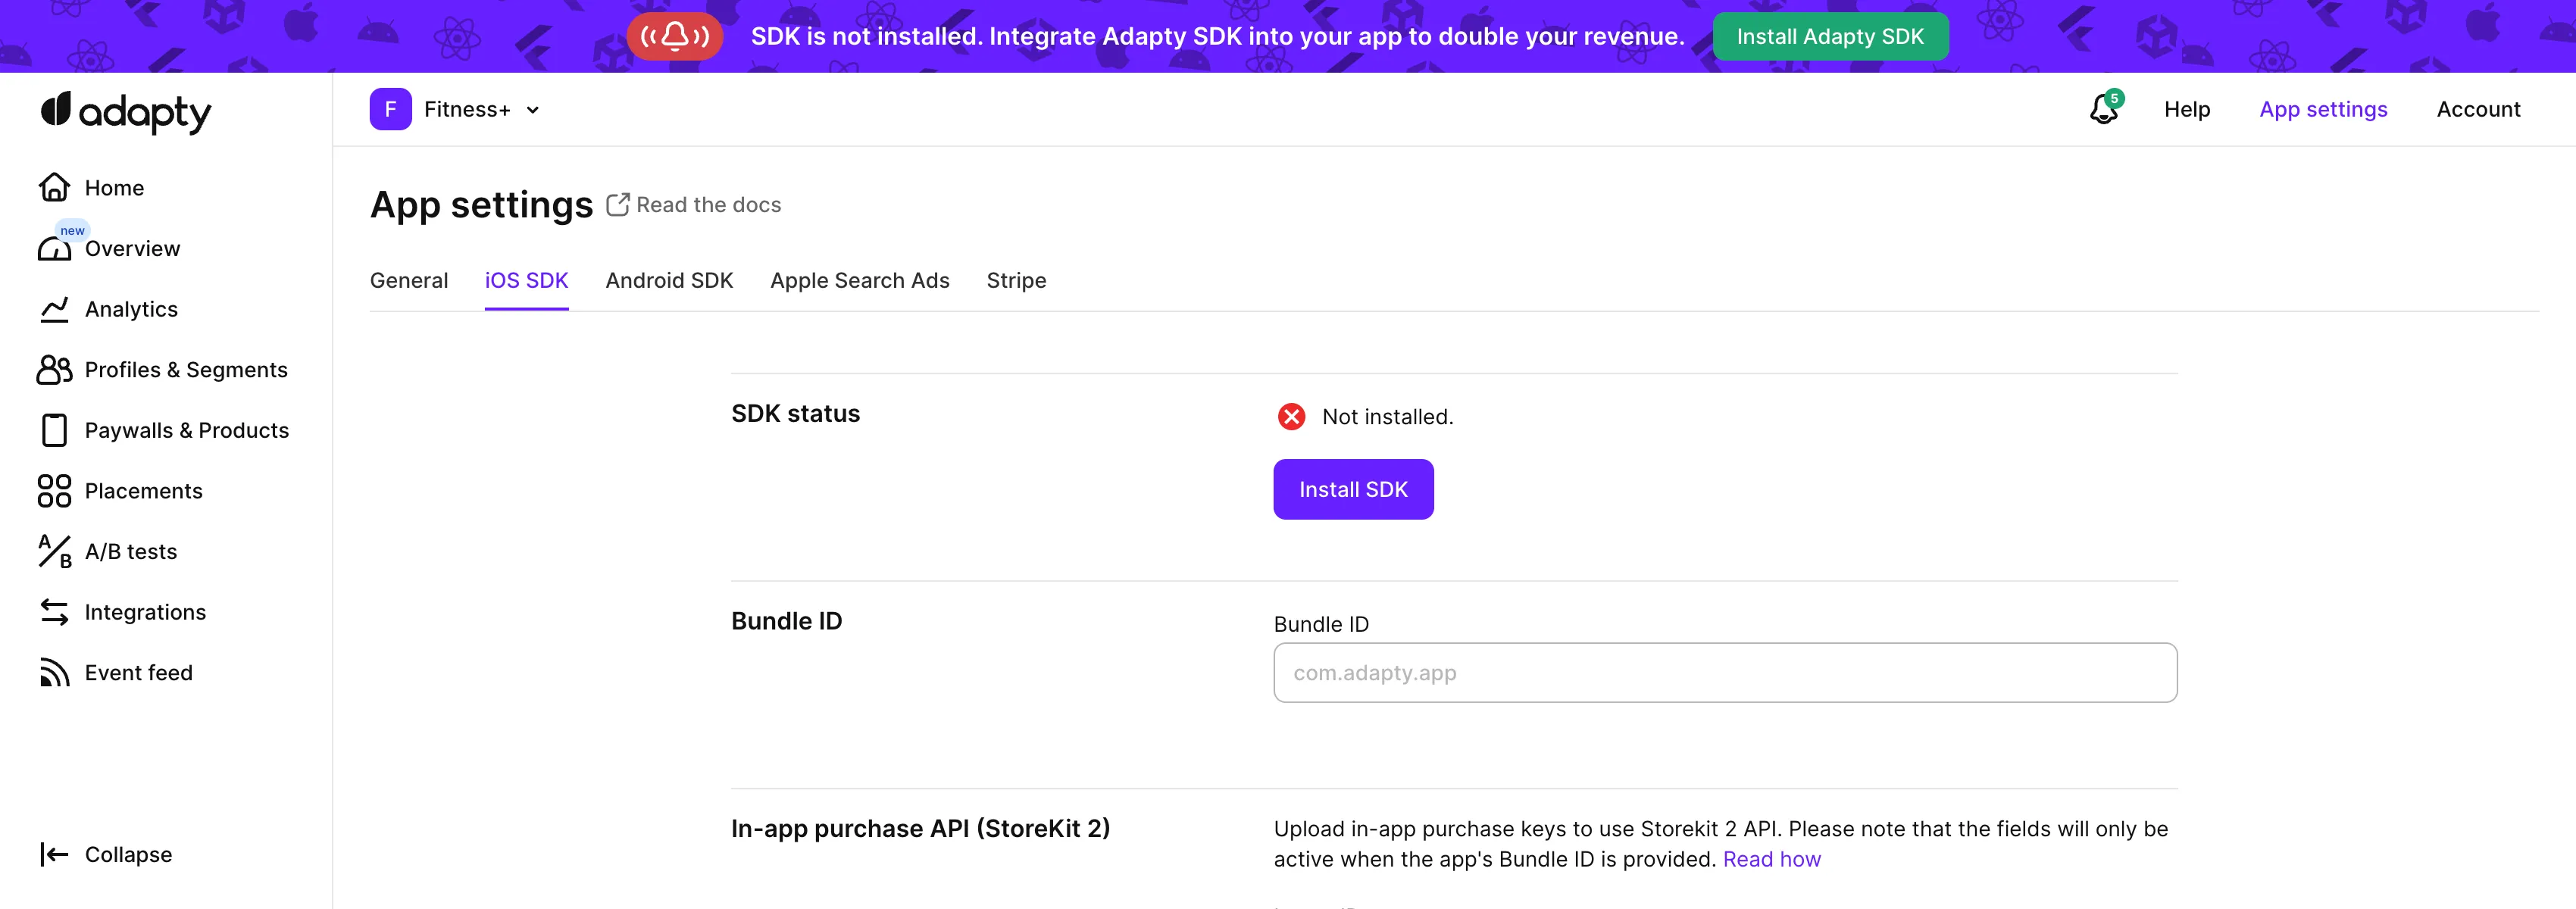
 3. Adapty のトップメニューから [**App settings** -> **iOS SDK** タブ](https://app.adapty.io/settings/ios-sdk) を開き、コピーした値を **Bundle ID** フィールドに貼り付けます。
 4. App Store Connect の **App information** ページに戻り、**Apple ID** をコピーします。
5. Adapty ダッシュボードの [**App settings** -> **iOS SDK**](https://app.adapty.io/settings/ios-sdk) ページで、**Apple app ID** フィールドにその ID を貼り付けます。
## ステップ2. プロダクトを確認する \{#step-3-check-products\}
1. **App Store Connect** にアクセスし、左側のメニューから [**Monetization** → **Subscriptions**](https://appstoreconnect.apple.com/apps/6477523342/distribution/subscriptions) に移動します。
4. App Store Connect の **App information** ページに戻り、**Apple ID** をコピーします。
5. Adapty ダッシュボードの [**App settings** -> **iOS SDK**](https://app.adapty.io/settings/ios-sdk) ページで、**Apple app ID** フィールドにその ID を貼り付けます。
## ステップ2. プロダクトを確認する \{#step-3-check-products\}
1. **App Store Connect** にアクセスし、左側のメニューから [**Monetization** → **Subscriptions**](https://appstoreconnect.apple.com/apps/6477523342/distribution/subscriptions) に移動します。
 2. サブスクリプショングループ名をクリックすると、**Subscriptions** セクションにプロダクトの一覧が表示されます。
3. テストしているプロダクトが **Ready to Submit** としてマークされていることを確認します。
2. サブスクリプショングループ名をクリックすると、**Subscriptions** セクションにプロダクトの一覧が表示されます。
3. テストしているプロダクトが **Ready to Submit** としてマークされていることを確認します。
 4. 表内のプロダクトIDと、Adapty ダッシュボードの [**Products**](https://app.adapty.io/products) タブに表示されているIDを比較します。IDが一致しない場合は、表からプロダクトIDをコピーし、Adapty ダッシュボードで[プロダクトを作成](create-product)してください。
 ## ステップ3. プロダクトの提供地域を確認する \{#step-4-check-product-availability\}
1. **App Store Connect** に戻り、同じ **Subscriptions** セクションを開きます。
2. サブスクリプショングループ名をクリックしてプロダクトを表示します。
3. テストしているプロダクトを選択します。
## ステップ3. プロダクトの提供地域を確認する \{#step-4-check-product-availability\}
1. **App Store Connect** に戻り、同じ **Subscriptions** セクションを開きます。
2. サブスクリプショングループ名をクリックしてプロダクトを表示します。
3. テストしているプロダクトを選択します。
 4. **Availability** セクションまでスクロールし、必要なすべての国・地域が一覧に含まれていることを確認します。
 ## ステップ4. プロダクトの価格を確認する \{#step-5-check-product-prices\}
1. **App Store Connect** の **Monetization** → **Subscriptions** セクションに移動します。
2. サブスクリプショングループ名をクリックします。
3. テストしているプロダクトを選択します。
4. **Subscription Pricing** までスクロールし、**Current Pricing for New Subscribers** セクションを展開します。
## ステップ4. プロダクトの価格を確認する \{#step-5-check-product-prices\}
1. **App Store Connect** の **Monetization** → **Subscriptions** セクションに移動します。
2. サブスクリプショングループ名をクリックします。
3. テストしているプロダクトを選択します。
4. **Subscription Pricing** までスクロールし、**Current Pricing for New Subscribers** セクションを展開します。
 5. 必要なすべての価格が一覧に表示されていることを確認します。
 ## ステップ5. アプリの有料ステータス、銀行口座、税務フォームが有効であることを確認する \{#step-5-check-app-paid-status-bank-account-and-tax-forms-are-active\}
1. [**App Store Connect**](https://appstoreconnect.apple.com/) のホームページで **Business** をクリックします。
## ステップ5. アプリの有料ステータス、銀行口座、税務フォームが有効であることを確認する \{#step-5-check-app-paid-status-bank-account-and-tax-forms-are-active\}
1. [**App Store Connect**](https://appstoreconnect.apple.com/) のホームページで **Business** をクリックします。
 2. 会社名を選択します。
 3. 下にスクロールし、**Paid Apps Agreement**、**Bank Account**、**Tax forms** がすべて **Active** になっていることを確認します。
 これらの手順を実行することで、`InvalidProductIdentifiers` の警告を解消し、プロダクトをストアで有効にできるはずです。
## ステップ6. 問題が解消しない場合はプロダクトを再作成する \{#step-6-recreate-the-product-if-its-stuck\}
ステップ1〜5をすべてパスしている場合(`Approved` ステータス、バンドルIDの一致、有効なAPIキー)でも、SDKが `1000 noProductIDsFound` を返し続けることがあります。この場合、プロダクトがAppleのレジストリでスタックしている可能性があります。App Store ConnectのUIにはプロダクトが存在するものの、StoreKitのルックアップパスに公開されていない状態になることがあります。
App Store Connectでプロダクトを削除し、同じプロダクトIDで再作成してください。再作成後、反映されるまで最大24時間かかる場合があります。
これらの手順を実行することで、`InvalidProductIdentifiers` の警告を解消し、プロダクトをストアで有効にできるはずです。
## ステップ6. 問題が解消しない場合はプロダクトを再作成する \{#step-6-recreate-the-product-if-its-stuck\}
ステップ1〜5をすべてパスしている場合(`Approved` ステータス、バンドルIDの一致、有効なAPIキー)でも、SDKが `1000 noProductIDsFound` を返し続けることがあります。この場合、プロダクトがAppleのレジストリでスタックしている可能性があります。App Store ConnectのUIにはプロダクトが存在するものの、StoreKitのルックアップパスに公開されていない状態になることがあります。
App Store Connectでプロダクトを削除し、同じプロダクトIDで再作成してください。再作成後、反映されるまで最大24時間かかる場合があります。