Flutter is a framework developed by Google that lets you quickly create cross-platform apps. Since Flutter apps run on both iOS and Android simultaneously, any in-app purchases library needs to be compatible with both Apple’s StoreKit and Google’s Billing Library.
From an architectural perspective, flutter in app purchase plugins function as wrappers around native libraries. In our case, it’s a wrapper around our own iOS and Android SDK libraries.
Open-source libraries for Flutter in-app purchases
Popular open-source solutions for Flutter in-app purchases include the open-source plugins in_app_purchase (developed by the Flutter team) and flutter_inapp_purchase (a non-official plugin) .
These plugins focus on client-side purchases. They don’t feature server-side receipt validation. You’ll need to build your own server infrastructure to validate receipts and track things like renewals, refunds, trials, and cancellations.
These libraries also tend to lag behind when it comes to supporting new store features. For example, they currently don’t fully support promo offers, pay-as-you-go features, or the pay upfront feature for iOS.
Since our library talks to our server, it features all of these:
- Server-side purchase validation
- Native payment features
- Subscription and purchase analytics
- Paywalls and promo offers
- A/B testing tools for purchases, pricing, and promotions
Let’s walk through the steps you should take before implementing purchases in your Flutter app.
1. Creating a developer account on iOS and Android
First, you’ll need to create developer accounts for both platforms if you don’t already have them. Then you’ll need to set up in-app subscriptions for iOS and Android.
For detailed instructions, check out these resources:
After setting up your developer accounts and creating your products in both stores, you can move on to configuring your Flutter project for in-app purchases.
2. Flutter in-app purchases setup
To configure in-app purchases in your Flutter app, you’ll need to set up your project in Adapty. Sign into your Adapty account, create a new app from the app switcher menu in the upper-left corner, then navigate to the App settings page.
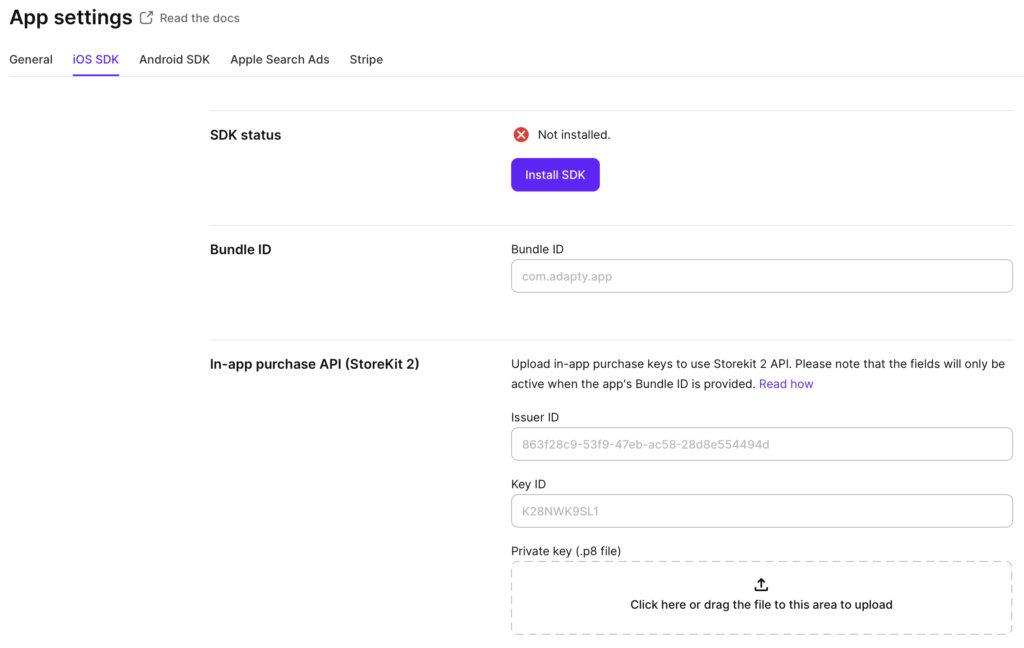
For iOS, you’ll need to:
- Specify the Bundle ID to link your Adapty project to your app.
- Configure the IAP API for StoreKit 2 with the Issuer ID, Key ID, and Private key (all from App Store Connect).
- Specify the App Store Shared Secret, which the Adapty server will use to establish a connection to Apple’s servers and validate receipts.
- Set up App Store Server Notifications in App Store Connect, so that you can be notified about subscription events.
For Android, you’ll need to provide:
- Package name – this is the Android equivalent of the iOS Bundle ID.
- Service Account Key File – this gives Adapty permission to communicate with Google Play
You can find your Android package name in the /android/app/build.gradle file, under the android.defaultConfig.applicationId property.
android.defaultConfig.applicationId3. Configuring products and paywalls
The Adapty product allows you to manage Flutter in-app purchases across different platforms. This approach simplifies cross-platform statistics tracking and lets you work with unified product entities rather than platform-specific identifiers.
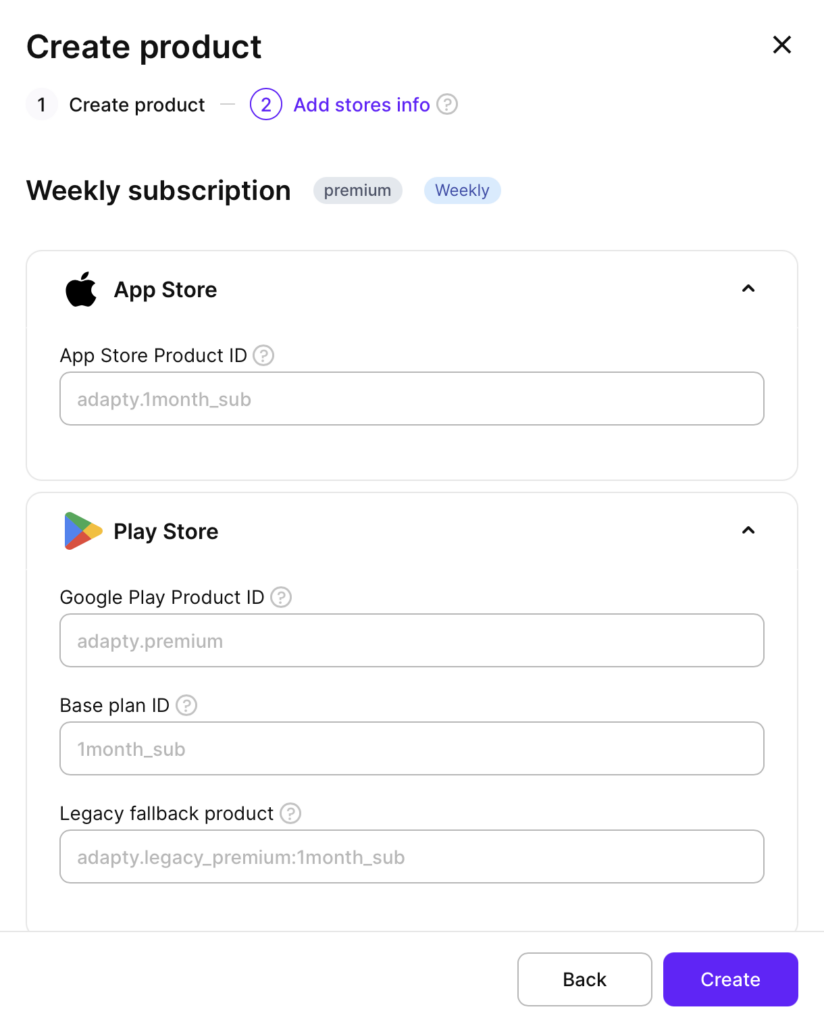
Creating a product
First, create your subscription products in both Google Play Console and App Store Connect. For example, you might set up a weekly subscription option.
Then, in your Adapty dashboard:
- Go to the Products section
- Create a new product
- Add the product IDs from both platforms (the IDs you created in App Store Connect and Google Play Console)
This links the platform-specific products into a single entity that you can reference in your code and analytics.
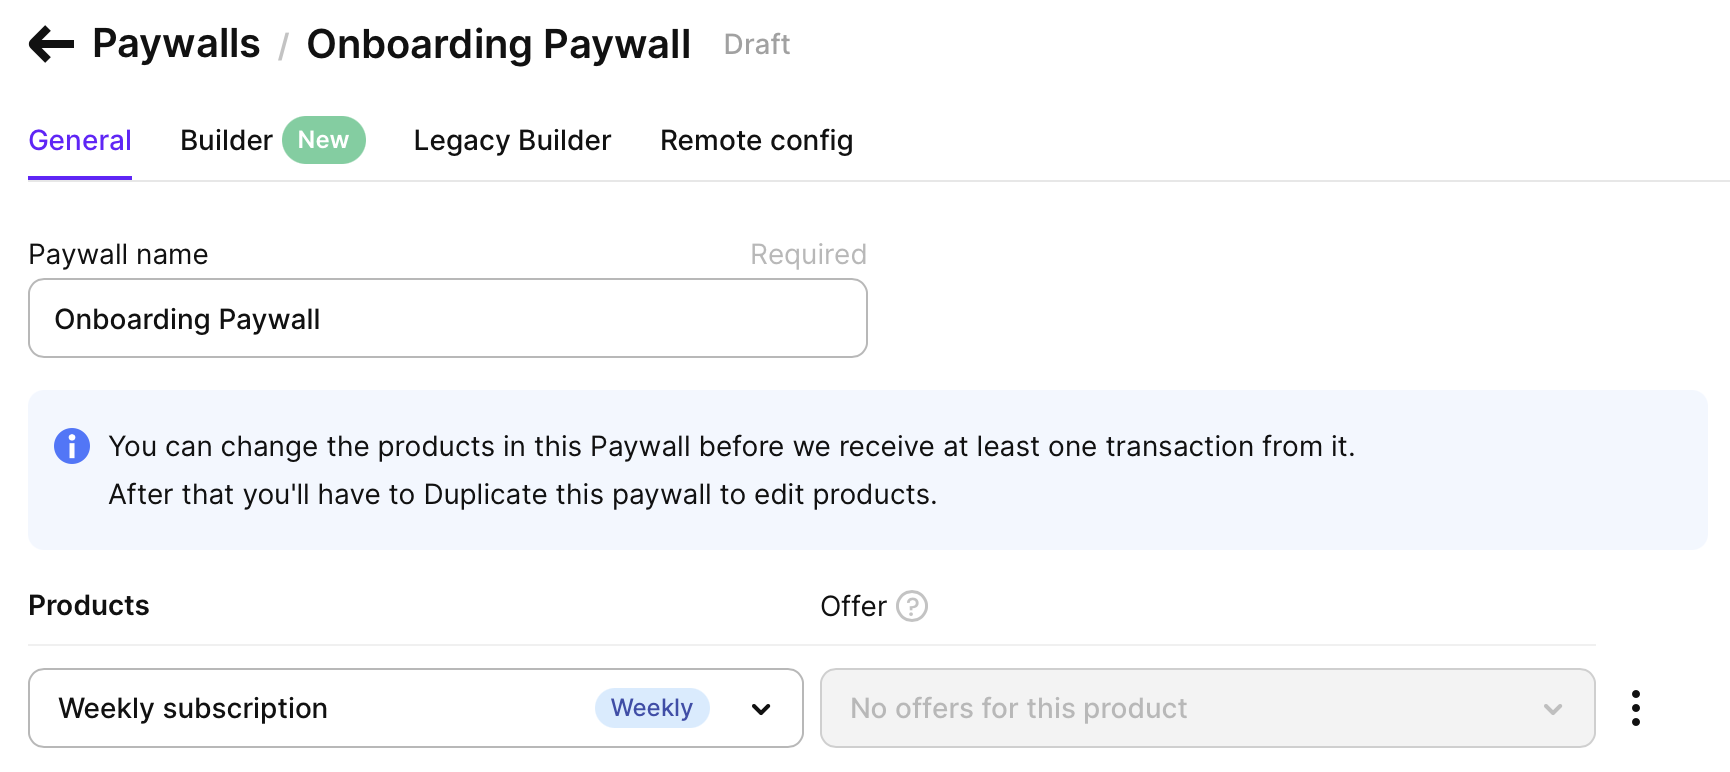
Creating a paywall
To maximize revenue from Flutter in-app purchases, creating an optimized paywall is crucial:
- Go to the Paywalls section in your Adapty dashboard.
- Create a new paywall with a descriptive name.
- Add the products you want to display on this paywall.
The advantage of this approach is that you can control which products appear on your paywall directly from the dashboard, without needing to update your app’s code.
Designing the paywall
The next step is designing your paywall. There are different approaches on how to create a profitable and good-looking paywall, but usually, it requires some experienced design work and more coding as well. To make this step easier, you can use Adapty’s Paywall Builder.
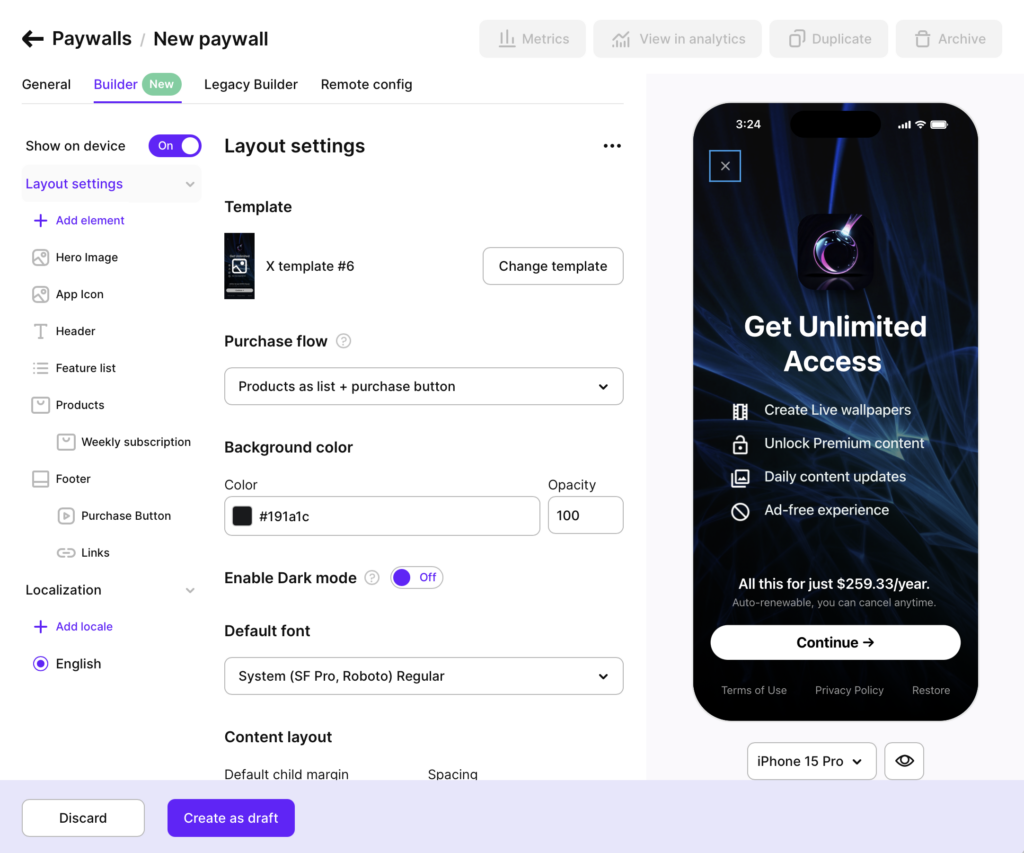
The Paywall Builder is a user-friendly editor that lets you create and modify paywalls instantly without coding or design skills. In just a few steps, you can build a native paywall featuring:
- Attractive backgrounds
- Compelling headlines
- Clear feature lists
- Flexible subscription options
- Eye-catching call-to-action buttons
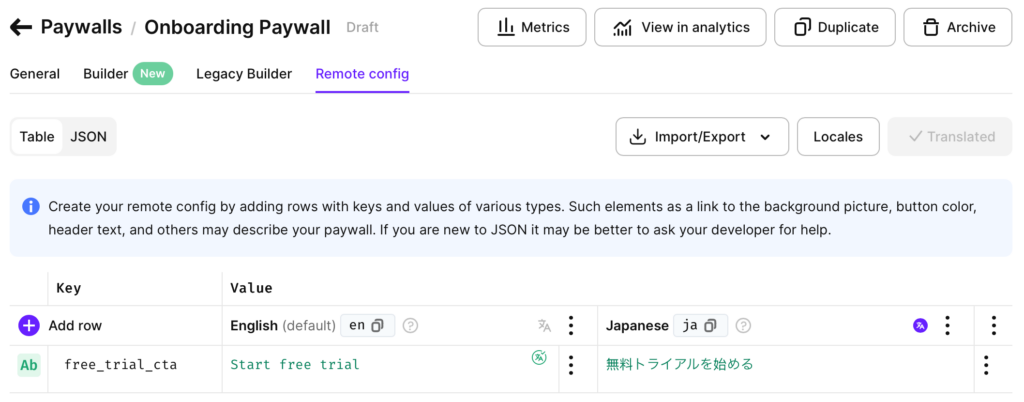
The Remote Config editor helps translate your paywall text into multiple languages. The AI-powered translation feature makes localization simple:
- Enter your keys and English text.
- Select your target languages.
- Click the translate button.
- The system automatically converts all your English strings to each selected language.
Once your products and paywalls are configured, you’re ready to integrate the SDK into your Flutter app.
4. Integrate the Adapty SDK for Flutter IAP
Now let’s set up the main functions needed to configure and use Flutter in-app purchases in your app.
Installing the library
First, add the adapty_flutter library to your project. To do that, add the following dependency to your pubspec.yaml file:
dependencies:
adapty_flutter: ^3.4.0After that, run:
flutter pub getFrom here, you can import Adapty SDK into your app like this:
import 'package:adapty_flutter/adapty_flutter.dart';Configuration
iOS:
- Create an
Adapty-Info.plistfile and add it to your project. - Add the
AdaptyPublicSdkKeyin this file. - Set its value to your Public SDK key.
Android:
- Add the
AdaptyPublicSdkKeyintoAndroidManifest.xml.
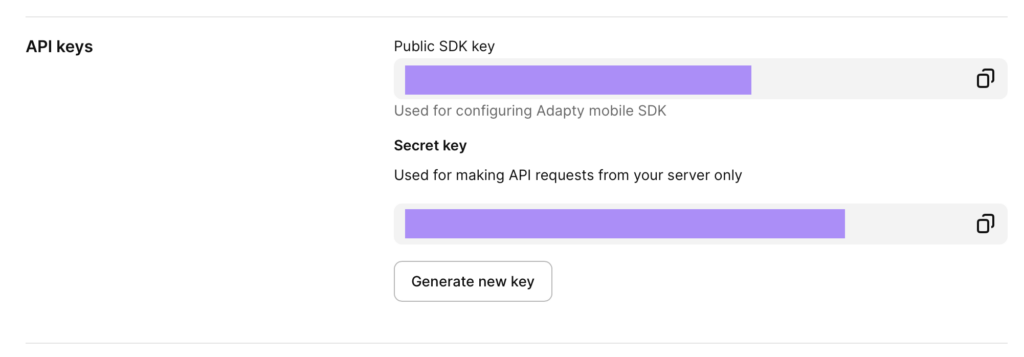
You can find your SDK key in App settings section of your Adapty dashboard:
Adapty-Info.plist:
<dict>
	...
<key>AdaptyPublicSdkKey</key>AndroidManifest.xml:
<application ...>
        ...
        <meta-data
               android:name="AdaptyPublicSdkKey"
               android:value="PUBLIC_SDK_KEY" />
</application>Next, activate the SDK by invoking this code on the Flutter side:
void main() {
  runApp(MyApp());
}
class _MyAppState extends State<MyApp> {
  @override
  void initState() {
    Adapty().setLogLevel(AdaptyLogLevel.debug);
    try {
      await Adapty().activate(
        configuration: AdaptyConfiguration(
          apiKey: 'API key goes here'
        )
          ..withLogLevel(AdaptyLogLevel.debug)
          ..withObserverMode(false)
          ..withCustomerId(null)
          ..withIpAddressCollectionDisabled(false)
          ..withAppleIdfaCollectionDisabled(false)
          ..withGoogleAdvertisingIdCollectionDisabled(false)
      );
    } catch (e) {
      // handle the error
    }
    super.initState();
  }
  // ... _MyAppState implementation ...
}Adapty logs error messages and other important data to help you understand what’s going on. The function lets you choose one of the five possible values:
Future<void> setLogLevel(AdaptyLogLevel value)You can read more here.
Adapty creates an internal profile ID for every user. However, if you have your own authentication system, you should set your own Customer User ID, which you can do when you activate the Adapty SDK at startup:
..withCustomerId('customer ID')Or you can separately call identify later in your code if you aren’t immediately aware of your customer’s ID at launch:
try {
  await Adapty().identify(customerUserId);
} on AdaptyError catch (adaptyError) {
  // handle the error
} catch (e) {
}You can read more here.
Retrieve and display paywalls
To retrieve a paywall from your configuration, use this code:
try {
  final paywall = await Adapty().getPaywall(
        placementId: "YOUR_PLACEMENT_ID",
        locale: "en"
        );
  // the requested paywall
} on AdaptyError catch (adaptyError) {
  // handle the error
} catch (e) {
}Once you have the paywall, you can display the paywall view you designed in Paywall Builder:
try {
  final view = await AdaptyUI().createPaywallView(
        paywall: paywall,
        customTags: {
          'CUSTOM_TAG_NAME': 'John',
        },
        customTimers: {
          'CUSTOM_TIMER_6H': DateTime.now().add(const Duration(seconds: 3600 * 6)),
          'CUSTOM_TIMER_NY': DateTime(2025, 1, 1), // New Year 2025
        },
        preloadProducts: preloadProducts,
      );
  await view.present();
} on AdaptyError catch (e) {
  // handle the error
} catch (e) {
  // handle the error
}Handle purchases in Flutter apps
In the previous step, you retrieved your remotely configured paywall and showed it to the user. Paywall Builder paywalls handle showing and processing purchases automatically. However, you can implement callbacks to create a better user experience around the paywall.
Before presenting a paywall, implement the AdaptyUIObserver methods and call the following:
AdaptyUI().setObserver(this);You can observe and react to various user-generated events from the paywall. See this document for more details.
To observe the start of the purchase process for a product by the user, implement the following method:
void paywallViewDidStartPurchase(AdaptyUIView view, AdaptyPaywallProduct product) {
}When a purchase completes, this method will be called:
void paywallViewDidFinishPurchase(AdaptyUIView view,
                                  AdaptyPaywallProduct product,
                                  AdaptyPurchaseResult purchaseResult) {
    switch (purchaseResult) {
      case AdaptyPurchaseResultSuccess(profile: final profile):
        // successful purchase
        break;
      case AdaptyPurchaseResultPending():
        // purchase is pending
        break;
      case AdaptyPurchaseResultUserCancelled():
        // user canceled the purchase
        break;
      default:
        break;
    }
}It’s recommended to dismiss the paywall on success or cancellation. When a purchase succeeds, you’ll receive an updated profile that contains the user’s access status. This object contains data about access levels, subscriptions, and purchases.
Usually, you can tell whether the user can access the premium features of your app just by checking their access level. Use the code block below to check the status, replacing ‘premium’ with whatever you’ve called your paid features access level inside the Adapty dashboard (the default value is ‘premium’):
if (profile?.accessLevels['premium']?.isActive ?? false) {
  // grant access to premium features
}Check Flutter in-app purchases status
You can check the access level at any point in your app with the following. It’s recommended to do this before allowing access to paid-only features or screens within the app.
try {
  final profile = await Adapty().getProfile();
  // check the access
} on AdaptyError catch (adaptyError) {
  // handle the error
} catch (e) {
}Access levels provide a quick way to determine what functionality the user can access. If they haven’t purchased anything, their access level will be null. Otherwise, it corresponds to what you’ve defined in your access levels configuration.
For example, you could have two different access levels, something like Plus and Pro. These could act like tiers, with one unlocking a subset of the other. Or different purchases could unlock different access levels and features. Many apps have just one access level however. It’s up to you to decide what’s best for the products and functionality you offer.
You can also subscribe to the .didUpdateProfileStream stream to timely learn of any changes in the subscriber’s access level. Here’s how:
Adapty().didUpdateProfileStream.listen((profile) {
  // handle any changes to subscription state
});Wrapping up
This tutorial has walked you through integrating in-app purchases into your Flutter application using Adapty.
Our SDK helps you build straightforward, maintainable code. To see how Adapty can optimize your monetization strategies, improve user experiences, and boost your revenue, schedule a free demo call with us.