TL;DR: Use Apple Ads Basic for testing ($10K/month limit, auto-managed) or Advanced for full control (unlimited budget, all App Store placements). Optimize for subscription revenue, not just installs. Most “cheap” keywords deliver tire-kickers, while “expensive” ones often bring paying users.
Apple Ads remains one of the most effective ways to acquire high-intent users for iOS apps. With over 600 million weekly App Store visitors, it’s where users are literally one tap away from downloading your app. But most developers face a critical gap: connecting ad spend to actual revenue.
While Apple’s dashboard shows installs and clicks, it doesn’t reveal which keywords drive paying subscribers versus non-converting users. This guide covers everything you need to know about Apple Ads and how to solve the attribution gap that’s costing you profitable growth.
What is Apple Ads?
Apple Ads is Apple’s official advertising platform for the App Store. It offers two distinct solutions designed for different stages of your growth:
- Apple Ads Basic
- Apple Ads Advanced
Let’s dive into both, starting with Apple Ads Basic.
Apple Ads Basic
Best for: Beginners testing App Store advertising potential.
Apple Ads Basic is a fully managed solution: you set a budget and let Apple handle the rest.
Key features:
- Cost-per-install (CPI) pricing. You only pay when someone downloads your app
- Single ad placement. Ads appear only at the top of search results
- Maximum 50 apps per account
- Monthly budget cap: $10,000 per app
Limitations: No keyword control, limited targeting, and basic reporting that ends at the install.
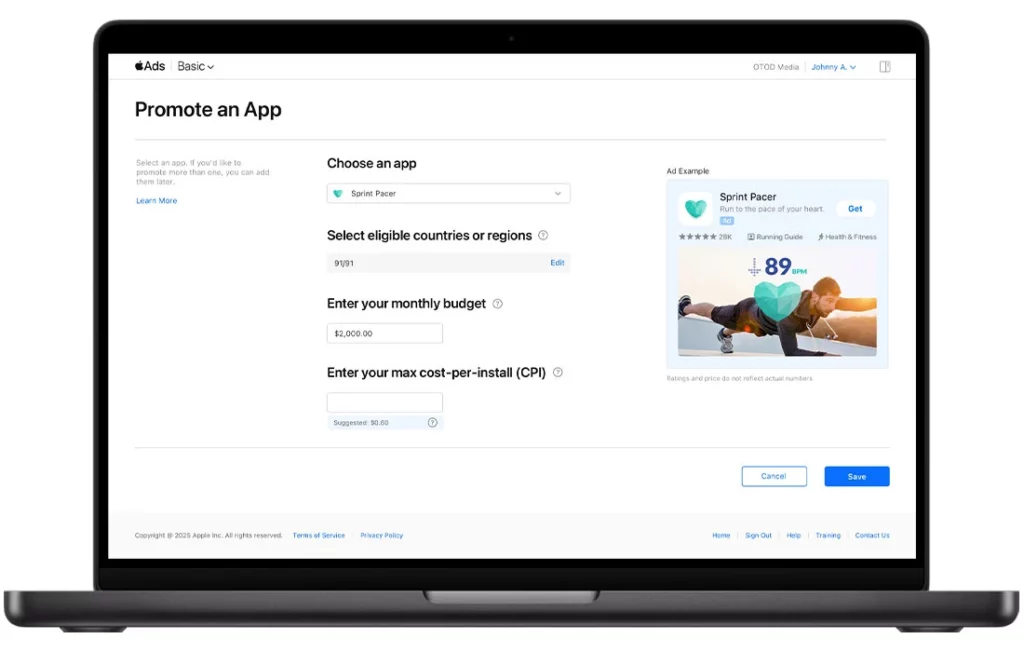
Apple Ads Basic: 3-step setup
Step 1: Choose your countries/regions
Choose your battlefield: promote globally across all available markets or focus on specific high-value regions.
Pro tip: Start narrow. Pick 3-5 countries where your app already performs well organically. You can always expand once you identify winning markets.
Step 2: Set a monthly budget
Set your monthly investment ceiling, anywhere from $100 to $10,000 per app.
Budget flexibility rules:
- Scaling up → Increase anytime to capture more opportunities
- Scaling down → Changes only take effect next calendar month (Apple needs time to adjust pacing)
If you’re ready to invest more than $10,000 monthly per app, Apple Ads Advanced removes all budget restrictions and unlocks advanced targeting.
Step 3: Set a max CPI
The max CPI is the maximum amount that you’d spend to get an app install. And this is where most beginners stumble. Your maximum CPI determines your competitive positioning in Apple’s auction system.
The platform analyzes your app category, competitor bids, and historical performance to suggest optimal CPIs. Ignore this at your own risk.
Apple continuously refines suggestions based on:
- Seasonal trends
- Real-time competitor activity
- Your app’s conversion performance
- Market demand fluctuations
Start with Apple’s suggested CPI or 10-20% higher. Lower bids = fewer impressions. Higher bids = more visibility but watch your unit economics.
What Apple Ads Basic automates
No keyword research needed. Apple matches your ads to relevant searches using your App Store listing, app category, and similar successful apps.
Zero creative work. Ads auto-generate from your existing App Store assets. This makes Apple Ads optimization crucial, your listing IS your ad creative.
Custom Product Pages amplify performance. Create up to 35 variations with different screenshots, videos, and messaging. Apple tests these automatically to find your best-converting combination.
The hidden limitation
Here’s what Apple Ads Basic won’t tell you: you’re optimizing blind.
Apple shows you got 100 installs at $3.50 CPI, but doesn’t reveal:
- How many started trials
- Which users became paying subscribers
- Your actual return on ad spend
- Lifetime value by user cohort
As a result, you might pause “expensive” keywords that actually deliver your highest-value subscribers while scaling “cheap” keywords that bring tire-kickers.
Fix it: Connect Apple Ads Basic to revenue attribution (like Adapty) to see which campaigns drive real business growth.
10 steps to set up Apple Ads Advanced
Best for: Growth teams ready for granular control, unlimited budgets, and comprehensive App Store coverage.
Apple Ads Advanced transforms your advertising from basic search placements to complete App Store domination. Using a cost-per-tap (CPT) pricing model, you only pay when users actively engage with your ads.
With Advanced, you can promote unlimited apps without the $10,000 monthly budget cap. More importantly, you gain granular control over every aspect of your campaigns from precise keyword bidding to advanced audience targeting.
The setup process is comprehensive but powerful. Here’s your complete roadmap:
Step 1: Ad placements
Your first critical decision determines where your ads appear across the App Store ecosystem. Apple Ads Advanced offers four prime advertising real estate options:
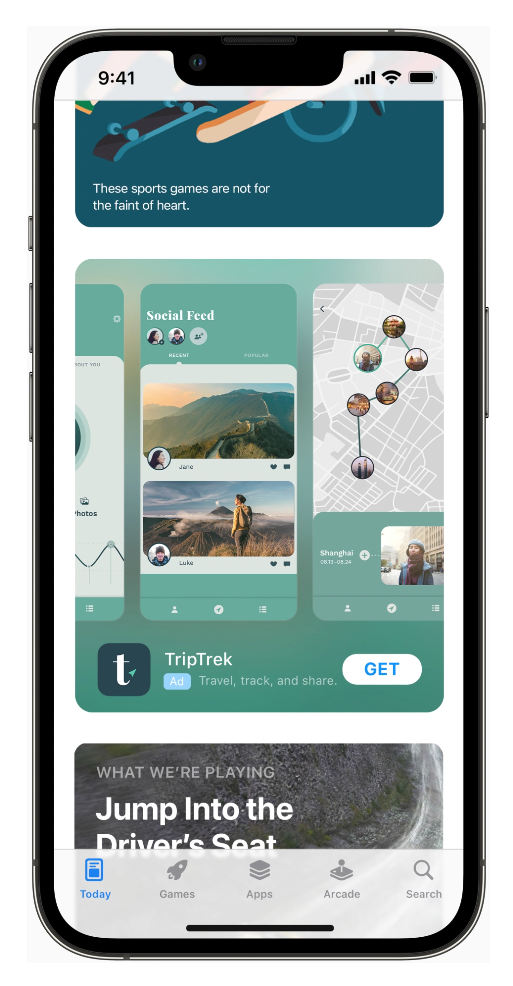
Today tab
When users tap the App Store icon, they land here first, making this the most visited section of the entire platform. Today tab ads capture users in discovery mode, perfect for building awareness and driving impulse downloads.
Best for: Brand building, seasonal campaigns, and reaching users who aren’t actively searching yet.
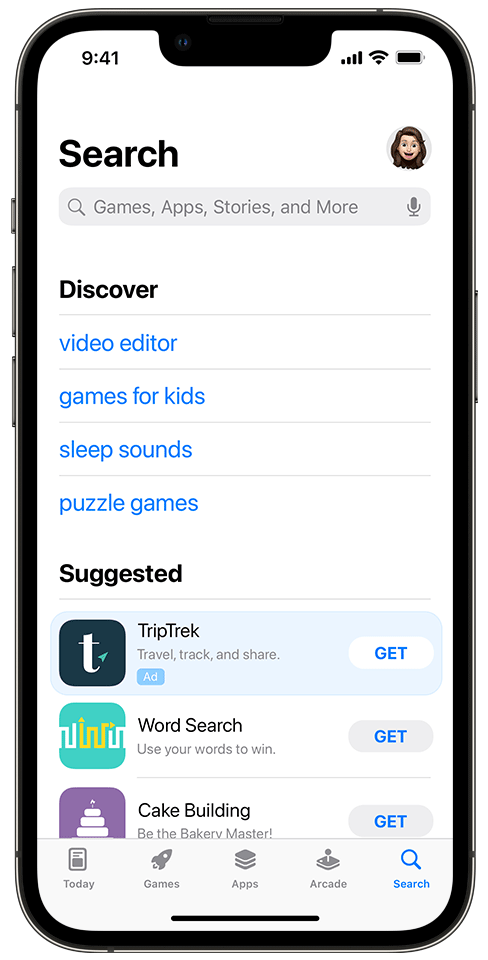
Search tab
Over 70% of App Store visitors use search functionality. Search tab ads appear in the “Suggested” section before users even start typing, letting you capture high-intent traffic at the perfect moment.
Best for: Intercepting users with search intent and competitive conquest campaigns.
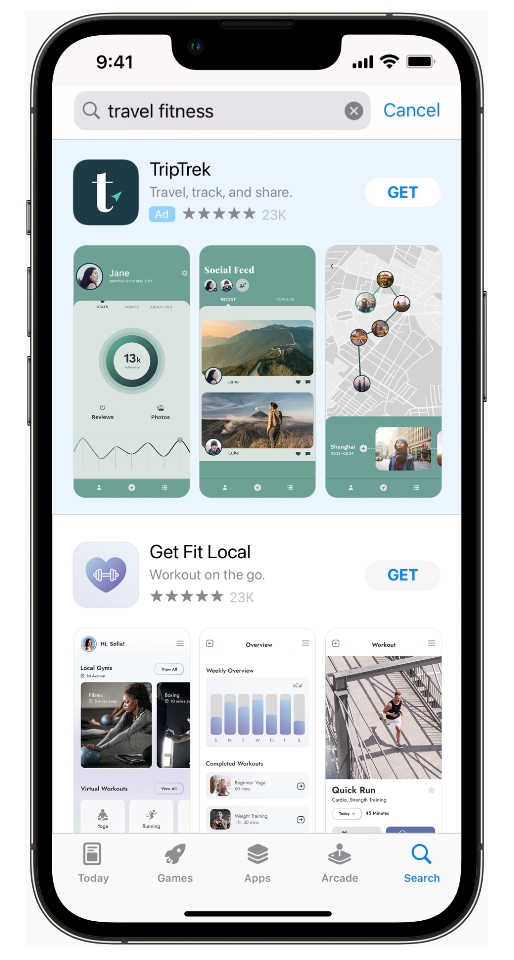
Search results
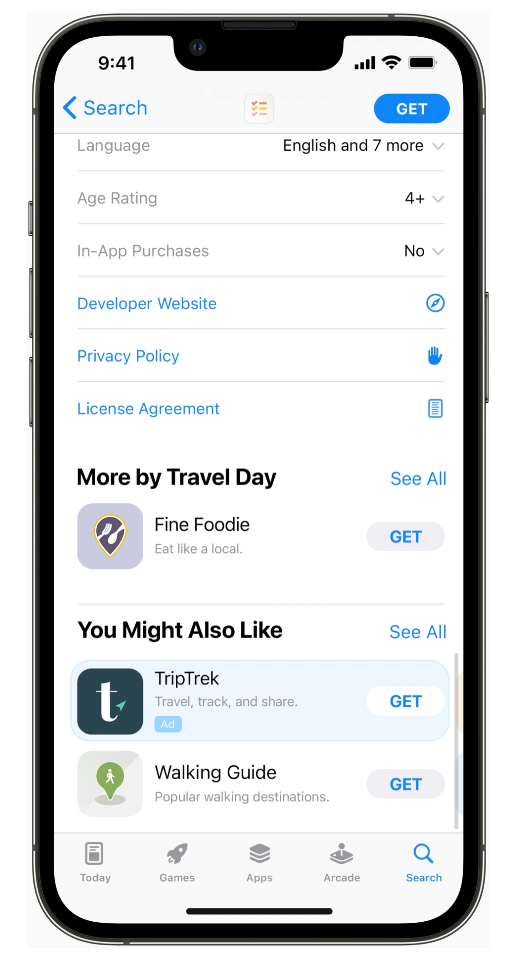
Apple reports that 65% of app downloads happen directly after an App Store search. This placement puts your ads above organic results when users search for your target keywords, the same functionality available in Apple Ads Basic, but with full customization control.
Best for: Keyword-driven acquisition and protecting branded search terms.
Product pages
Show your ads directly on competitors’ app listing pages. This placement captures users at the moment they’re evaluating alternatives, giving you a final chance to steal conversions.
Best for: Competitive conquest and category expansion strategies.
Step 2: Geographic targeting & market strategy
Once you’ve selected ad placements, define where your ads will run. Apple Ads Advanced allows intelligent location grouping for streamlined campaign management.
Pro strategy: Group similar markets together (like clustering all European countries) to simplify bid management while maintaining regional budget control.
Step 3: Campaign foundation setup
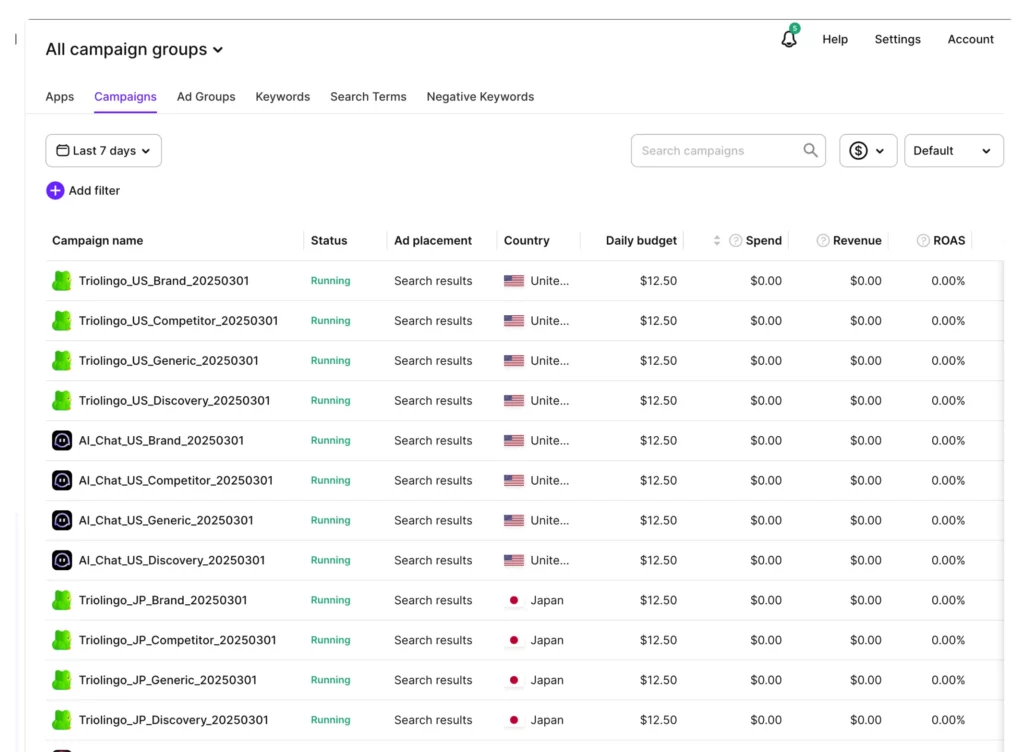
Campaign naming. Use descriptive, consistent naming conventions (e.g., “FitnessApp_US_Branded_Q3”)
Daily budget allocation. Set realistic daily budgets knowing Apple may exceed them on high-opportunity days. Your effective monthly budget equals daily budget × 30.4 days.
Campaign scheduling. Plan launches strategically using start and end date controls, invaluable for coordinated product launches or seasonal campaigns.
Step 4: Ad group architecture
Ad groups organize related keywords under unified bidding strategies. Think of them as themed keyword buckets with shared targeting rules.
Smart ad group structures:
- Branded keywords. Your app name and variations
- Competitor terms. Rival app names and branded keywords
- Category keywords. Generic terms like “fitness app” or “meditation”
- Feature-based. Specific functionality like “calorie counter” or “workout timer”
- Discovery group. Search match-enabled for automatic keyword mining
Ad group configuration process:
1. Naming strategy. Use clear, descriptive names that indicate keyword theme and targeting (e.g., “Meditation_Competitors_iOS15+”)
2. Cost-Per-Tap bidding. Set your maximum CPT bid at the ad group level. This bid automatically applies to all keywords within the group, though you can override with keyword-level bids for precise control.
Apple provides intelligent bid suggestions based on your app category, similar advertiser behavior, and competitive landscape data. These recommendations are goldmines, use them as starting points.
3. Cost-Per-Acquisition goals. For search result placements, you can set CPA targets representing your maximum acceptable cost per conversion. CPA goals typically exceed CPT bids since not every tap converts.
Step 5: Match type strategy
Choose how broadly or narrowly Apple matches your keywords to user searches:
Broad match
Captures related search variations. Bidding on “weight loss app” might show ads for searches like “diet tracker” or “fitness goals.”
Use for: Discovery, reaching adjacent audiences, maximizing reach
Exact match
Shows ads only for precise keyword matches. Bidding on “intermittent fasting app” triggers ads solely for that exact phrase.
Use for: Protecting branded terms, high-intent keywords, budget control
Search match:
Apple’s algorithmic keyword discovery uses your app listing, category data, and similar successful apps to automatically match relevant searches.
Search Match often uncovers profitable long-tail keywords you’d never think to bid on manually. Enable it in dedicated discovery ad groups to mine winning terms for manual promotion.
Step 6: Keyword research
Apple streamlines keyword research with intelligent recommendations based on your app and successful competitors. You can add custom keywords, and Apple suggests related terms for each addition.
Winning keyword strategy:
- General terms (like “fitness”) drive awareness but consume more budget
- Specific terms (like “HIIT workout timer”) generate higher-quality leads with better ROI
- Branded keywords protect your territory and capture high-intent users
- Competitor keywords steal consideration from rivals
Continuously edit keyword lists, pause underperformers, and promote Search Match discoveries to dedicated bidding.
Step 7: Product page ad placements
For product page placements, control which app categories display your ads:
- All categories: Maximum reach but potential relevance issues
- Similar categories: Balanced approach targeting adjacent audiences
- Your category only: Highest relevance but limited scale
Step 8: Ad targeting settings
Layer additional targeting based on Apple’s user data:
- Demographic options: Age ranges, gender, geographic regions
- Device targeting: Specific iPhone models, iOS versions, device capabilities
- Behavioral signals: App usage patterns, purchase history, engagement levels
Narrower targeting reduces impression volume but increases relevance. Balance reach with precision based on your goals.
Step 9: Scheduling ad groups
Launch ad groups in phases rather than all at once for controlled testing and budget management.
Run ads only during optimal conversion windows. If weekday performance significantly outperforms weekends, schedule accordingly to maximize efficiency.
Step 10: Previewing, creating, and customizing ads
The final step lets you preview how ads appear across different placements. For certain ad placements, you can customize ad variations using different custom product pages.
Create keyword-specific landing experiences that match ad messaging to conversion-focused app store listings.
Once everything is configured, hit “Create Campaign” to launch your comprehensive Apple Ads Advanced strategy.
Apple Ads Basic vs. Apple Ads Advanced
The choice between Apple Ads Basic and Advanced determines your entire advertising strategy and potential scale. Here’s how to make the right decision for your app’s growth stage.
When Apple Ads Basic makes sense
Perfect for: First-time App Store advertisers, limited marketing resources, or testing market viability.
Apple Ads Basic operates as a fully managed advertising solution. You provide Apple with a monthly budget and targeting preferences, then Apple handles everything else: keyword selection, bid optimization, creative generation, and performance management.
Apple leverages machine learning algorithms trained on millions of App Store interactions to optimize your campaigns automatically. You’re essentially renting Apple’s advertising expertise without needing in-house campaign management skills.
Basic serves as an excellent entry point for evaluating App Store advertising potential. You can validate whether paid App Store acquisition works for your app before investing in more complex Advanced campaigns.
When Apple Ads Advanced becomes essential
Best for: Serious growth initiatives, multi-app portfolios, or when you need complete campaign control.
Advanced transforms you from a passive advertiser into an active campaign strategist. You gain granular control over budget allocation, keyword selection, audience targeting, and creative optimization across every App Store touchpoint.
Instead of Apple making all decisions, you build sophisticated campaign structures with themed ad groups, precise keyword targeting, and custom audience segments. This control enables significantly better performance when managed expertly.
Advanced lets you deliver coordinated messaging across the entire user journey from awareness-building Today tab ads to conversion-focused search result placements to competitive conquest on product pages.
Complete feature comparison
| Apple Ads Basic | Apple Ads Advanced | |
|---|---|---|
| Pricing model | Cost-per-install: You pay each time a user installs your app using a delivered ad | Cost-per-tap: You pay each time a user engages with your ad. You can also go with the cost-per-acquisition model for search results ads |
| Who it’s for | Only app makers (developers) can run Apple Ads Basic for the apps they own | Developers, advertisers, and agencies can all tap the Apple Ads Advanced platform |
| Number of apps the account can support | 50 | Unlimited |
| Monthly budget per app | USD 10,000/app/month | Unlimited |
| Ad placements | Apple Ads Basic lets you place your ads on top of Apple’s organic search results for your target terms | Apple Ads Advanced lets you show your ads in the App Store Today tab, on the Search tab, in App Store search results, and across other apps’ product pages that customers are browsing |
| Support for ad creatives | Ads are created for you | You get some control over your ad creatives |
| How it works | This is almost a done-for-you ad service where Apple runs your ads for you based on the monthly budget and CPI you set. A simple three-step process is all you need to get started with Apple Ads with this version | This ad service gives you granular control over every dollar you ever spend with the platform. This solution can quickly turn into a complex account for aggressive advertisers |
| Reporting | Offers very basic reporting focused on the number of installs and the average cost-per-install | Gives more detailed reporting than the basic version, includes stats on impressions and taps, but still leaves many questions unanswered |
Apple Search Ads reporting: The revenue attribution gap
Apple Ads is a powerful tool for driving installs. Whether you’re targeting brand keywords or exploring new markets, it can bring a steady stream of users to your app. But once those users arrive, then what?
If you’ve ever tried to figure out whether your Apple Ads campaigns are actually driving revenue, you’ve likely hit a wall.
Apple’s native reporting stops at the install. You get basic metrics like impressions, taps, installs, and CPI. But for most subscription-based apps, that’s not enough. What you need to know is:
- Are these installs converting to trials?
- Are users sticking around and paying?
- Which campaigns or keywords bring the highest LTV?
Unfortunately, Apple Ads, both Basic and Advanced, doesn’t provide answers to these questions.
The case for full-funnel attribution from installs to revenue
To make sense of Apple Ads as part of your overall growth strategy, you need full-funnel attribution. That means:
- Knowing which campaigns, ad groups, or keywords bring in trials and subscribers
- Being able to compare performance across all paid channels
- Making decisions based on actual revenue, not install volume
This is the gap we designed Adapty Ads Manager to fill.
How Adapty extends Apple Ads reporting
Adapty connects directly to Apple’s AdServices API (no MMP required), so you get attribution from click to install to revenue, without relying on postbacks or third-party integrations.
What this enables:
- Real-time tracking of installs, trials, subscriptions, renewals, and refunds
- Keyword-level metrics like ROAS, ARPU, and LTV
- Channel and campaign comparisons in one place
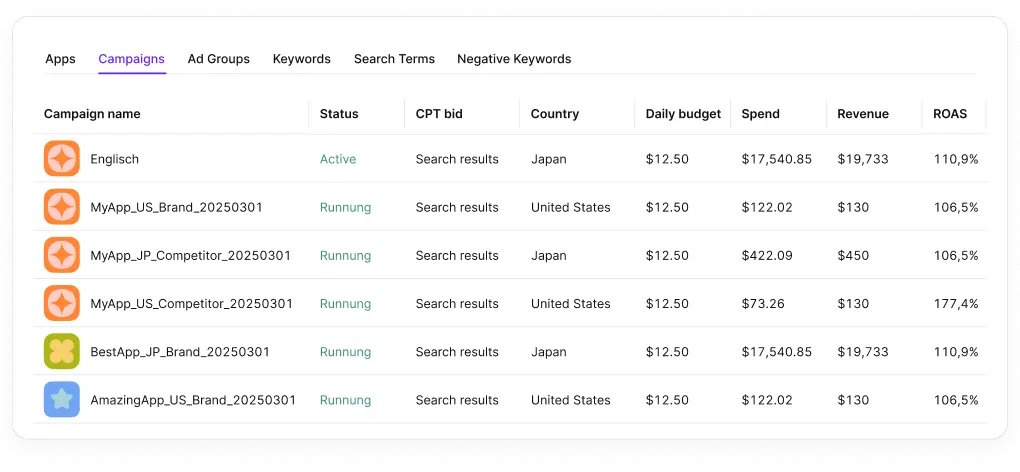
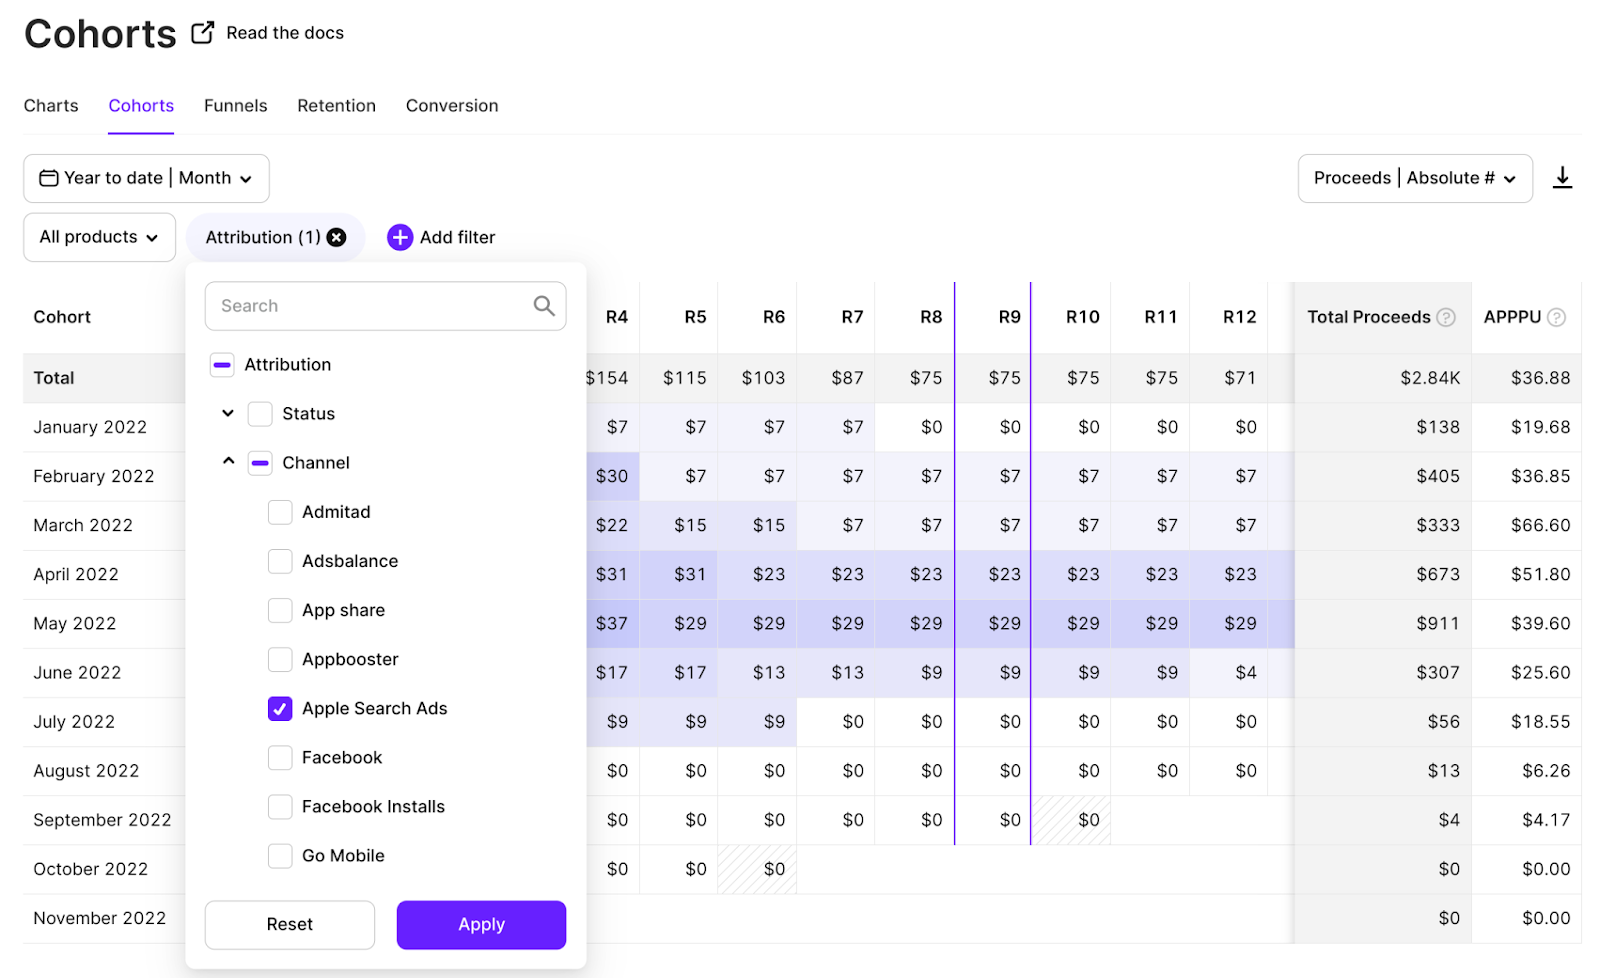
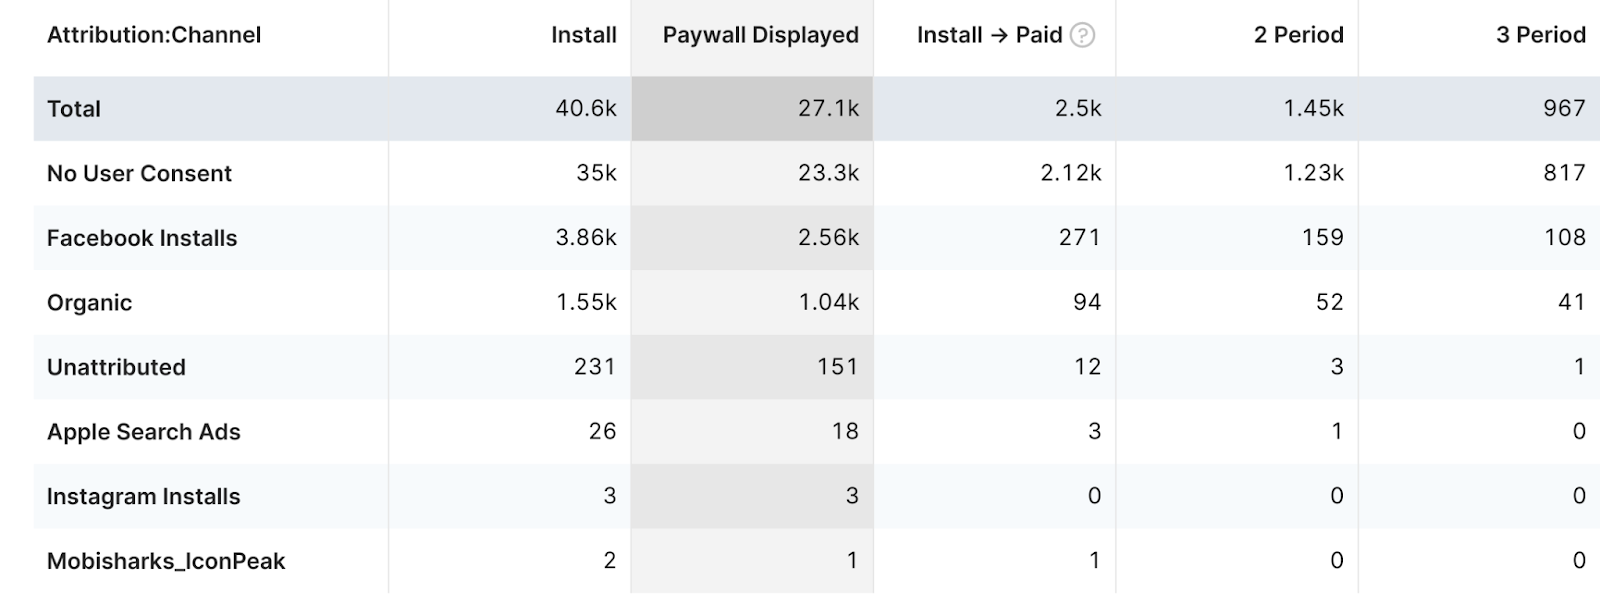
Here’s what the data can look like when tied to revenue:
This kind of reporting changes how you allocate budget. You’re not guessing which keywords perform best, you’re seeing it in real revenue terms.
Understand what happens after the install
Apple Ads tells you how many users install your app, but not what they do next.
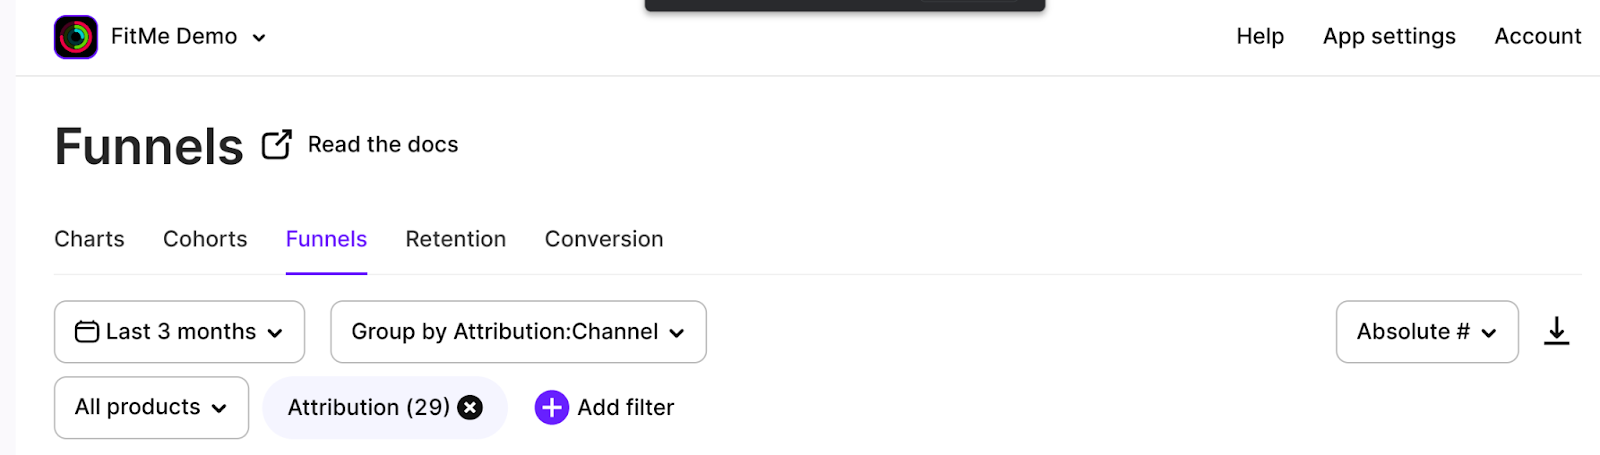
With Adapty, you can go beyond install counts and see how those users behave over time. Using Funnels and Cohorts, you can:
- Track how many users start a trial after install
- See how many trials convert to subscriptions
- Monitor retention and revenue across time windows like 7, 30, or 90 days
This helps answer essential questions like:
- Are users from Apple Ads converting better than those from Meta?
- Do weekly trials perform differently for Apple Ads campaigns vs organic installs?
- Which creatives lead to higher retention?
Instead of relying on install volume or first-week conversion alone, you get a full view of the user lifecycle from click to long-term value.
That’s not all.
Adapty also lets you segment your paid iOS leads from the Apple Ads channel and show them a paywall personalized for the ad creative they saw (among other possible personalizations). You can also run paywall tests specifically for this segment:
Wrapping it up
Apple Ads puts your app in front of users right when they’re searching on the App Store, just one tap away from install. With built-in CPT recommendations and CPI reporting, it’s a solid performance channel for subscription apps.
But like any paid channel, it only works as long as you keep spending. To make the most of your budget, you need to constantly optimize: bidding, creatives, keywords, and more. That takes time, expertise, or expensive agency support.
Even then, one major blind spot remains: revenue attribution.
Knowing which keyword brings in installs is helpful, but knowing which ones drive subscribers and revenue is critical.
That’s why connecting Apple Ads with your subscription analytics matters. Tools like Adapty help close this gap by showing how installs turn into trials, subscriptions, and long-term value.
Want to go further? Explore How to analyze and optimize Apple Ads for tactical frameworks on attribution, keyword segmentation, and ROAS-based bidding. When you’re ready to grow, Apple Ads guide: Best practices lays out advanced campaign structures and scaling principles built for maximizing profitability.
👉 Ready to connect installs to revenue? Try Adapty with one-click Apple OAuth integration and start optimizing for profit, not just installs.
About Adapty: We provide complete subscription management infrastructure for iOS and Android apps, including paywall optimization, A/B testing, and revenue attribution for Apple Ads. Our analytics answer the growth questions that matter: which channels drive paying subscribers and sustainable revenue growth.
Frequently asked questions
– Trial starts by keyword
– Subscription conversion
– Keyword-level ROAS and LTV
This helps you avoid optimizing for low-cost installs that don’t generate revenue.